
1. Introduction
This manual provides detailed instructions for the installation, operation, maintenance, and troubleshooting of the BIGTREETECH Pi V1.2 and SKR Pico Control Board Kit. This kit is designed to enhance 3D printer performance, particularly for Voron V0 models, by enabling the use of Klipper firmware. Please read this manual thoroughly before proceeding with installation or operation.
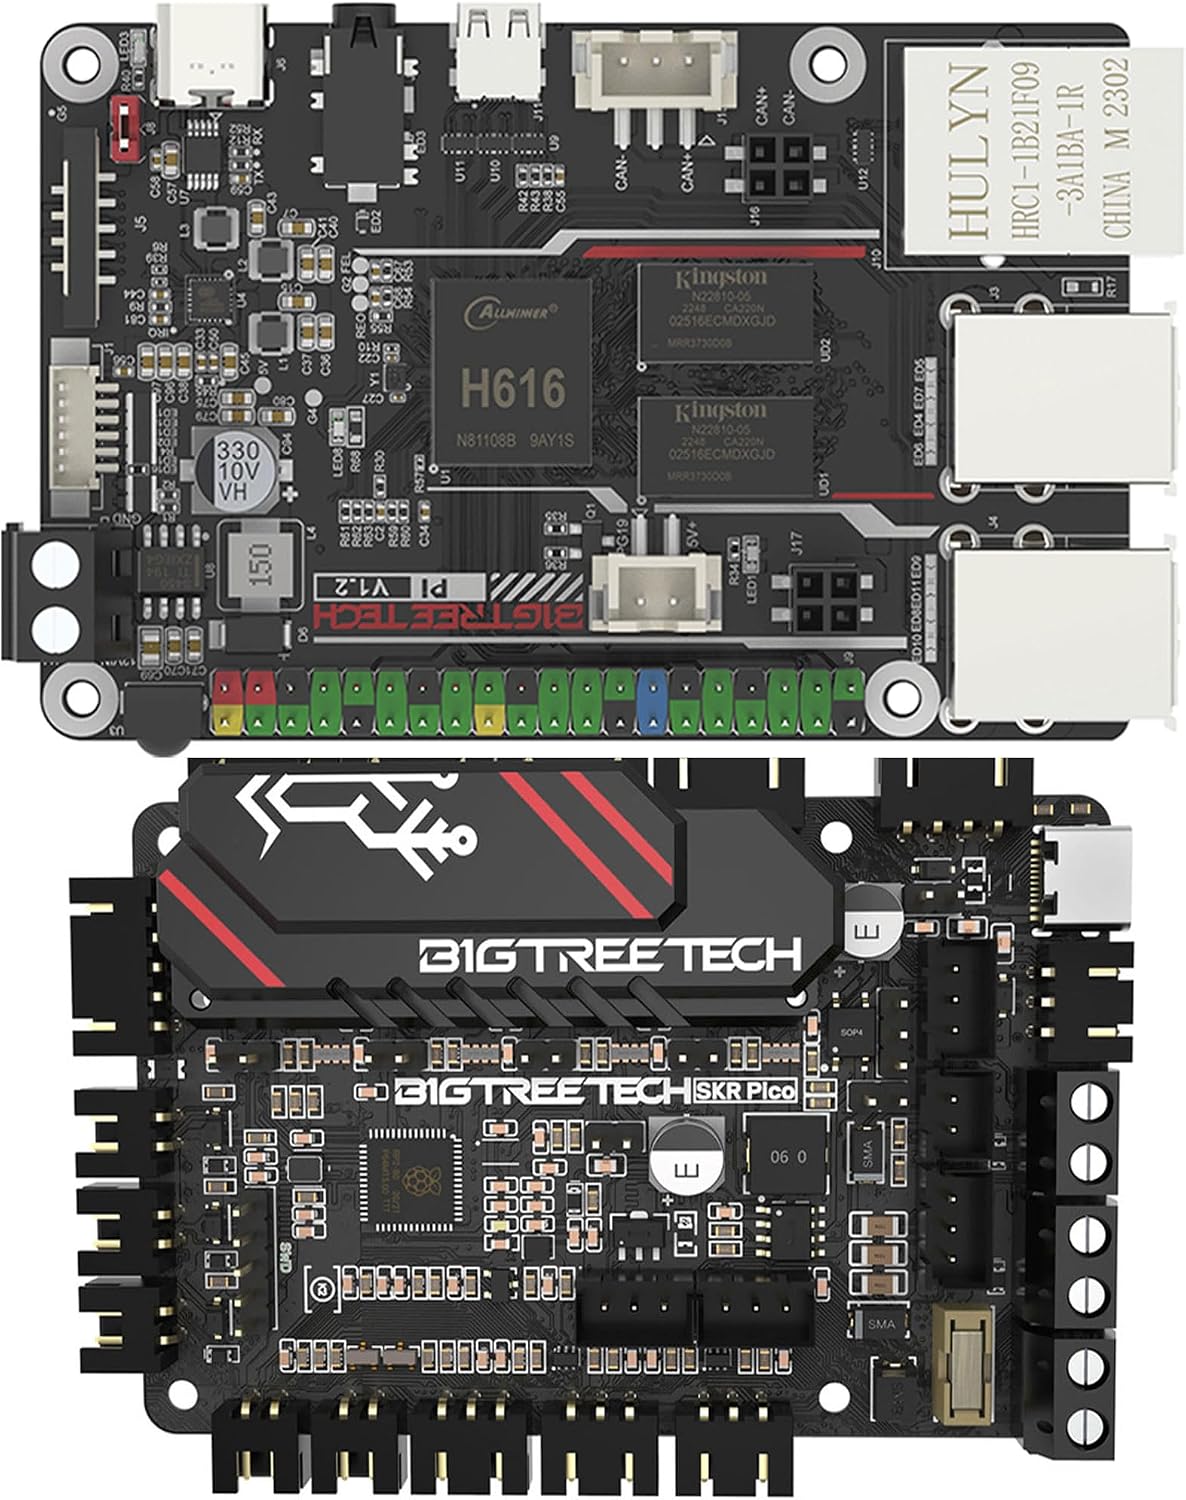
Figure 1: Overview of the BIGTREETECH Pi V1.2 and SKR Pico Control Boards.
2. Product Overview
The BIGTREETECH Pi V1.2 and SKR Pico Control Board Kit offers a powerful and compact solution for 3D printer control, optimized for Klipper firmware. The kit combines a high-performance single-board computer with a dedicated motion control board.
2.1 BIGTREETECH Pi V1.2 Features
- Processor: Quad-core 64-bit ARM Cortex-A53 @ 1.5GHz.
- Memory: 1GB DDR3 RAM.
- Network: Onboard 100M Ethernet interface and 2.4G WiFi module.
- Graphics: Mali G31 MP2 GPU, supporting OpenGL3.2.
- Connectivity: 40-pin GPIO, 4 x USB 2.0 ports, HDMI output, CAN bus, ADXL345 SPI port.
- Power Input: DC 12V-24V via screw terminals, DC 5V±5%/2A via USB Type-C.

Figure 2: The BIGTREETECH Pi V1.2 features a 64-bit Quad-Core Architecture, ARM Cortex-A53 processor, and 1GB DDR3L RAM for efficient and powerful operation.

Figure 3: Key ports on the BIGTREETECH Pi V1.2 include a PWM Fan Port, SPI Port for ADXL345 (for Klipper input shaper calibration), a dedicated CAN bus Port (requires U2C module, sold separately), and multiple display options including 4K UHD HDMI and low-power OLED/TFT screens via SPI.

Figure 4: The BIGTREETECH Pi V1.2 offers flexible power input (DC 12V-24V via screw terminals, DC 5V±5%/2A via USB Type-C) and rich connectivity with a 40-pin GPIO header and 4 x USB 2.0 ports for various peripherals.

Figure 5: The BIGTREETECH Pi V1.2 supports both wired (onboard RJ45 for 100Mbps) and wireless (built-in 2.4G WiFi module with external antenna support) network connections.
2.2 BIGTREETECH SKR Pico V1.0 Features
- Microprocessor: Raspberry Pi ARM Cortex-M0+ main control RP2040.
- Motor Drivers: Onboard UART mode of TMC2209 silent drivers.
- Motor Interfaces: 5 motor interfaces (ME, MX, MY, MZ1, MZ2) supporting dual Z-axis.
- Homing: Supports sensorless homing.
- Cooling: 3 CNC fan ports.
- Sensors: Filament runout detection, 3 limit switches, proximity sensor, BL_Touch support.
- Lighting: RGB LED and RGB light support.
- Connectivity: Type-C interface for main control communication, laser port, heating cable connections.
- Design: Newly upgraded heat sink for improved heat dissipation.

Figure 6: The BIGTREETECH SKR Pico V1.0 is powered by the Raspberry Pi ARM Cortex-M0+ RP2040 microprocessor.

Figure 7: The SKR Pico V1.0 features an optimized heat sink design for better heat dissipation and enhanced performance stability.

Figure 8: The SKR Pico V1.0 includes an easy-to-remove and install fuse kit and a Type-C interface for reliable main control communication.

Figure 9: A comprehensive view of the BIGTREETECH SKR Pico V1.0 control board.
2.3 Product Video
Video 1: This video provides an overview of the BIGTREETECH SKR Pico V1.0 Controller Board, highlighting its features and suitability for Voron V0 3D printers. It demonstrates the compact design, lateral terminals for vertical mounting, the RP2040 main control chip, silent TMC2209 drivers, sensorless homing, various ports including Raspberry Pi connection, CNC fan ports, filament runout detection, limit switches, RGB LED, proximity sensor, BL_Touch, Type-C, laser, and heating cable connections. The video also showcases the new heat sink design and different style options.
3. Setup Guide
This section outlines the general steps for setting up your BIGTREETECH Pi V1.2 and SKR Pico Control Board Kit. Specific wiring diagrams and Klipper configuration files should be referenced from the official BIGTREETECH documentation or community resources for your specific 3D printer model.
- Hardware Installation:
- Mount the SKR Pico board securely within your 3D printer enclosure. The compact design and lateral terminals facilitate vertical mounting, especially in space-constrained environments like the Voron V0.
- Connect the BIGTREETECH Pi V1.2 to the SKR Pico board. Ensure all connections are firm and correctly oriented.
- Connect stepper motors to the designated motor interfaces (ME, MX, MY, MZ1, MZ2) on the SKR Pico.
- Wire endstops, filament runout sensors, and any other peripherals (e.g., BL_Touch, proximity sensor, fans) to their respective ports on the SKR Pico.
- Connect the power supply to the SKR Pico (DC 12V-24V) and the BIGTREETECH Pi V1.2 (DC 5V).
- Klipper Firmware Setup:
- Prepare an SD card for the BIGTREETECH Pi V1.2 with a suitable operating system (e.g., MainsailOS, FluiddPi) that includes Klipper.
- Flash the Klipper firmware onto the SKR Pico board. Refer to the Klipper documentation for specific flashing procedures for RP2040 microcontrollers.
- Configure the Klipper `printer.cfg` file. This file will define your printer's kinematics, motor settings, sensor configurations, and other operational parameters. Pay close attention to the pin assignments for the SKR Pico.
- Establish network connectivity for the BIGTREETECH Pi V1.2 via Ethernet or WiFi.
- Access the Klipper web interface (Mainsail or Fluidd) from a computer on the same network to manage your printer.
- Initial Testing:
- Perform initial motor movement tests to ensure correct wiring and configuration.
- Test endstops and sensorless homing functionality.
- Calibrate your printer using Klipper's calibration tools, including input shaper calibration with an ADXL345 accelerometer connected to the Pi V1.2's SPI port.
4. Operating Instructions
Once the BIGTREETECH Pi V1.2 and SKR Pico Kit is set up with Klipper firmware, operation is primarily managed through the Klipper web interface (Mainsail or Fluidd).
- Web Interface Access: Open a web browser and navigate to the IP address or hostname of your BIGTREETECH Pi V1.2.
- Printer Control: Use the interface to control printer movements, heat the hotend and bed, load/unload filament, and start/pause/cancel prints.
- G-Code Upload: Upload G-code files generated by your slicer directly to the Klipper host for printing.
- Monitoring: Monitor printer status, temperature, and progress in real-time.
- Configuration Management: Edit and save your `printer.cfg` and other Klipper configuration files directly from the web interface.
- Firmware Updates: Klipper firmware updates for both the host (Pi V1.2) and the microcontroller (SKR Pico) can typically be performed through the web interface.
5. Maintenance
Regular maintenance ensures the longevity and optimal performance of your control board kit.
- Dust Removal: Periodically clean the boards and components to prevent dust buildup, which can lead to overheating. Use compressed air or a soft brush.
- Connection Checks: Ensure all wiring connections remain secure. Loose connections can cause intermittent issues or component damage.
- Firmware Updates: Keep Klipper firmware and the operating system on your BIGTREETECH Pi V1.2 updated to benefit from bug fixes and new features.
- Heat Sink Inspection: Verify that the heat sinks on the SKR Pico are free from obstructions and effectively dissipating heat. Ensure any connected fans are operational.
- Fuse Inspection: If power issues occur, inspect the fuse on the SKR Pico. Replace with a fuse of the correct rating if necessary.
6. Troubleshooting
This section provides general troubleshooting tips for common issues. For more specific problems, consult the Klipper documentation, BIGTREETECH support resources, or relevant community forums.
- Printer Not Responding:
- Check power connections to both the Pi V1.2 and SKR Pico.
- Verify network connectivity to the Pi V1.2.
- Ensure Klipper firmware is correctly flashed to the SKR Pico and the `printer.cfg` file is valid. Check the Klipper log for errors.
- Motor Issues (No Movement, Skipping Steps):
- Confirm motor wiring is correct and secure.
- Check stepper driver current settings in `printer.cfg`.
- Inspect motor drivers for overheating.
- Sensor Errors (Endstops, Filament Runout):
- Verify sensor wiring and functionality.
- Check sensor pin definitions in `printer.cfg`.
- For sensorless homing, ensure the `driver_SGTHRS` value is correctly tuned.
- Overheating:
- Ensure adequate airflow around the boards.
- Verify cooling fans are operating correctly.
- Check ambient temperature of the enclosure.
7. Specifications
| Feature | Specification |
|---|---|
| Brand | BIGTREETECH |
| Model Name | Pi V1.2 + SKR Pico |
| Compatible Devices | 3D Printer (e.g., Voron V0) |
| BIGTREETECH Pi V1.2 CPU | Quad-core 64-bit ARM Cortex-A53 @ 1.5GHz |
| BIGTREETECH Pi V1.2 RAM | 1GB DDR3 |
| BIGTREETECH Pi V1.2 GPU | Mali G31 MP2 (supports OpenGL3.2) |
| BIGTREETECH Pi V1.2 Network | 100M Ethernet, 2.4G WiFi |
| SKR Pico Microprocessor | Raspberry Pi ARM Cortex-M0+ RP2040 |
| SKR Pico Stepper Drivers | TMC2209 (UART mode) |
| SKR Pico Motor Interfaces | 5 (ME, MX, MY, MZ1, MZ2) |
| SKR Pico Fan Ports | 3 x CNC Fan |
| SKR Pico Power Input | DC 12V-24V |
| SKR Pico Communication | Type-C |
8. Warranty and Support
For warranty information, technical support, and additional resources, please refer to the official BIGTREETECH website or contact their customer service. Community forums and online documentation for Klipper firmware also provide extensive support and troubleshooting guides.
Official BIGTREETECH Store: Visit the BIGTREETECH Store on Amazon