Introduction
This manual provides essential information for the safe and proper installation, operation, and maintenance of your maXpeedingrods Class 3 Trailer Hitch Receiver. Please read all instructions carefully before proceeding with installation or use. Retain this manual for future reference.
Safety Information
WARNING: Improper installation or use of this product can result in serious injury or property damage. Always follow all instructions and safety precautions.
- Ensure the hitch receiver is correctly installed and all fasteners are tightened to the manufacturer's specifications.
- Do not exceed the Gross Trailer Weight (GTW) or Tongue Weight (TW) ratings of the hitch receiver or your vehicle, whichever is lower.
- Regularly inspect the hitch receiver for signs of wear, damage, or corrosion. Replace any damaged components immediately.
- Always use appropriate safety chains when towing.
- Consult your vehicle's owner's manual for specific towing guidelines and capacities.
Package Contents
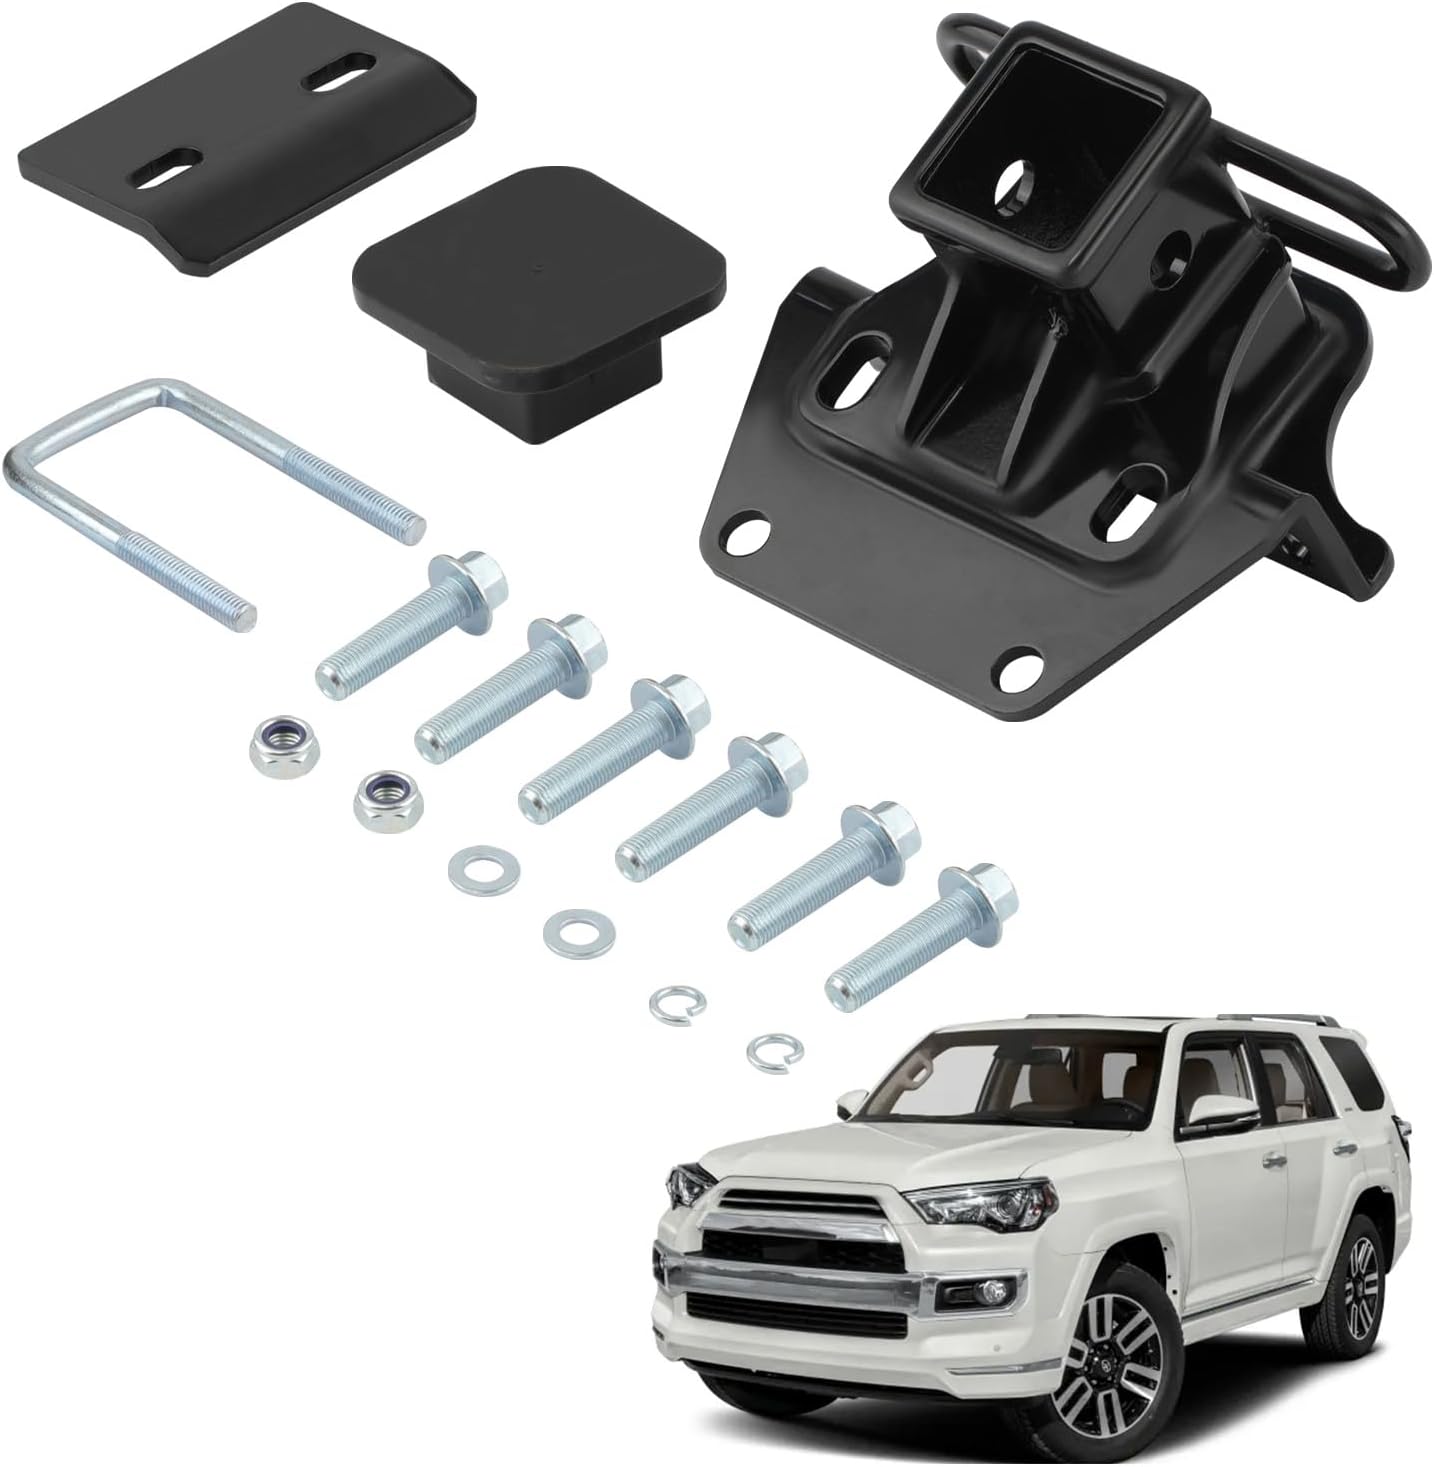
Verify that all components are present before beginning installation:
- Class 3 Trailer Hitch Receiver (2-inch)
- Mounting Hardware (bolts, nuts, washers)
- Hitch Tube Cover
- U-bolt (if applicable for specific mounting)
Specifications
| Feature | Specification |
|---|---|
| Receiver Tube Size | 2 inches x 2 inches |
| Gross Trailer Weight (GTW) | 6000 LBS |
| Tongue Weight (TW) | 600 LBS |
| Material | Heavy-duty Carbon Steel (Alloy Steel) |
| Finish | Black Powder Coated (Rust-Resistant) |
| Product Dimensions | 8.66 x 8.27 x 8.27 inches |
| Item Weight | 10.88 pounds |
Note: Towing capacities are limited to the lowest-rated component in your towing system, including the vehicle, hitch, ball mount, and trailer ball.


Vehicle Fitment
This trailer hitch receiver is designed for direct fitment on the following vehicles:
- Toyota 4Runner: 2003, 2004, 2005, 2006, 2007, 2008, 2009, 2010, 2011, 2012, 2013, 2014, 2015, 2016, 2017, 2018, 2019, 2020, 2021, 2022
- Lexus GX470: 2003, 2004, 2005, 2006, 2007, 2008, 2009
Setup and Installation
Professional installation is recommended for optimal safety and performance.
- Preparation: Park the vehicle on a level surface and engage the parking brake. Allow the exhaust system to cool if recently driven. Gather all necessary tools (e.g., wrenches, sockets, torque wrench).
- Locate Mounting Points: Identify the frame mounting points on your vehicle, typically near the rear bumper. These may be pre-drilled holes or require minor modifications depending on the vehicle model.
- Position the Hitch: Carefully lift the hitch receiver into position, aligning the mounting holes on the hitch with the vehicle's frame. It may be helpful to have an assistant for this step.
- Install Hardware: Insert the provided bolts, washers, and nuts through the aligned holes. Hand-tighten all fasteners to secure the hitch in place.
- Torque Fasteners: Using a torque wrench, tighten all bolts to the torque specifications provided in your vehicle's service manual or the hitch manufacturer's specific instructions (if different). Ensure even tightening across all bolts.
- Final Inspection: Double-check all connections to ensure they are secure. Verify that the hitch does not interfere with any vehicle components (e.g., exhaust, spare tire).

Operating Instructions
Once installed, the 2-inch receiver allows for the attachment of various towing and hauling accessories:
- Connecting a Ball Mount: Insert your 2-inch shank ball mount into the receiver tube. Align the pinholes and secure with a hitch pin and clip (not included).
- Attaching Cargo Carriers or Bike Racks: Slide the accessory's 2-inch shank into the receiver tube. Secure it with a hitch pin and clip, and any additional anti-rattle devices if provided with the accessory.
- Towing a Trailer: After connecting the ball mount and trailer, ensure the trailer's safety chains are properly crossed and attached to the designated chain loops on the hitch receiver. Connect trailer lighting as required.


Maintenance
- Regular Inspection: Periodically inspect the hitch receiver, mounting hardware, and vehicle frame for any signs of rust, cracks, bends, or loose fasteners.
- Cleaning: Clean the hitch receiver regularly, especially after exposure to road salt, dirt, or harsh weather conditions. Use mild soap and water, then dry thoroughly.
- Corrosion Protection: The hitch is powder-coated for corrosion resistance. If the coating is damaged, touch up with rust-inhibiting paint to prevent rust formation.
- Lubrication: Keep the receiver tube free of debris. Lightly lubricate the inside of the receiver tube and hitch pin holes to prevent seizing.
Troubleshooting
- Loose Hitch: If the hitch feels loose, re-check all mounting bolts and ensure they are torqued to the specified values. Over time, bolts can loosen due to vibration.
- Difficulty Inserting Accessories: Ensure the receiver tube is clean and free of rust or debris. A wire brush can be used to clean the inside if necessary.
- Excessive Noise/Rattle: This may indicate a loose connection or an accessory that does not fit snugly. Consider using an anti-rattle device with your hitch accessory.
- Rust Formation: While powder-coated, severe scratches or prolonged exposure to corrosive elements can lead to rust. Address minor rust spots with rust converter and touch-up paint.
Warranty and Support
maXpeedingrods warrants its products against manufacturing defects under normal use for 1 year from the date of purchase. This warranty covers defects in materials and workmanship. For technical support or customer service, please contact maXpeedingrods directly. Lifetime technical support is provided.
For further assistance, please visit the maXpeedingrods Store on Amazon.


