1. Product Overview
The Diyeeni Nab Reel Hub Adaptors are designed to facilitate the use of 10-inch tape reels on compatible reel-to-reel tape recorders. These adaptors ensure a secure and stable fit, crucial for optimal playback and recording performance.
Model: Diyeeniqgnv41mwoz-16
Brand: Diyeeni
Key Features:
- Fine Crafted: Exquisitely crafted aluminum NAB hub adapter with a polished metal handle and black ABS base, designed for 10-inch reels.
- Stable Performance: Lockable design prevents loosening, ensuring high standards of rotation concentricity and eliminating shaking during operation.
- Compatible: Suitable for various reel-to-reel tape recorders, including models from ReVox, Akai, and Teac.
- Premium Material: Constructed from durable aluminum alloy and ABS material for robust and long-lasting performance.
- Simple Installation: Easy to install and use, requiring minimal effort.
2. Specifications
| Feature | Detail |
|---|---|
| Item Type | NAB Hub Adapters |
| Material | Aluminum Alloy, ABS |
| Applicable Size | 10 inches |
| Compatibility | For Studer ReVox, Akai, Teac, etc. Reel to Reel Tape Recorders |
| Item Weight | 3 pounds |
| Package Dimensions | 7.09 x 3.54 x 2.76 inches |
| Model Number | Diyeeniqgnv41mwoz-16 |
3. Setup and Installation
The Diyeeni Nab Reel Hub Adaptors are designed for straightforward installation. Follow these steps to properly attach them to your 10-inch reel-to-reel tape recorder.
3.1 Unpacking
Carefully remove the NAB hub adaptors from their packaging. Inspect both adaptors for any signs of damage during transit.
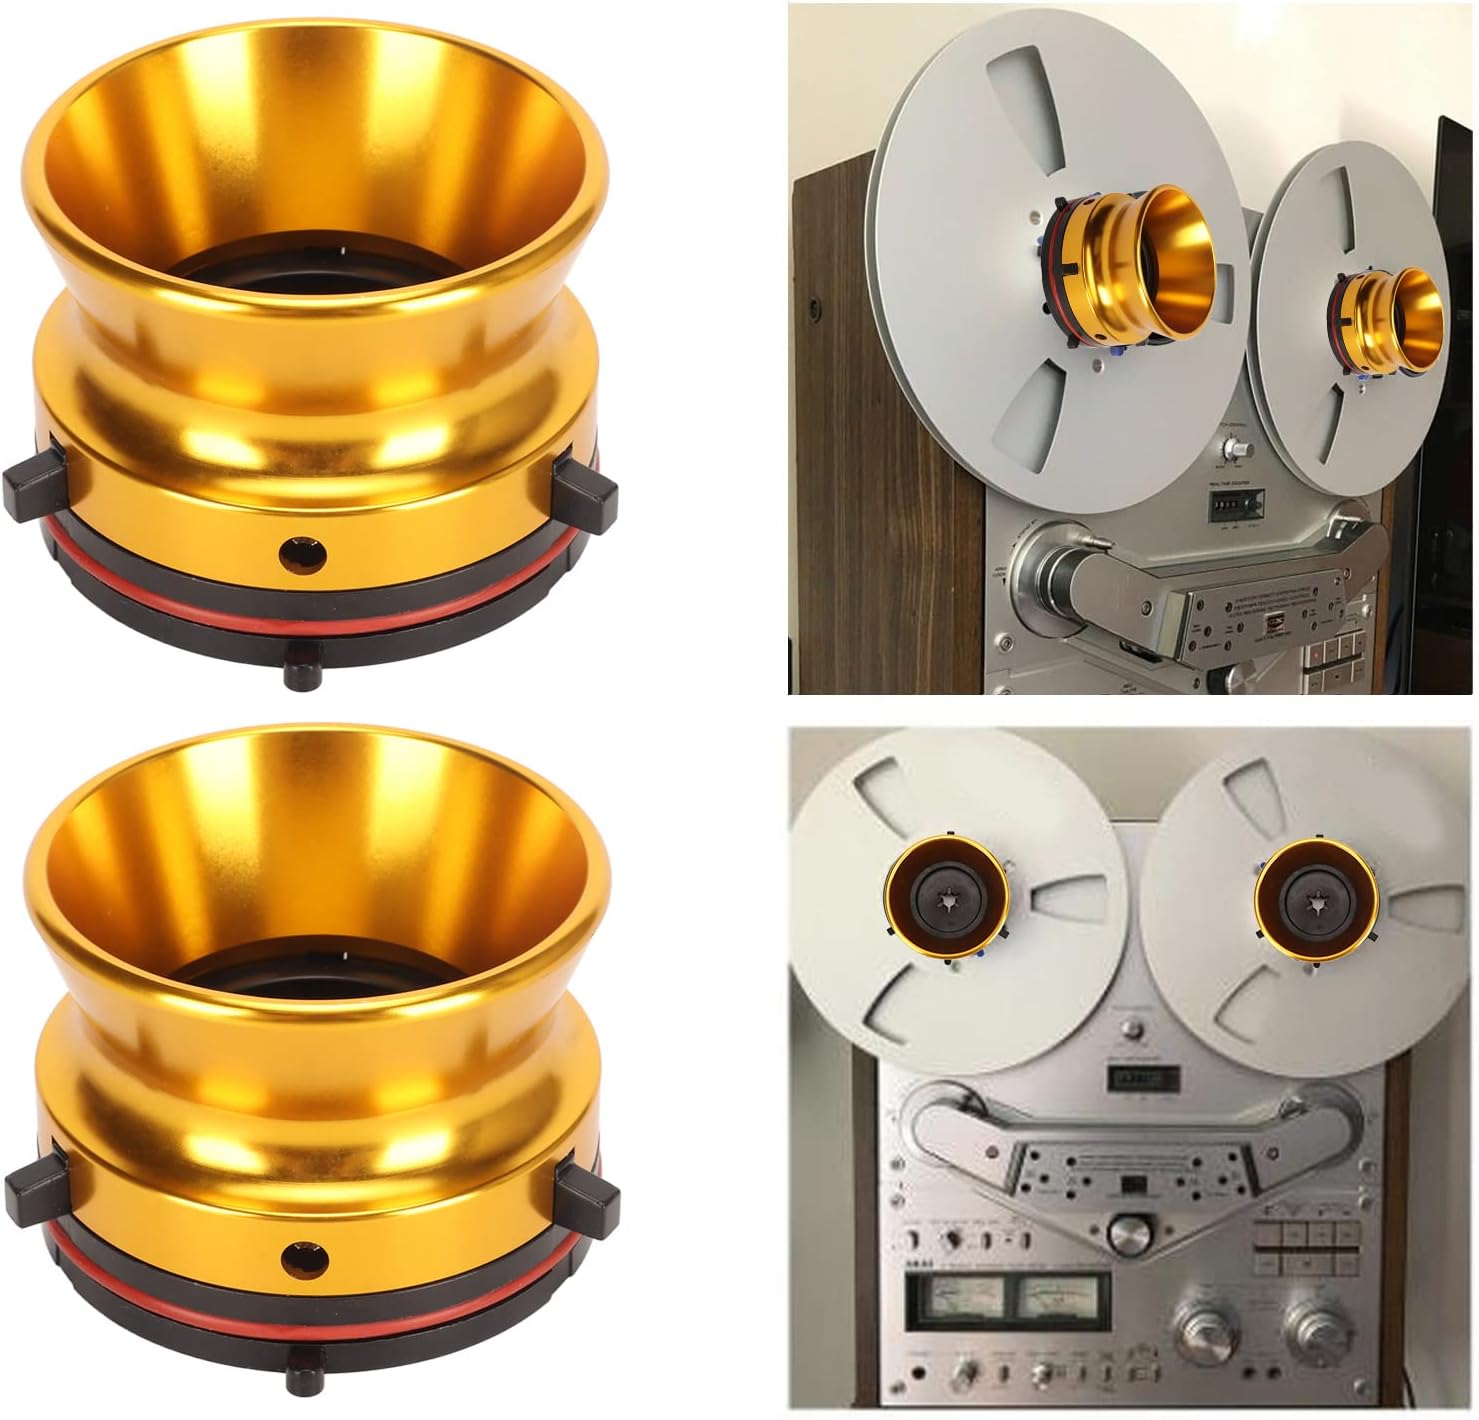
Figure 1: A pair of gold Diyeeni Nab Reel Hub Adaptors.
3.2 Attaching to Reel-to-Reel Player
- Ensure your reel-to-reel tape recorder is powered off and unplugged for safety.
- Locate the spindle on your tape recorder where the reels are mounted.
- Align the central opening of the NAB hub adaptor with the spindle. The adaptor features a locking mechanism (small tabs) on its base.
- Gently push the adaptor onto the spindle until it clicks into place, indicating it is securely locked. The adaptor should not wobble or feel loose.
- Repeat the process for the second adaptor on the other spindle.

Figure 2: Diyeeni Nab Reel Hub Adaptors correctly installed on a reel-to-reel tape recorder with 10-inch reels.
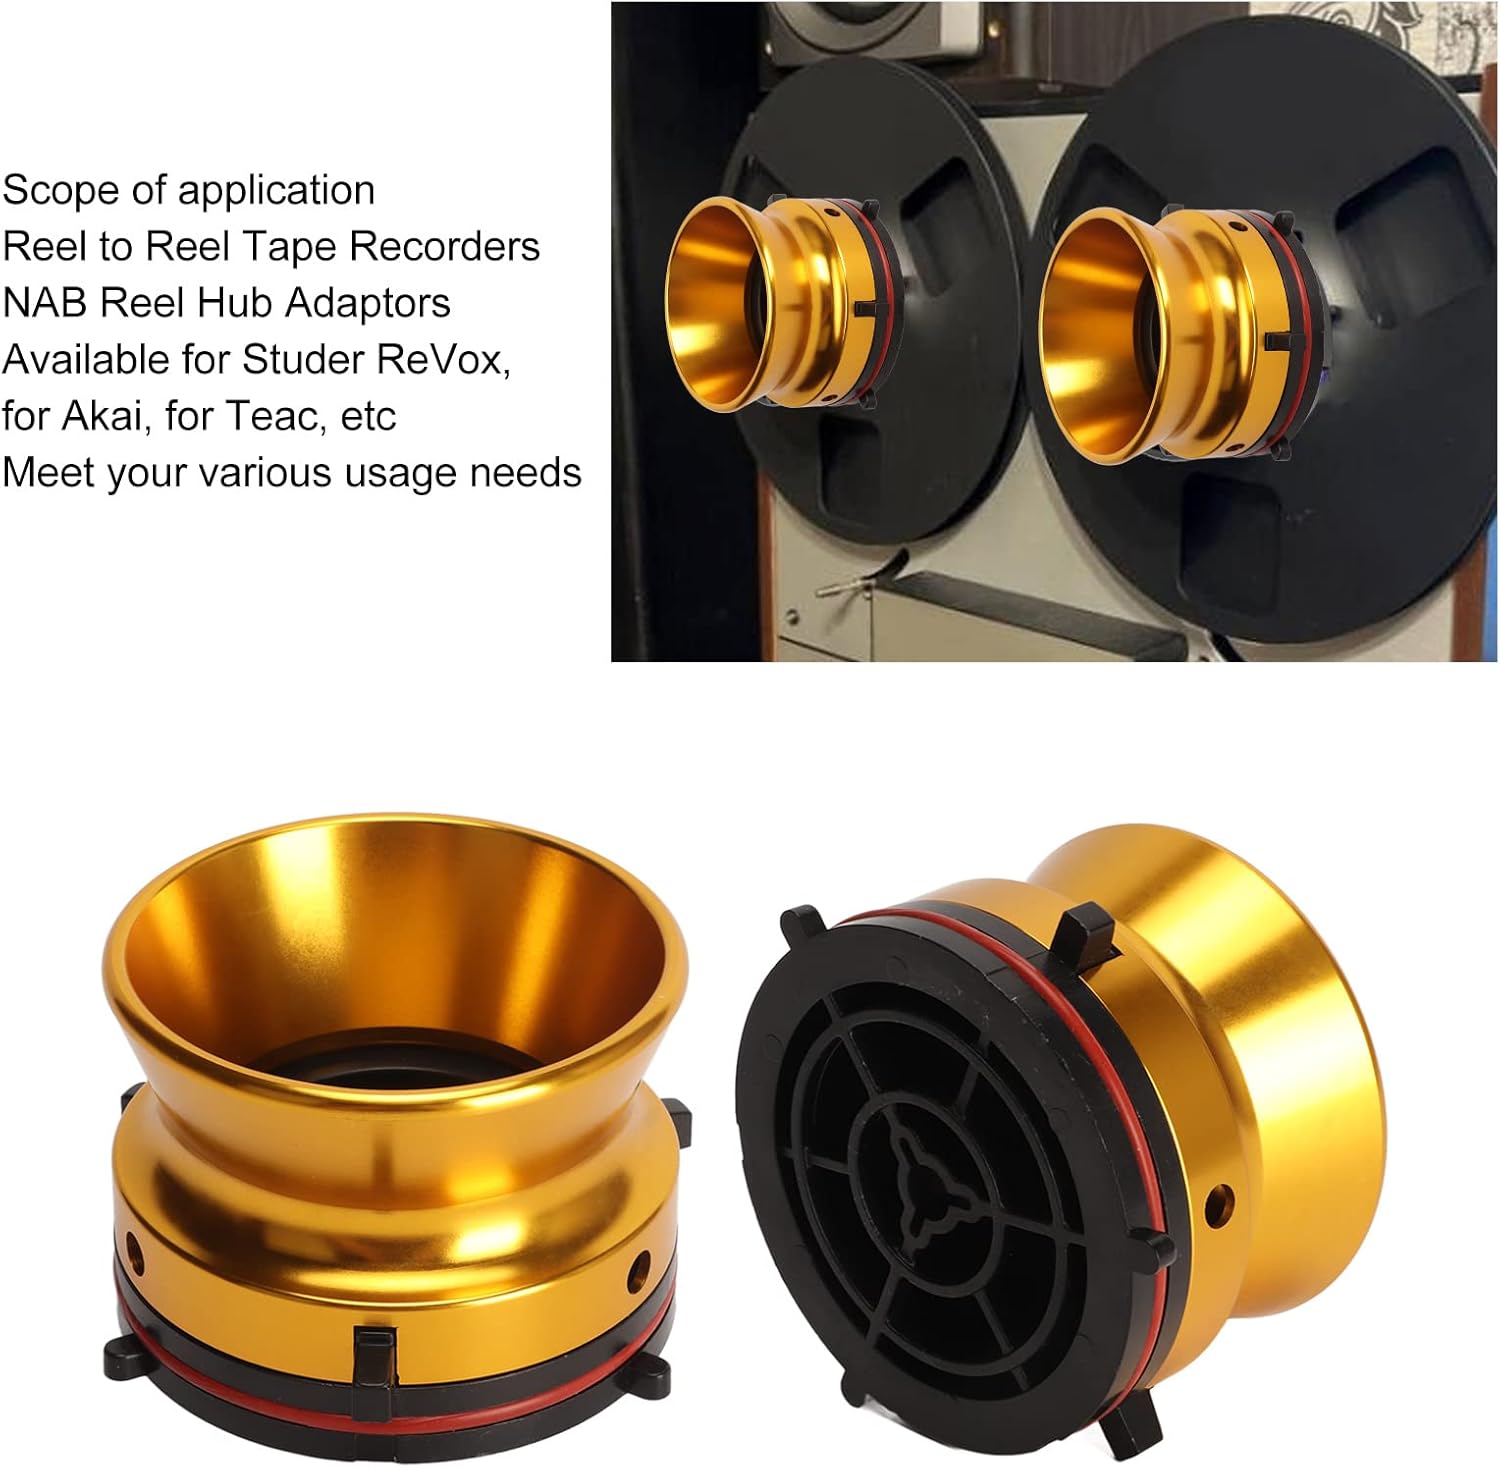
Figure 3: Detailed view of the adaptor's base, highlighting the locking tabs for secure attachment.
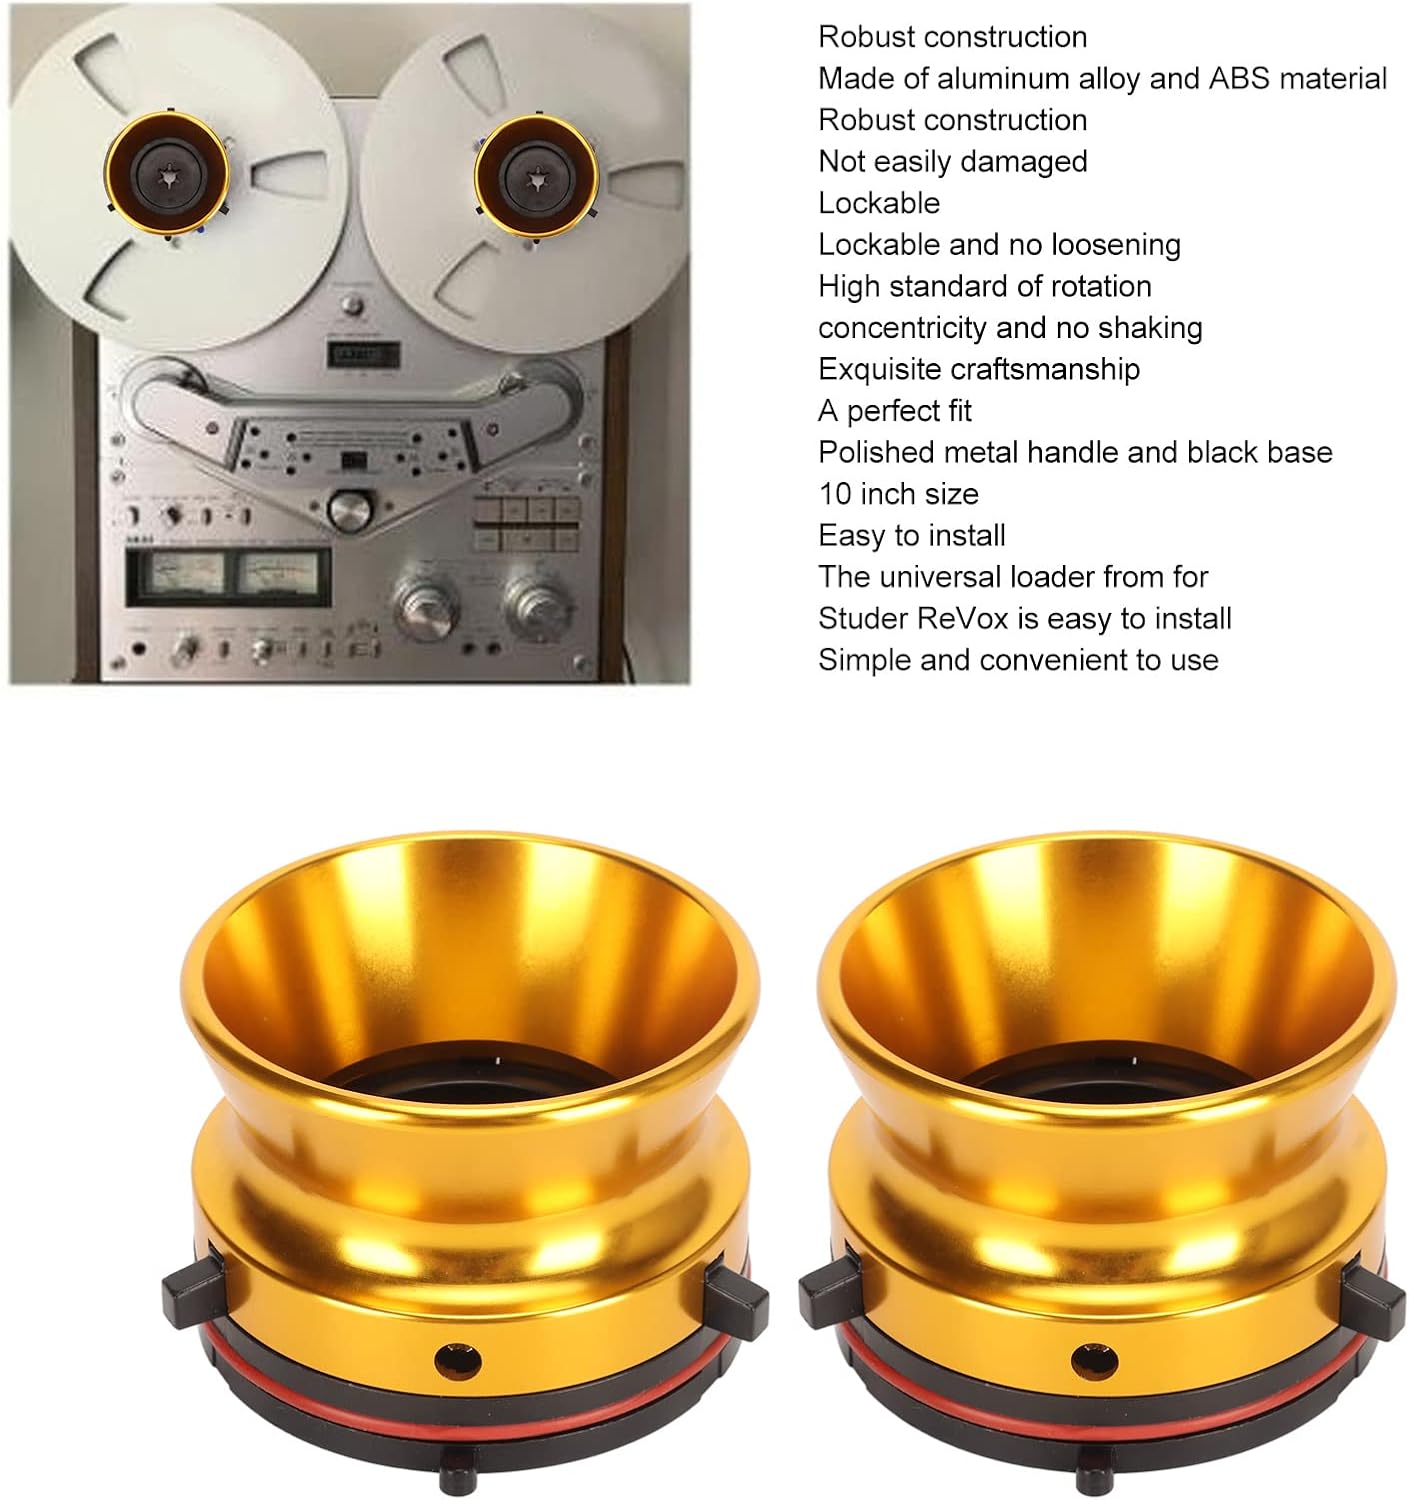
Figure 4: The adaptors in use on a vintage reel-to-reel machine.
4. Operating Instructions
Once the NAB hub adaptors are securely installed, you can mount your 10-inch tape reels and begin operation.
- Place your 10-inch tape reel onto the installed NAB hub adaptor. Ensure the reel sits flush and centered.
- The design of the adaptor provides a snug fit, preventing the reel from wobbling during playback or recording.
- Proceed with threading the tape according to your tape recorder's specific instructions.
- Power on your tape recorder and operate as usual. The adaptors maintain rotational concentricity for smooth tape movement.

Figure 5: Top view of an adaptor, showing the central mechanism for holding the tape reel.

Figure 6: Side profile of a single adaptor, highlighting its robust construction.
5. Maintenance
To ensure the longevity and continued performance of your Diyeeni Nab Reel Hub Adaptors, follow these simple maintenance guidelines:
- Cleaning: Wipe the adaptors with a soft, dry cloth to remove dust and fingerprints. Avoid abrasive cleaners or solvents that could damage the finish or material.
- Storage: When not in use, store the adaptors in a clean, dry environment away from extreme temperatures or direct sunlight.
- Inspection: Periodically check the locking tabs and overall structure for any signs of wear or damage. If any part appears compromised, discontinue use and consider replacement.
6. Troubleshooting
This section addresses common issues that may arise during the use of your NAB hub adaptors.
6.1 Adaptor Does Not Fit Securely / Wobbles
- Check Compatibility: Ensure your tape recorder is compatible with NAB hub adaptors and specifically designed for 10-inch reels. Some older or specific models may have unique spindle designs. For example, some users have reported fit issues with certain TEAC models (e.g., TEAC 3340S) where the height may be incorrect, leading to flange scraping.
- Verify Installation: Re-check that the adaptor is fully pushed onto the spindle and the locking tabs are engaged. A firm click should be heard or felt.
- Inspect Adaptor: Examine the adaptor for any manufacturing defects or damage that might prevent a secure fit, or cause it to feel flimsy or unbalanced.
6.2 Reel Does Not Spin Smoothly
- Check Adaptor Seating: Ensure the tape reel is properly seated on the adaptor and is not tilted.
- Tape Path: Verify that the tape is correctly threaded through all guides and tension arms on the tape recorder.
- Recorder Issues: If the issue persists, the problem might lie with the tape recorder itself (e.g., motor, belts, tension mechanisms) rather than the adaptors. Consult your tape recorder's manual.
7. Official Product Videos
The following videos provide additional visual guidance on the Diyeeni Nab Reel Hub Adaptors.
NAB Hub Adapters Overview
This video provides a comprehensive overview of the NAB Hub Adapters, demonstrating their features and general appearance. (Source: Diyeeni us)
1 Pair Nab Hub Adapters - Product Showcase
A short video showcasing a pair of NAB Hub Adapters, highlighting their design and compatibility with 10-inch reel-to-reel tape recorders. (Source: Chenndus)
10 Inch Aluminium Nab Hub Adapter - Features
This video demonstrates the features of the 10-inch aluminum NAB hub adapter, emphasizing its construction and ease of use. (Source: Chenndus)
Polished Reel to Reel Tape Adapters
A video highlighting the polished finish and overall quality of the reel to reel tape adapters. (Source: Oumij1)
8. Warranty and Support
Information regarding product warranty and customer support is not provided in this manual. Please refer to the product packaging or the manufacturer's official website for details on warranty coverage, returns, and technical assistance.


