1. Introduction
This manual provides essential instructions for the safe and efficient use of your Yard Force AL C22BN 20V 2.0Ah Li-ion Battery and Charger Kit. This kit includes a 20V / 2.0Ah Lithium-ion battery (AL C20B) and a charging station (AL C20C), designed for compatibility with all YARD FORCE & PowerG 20V tools. Please read this manual thoroughly before first use and retain it for future reference.
The universal 20V / 2.0Ah lithium-ion battery with charger kit is suitable for all YARD FORCE & PowerG tools. Its state-dependent charging process significantly extends battery life, and fast charging technology further prolongs battery runtime through optimized charge cycles. The battery features an LED charge status indicator and a digital LED light for constant battery level checks. Both components boast a compact design for space-saving storage.

Image 1.1: The Yard Force 20V 2.0Ah Li-ion Battery and its compatible charger.
2. Safety Information
Always observe basic safety precautions when using electrical appliances to reduce the risk of fire, electric shock, and personal injury.
2.1 Battery Safety
- Do not disassemble, open, or shred battery cells or packs.
- Do not short-circuit a battery pack. Do not store battery packs haphazardly in a box or drawer where they may short-circuit each other or be short-circuited by conductive materials.
- Do not expose battery packs to heat or fire. Avoid storage in direct sunlight.
- Do not subject battery packs to mechanical shock.
- In the event of battery leakage, do not allow the liquid to come into contact with the skin or eyes. If contact has been made, wash the affected area with copious amounts of water and seek medical advice.
- Keep battery packs clean and dry.
- Do not use any charger other than that specifically provided for use with the equipment.
- Do not use any battery pack which is not designed for use with the equipment.
- Keep battery packs out of the reach of children.
- Seek medical advice immediately if a battery pack has been swallowed.
- Dispose of exhausted battery packs promptly and according to local regulations.
2.2 Charger Safety
- This charger is designed for charging Yard Force 20V Li-ion batteries only. Do not attempt to charge other types of batteries.
- Do not expose the charger to rain or wet conditions.
- Do not operate the charger if it has received a sharp blow, been dropped, or otherwise damaged. Take it to an authorized service center.
- Do not use the charger if the cord or plug is damaged.
- Ensure adequate ventilation during charging. Do not cover the charger.
- Unplug the charger from the power outlet when not in use or before cleaning.
3. Package Contents
Carefully unpack your Yard Force AL C22BN kit and check that all items are present and undamaged.
- 1 x Yard Force 20V 2.0Ah Li-ion Battery (Model: AL C20B)
- 1 x Yard Force 20V Battery Charger (Model: AL C20C)
- 1 x User Manual
If any parts are missing or damaged, please contact your retailer or Yard Force customer service.
4. Product Features
- Universal Compatibility: 20V / 2.0Ah Li-ion battery and charger kit designed for all YARD FORCE & PowerG 20V tools.
- Extended Battery Life: State-dependent charging process optimizes battery health and longevity.
- Fast Charging Technology: Efficient charging cycles contribute to prolonged battery runtime.
- Charge Status Indicator: Integrated LED lights or digital display show the current charge level.
- Compact Design: Both battery and charger are designed for convenient, space-saving storage.

Image 4.1: The 20V 2.0Ah Li-ion battery featuring a digital charge level display.
5. Setup
5.1 Charging the Battery
- Connect the charger (AL C20C) to a standard power outlet. The charger's LED indicator will typically illuminate green, indicating standby mode.
- Insert the 20V Li-ion battery (AL C20B) into the charger, ensuring it slides in completely and clicks securely into place.
- The charger's LED indicator will change (e.g., to red or flashing green) to signify that charging is in progress.
- Once the battery is fully charged, the LED indicator on the charger will change again (e.g., to solid green).
- Remove the fully charged battery from the charger.

Image 5.1: The Yard Force 20V battery charger, ready for use.
5.2 Inserting the Battery into a Tool
- Ensure the tool is switched off before inserting the battery.
- Align the battery with the battery compartment or slot on your compatible Yard Force or PowerG 20V tool.
- Slide the battery into the slot until it clicks firmly into place. Ensure it is fully seated and secure.
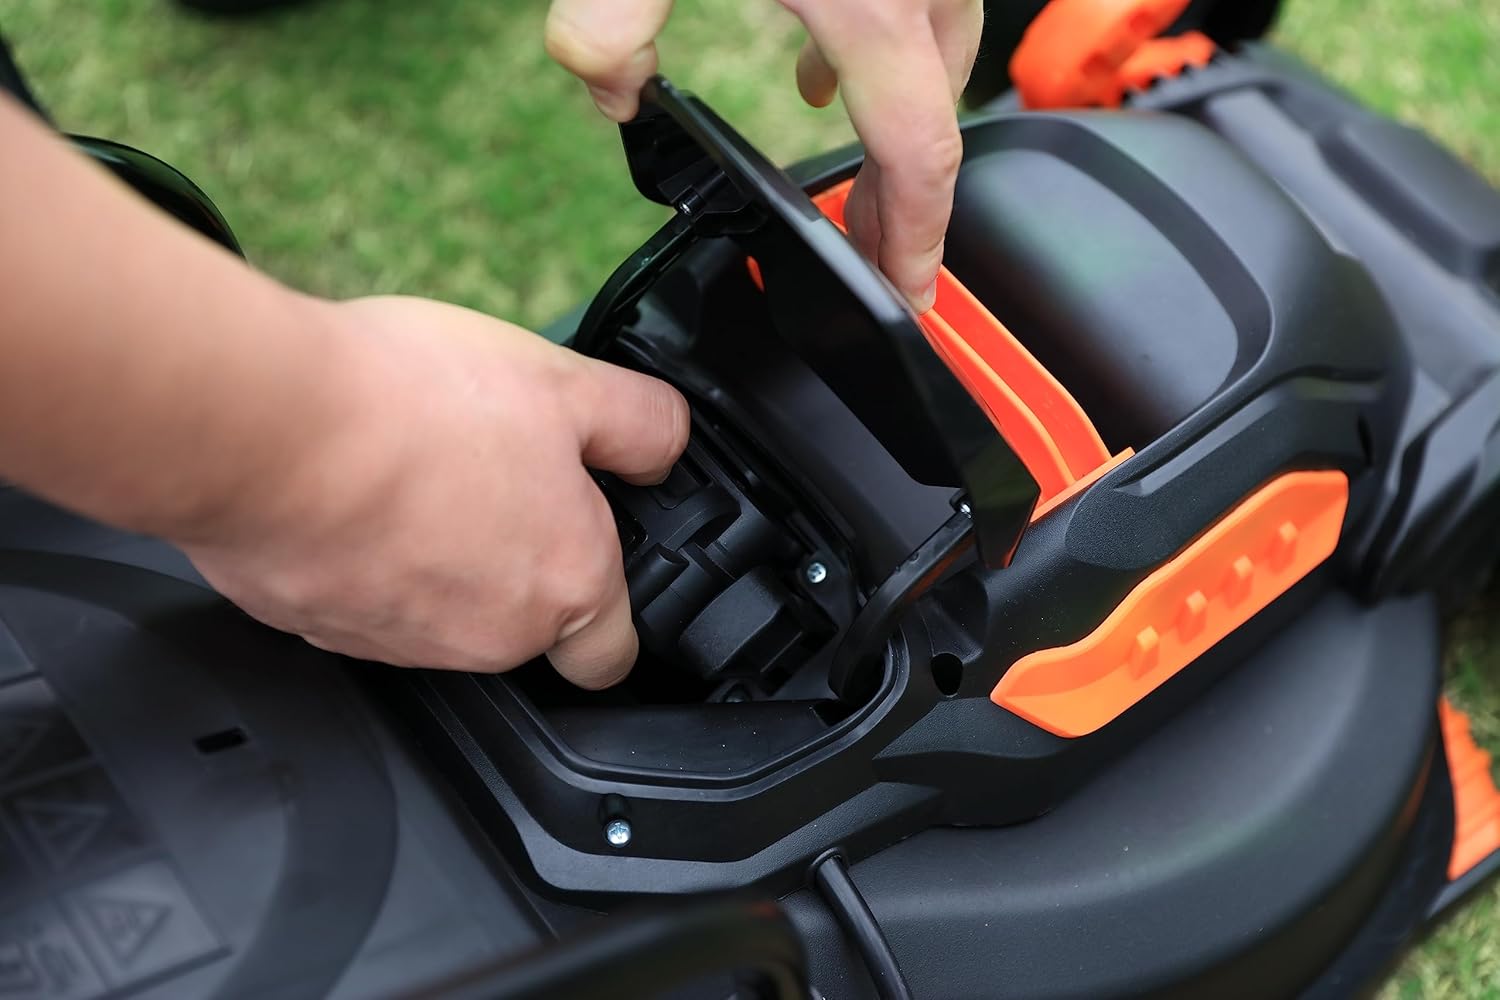
Image 5.2: Proper insertion of the battery into a compatible Yard Force tool.
5.3 Removing the Battery from a Tool
- Ensure the tool is switched off.
- Locate and press the battery release button, usually found on the battery or the tool itself.
- Slide the battery out of the tool's compartment.

Image 5.3: Two Yard Force 20V batteries correctly installed in a lawnmower's battery compartment.
6. Operating Instructions
6.1 Checking Battery Level
To check the remaining charge level of your battery, press the battery level indicator button located on the battery pack. The digital LED display or a series of LED lights will illuminate, indicating the current charge status.

Image 6.1: A user checking the battery charge level by pressing the indicator button.
6.2 General Use
- Always ensure the battery is fully charged before starting any task for optimal performance and runtime.
- Do not force the battery into a tool. If it does not slide in easily, check for proper alignment.
- Avoid completely draining the battery during use, as this can reduce its overall lifespan. Recharge when the power noticeably decreases.

Image 6.2: Yard Force 20V tools in use, powered by the compatible battery system.

Image 6.3: A Yard Force 20V sprayer tool operating with the battery.
7. Maintenance
7.1 Cleaning
- Wipe the battery and charger with a dry, soft cloth.
- Do not use solvents, abrasive cleaners, or immerse in water.
- Keep the battery terminals clean and free from debris.
7.2 Storage
- Store the battery and charger in a cool, dry place, away from direct sunlight, moisture, and extreme temperatures.
- For long-term storage, it is recommended to charge the battery to approximately 50-60% capacity.
- Recharge the battery every 3-6 months during long-term storage to prevent deep discharge and maintain battery health.
8. Troubleshooting
8.1 Battery Not Charging
- Check Power Connection: Ensure the charger is securely plugged into a working power outlet.
- Battery Seating: Verify that the battery is correctly and fully seated in the charger.
- Charger Indicator: Observe the charger's LED indicator. If there is no light, the charger may be faulty or not receiving power.
- Temperature: If the battery is extremely hot or cold, allow it to reach room temperature (10°C - 40°C / 50°F - 104°F) before attempting to charge.
8.2 Battery Not Powering Tool
- Check Charge Level: Press the battery level indicator button to confirm the battery has sufficient charge.
- Battery Insertion: Ensure the battery is securely and fully inserted into the tool's battery compartment.
- Tool Compatibility: Verify that the battery is compatible with the specific tool model.
- Tool/Battery Fault: If the battery is fully charged and correctly inserted but the tool still does not operate, there may be a fault with either the tool or the battery. Contact customer support.
9. Specifications
| Feature | Specification |
|---|---|
| Brand | Yard Force |
| Item Model Number | AL C22BN (Kit) |
| Battery Model | AL C20B |
| Charger Model | AL C20C |
| Battery Type | Lithium-ion |
| Battery Voltage | 20 Volts |
| Battery Capacity | 2.0Ah |
| Color | Black |
| Manufacturer | YARD FORCE |
| Country of Origin | China |
| Spare Parts Availability | Information unavailable on spare parts |
| Software Updates Guaranteed Until | Information not available |
10. Warranty and Support
For detailed warranty information, product registration, and customer support, please refer to the official Yard Force website or contact your local authorized retailer. It is recommended to keep your purchase receipt as proof of purchase for any warranty claims.


