
KAIWEETS KES01M
KAIWEETS Stud Finder Wall Scanner Instruction Manual
Model: KES01M
1. Introduction and Overview
The KAIWEETS Stud Finder Wall Scanner (Model KES01M) is an advanced electronic stud detector designed to quickly and accurately locate wood, metal studs, joists, pipes, and live AC wires hidden behind walls, floors, and ceilings. Equipped with a high-sensitivity microprocessor chip and a self-calibration system, it provides reliable detection for various materials, making it an essential tool for home improvement projects, installations, and renovations. Its intuitive 3-color LCD display and audio alarm ensure clear and immediate feedback during scanning.

Figure 1: KAIWEETS Stud Finder Wall Scanner (Model KES01M) and included 9V battery.
2. Key Features
- 5-in-1 Multi-functional Detection: Locates wood studs (3/4" and 1-1/2" deep), metal (ferrous and non-ferrous up to 2.36" deep), and live unshielded AC wires (up to 2" deep).
- High Accuracy: Utilizes an intelligent microprocessor chip and advanced self-calibration for reliable and precise detection.
- Tri-Color Backlight LCD Display: Provides clear visual feedback with green (no target), orange (target edge), and red (stud center) indicators. Directional arrows and signal bars assist in pinpointing locations.
- Audio Alarm: A buzzer sounds an alarm when a target is detected, especially at the stud center.
- AC Wire Warning: Detects live unshielded AC wires in all modes to prevent accidental drilling.

Figure 2: Visual representation of the 5-in-1 detection capabilities.

Figure 3: The tri-color backlight display indicating no stud, stud edge, and stud center.
3. Setup
3.1 Battery Installation
- Locate the battery compartment cover on the back of the device.
- Slide the cover open.
- Insert the included 9V battery, ensuring correct polarity (+/-).
- Close the battery compartment cover securely.
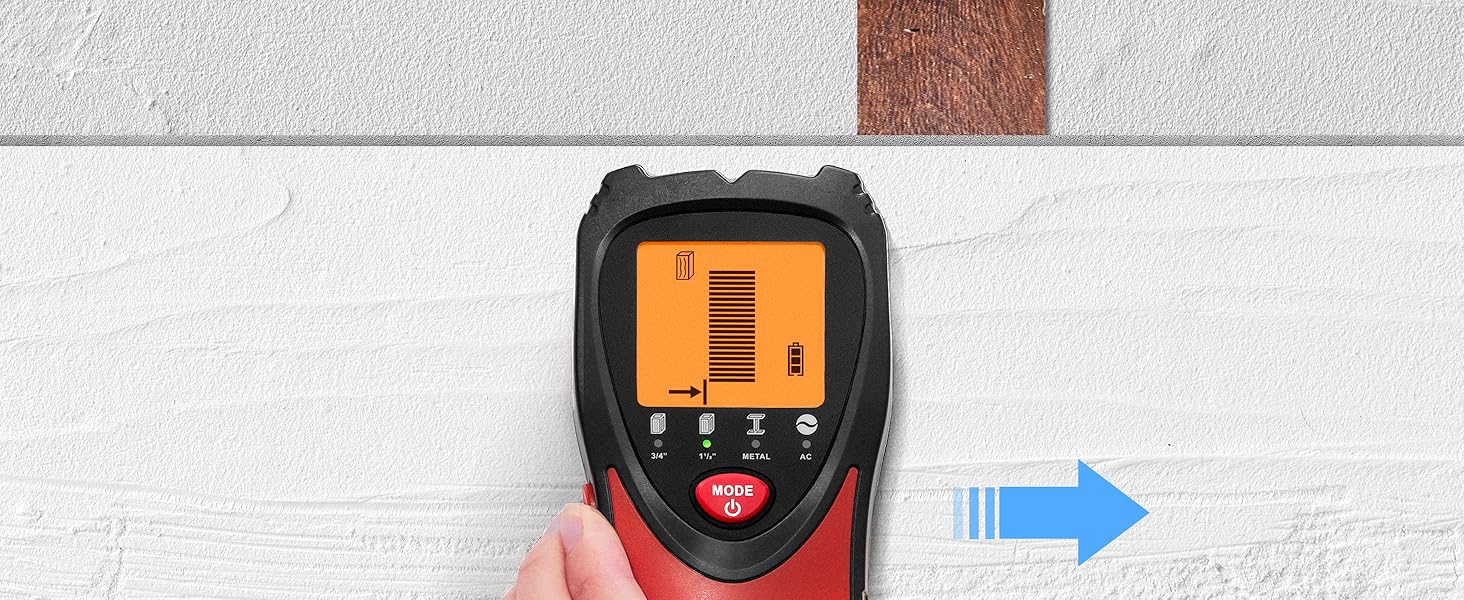
Figure 4: Proper installation of the 9V battery.
3.2 Initial Calibration
Before each use, or when moving to a new scanning area, the device must be calibrated for optimal accuracy. Calibration adapts the scanner to the specific wall material.
- Place the stud finder flat against the wall where you intend to scan, ensuring there are no known studs, metal, or wires in that immediate area.
- Press and hold the calibration button (red button on the side) until the display indicates calibration is complete (usually a beep and a stable green screen).
- Keep your hand on the calibration button throughout the scanning process.
Video 1: KAIWEETS Stud Finder Wall Scanner Operation Demonstration. This video illustrates the calibration and scanning process for various modes.
4. Operating Instructions
The KAIWEETS Stud Finder offers five scanning modes to detect different hidden objects. Always ensure proper calibration before scanning.
4.1 Selecting a Mode
Press the "MODE" button (red button with power icon) to cycle through the available scanning modes:
- 3/4" Stud Scan: For detecting wood and metal studs up to 0.75 inches (19mm) deep.
- 1-1/2" Stud Scan: For detecting wood and metal studs up to 1.5 inches (38mm) deep.
- Metal Scan: For detecting ferrous and non-ferrous metals up to 2.36 inches (60mm) deep.
- AC Scan: For detecting live unshielded AC wires up to 2 inches (51mm) deep.

Figure 5: Overview of the LCD display and button functions.
4.2 Scanning Procedure
- After selecting the desired mode and calibrating, slowly slide the tool horizontally across the surface.
- Observe the LCD display and listen for the audio alarm.
- The display will show directional arrows and signal bars indicating proximity to a target.
- The backlight color will change:
- Green: No target detected.
- Orange: Target edge detected.
- Red: Stud center detected (in stud mode), accompanied by an audio alarm.
- Once the stud center is indicated (red backlight and continuous beep), mark the spot.
- For best results, scan the area multiple times from different directions to confirm the target's location.
4.3 Specific Mode Usage Tips
4.3.1 Stud Mode (3/4" & 1-1/2")
These modes are designed to locate the center and edges of wood and metal studs. Always start with the 3/4" mode to minimize false readings. If no stud is found or a deeper scan is needed, switch to 1-1/2" mode.

Figure 6: Illustration of stud mode detection and depth capabilities.
4.3.2 Metal Scan Mode
Use this mode to detect metal objects such as pipes or rebar. It can detect metal up to 2.36 inches (60mm) deep. To differentiate between wood and metal, first use a stud mode to locate the object, then switch to metal mode. If the object is still detected, it is metal; otherwise, it is likely wood.

Figure 7: Illustration of metal mode detection.
4.3.3 AC Scan Mode
This mode detects live unshielded AC wires up to 2 inches (51mm) deep. The AC wire warning icon will flash on the display when live wires are detected, regardless of the active scanning mode. This feature is crucial for safety to avoid electrical hazards during drilling or cutting.
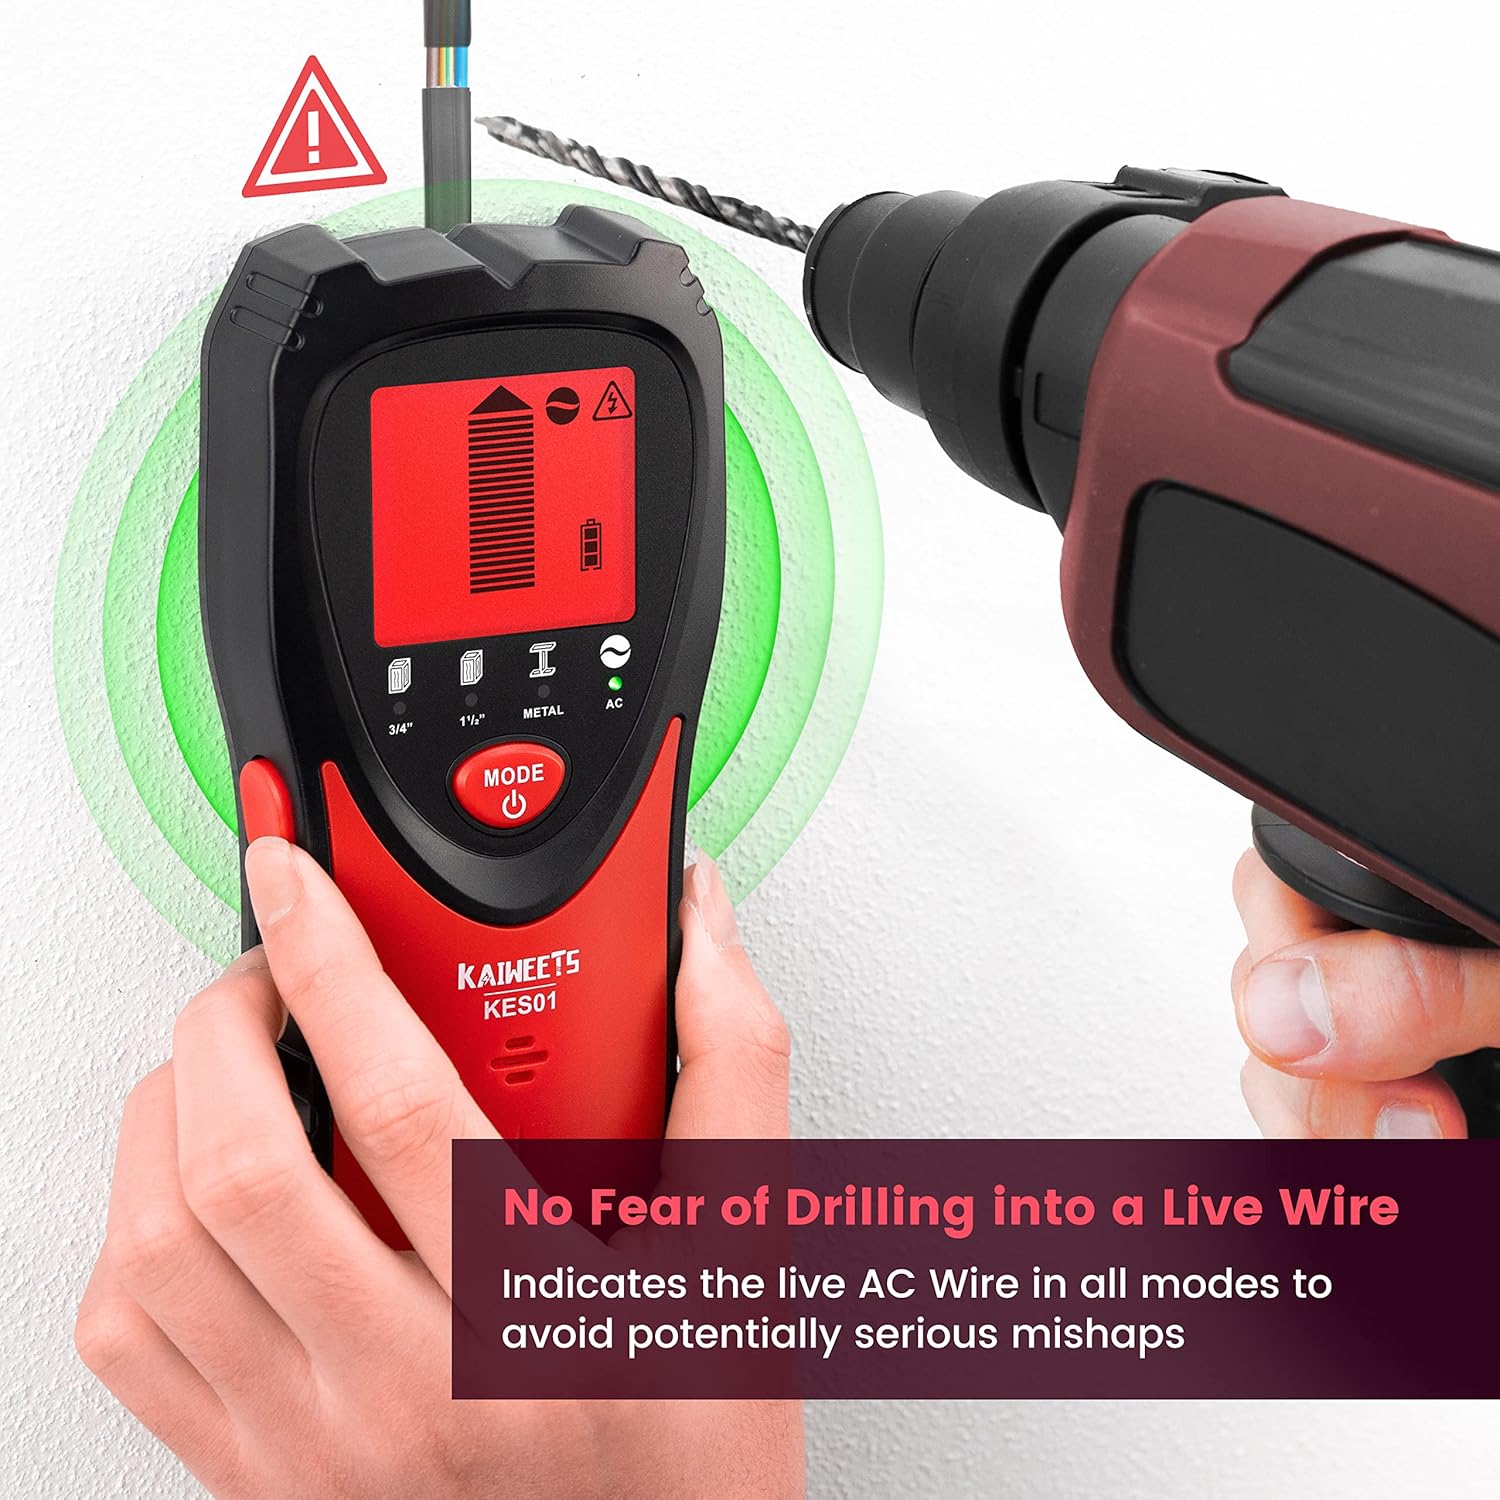
Figure 8: Safety feature demonstrating AC wire detection.
Video 2: Stud Finder Wall Scanner with Tricolor Backlight. This video highlights the tri-color backlight and AC detection features.
5. Maintenance
- Keep the device clean and dry. Wipe with a soft, damp cloth. Do not use abrasive cleaners or solvents.
- Store the stud finder in its dustproof bag (included) when not in use to protect it from dust and debris.
- Remove the battery if the device will not be used for an extended period to prevent battery leakage and corrosion.
- Avoid exposing the device to extreme temperatures or high humidity.
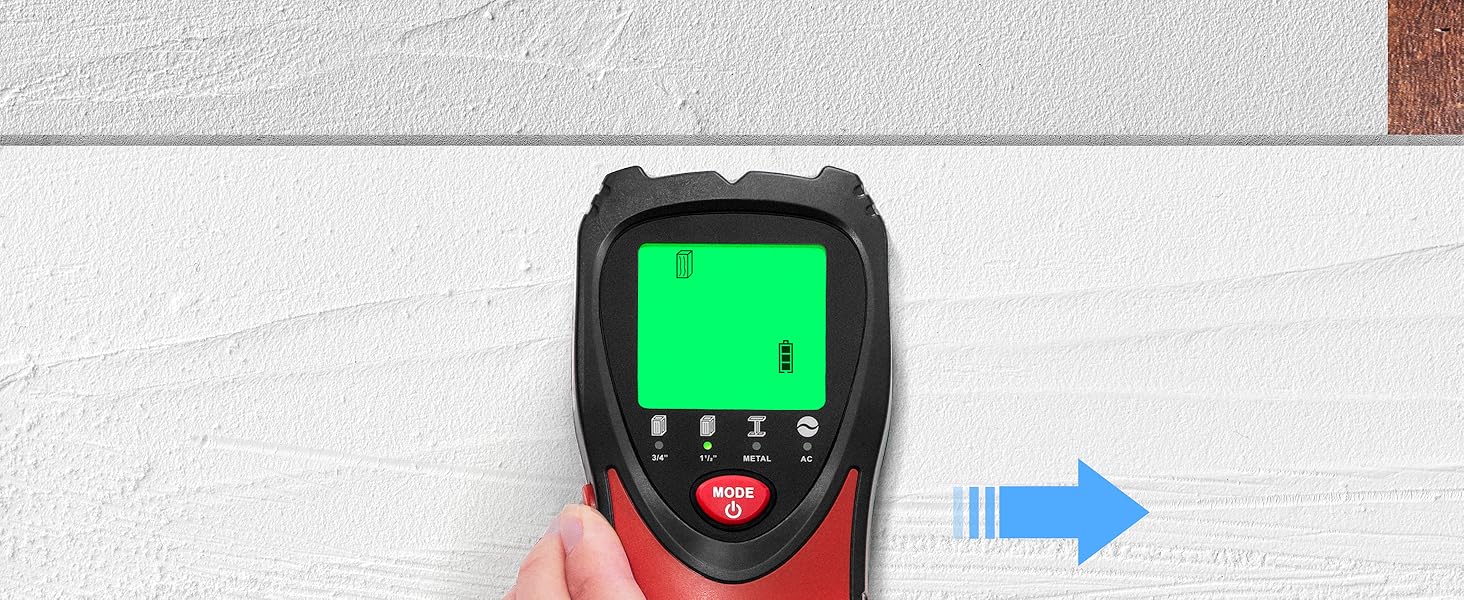
Figure 9: Included accessories for storage and maintenance.
6. Troubleshooting
- Inconsistent Readings:
- Ensure proper calibration on a blank wall area before scanning.
- Slowly slide the device across the surface. Rapid movement can lead to inaccurate results.
- Re-calibrate if moving to a different wall material or if readings become erratic.
- Check battery level; a low battery can affect performance.
- No Detection:
- Verify the correct mode is selected for the target material (wood, metal, AC).
- Ensure the device is held flat against the wall and the calibration button is continuously pressed.
- The target might be deeper than the selected mode's detection depth. Try the 1-1/2" stud mode or metal mode if applicable.
- False Positives (Detecting where no object exists):
- This can occur due to moisture in the wall or nearby electrical interference. Try scanning a different area or on a drier day.
- Ensure your hand is not touching the scanning surface or other parts of the wall during operation, as this can interfere with readings.
7. Specifications
| Product Dimensions | 7.72 x 3.66 x 1.85 inches |
| Item Weight | 6.3 ounces |
| Model Number | KES01M |
| Batteries | 1 9V battery required. (included) |
| Manufacturer | KAIWEETS |
8. Warranty and Support
KAIWEETS offers a 36-month (3-Year) warranty for this product, ensuring peace of mind for your purchase. Additionally, customers can enjoy lifetime support, which includes the option of receiving a replacement item if necessary. For any inquiries or assistance, please contact KAIWEETS customer service through their official channels.
Related documentsKES01M

Ask a question about this manual
Ask about setup, troubleshooting, compatibility, parts, safety, or missing instructions. Manuals+ will review the question and use this page’s manual context to help answer it.