
1. Introduction
This manual provides comprehensive instructions for the Senzooe 4.3-inch TFT LCD display module (Model: 707638024155). This display features an RGB 40-pin interface and supports resolutions of 480x272 and 800x480. It is designed for integration into various electronic projects and devices. Please read this manual thoroughly before installation and operation to ensure proper use and to prevent damage.
2. Safety Information
- Always handle the display module with care to avoid physical damage.
- Avoid exposing the display to extreme temperatures, humidity, or direct sunlight.
- Ensure proper grounding and power supply voltage to prevent electrical damage.
- Do not attempt to disassemble or modify the display module. This may void the warranty and cause damage.
- Wear anti-static gloves or use an anti-static wrist strap when handling the module to prevent electrostatic discharge (ESD) damage.
- Keep out of reach of children.
3. Package Contents
Please check the package contents upon receipt. If any items are missing or damaged, contact your supplier immediately.
- Senzooe 4.3-inch TFT LCD Display Module (Model: 707638024155)
- (Note: Additional accessories such as cables or adapter boards may be sold separately.)
4. Product Overview
The Senzooe 4.3-inch TFT LCD display is a compact and versatile display solution. It features a 4.3-inch diagonal screen, an RGB 40-pin interface, and supports two primary resolutions: 480x272 and 800x480. The display is designed for easy integration into embedded systems, industrial control panels, and other applications requiring a clear visual interface.
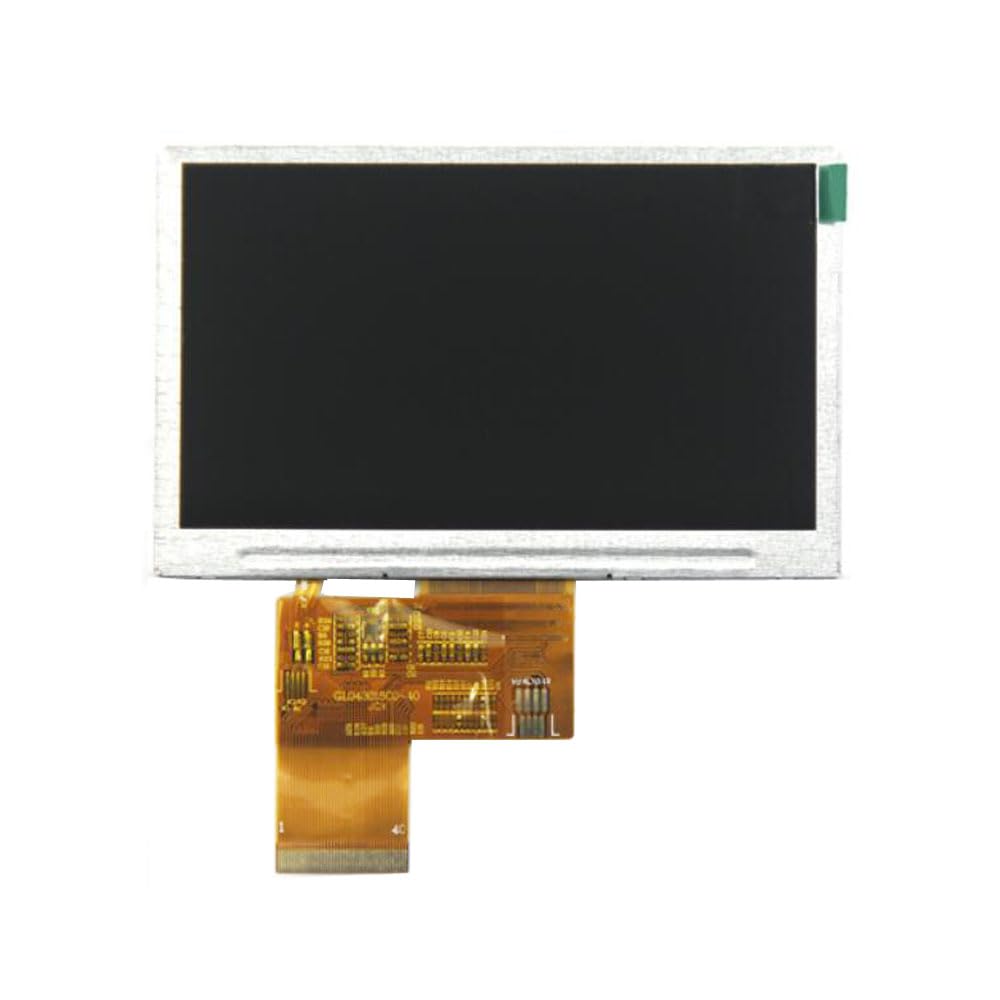
Figure 4.1: Rear view of the Senzooe 4.3-inch TFT LCD display module. The metallic backplate covers the display panel, and a flexible flat cable (FFC) connector extends from the right side, revealing the integrated circuit board and connection pins.
Key Features:
- Display Size: 4.3 inches (diagonal)
- Interface: RGB 40-pin
- Supported Resolutions: 480x272 and 800x480
- Touch Functionality: The display supports touch input for 480x272 resolution. The 800x480 resolution mode does not include touch functionality.
5. Setup
5.1 Connection to Host Device
The display module connects to a host device (e.g., microcontroller, single-board computer) via its 40-pin RGB interface. Ensure the host device provides compatible RGB signals, synchronization signals (HSYNC, VSYNC, DE), and a clock signal (PCLK).
- Identify Pinout: Refer to the technical documentation of your host device and the display module's datasheet for the exact pin assignments of the 40-pin FFC connector. Common pins include:
- VCC (Power Supply)
- GND (Ground)
- R0-R5 (Red Data Lines)
- G0-G5 (Green Data Lines)
- B0-B5 (Blue Data Lines)
- HSYNC (Horizontal Sync)
- VSYNC (Vertical Sync)
- DE (Data Enable)
- PCLK (Pixel Clock)
- RESET (Reset Pin)
- LED_A (LED Anode for Backlight)
- LED_K (LED Cathode for Backlight)
- TP_CS, TP_SCK, TP_MISO, TP_MOSI (Touch Panel SPI Interface, if applicable for 480x272)
- Prepare Cables: Use a compatible 40-pin FFC cable to connect the display to your host device. Ensure the cable is correctly oriented and securely seated in both connectors.
- Power Supply: Connect the appropriate power supply (typically 3.3V or 5V, refer to datasheet) to the VCC and GND pins. Ensure the backlight power (LED_A, LED_K) is also correctly connected, often requiring a separate power source or a current-limiting resistor.
- Initial Power-Up: After all connections are secure, power on your host device. The display should initialize and show content if the signals are correctly configured.
5.2 Resolution Configuration
The display supports both 480x272 and 800x480 resolutions. The desired resolution is typically configured via the host device's display controller settings or software. Ensure the timing parameters (pixel clock, horizontal/vertical sync pulses, front/back porches) match the display's specifications for the chosen resolution.
Important Note on Touch Functionality:
This display module features touch input when operating at 480x272 resolution. However, when configured for 800x480 resolution, the touch functionality is not available. Plan your application accordingly based on the required resolution and touch interaction.
6. Operating Instructions
6.1 Powering On/Off
The display powers on and off with the host device it is connected to. Ensure the power supply is stable during operation.
6.2 Displaying Content
Content is rendered on the display by the host device's graphics controller. Program your host device to output the desired video signals (RGB, HSYNC, VSYNC, DE, PCLK) according to the display's specifications for the chosen resolution.
6.3 Touch Input (for 480x272 resolution only)
If operating at 480x272 resolution, the integrated touch panel can be used for user interaction. The touch panel typically communicates via an SPI interface (TP_CS, TP_SCK, TP_MISO, TP_MOSI). Your host device will need to implement a touch controller driver to read touch coordinates and interpret gestures.
- Calibration: Touch screens often require calibration for accurate input. Refer to your host device's operating system or software documentation for calibration procedures.
- Pressure: Apply light, even pressure with a finger or a stylus designed for resistive touchscreens.
7. Maintenance
7.1 Cleaning the Display
To clean the display surface, gently wipe it with a soft, lint-free cloth. For stubborn smudges, slightly dampen the cloth with distilled water or a specialized LCD cleaning solution. Do not use abrasive cleaners, alcohol, or solvents, as these can damage the screen coating.
7.2 Storage
When not in use, store the display module in its original packaging or an anti-static bag in a cool, dry place, away from direct sunlight and extreme temperatures.
8. Troubleshooting
| Problem | Possible Cause | Solution |
|---|---|---|
| No display / Blank screen |
|
|
| Flickering or distorted image |
|
|
| Touch screen unresponsive (at 480x272) |
|
|
| Touch screen not working at 800x480 |
|
|
9. Specifications
| Feature | Detail |
|---|---|
| Brand | Senzooe |
| Model Number | 707638024155 |
| ASIN | B0C7RN8C2D |
| Display Type | TFT LCD |
| Display Size | 4.3 inches |
| Interface | RGB 40-pin |
| Supported Resolutions | 480x272, 800x480 |
| Touch Functionality | Yes (for 480x272 resolution only); No (for 800x480 resolution) |
| Manufacturer | Senzooe |
| Country of Origin | China |
| UPC | 707638024179 |
10. Warranty and Support
Senzooe products are manufactured to high-quality standards. For specific warranty terms and conditions, please refer to the documentation provided with your purchase or contact your retailer. Technical support may be available through the point of purchase or the manufacturer's official channels.
For further assistance, please visit the product page on Amazon.com.be or contact the seller directly.