
1. Introduction
Thank you for choosing the Keyluv Queen Bed Frame with LED Lights. This modern upholstered platform bed features integrated RGB LED lighting, a visual-floating design, and a sturdy wood slat support system. This manual provides detailed instructions for assembly, operation, maintenance, and troubleshooting to ensure a safe and enjoyable experience with your new bed frame.

Image 1.1: Keyluv Queen Bed Frame with LED Lights, showcasing its modern design and integrated lighting.
2. Safety Information
Please read and understand all instructions before beginning assembly and use. Keep this manual for future reference.
- Ensure all components are present and undamaged before assembly. Do not proceed with assembly if any parts are missing or broken.
- Assemble the bed frame on a soft, clean surface (e.g., carpet or cardboard) to prevent scratches.
- Always tighten all bolts and screws securely. Periodically check and re-tighten fasteners to maintain stability.
- Do not stand or jump on the bed frame.
- Do not exceed the maximum weight capacity of 800 lbs for the Queen size.
- Keep electrical components (LED lights, power adapter) away from water and moisture.
- Ensure proper ventilation around the LED light power supply.
3. Package Contents
Verify that all the following components are included in your package:
| Component | Quantity |
|---|---|
| Headboard (with integrated LED lights) | 1 |
| Footboard | 1 |
| Side Rails | 2 |
| Center Support Beam | 1 |
| Support Legs | Various |
| Wood Slats (with Velcro) | Set |
| Hardware Pack (bolts, washers, Allen key) | 1 |
| LED Remote Control | 1 |
| Power Adapter for LED Lights | 1 |
| Instruction Manual | 1 |
4. Assembly Instructions
Follow these steps carefully for proper assembly. It is recommended to have two people for assembly.
- Unpack and Identify Parts: Lay out all components on a soft, clean surface. Refer to the parts list and diagrams to identify each piece.
- Assemble Headboard: Attach the headboard legs to the upholstered headboard using the provided bolts and Allen key. Ensure they are securely fastened.
- Attach Side Rails: Connect the side rails to the assembled headboard and footboard using the appropriate hardware. Do not fully tighten bolts until all major components are connected.
- Install Center Support: Place the center support beam along the middle of the bed frame, connecting it to the headboard and footboard. Attach any additional support legs to the center beam.
- Place Wood Slats: Unroll the wood slats across the bed frame. The slats are designed with Velcro for easy and secure attachment to the side rails. Ensure even spacing (approximately 4 inches apart) for optimal mattress support.
- Install LED Lights: The LED light strips are pre-installed in the headboard and along the under-bed frame. Connect the light strips to the power adapter and then plug the adapter into a wall outlet.
- Final Tightening: Once all components are in place and aligned, securely tighten all bolts and screws.

Image 4.1: Detailed view of the bed frame's sturdy metal central structure, noise-free design, narrow slat spacing, and easy-to-assemble Velcro slats.

Image 4.2: Product dimensions for the Queen size bed frame, indicating overall length, width, and headboard height range.
Video 4.1: An official product video demonstrating the assembly process and key features of the Keyluv LED floating bed frame.
5. Operating Instructions
5.1 LED Light Operation
Your Keyluv bed frame features integrated RGB LED lights that can be controlled via a remote control or a smartphone application.
- Remote Control: Use the included 2.4G music controller to turn lights on/off, change colors (over 60,000 options), adjust brightness, select wave patterns, and activate music sync mode.
- Smartphone App: Download the dedicated app (refer to the manual for QR code or app store name) to control the lights via Bluetooth. The app offers advanced features including precise color selection, music mode, brightness adjustment, and timer settings.
- Independent Light Control: The headboard light and the under-bed light strips can be controlled independently or simultaneously, depending on your preference and connection setup.

Image 5.1: Overview of LED light features including over 60,000 colors, music mode, Bluetooth APP control, brightness adjustment, and timer setting.

Image 5.2: The included 2.4G music controller for operating the LED lights.

Image 5.3: Example of the smartphone application interface for controlling the LED lights.
5.2 Headboard Height Adjustment
The headboard height is adjustable to accommodate different mattress thicknesses or if you choose to use a box spring.
- The headboard height adjusts in two-inch increments, from a minimum of 41.3 inches to a maximum of 43.3 inches.
- There are three pre-drilled holes on the headboard legs, allowing you to set the headboard higher for a box spring or lower for a mattress-only setup.
- To adjust, loosen the bolts connecting the headboard to the legs, slide the headboard to the desired height, and re-tighten the bolts securely.

Image 5.4: Illustration of the adjustable headboard height, showing the range from 41.3 to 43.3 inches.

Image 5.5: Demonstrates that no box spring is needed and highlights the independent control of headboard and under-bed lights.
6. Maintenance
Regular maintenance will help prolong the life and appearance of your bed frame.
- Cleaning Upholstery: For general cleaning, wipe the upholstered surfaces with a soft, damp cloth. For tougher spots, use a mild soap solution and wipe dry immediately. Avoid harsh chemicals or abrasive cleaners.
- Frame Cleaning: Wipe metal and wood components with a dry or slightly damp cloth.
- Fastener Check: Periodically (every 3-6 months) check all bolts and screws to ensure they are tight. Re-tighten as necessary to prevent wobbling or squeaking.
- LED Lights: Ensure the LED light strips and power adapter are free from dust and debris. Do not attempt to repair or modify the LED system yourself.
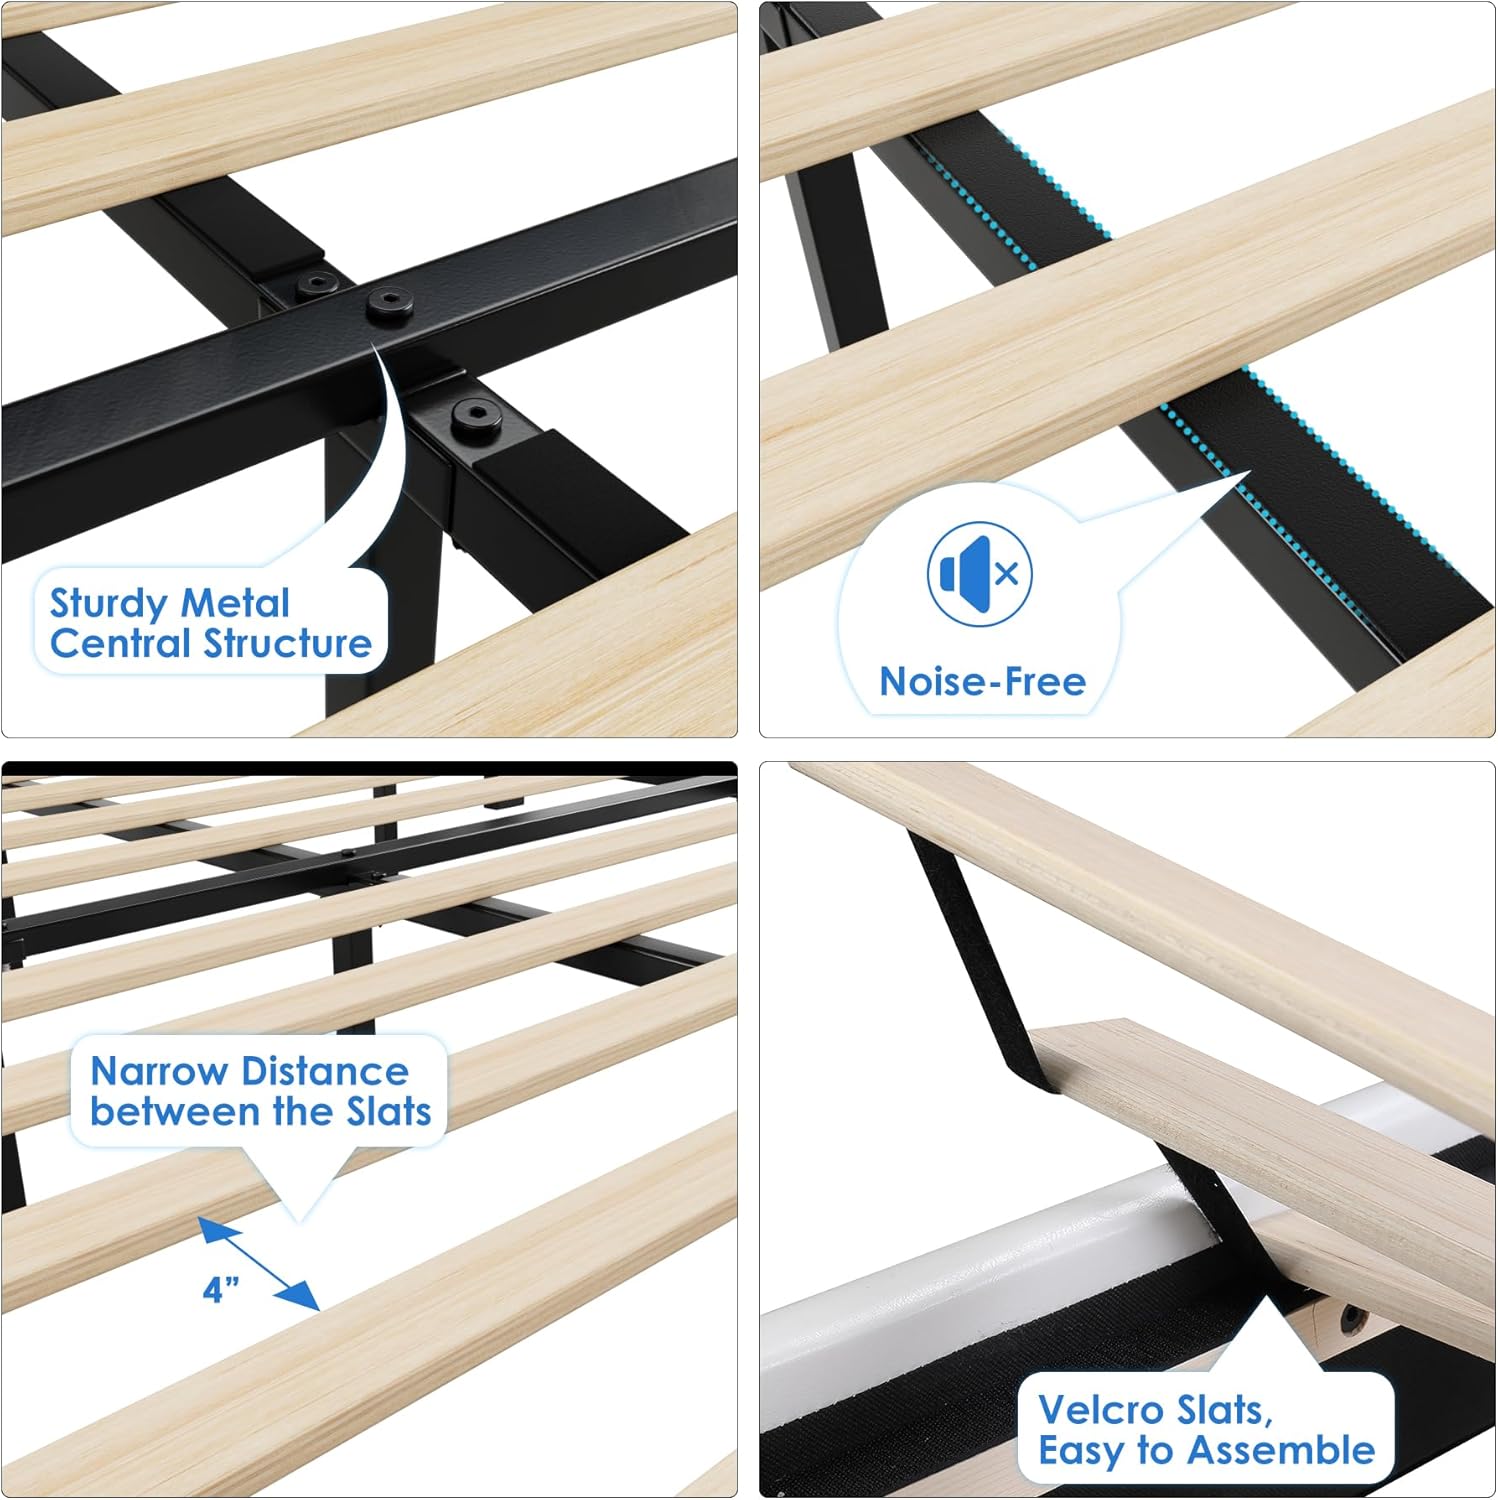
Image 6.1: Close-up of the upholstered headboard, highlighting its soft-touch leather, button tufting, and easy-clean properties.
7. Troubleshooting
If you encounter any issues with your bed frame, refer to the following common problems and solutions:
| Problem | Possible Cause | Solution |
|---|---|---|
| LED lights not turning on. | Power adapter unplugged, loose connection, remote battery dead, app not connected. | Check power outlet and connections. Replace remote battery. Ensure Bluetooth is enabled and app is connected. |
| Bed frame squeaks. | Loose bolts, uneven floor, slats not properly seated. | Tighten all assembly bolts. Ensure bed is on a level surface. Verify all slats are securely in place. |
| Parts missing or damaged upon arrival. | Shipping damage, packing error. | Do not assemble. Contact Keyluv customer support immediately with your order details. |
| Difficulty with assembly. | Misinterpretation of instructions, incorrect part orientation. | Review the assembly instructions carefully, paying attention to diagrams. Ensure parts are oriented correctly. Contact customer support if needed. |
8. Specifications
| Feature | Detail |
|---|---|
| Size | Queen |
| Product Dimensions (L x W x H) | 83.85" x 65.35" x 43.3" |
| Headboard Height Adjustment | 41.3" - 43.3" |
| Color | White |
| Finish Type | Wood |
| Included Components | Headboard, Slats |
| Compatible Mattress Size | Queen (Recommended thickness: 10-12 inches) |
| Assembly Required | Yes (Approx. 30 minutes) |
| Ground to Item Distance (Clearance) | 6.1 Inches |
| Item Weight | 87 pounds |
| Weight Capacity | 800 lbs |
| Special Features | Adjustable Headboard, Squeak Resistant, Integrated RGB LED Lights, Bluetooth App Control, Music Sync Mode, Floating Design, Upholstered Leather, No Box Spring Needed |
| Model Number | KLV-UP-224 |
| UPC | 721718608165 |
9. Warranty and Customer Support
Keyluv is committed to providing high-quality products and excellent customer service. For specific warranty details regarding your bed frame, please refer to the product listing on the retailer's website or contact Keyluv customer support directly.
If you have any questions, require assistance with assembly, or need to report missing/damaged parts, please reach out to our customer support team. We are dedicated to ensuring your satisfaction.
Keyluv Customer Support:
- Refer to your purchase platform for direct contact methods.
- Visit the official Keyluv brand store for more information and contact options: Keyluv Store