
Candy 31019604
Candy HCU1282DWB4/1-S Front Loading Washing Machine User Manual
Model: 31019604
1. Product Overview
The Candy HCU1282DWB4/1-S is an 8 kg front-loading washing machine designed for efficient and convenient laundry care. It features a 1200 rpm spin speed and a user-friendly interface, making it suitable for various household needs.
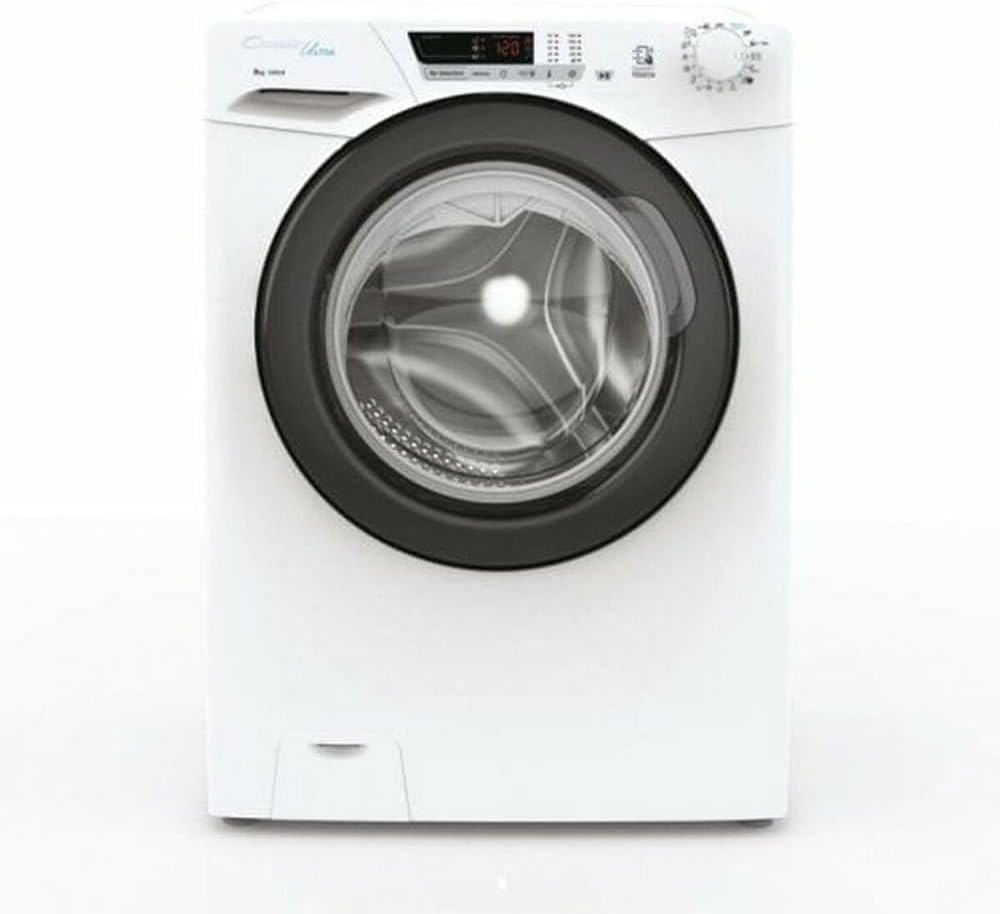
Figure 1.1: Front view of the Candy HCU1282DWB4/1-S washing machine, showcasing its white finish and black door.

Figure 1.2: Energy label for the Candy HCU1282DWB4/1-S washing machine, indicating its energy efficiency class B, 8 kg capacity, 55 kWh/100 cycles, and 77 dB noise level.
2. Setup and Installation
Proper installation is crucial for the safe and efficient operation of your washing machine. Please follow these steps carefully.
2.1 Unpacking
- Carefully remove all packaging materials, including the polystyrene base and any protective film.
- Inspect the machine for any transport damage. If damaged, do not install or use it, and contact your retailer.
2.2 Removing Transit Bolts
Before using the appliance, remove all transit bolts located at the rear of the machine. These bolts secure the drum during transport and must be removed to prevent damage during operation.
- Locate the transit bolts on the rear panel of the washing machine. There are typically 4 bolts.
- Using an appropriate wrench, loosen and remove each bolt.
- Insert the plastic caps provided in the accessory bag into the holes left by the bolts.
- Keep the transit bolts for future transport of the machine.

Figure 2.1: Rear view of the washing machine, illustrating the water inlet and drain hoses, and the positions where transit bolts need to be removed.
2.3 Leveling the Machine
The machine must be perfectly level to prevent excessive vibration and noise during operation.
- Place the machine on a firm, flat floor.
- Adjust the adjustable feet at the front of the machine by screwing them in or out until the machine is stable and level. Use a spirit level to verify.
- Once level, tighten the lock nuts on the feet to secure them in position.
2.4 Water Connection
- Connect the cold water inlet hose to a cold water tap with a 3/4" thread. Ensure the rubber washer is correctly fitted.
- Connect the other end of the hose to the water inlet valve at the back of the washing machine.
- Ensure all connections are tight to prevent leaks.
2.5 Drain Connection
- Position the drain hose at a height between 60 cm and 100 cm from the floor.
- The drain hose can be hooked over the edge of a sink or connected to a dedicated standpipe. Ensure it is not kinked or obstructed.
2.6 Electrical Connection
- Ensure the voltage and frequency of your electrical supply match those indicated on the machine's rating plate (240 Volts).
- Plug the power cord into a grounded electrical outlet. Do not use extension cords or multiple adapters.
3. Operating Instructions
This section guides you through the basic operation of your Candy washing machine.
3.1 Control Panel Overview
The control panel consists of a program selector knob, function buttons, and a digital display.

Figure 3.1: Close-up view of the washing machine's control panel, showing the program dial, digital display, and various function buttons.
- Program Selector Knob: Used to select the desired wash program (e.g., Cotton, Synthetics, Delicates).
- Digital Display: Shows remaining time, error codes, and selected options.
- Function Buttons: Allow selection of additional options like spin speed, temperature, pre-wash, or delay start.
- Start/Pause Button: To start or pause a wash cycle.
3.2 Loading Laundry
- Open the washing machine door.
- Load laundry into the drum, ensuring not to overload. Leave enough space for clothes to tumble freely. The maximum capacity is 8 kg.
- Close the door firmly until it clicks.
3.3 Adding Detergent and Additives
Pull out the detergent dispenser drawer located on the top left of the control panel.
- Compartment I (Pre-wash): For pre-wash detergent.
- Compartment II (Main wash): For main wash detergent.
- Compartment III (Softener): For fabric softener or other additives.
Pour the appropriate amount of detergent and additives into the respective compartments according to the detergent manufacturer's instructions and the load size. Push the drawer back in gently.
3.4 Selecting a Wash Program
- Turn the program selector knob to choose the desired wash program. The display will show the default temperature and spin speed for that program.
- If desired, adjust the temperature and spin speed using the corresponding function buttons.
- Select any additional functions (e.g., extra rinse, easy iron) by pressing the relevant buttons.
3.5 Starting the Wash Cycle
- Press the Start/Pause button to begin the wash cycle. The door will lock, and the machine will start filling with water.
- To pause a cycle, press the Start/Pause button again. Press it once more to resume.
- At the end of the cycle, the machine will signal completion, and the door will unlock.
- Unload the laundry and leave the door slightly ajar to allow the drum to air dry.
4. Maintenance and Care
Regular maintenance ensures the longevity and optimal performance of your washing machine.
4.1 Cleaning the Detergent Dispenser Drawer
Residue can build up in the detergent drawer. Clean it regularly to prevent blockages.
- Pull out the detergent drawer completely.
- Remove any removable inserts.
- Rinse the drawer and inserts under running water to remove all detergent residue. Use a brush if necessary.
- Clean the housing of the drawer inside the machine.
- Reinsert the drawer and inserts.
4.2 Cleaning the Drain Filter
The drain filter collects lint and small objects. Clean it periodically to ensure proper drainage.

Figure 4.1: Image showing the accessible drain filter compartment at the bottom front of the washing machine, with the filter removed for cleaning.
- Place a shallow container or towel under the filter cover to catch any residual water.
- Open the filter cover, usually located at the bottom front of the machine.
- Slowly unscrew the filter counter-clockwise until water starts to drain. Allow all water to drain.
- Once drained, fully remove the filter.
- Clean the filter under running water, removing any lint or debris. Check the filter housing for foreign objects.
- Screw the filter back in clockwise until it is securely tightened. Close the filter cover.
4.3 Cleaning the Exterior and Drum
- Wipe the exterior of the machine with a soft, damp cloth. Do not use abrasive cleaners.
- To clean the drum, run a hot wash cycle with no laundry and a small amount of detergent or a specialized washing machine cleaner.
- Periodically clean the rubber seal around the door to remove any mold or residue.
5. Troubleshooting
Before contacting service, please check the following common issues and their solutions.
| Problem | Possible Cause | Solution |
|---|---|---|
| Machine does not start |
|
|
| Water not filling |
|
|
| Water not draining |
|
|
| Excessive vibration/noise |
|
|
| Detergent residue in dispenser |
|
|
6. Specifications
Key technical specifications for the Candy HCU1282DWB4/1-S washing machine.
| Feature | Specification |
|---|---|
| Brand | Candy |
| Model Number | 31019604 |
| Capacity | 8 Kilograms |
| Maximum Spin Speed | 1200 rpm |
| Dimensions (L x W x H) | 56 x 65 x 89 cm |
| Weight | 65 Kilograms |
| Voltage | 240 Volts |
| Color | White |
| Loading Type | Front Load |
| Controls Type | Buttons |
Related documents31019604


Ask a question about this manual
Ask about setup, troubleshooting, compatibility, parts, safety, or missing instructions. Manuals+ will review the question and use this page’s manual context to help answer it.