
ALSEYE W90
ALSEYE W90 CPU Cooler Instruction Manual
Model: W90 Intel Version
1. Introduction
Thank you for choosing the ALSEYE W90 CPU Cooler. This high-performance cooler is designed to provide efficient heat dissipation for your PC, featuring a unique temperature display and vibrant ARGB lighting. This manual will guide you through the installation, operation, and maintenance of your W90 CPU Cooler to ensure optimal performance and longevity.

Image 1.1: The ALSEYE W90 CPU Cooler, showcasing its compact design, integrated temperature display, and colorful ARGB fan.
2. Key Features
- Temperature Display Function: The W90 CPU Cooler includes an integrated temperature display. Precise CPU real-time temperature can be monitored using the dedicated "BEM" software.
- ARGB & PWM Performance Fan: Equipped with a 90mm fan featuring Addressable RGB (ARGB) lighting and Pulse Width Modulation (PWM) control. This provides both stunning visual effects and efficient, quiet cooling performance.
- High-Performance Heat Column: Built with a 40mm height copper heat column for enhanced cooling capabilities. Note that the W90 has a TDP of approximately 135W and is not recommended for overclocked PC systems.
- Compact Size: With dimensions of 102x102x82mm, this cooler is an ideal choice for small-form-factor (SFF) PC cases and motherboards.
- Intel Socket Compatibility: Supports Intel LGA 1700, 1200, and 115X sockets. Recommended for Intel i3-i5 CPU models (i7-i9 above 10th generation are not recommended).

Image 2.1: Visual representation of the W90 CPU cooler's ARGB lighting and fan specifications, highlighting its low noise level and efficient speed range.
3. Package Contents
Please verify that all items are present in your package:
- ALSEYE W90 CPU Cooler (with pre-applied thermal paste)
- Mounting Hardware for Intel LGA 1700/1200/115X sockets
- User Manual (this document)
4. Technical Specifications
| Attribute | Value |
|---|---|
| Product Dimensions | 102mm (L) x 102mm (W) x 82mm (H) |
| Item Model Number | W90 |
| Weight | 1.1 Pounds |
| Manufacturer | ALSEYE |
| Country of Origin | China |
| Power Connector Type | 5V3pin/12V/4pin |
| Voltage | 12 Volts |
| Wattage (TDP) | 135 watts |
| Cooling Method | Air |
| Compatible Devices | Desktop PCs |
| Noise Level | 35 dB (Max) |
| Material | Copper (Heat Column) |
| Maximum Rotational Speed | 2200 RPM |

Image 4.1: Detailed product dimensions and a table summarizing key technical specifications of the W90 CPU Cooler.

Image 4.2: Visual representation of the W90 CPU Cooler and its mounting bracket, indicating compatibility with Intel LGA1700/1200/115X sockets.
5. Setup and Installation
The ALSEYE W90 CPU Cooler is designed for straightforward installation. Please follow these general steps. Refer to your motherboard's manual for specific CPU socket preparation if needed.
- Prepare Motherboard: Ensure your motherboard is compatible with Intel LGA 1700/1200/115X sockets. Clean the CPU surface if there is any old thermal paste. The W90 cooler comes with thermal paste pre-applied.
- Install Backplate (if applicable): For some sockets, a backplate might be required. Position it correctly behind the motherboard.
- Attach Mounting Brackets: Secure the appropriate mounting brackets to the cooler base according to your CPU socket type. The brackets are adjustable; ensure they are correctly aligned for your socket.
- Position Cooler: Carefully align the cooler with the CPU socket and the mounting holes on the motherboard. Ensure the temperature display is oriented as desired for visibility.
- Secure Cooler: Gently press down and secure the cooler using the provided screws or clips. Tighten screws in a diagonal pattern to ensure even pressure.
- Connect Cables: Connect the 4-pin PWM fan cable to the CPU_FAN header on your motherboard. Connect the 5V 3-pin ARGB cable to a compatible ARGB header on your motherboard for lighting control.

Image 5.1: An exploded view diagram showing the components and steps for installing the W90 CPU Cooler onto a motherboard.
6. Operating Instructions
6.1. Temperature Display
The W90 CPU Cooler features a built-in display that shows the real-time CPU temperature. To enable and accurately read the temperature, you need to install the ALSEYE "BEM" software. This software reads the precise CPU temperature and transmits it to the cooler's display.
- Software Download: Visit the official ALSEYE website or use the QR code provided in the physical manual (if available) to download the "BEM" software.
- Installation: Follow the on-screen instructions to install the software on your PC.
- Monitoring: Once installed and running, the software will communicate with the cooler, and the temperature display will show your CPU's current temperature.
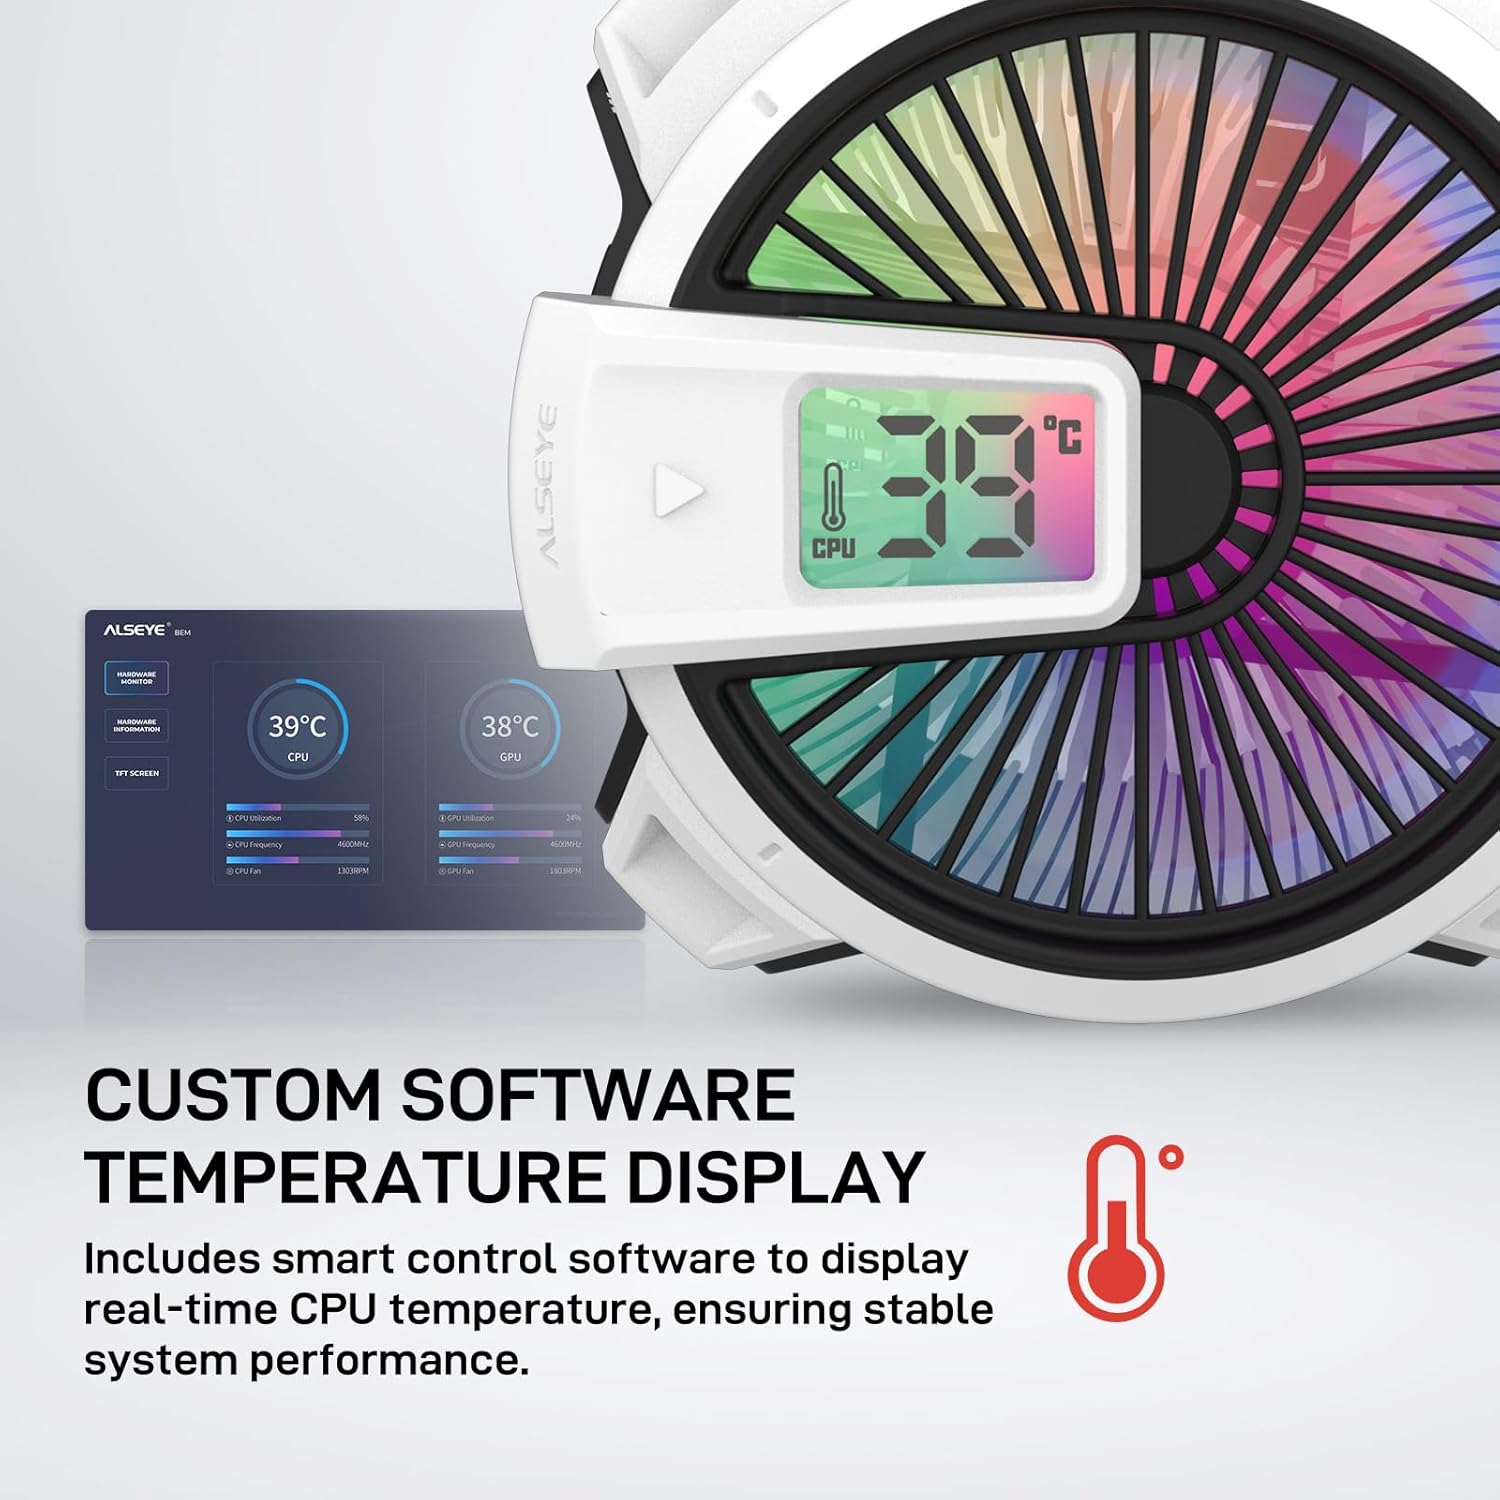
Image 6.1: The W90 CPU Cooler's temperature display and a screenshot of the accompanying "BEM" software interface for real-time CPU temperature monitoring.
6.2. ARGB Lighting Control
The 90mm fan on the W90 cooler features Addressable RGB (ARGB) lighting. The lighting effects can be controlled via your motherboard's ARGB software (e.g., ASUS Aura Sync, MSI Mystic Light Sync, Gigabyte RGB Fusion, ASRock Polychrome Sync) if your motherboard has a compatible 5V 3-pin ARGB header.
- Connect ARGB Cable: Ensure the 5V 3-pin ARGB cable from the cooler is connected to the correct ARGB header on your motherboard.
- Software Control: Use your motherboard's dedicated RGB control software to customize lighting modes, colors, and synchronization with other ARGB components in your system.

Image 6.2: The ALSEYE W90 CPU Cooler integrated into a PC build, demonstrating its colorful ARGB lighting effects within the system.
6.3. Official Product Video
Watch the official product video for a visual guide on the ALSEYE W90 CPU Cooler's features and aesthetics.
Video 6.3: An official video showcasing the ALSEYE W90 CPU Cooler, highlighting its ARGB lighting and overall appearance within a PC build.
7. Maintenance
Regular maintenance helps ensure the longevity and optimal performance of your CPU cooler.
- Dust Removal: Periodically clean the fan blades and heatsink fins to prevent dust buildup, which can impede airflow and cooling efficiency. Use compressed air or a soft brush. Ensure the PC is powered off and unplugged before cleaning.
- Thermal Paste: The W90 comes with pre-applied thermal paste. If you ever need to re-install the cooler or replace the CPU, you will need to clean off the old thermal paste and apply new thermal paste to ensure proper heat transfer.
- Cable Management: Ensure all cables connected to the cooler are neatly managed and do not obstruct airflow within the PC case.
8. Troubleshooting
If you encounter issues with your ALSEYE W90 CPU Cooler, refer to the following common problems and solutions:
| Problem | Possible Cause / Solution |
|---|---|
| Temperature Display Not Working / Incorrect Reading |
|
| ARGB Lighting Not Working / Incorrect Colors |
|
| Poor Cooling Performance / High CPU Temperatures |
|
| Fan Noise |
|
9. Warranty and Support
ALSEYE products are manufactured to the highest quality standards. For warranty information and technical support, please refer to the warranty card included with your product or visit the official ALSEYE website. Keep your proof of purchase for warranty claims.
ALSEYE Official Website: www.alseyecooler.com
Related documentsW90


Ask a question about this manual
Ask about setup, troubleshooting, compatibility, parts, safety, or missing instructions. Manuals+ will review the question and use this page’s manual context to help answer it.