
Introduction
This manual provides comprehensive instructions for the Bushnell Tour V6 Golf Rangefinder Patriot Pack. The Tour V6 is designed to offer accurate and consistent distance measurements for golf, featuring improved electronics and a robust, weather-resistant design. Please read this manual thoroughly before using your device to ensure optimal performance and longevity.
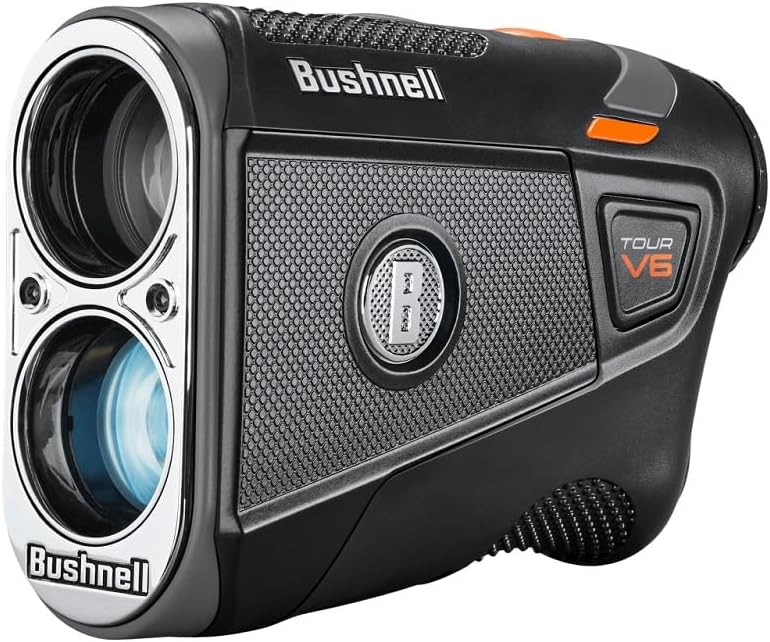
Figure 1: The Bushnell Tour V6 Golf Rangefinder.
Product Overview
The Bushnell Tour V6 Golf Rangefinder is an advanced laser rangefinder engineered for precision on the golf course. It incorporates several key features to enhance your game.
Key Features:
- Improved Pinseeker with Visual Jolt: Provides tactile vibration feedback and a flashing red ring when the flag is locked, confirming target acquisition.
- Enhanced Weather Resistance (IPX6): Designed to withstand various weather conditions, offering reliable performance.
- BITE Magnetic Mount: Integrated magnetic strip allows for secure attachment to golf cart frames or other magnetic surfaces for convenient access.
- 1300 Yard Range: Capable of measuring distances up to 1300 yards.
- 6X Magnification: Offers clear and magnified views of your target.
Package Contents:
- Bushnell Tour V6 Golf Rangefinder
- Premium Carrying Case
- CR2 Battery (included)
- Microfiber Cleaning Cloth
- Quick Start Guide
- Patriot Pack Commemorative Coin

Figure 2: The Bushnell Tour V6 Golf Rangefinder Patriot Pack, showing the rangefinder, its protective carrying case, a CR2 battery, and a commemorative coin.
Setup
1. Battery Installation
- Locate the battery compartment cap on the bottom of the rangefinder.
- Rotate the cap counter-clockwise to open.
- Insert the included CR2 3-volt lithium battery, ensuring the positive (+) terminal is facing outwards.
- Replace the battery compartment cap and rotate clockwise to secure it.

Figure 3: Top-down view of the rangefinder, highlighting the battery compartment at the front base.
2. Initial Power On
After installing the battery, press the Power/Fire button (orange button on top) to turn on the device. The internal display will illuminate.
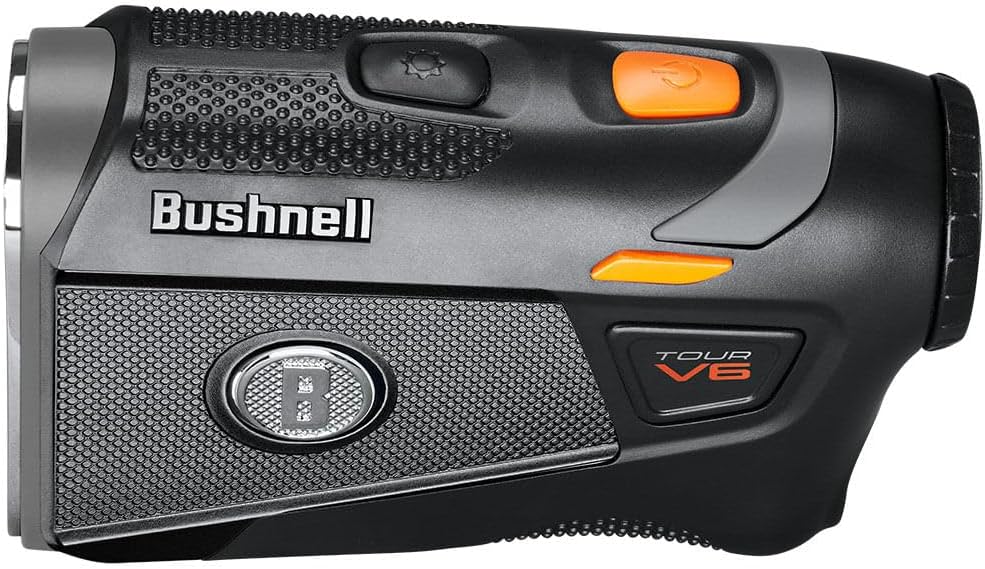
Figure 4: Top view of the rangefinder, indicating the location of the power button.
Operating Instructions
1. Measuring Distance
- Look through the eyepiece and aim the reticle (circle in the center of the display) at your desired target.
- Press and release the Power/Fire button. The distance to the target will be displayed in the viewfinder.
- For continuous scanning, press and hold the Power/Fire button while sweeping across multiple targets.
2. Pinseeker with Visual Jolt
This feature assists in acquiring the flagstick without inadvertently picking up background targets. When multiple objects are in the field of view, the rangefinder prioritizes the closest object, which is typically the flagstick.
- While aiming at the flagstick, press and hold the Power/Fire button.
- Slowly sweep the reticle across the flagstick.
- Once the flagstick is identified and locked, the device will vibrate (JOLT) and a red ring will flash in the display, confirming the measurement.
3. BITE Magnetic Mount
The integrated BITE magnetic mount allows for convenient attachment of the rangefinder to metal surfaces, such as a golf cart frame. This provides easy access during play.

Figure 5: The rangefinder utilizing its BITE magnetic mount to attach to a golf cart bar.

Figure 6: Side view of the rangefinder, indicating the location of the BITE magnetic mount.
4. Changing Measurement Units
To switch between yards and meters, press and hold the Mode button (small button next to the Power/Fire button) for approximately 3 seconds while the device is powered on. The unit of measurement will change in the display.
Maintenance
Cleaning:
- Gently wipe the exterior of the rangefinder with a soft, clean cloth.
- For lenses, use the provided microfiber cleaning cloth or a similar soft, lint-free cloth. Avoid abrasive materials.
- Do not use harsh chemicals or solvents for cleaning.
Storage:
- Store the rangefinder in its protective carrying case when not in use.
- Keep the device in a cool, dry place, away from direct sunlight and extreme temperatures.
- If storing for extended periods, remove the battery to prevent leakage.
Troubleshooting
| Problem | Possible Cause | Solution |
|---|---|---|
| No display/Device does not power on | Battery is dead or incorrectly installed. | Check battery orientation. Replace with a new CR2 battery. |
| Inaccurate readings | Lens is dirty; target is too small or reflective; environmental factors (fog, rain). | Clean lenses with microfiber cloth. Ensure stable aim. Avoid using in heavy fog/rain if possible. |
| Cannot acquire target | Target is beyond range; target is non-reflective; unsteady hand. | Ensure target is within 1300-yard range. Aim at a more reflective part of the target. Use a steady grip. |
Specifications
| Feature | Detail |
|---|---|
| Model Number | 202301P |
| Magnification | 6X |
| Measuring Range | Up to 1300 yards (approx. 1189 meters) |
| Battery Type | CR2 3-volt Lithium (included) |
| Water Resistance | IPX6 (Weather Resistant) |
| Dimensions | 11.4L x 4.1W x 7.9H Centimetres |
| Weight | 454 g |
| Material | Plastic |
| Color | Black/Gray/Orange |
Warranty and Support
Bushnell Golf products are manufactured to high standards and are designed to provide reliable performance. For specific warranty information, please refer to the warranty card included with your product or visit the official Bushnell Golf website.
For technical support, service, or to inquire about replacement parts, please contact Bushnell Golf customer service through their official website or the contact information provided in your product packaging.
Official Website: www.bushnellgolf.com


