
1. Product Overview
The Spigen OneTap Pro 3 is a wireless charging phone mount designed for Tesla vehicles. It features a foldable and hidden design, providing a secure and convenient way to mount and charge compatible smartphones. The mount attaches to the back of the Tesla's center display and offers adjustable viewing angles.

Image: The Spigen OneTap Pro 3 mount attached to a Tesla screen, holding a smartphone.
2. Compatibility
This mount is compatible with specific Tesla models and smartphone types:
- Tesla Models: All Tesla Model Y, Model 3, Model S, Model X, and Cybertruck. Also compatible with the updated 16-inch QHD front display for Model Y Premium/Performance (2026).
- Smartphones:
- iPhones with MagSafe (iPhone 12 or newer, including iPhone 17, 16, 15, 14, 13, 12 series) or iPhones with MagSafe cases.
- Galaxy phones (Galaxy S25, S24, S23, etc.) or Pixel phones (Pixel 9, 8, 7, etc.) with MagSafe cases.
- Pixel 10, Pixel 10 Pro, Pixel 10 Pro XL, Pixel 10 Pro Fold with Pixelsnap.

Image: Visual guide illustrating compatible Tesla models and iPhone generations.
3. Setup Instructions
Follow these steps for proper installation of your Spigen OneTap Pro 3 mount:
- Prepare the Surface: Ensure the back of your Tesla's center display is clean, dry, and free of dust or oils.
- Apply Adhesive: Remove the protective film from the strong double-sided tape on the mount. Carefully position the mount in the desired location on the back of the display, ensuring it is level. Press firmly for several seconds.
- Allow Adhesive to Cure: For optimal adhesion strength, allow the adhesive to set for at least 8 hours before using the mount. For full strength, wait 24 hours. An extra adhesive tape is included for reinstallation if needed.
- Connect Power Cable: Route the extended L-shaped USB-C charging cable from the mount to a rear USB outlet in your Tesla. The L-shaped design ensures seamless connectivity and a neat appearance.

Image: Step-by-step visual for applying the adhesive mount and recommended curing times.
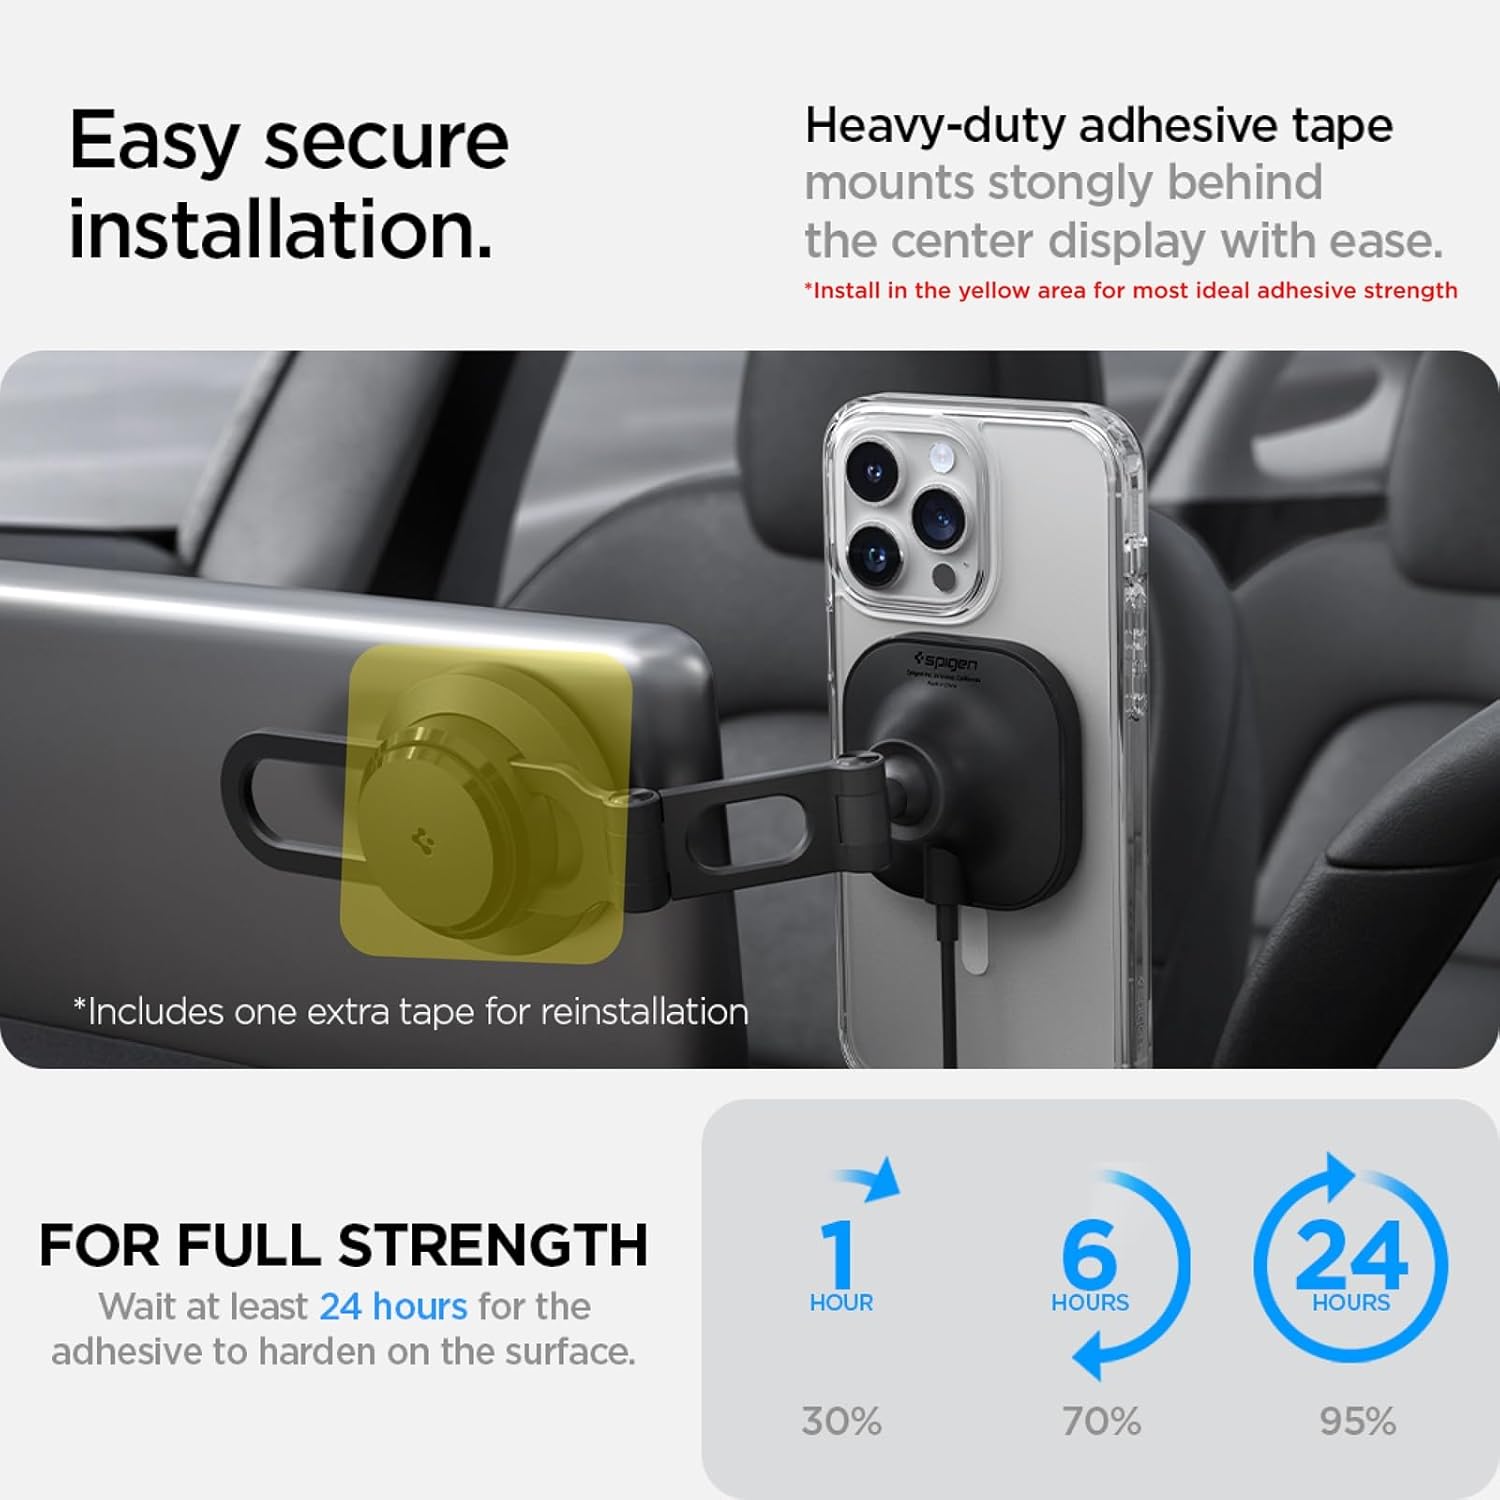
Image: The extended L-shaped USB-C cable connected to a Tesla's rear outlet for power.
Installation Video Guide
Video: Official Spigen installation guide for the OneTap Pro 3 Wireless Car Charger designed for Tesla.
4. Operating Instructions
Utilize the features of your Spigen OneTap Pro 3 mount for an optimal experience:
- Attaching Your Phone: Simply place your MagSafe-compatible iPhone or MagSafe-cased Android/Pixel phone onto the magnetic charging pad. The strong magnetic connection will securely hold your device.
- Wireless Charging: Once your phone is attached, wireless charging will begin automatically, indicated by your phone's charging status.
- Adjusting Viewing Angle: The mount features a double-jointed metal arm and a 360-degree rotatable head. Use the 'Push-to-Lock' mechanism to adjust the arm and rotate your phone to achieve your preferred viewing angle for navigation or other functions.
- Foldable Design: When not in use, the mount can be easily folded away behind the dashboard screen to maintain a clean and uncluttered interior.
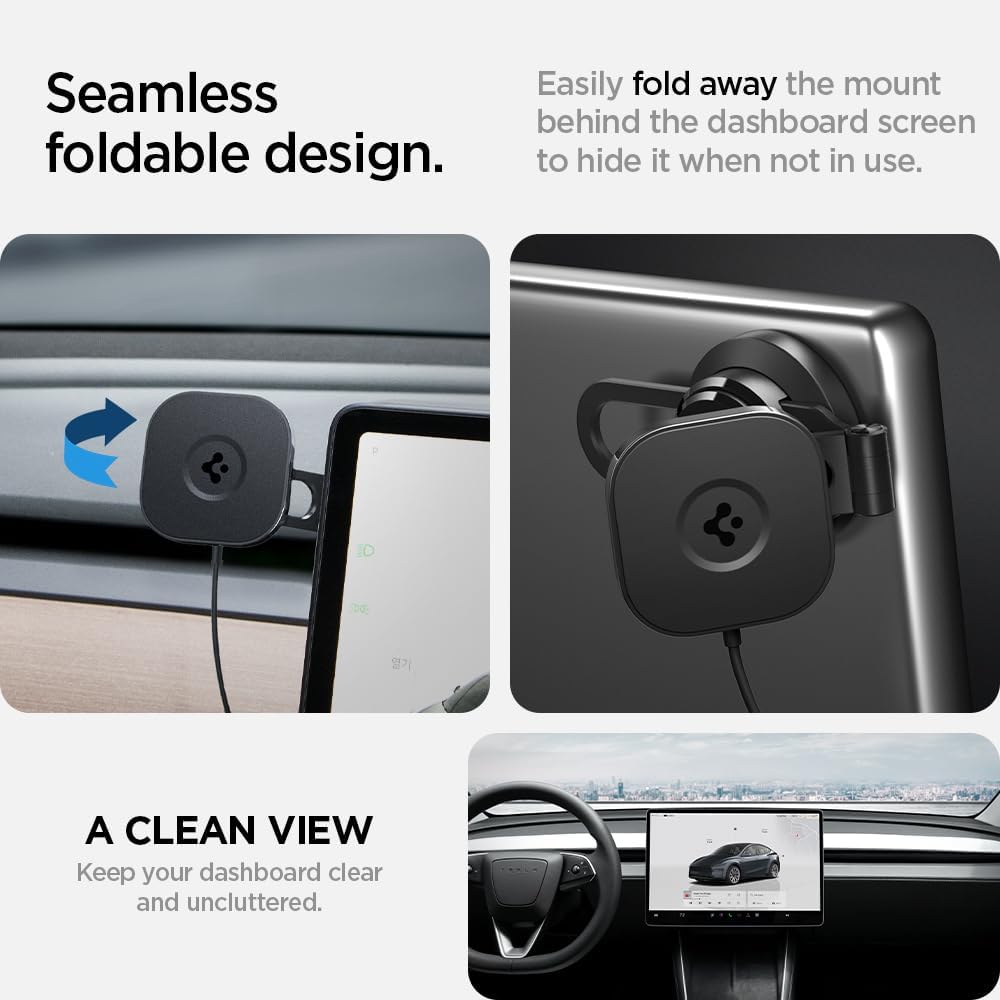
Image: The mount in its folded and extended positions, showcasing its hidden design.

Image: Visual representation of how to adjust the mount's angle and rotation.

Image: Detailed view of the double-jointed arm allowing for extensive adjustability.

Image: A smartphone displaying a charging indicator while mounted, demonstrating steady wireless charging.
5. Maintenance
To ensure the longevity and optimal performance of your phone mount:
- Cleaning: Wipe the mount regularly with a soft, dry, or slightly damp cloth to remove dust and fingerprints. Avoid harsh chemicals or abrasive cleaners.
- Adhesive Check: Periodically check the adhesive bond to the Tesla screen. If the mount feels loose, clean the area thoroughly and reapply with the provided extra adhesive tape, ensuring proper curing time.
- Cable Inspection: Inspect the USB-C cable for any signs of wear or damage. Replace if necessary to ensure consistent charging.
6. Troubleshooting
If you encounter issues with your Spigen OneTap Pro 3 mount, refer to the following common solutions:
- Mount is not sticking or falls off:
- Ensure the installation surface was thoroughly cleaned and dry before applying the adhesive.
- Allow the adhesive sufficient time to cure (at least 8 hours, ideally 24 hours) before placing a phone on the mount.
- Extreme temperatures (very hot or very cold) can affect adhesive performance. If installed in such conditions, allow more curing time or consider reapplication in moderate temperatures.
- Use the provided extra adhesive tape for reinstallation if the original adhesive has failed.
- Phone is not charging wirelessly:
- Verify that the USB-C cable is securely connected to both the mount and a functional USB outlet in your Tesla.
- Ensure your phone is correctly aligned on the magnetic charging pad. The phone's charging coil needs to align with the mount's coil.
- Confirm your phone is MagSafe compatible (iPhone 12 or newer) or is using a MagSafe-compatible case for Android/Pixel devices.
- Remove any thick phone cases that might interfere with wireless charging.
- Phone gets hot during charging:
- It is normal for phones to warm up during wireless charging, especially during prolonged use or in hot weather conditions. This is typically not a cause for concern.
- If the phone becomes excessively hot, temporarily remove it from the charger to allow it to cool down.
7. Specifications
| Product Dimensions | 7.89 x 2.59 x 2.05 inches |
| Item Weight | 2.8 ounces |
| Item Model Number | ACP06860 |
| Connectivity Technologies | Wireless |
| Special Features | Ergonomic, Foldable, Rotatable, Tilt Head, Wireless Charging |
| Color | Black |
| Manufacturer | Spigen |
| Compatible Devices | MagSafe compatible iPhones and Galaxy/Pixel phones with MagSafe cases |
| Compatible Phone Models | iPhone 17 Pro Max, iPhone 17 Pro, iPhone Air, iPhone 17, 16, 15, 14, 13, 12, MagSafe compatible case |
| Mounting Type | Vehicle Mount |
8. Warranty and Customer Support
Spigen products are designed for quality and durability. For information regarding product warranty, please refer to the official Spigen website or the warranty card included with your purchase.
If you require further assistance, have questions, or need to report an issue, please contact Spigen customer support through their official channels. Contact details can typically be found on the Spigen website or product packaging.