
ELEGOO US-EL-3D-N4P
Contents
ELEGOO Neptune 4 Pro 3D Printer User Manual
Model: US-EL-3D-N4P
1. Introduction
The ELEGOO Neptune 4 Pro is a high-speed FDM 3D printer designed for efficiency and precision. Equipped with Klipper firmware and a powerful processor, it achieves impressive print speeds of up to 500mm/s. Its robust all-metal guide rails, segmented heated zones, and advanced direct drive extruder ensure stable and high-quality prints across various filament types. This manual provides detailed instructions for setting up, operating, maintaining, and troubleshooting your Neptune 4 Pro printer.
2. What's in the Box
- ELEGOO Neptune 4 Pro Main Unit (Base)
- Gantry Assembly (Pre-assembled frame with X/Z axes)
- Print Head Assembly (Direct Drive Extruder with 300°C High-Temp Nozzle)
- Flexible PEI Magnetic Build Plate
- 4.3-inch Removable Capacitive Touchscreen
- Spool Holder Assembly
- External Model Cooling Fan Bar
- Power Cable
- USB Cable
- Ethernet Cable
- Tool Kit (Snips, Spatula, Allen Wrenches, Screwdrivers, Cleaning Needle)
- Sample PLA Filament
- Filament Detector
- Spare Nozzles
- USB Drive (containing User Manual PDF and software)
3. Setup Guide
Follow these steps to assemble your ELEGOO Neptune 4 Pro 3D Printer:
- Unpacking and Inspection: Carefully remove all components from the packaging. Inspect for any visible damage. Ensure all parts listed in the 'What's in the Box' section are present.
- Gantry Installation: Place the main unit (base) on a stable surface. Align the gantry assembly with the designated slots on the base. Secure it using the provided screws from underneath the base. Ensure the Z-axis lead screws are fully lowered to align the gantry correctly.
- Print Head Assembly: Attach the direct drive extruder and hotend assembly to the X-axis carriage. Secure it with the appropriate screws. Ensure all connections are firm.
- Screen and Spool Holder Setup: Mount the magnetic touchscreen to its designated holder on the side of the base. Connect the coiled cable from the screen to the port on the printer's base. Assemble and mount the spool holder on top of the gantry.
- Cable Management: Connect all necessary cables (power, motor, end-stops, filament detector, cooling fans) to their respective ports. Use the provided cable clips and ties to ensure neat and secure cable routing, preventing interference with moving parts.
- Initial Power-On and Leveling: Connect the power cable and turn on the printer. Follow the on-screen instructions for initial setup and 121-point auto bed leveling. Fine-tune the Z-offset as needed to achieve optimal first layer adhesion.

Figure 3.1: Fully assembled ELEGOO Neptune 4 Pro 3D Printer.
4. Key Features
- Lightning-Fast Printing Speed: Equipped with Klipper firmware and a powerful processor, the Neptune 4 Pro can achieve an impressive printing speed of up to 500mm/s, significantly reducing print times.

Figure 4.1: Speed comparison highlighting the Neptune 4 Pro's rapid printing capabilities.
- Upgraded Precision with All-Metal Guide Rails: Both the X and Y axes feature robust all-metal guide rails with U-shaped steel wheels, ensuring smoother movement, reduced drag, and enhanced printing precision, even at high speeds.

Figure 4.2: Detailed view of the precise all-metal guide rails.
- Segmented Heated Zones: The build plate features two independent heating areas. The slicing software intelligently identifies the model size and activates peripheral heating zones only when necessary, optimizing power consumption and speeding up heating.
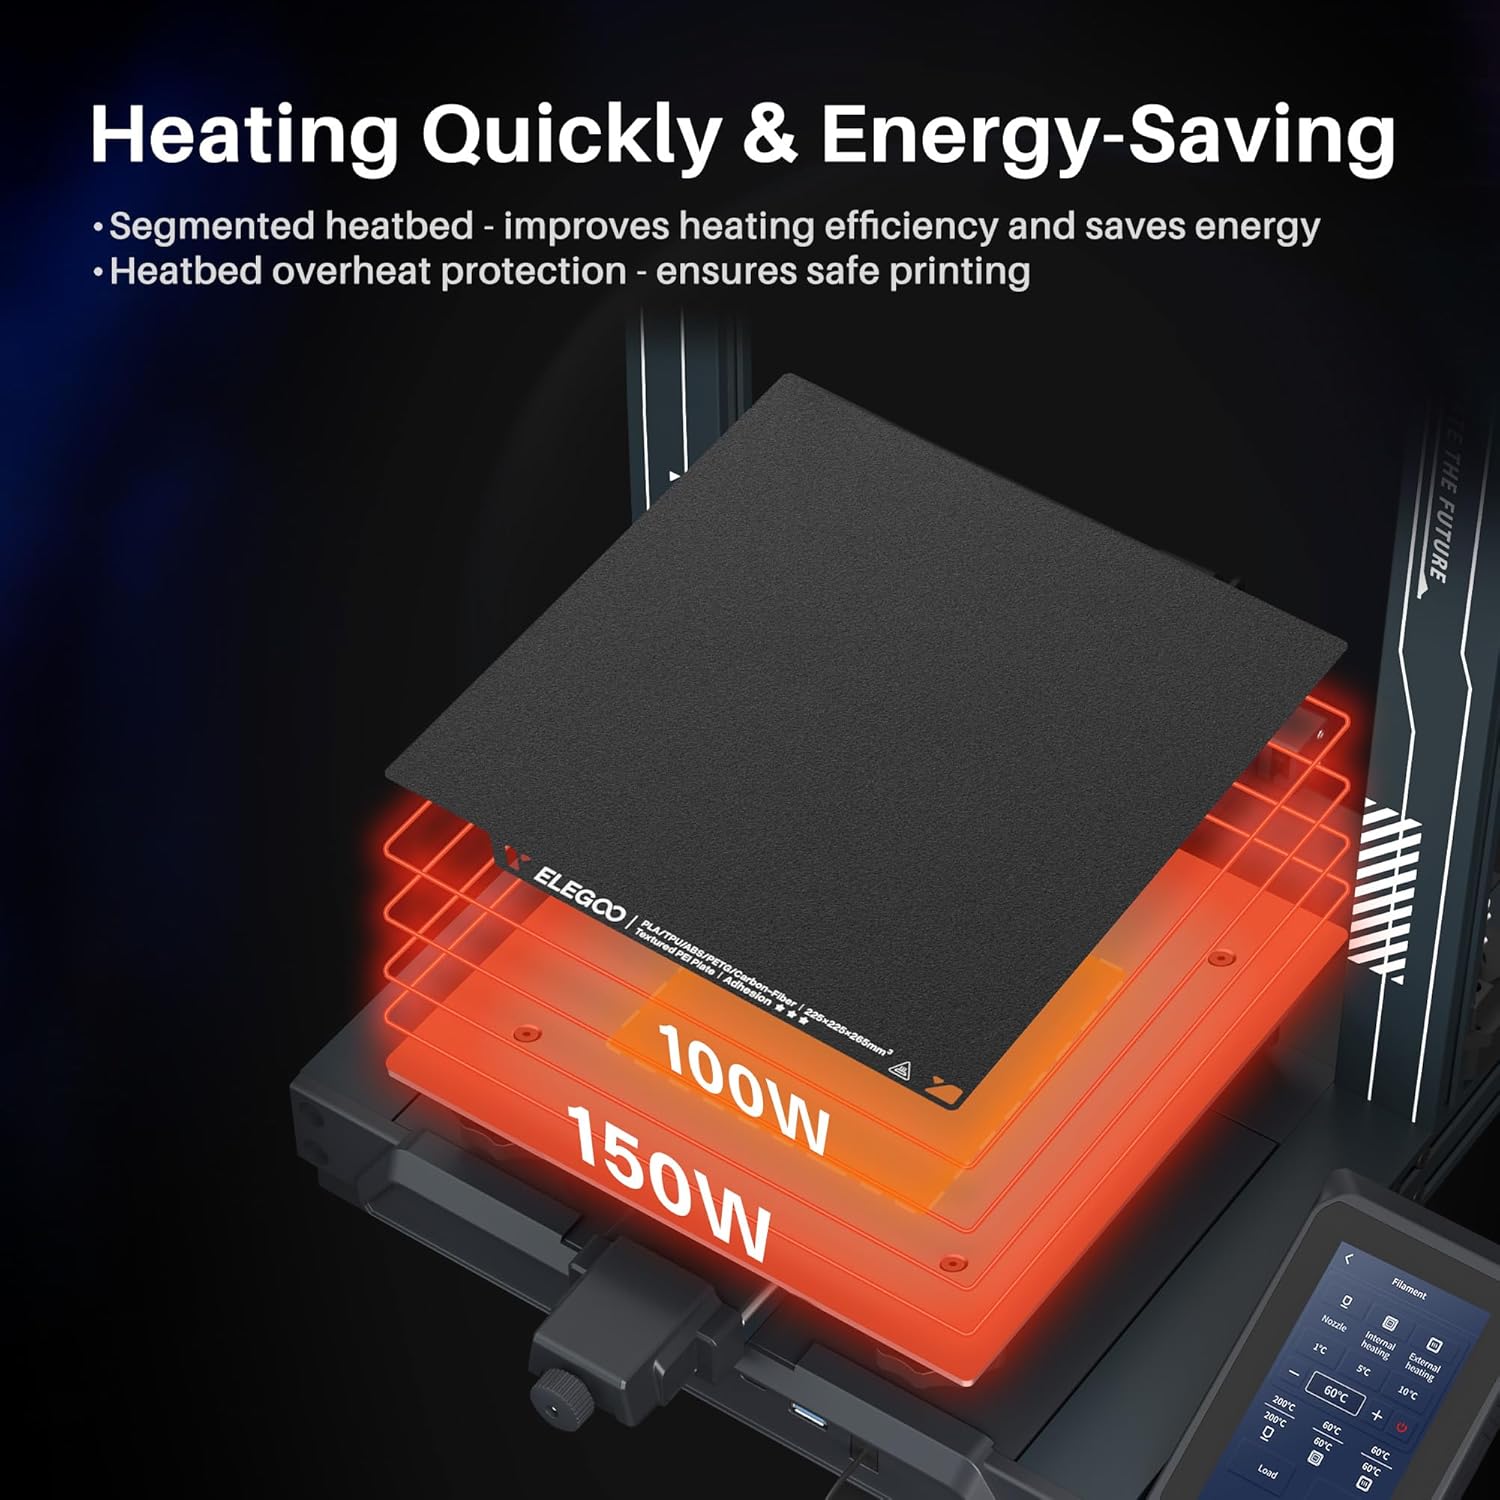
Figure 4.3: Illustration of the energy-saving segmented heated zones.
- Direct Drive Extruder with 300°C High-Temp Nozzle: The self-developed dual-gear direct drive extruder boasts a 5.2:1 reduction ratio for powerful and smooth filament feeding. Paired with a metal throat pipe and a unique air duct design, it minimizes nozzle clogging. The 300°C high-temp nozzle and extended hot end ensure faster melting and extrusion, supporting a wide range of filaments including PLA, PETG, ABS, TPU, and nylon.

Figure 4.4: Close-up of the upgraded direct drive extruder and 300°C nozzle.
- 121-Point Auto Leveling: The newly designed 121 (11x11) point auto bed leveling system ensures quick, precise, and hassle-free bed leveling, contributing to excellent first layer adhesion.

Figure 4.5: Visual representation of the 121-point auto leveling process.
- Efficient Cooling System: Powerful double-sided cooling fans and dedicated model cooling blower fans provide omnidirectional and rapid cooling of newly printed layers, preventing warping and enhancing overall print quality, especially at high speeds.
5. Operating Instructions
5.1 Basic Printing
To start a print, ensure your printer is properly assembled and leveled. Load your desired filament into the extruder. Select your G-code file from the USB drive via the touchscreen interface. Confirm print settings and initiate the print. Monitor the first layer to ensure proper adhesion.
5.2 Firmware Update
Keeping your printer's firmware updated is crucial for optimal performance and access to new features. Follow the steps outlined in the official firmware update tutorial:
Video 5.1: How to Update Firmware for Neptune 4 Plus & Max (Applicable to Neptune 4 Pro).
5.3 First Layer Printing Z-axis Compensation Value Fine-tuning
Achieving a perfect first layer is key to successful prints. Use the Z-axis compensation feature to fine-tune the nozzle height during the first layer. Refer to the detailed guide below:
Video 5.2: First Layer Printing Z-axis Compensation Value Fine-tuning Tutorial.
6. Maintenance
- Clean the Build Plate: After each print, allow the build plate to cool down. Flex the plate to remove the print. Clean the surface with isopropyl alcohol to ensure good adhesion for subsequent prints.
- Nozzle Cleaning: Regularly inspect the nozzle for clogs. Use the provided cleaning needle to clear any blockages while the hotend is heated.
- Lubricate Lead Screws: Periodically apply a small amount of lithium grease to the Z-axis lead screws to ensure smooth and consistent vertical movement.
- Check Belts: Ensure the X and Y axis belts are properly tensioned. They should be taut but not overly tight. Adjust the tensioners if necessary.
- Inspect Connections: Periodically check all electrical connections to ensure they are secure and free from damage.
7. Troubleshooting
7.1 Firmware Update Failed
If your firmware update encounters issues, consider the following:
- Check System and Memory: Ensure your USB drive is formatted correctly (FAT32) and has sufficient free space.
- Mainboard System Check: Verify that the mainboard system is functioning correctly and can be booted.
- Local Disk Memory: Confirm that the local disk memory on the printer is not over 500MB.
7.2 Common Print Quality Issues
- Poor First Layer Adhesion: Ensure the build plate is clean and properly leveled. Adjust the Z-offset to achieve optimal nozzle distance.
- Warping: Ensure proper bed temperature for your filament type. Use a brim or raft in your slicer settings. Ensure adequate cooling for the printed part.
- Stringing: Optimize retraction settings (distance and speed) in your slicer. Ensure filament is dry.
- Under/Over-extrusion: Calibrate your extruder's E-steps. Check filament diameter settings in your slicer.
8. Specifications
| Feature | Specification |
|---|---|
| Brand | ELEGOO |
| Model | US-EL-3D-N4P |
| Product Dimensions | 18.7 x 17.91 x 20.27 inches |
| Item Weight | 19.6 pounds (8890 Grams) |
| Build Volume | 8.85 x 8.85 x 10.43 inches (225 x 225 x 265mm) |
| Max Printing Speed | 500mm/s |
| Firmware | Klipper |
| Extruder Type | Dual-Gear Direct Drive |
| Max Nozzle Temperature | 300°C |
| Max Heated Bed Temperature | 110°C |
| Leveling | 121-Point Auto Leveling |
| Material | Aluminum |
| Compatible Devices | Laptop, Personal Computer, Smartphone |
9. Warranty and Support
ELEGOO products typically come with a manufacturer's warranty. Please refer to the warranty information provided on the official ELEGOO website or contact their customer support for specific details regarding your Neptune 4 Pro 3D Printer. For technical assistance, troubleshooting, or parts replacement, please reach out to ELEGOO customer service directly.
Ask a question about this manual
Ask about setup, troubleshooting, compatibility, parts, safety, or missing instructions. Manuals+ will review the question and use this page’s manual context to help answer it.