
Nilight ZH409, 18021F-B
Nilight ZH409 20 Inch LED Light Bar & 18021F-B 4 Inch LED Pods User Manual
Model: ZH409, 18021F-B
Brand: Nilight
Introduction
This manual provides detailed instructions for the installation, operation, and maintenance of your Nilight ZH409 20-inch Triple Row Flood Spot Combo LED Light Bar and Nilight 18021F-B 2PC 4-inch Triple Row Flood Spot Combo LED Pods. Please read this manual thoroughly before installation and use to ensure proper function and safety.
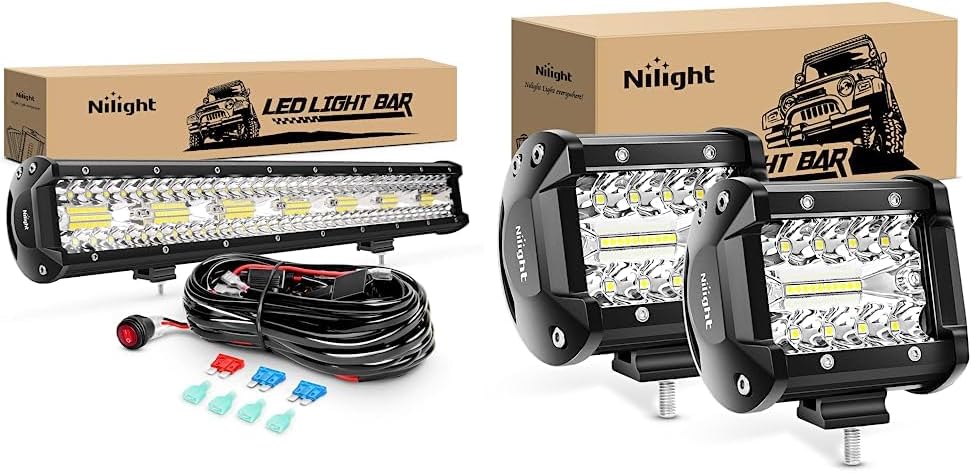
Figure 1: Nilight ZH409 20-inch LED Light Bar, 18021F-B 4-inch LED Pods, and included wiring harness.
Safety Information
Always observe the following safety precautions:
- Ensure the vehicle's power is disconnected before installation to prevent electrical shock.
- Verify the voltage compatibility (9-30V DC) before connecting the lights.
- Do not look directly into the light when it is operating, as it can cause eye damage.
- Securely mount the light bars and pods to prevent detachment during vehicle operation.
- This product is designed for off-road use only. Check local and provincial laws regarding auxiliary lighting.
- Keep wiring away from hot or moving parts of the vehicle.
- Use appropriate fuses as provided in the wiring harness.
Package Contents
Please check the package for the following items:
- 1 x Nilight ZH409 20-inch Triple Row LED Light Bar
- 2 x Nilight 18021F-B 4-inch Triple Row LED Pods
- 1 x Heavy Duty Off-Road Wiring Harness (for light bar)
- Mounting Brackets and Hardware (for both light bar and pods)

Figure 2: Components for the 20-inch LED Light Bar, including the light bar, wiring harness, and fuses.

Figure 3: Two Nilight 4-inch LED Pods, typically packaged together.
Setup and Installation
1. Mounting the Light Bar and Pods
- Identify a suitable mounting location on your vehicle that provides clear light projection and secure attachment.
- Assemble the adjustable mounting brackets to the light bar and pods using the provided hardware.
- Position the light bar and pods in the desired location and mark the drilling points for the mounting bolts.
- Drill pilot holes if necessary, ensuring not to damage any underlying vehicle components.
- Securely fasten the light bar and pods to the vehicle using the bolts, washers, and nuts. Adjust the angle for optimal beam direction.

Figure 4: Dimensions of the 20-inch LED Light Bar for mounting reference.

Figure 5: Dimensions of the 4-inch LED Pods for mounting reference.
2. Wiring Connection
The included wiring harness simplifies installation. Follow these steps:
- Connect the red wire from the wiring harness to the positive (+) terminal of your vehicle's battery.
- Connect the black wire from the wiring harness to the negative (-) terminal or a suitable ground point on the vehicle chassis.
- Plug the Deutsch connector from the light bar into the corresponding connector on the wiring harness.
- Route the wiring harness safely, away from hot engine parts, sharp edges, and moving components. Use zip ties or cable clips to secure the wiring.
- For the 4-inch LED pods, you may need to splice them into an existing auxiliary circuit or use a separate wiring harness (not included for pods in this specific kit) if independent control is desired. Ensure proper gauge wire and fusing for the pods.

Figure 6: Detailed view of the heavy-duty off-road wiring harness, including the switch and fuse block.
Operating Instructions
Once installed, operate your Nilight LED lights as follows:
- Turn on the vehicle's ignition.
- Press the switch connected to the wiring harness to activate the 20-inch LED light bar.
- If the 4-inch LED pods are wired to a separate switch, activate them independently.
- To turn off the lights, press the switch again.
The light bar features a combo beam pattern, providing both a wide flood and a focused spot beam for comprehensive illumination. The 4-inch pods also offer a flood spot combo beam.

Figure 7: Illustration of brightness features: high lumens chips, customized reflective cups, and improved PC lens for enhanced light output.
Maintenance
To ensure the longevity and optimal performance of your Nilight LED lights, follow these maintenance guidelines:
- Cleaning: Periodically clean the lens with a soft cloth and mild soap and water. Avoid abrasive cleaners that could scratch the lens.
- Inspection: Regularly check all mounting hardware for tightness. Vibrations from vehicle operation can loosen bolts over time.
- Wiring: Inspect the wiring harness for any signs of wear, fraying, or damage. Repair or replace damaged sections immediately.
- Waterproofing: While IP67 rated, avoid directing high-pressure water jets directly at the light bar or pods, especially at seals.
Troubleshooting
| Problem | Possible Cause | Solution |
|---|---|---|
| Lights do not turn on. | No power, loose connection, blown fuse, faulty switch. | Check battery connections. Ensure all wiring connections are secure. Inspect the fuse in the wiring harness and replace if blown. Test the switch for functionality. |
| Lights flicker or are dim. | Insufficient power, loose connection, corroded terminals. | Verify proper voltage supply. Tighten all electrical connections. Clean any corrosion from battery terminals or connectors. |
| Moisture inside the lens. | Seal compromise, extreme temperature changes. | Small amounts of condensation may dissipate. If persistent or significant, inspect seals for damage. Contact customer support if seals are compromised. |
| Mounting brackets loosen. | Vibration, improper tightening. | Re-tighten all mounting bolts securely. Consider using thread-locking compound for added security. |
Specifications
Nilight ZH409 20-inch Triple Row LED Light Bar
- Power: 420W
- Lumen Output: 42000LM
- Beam Pattern: Flood Spot Combo
- Input Voltage: 9-30V DC
- Working Lifespan: Over 30,000 hours
- Working Temperature: -40~85 degrees Celsius
- LED Color Temperature: Pure White 6000K-6500K
- Material: 6063 Aluminum Alloy Profile, High quality LED Chips, PC Lens
- Waterproof Rate: IP67
- Finish Type: Powder Coated
- Dimensions: Approximately 20.2" (L) x 3.1" (H) x 2.6" (D)
Nilight 18021F-B 2PC 4-inch Triple Row LED Pods
- Power: 60W (20 x 3W High Intensity LED per pod)
- Lumen Output: 6000LM (per pair)
- Beam Pattern: Spot
- Input Voltage: 9-30V DC
- Working Lifespan: Over 30,000 hours
- Working Temperature: -40~85 degrees Celsius
- LED Color Temperature: Pure White 6000K-6500K
- Material: 6063 Aluminum Alloy Profile, High quality LED Chips, PC Lens
- Waterproof Rate: IP67
- Finish Type: Powder Coated
- Dimensions: Approximately 3.8" (W) x 4.3" (H) x 2.6" (D)
Warranty and Support
Nilight products typically come with a manufacturer's warranty. For specific warranty details and duration (e.g., 2 years warranty mentioned for ZH409), please refer to the product packaging or the official Nilight website.
For technical support, troubleshooting assistance, or warranty claims, please contact Nilight customer service through their official website or the retailer from whom you purchased the product. Provide your product model number (ZH409, 18021F-B) and purchase details when contacting support.
Nilight Official Website: www.nilight.com (Note: This is a placeholder URL, please verify the actual official website for Nilight)
Related documentsZH409, 18021F-B


Ask a question about this manual
Ask about setup, troubleshooting, compatibility, parts, safety, or missing instructions. Manuals+ will review the question and use this page’s manual context to help answer it.