
Flylinktech JF-H-40DC
FLYLINKTECH 2-in-1 Folding Treadmill User Manual
Model: JF-H-40DC
1. Introduction
The FLYLINKTECH 2-in-1 Folding Treadmill is designed for versatile home and office use, offering both a traditional running mode and a compact under-desk walking mode. Equipped with a 2.25 HP ultra-quiet motor, it provides a comfortable exercise environment. This manual provides essential information for the safe and effective operation, maintenance, and troubleshooting of your treadmill.
Key features include 12 pre-set programs, LED display, and multiple control methods including touch screen, remote control, and a dedicated mobile application for tracking exercise data.

Image: The FLYLINKTECH 2-in-1 Folding Treadmill shown in its upright running configuration and its flat, under-desk walking configuration.
2. Important Safety Instructions
Before operating the treadmill, please read all instructions carefully. Keep this manual for future reference. Failure to follow these instructions may result in injury or damage to the product.
- Always consult with a physician before starting any exercise program.
- Place the treadmill on a flat, stable surface with at least 2 meters (6.5 feet) of clear space behind it and 0.6 meters (2 feet) on each side.
- Ensure the safety key is properly attached to both the treadmill and your clothing before beginning your workout.
- Do not allow children or pets near the treadmill while it is in operation.
- Wear appropriate athletic footwear and clothing. Avoid loose clothing that could get caught in moving parts.
- Do not operate the treadmill if it has a damaged cord or plug, or if it is not working properly.
- Unplug the treadmill from the power outlet when not in use, before cleaning, or before performing any maintenance.
- Do not attempt to service the treadmill yourself. Contact customer support for assistance.
- The maximum user weight capacity for this treadmill is 180 kg (380 lbs). Do not exceed this limit.
3. Product Components
Your FLYLINKTECH treadmill comes with the following main components:
- Main Treadmill Unit (including running belt, motor, frame)
- Control Panel with LED Display and Touch Buttons
- Device Holder (for tablet/phone)
- Remote Control
- Safety Key
- Power Cord
- User Manual (this document)
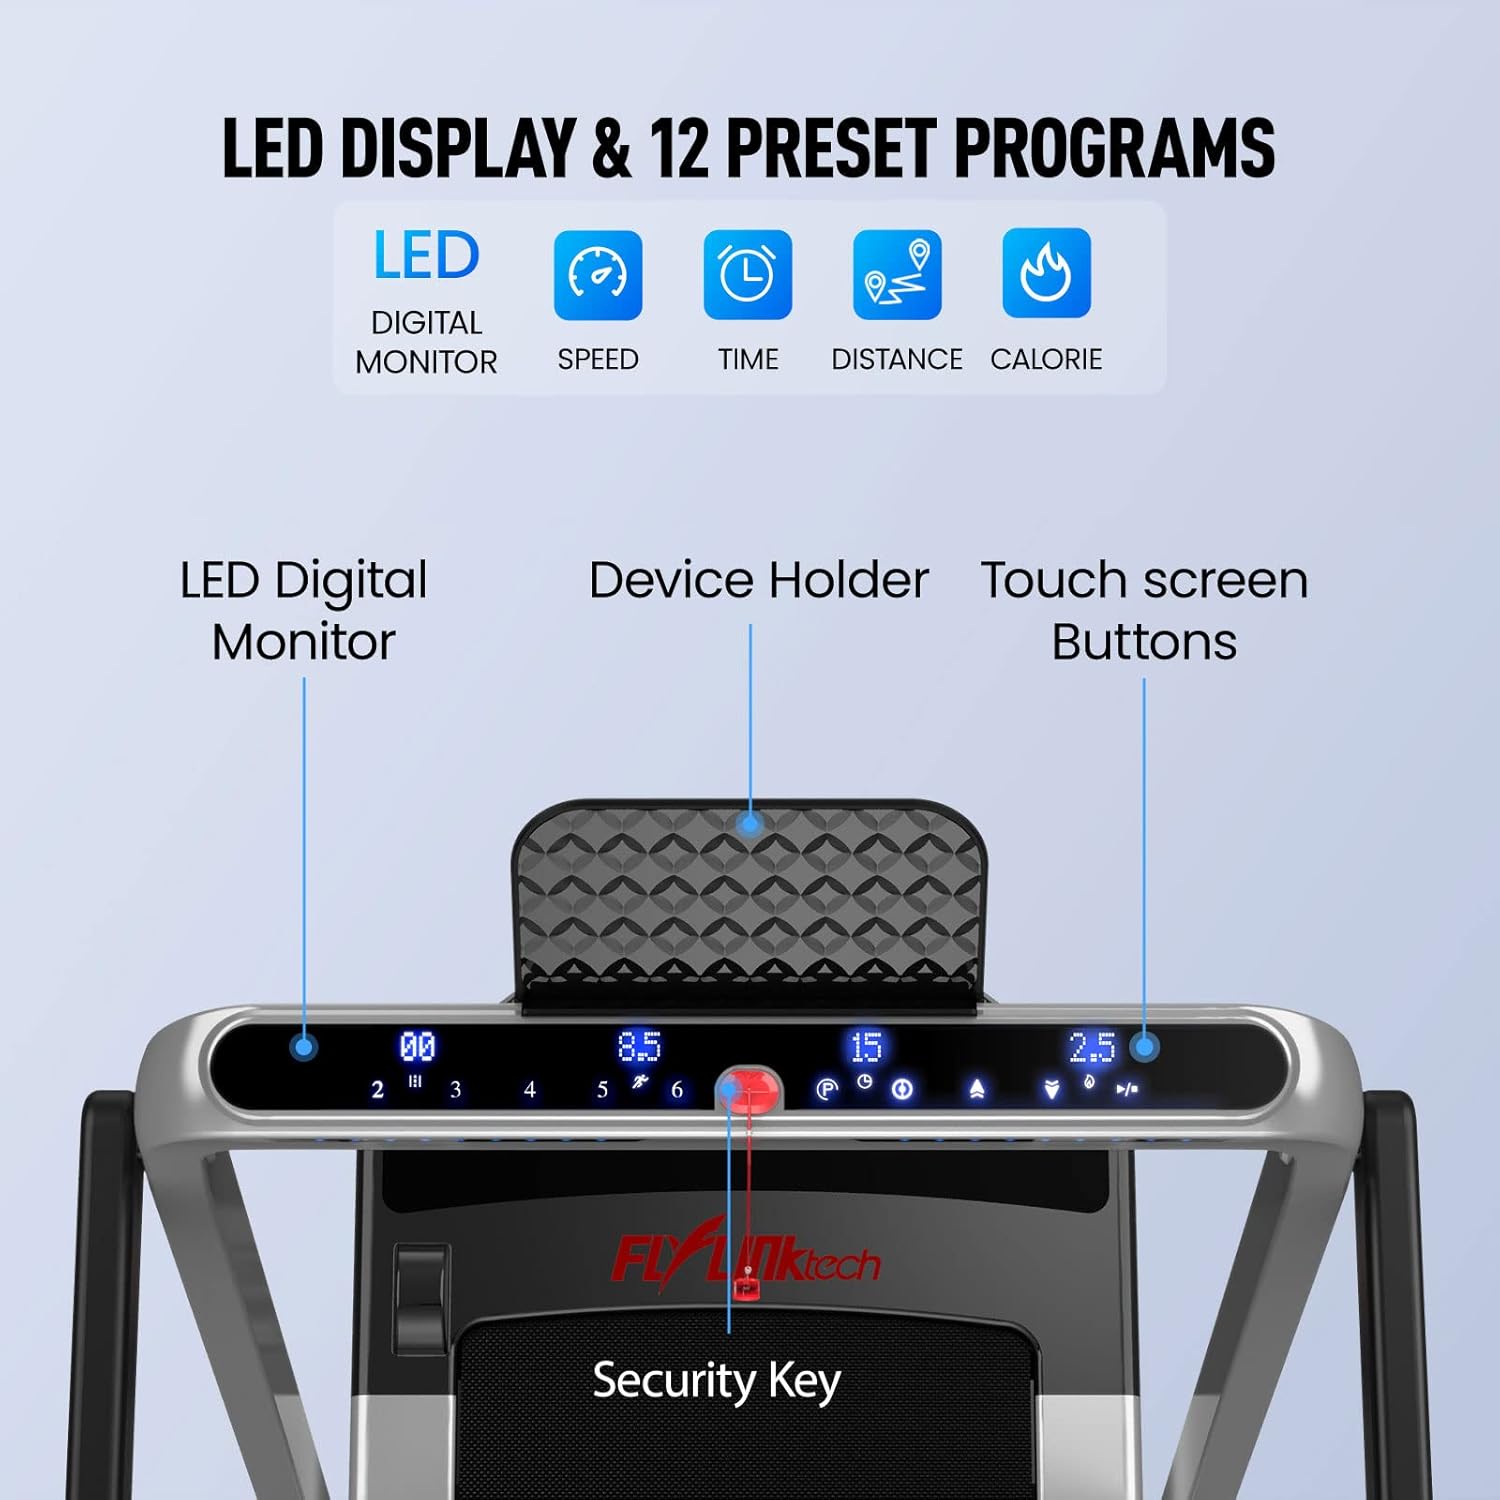
Image: Detailed view of the treadmill's control panel, highlighting the LED digital monitor, device holder, touch screen buttons, and the security key placement.
4. Setup and Assembly
The FLYLINKTECH 2-in-1 Folding Treadmill is designed for minimal assembly and is largely ready to use right out of the box. No complex installation is required.
4.1 Unfolding for Running Mode
- Carefully remove the treadmill from its packaging.
- Place the treadmill on a flat, stable surface.
- Lift the handrail assembly until it locks securely into the upright position. Ensure all locking mechanisms are engaged.
- Plug the power cord into a grounded electrical outlet.
4.2 Folding for Walking Mode or Storage
To convert to walking mode or for compact storage, the handrail can be folded down.
- Ensure the treadmill is powered off and unplugged.
- Locate the release mechanism for the handrail (refer to the diagram below).
- Press the release mechanism and carefully lower the handrail until it is flat against the running deck.
- For storage, utilize the built-in transport wheels to move the treadmill to a desired location. Its compact design allows it to be stored under furniture, requiring only 4 inches of vertical clearance when fully folded.
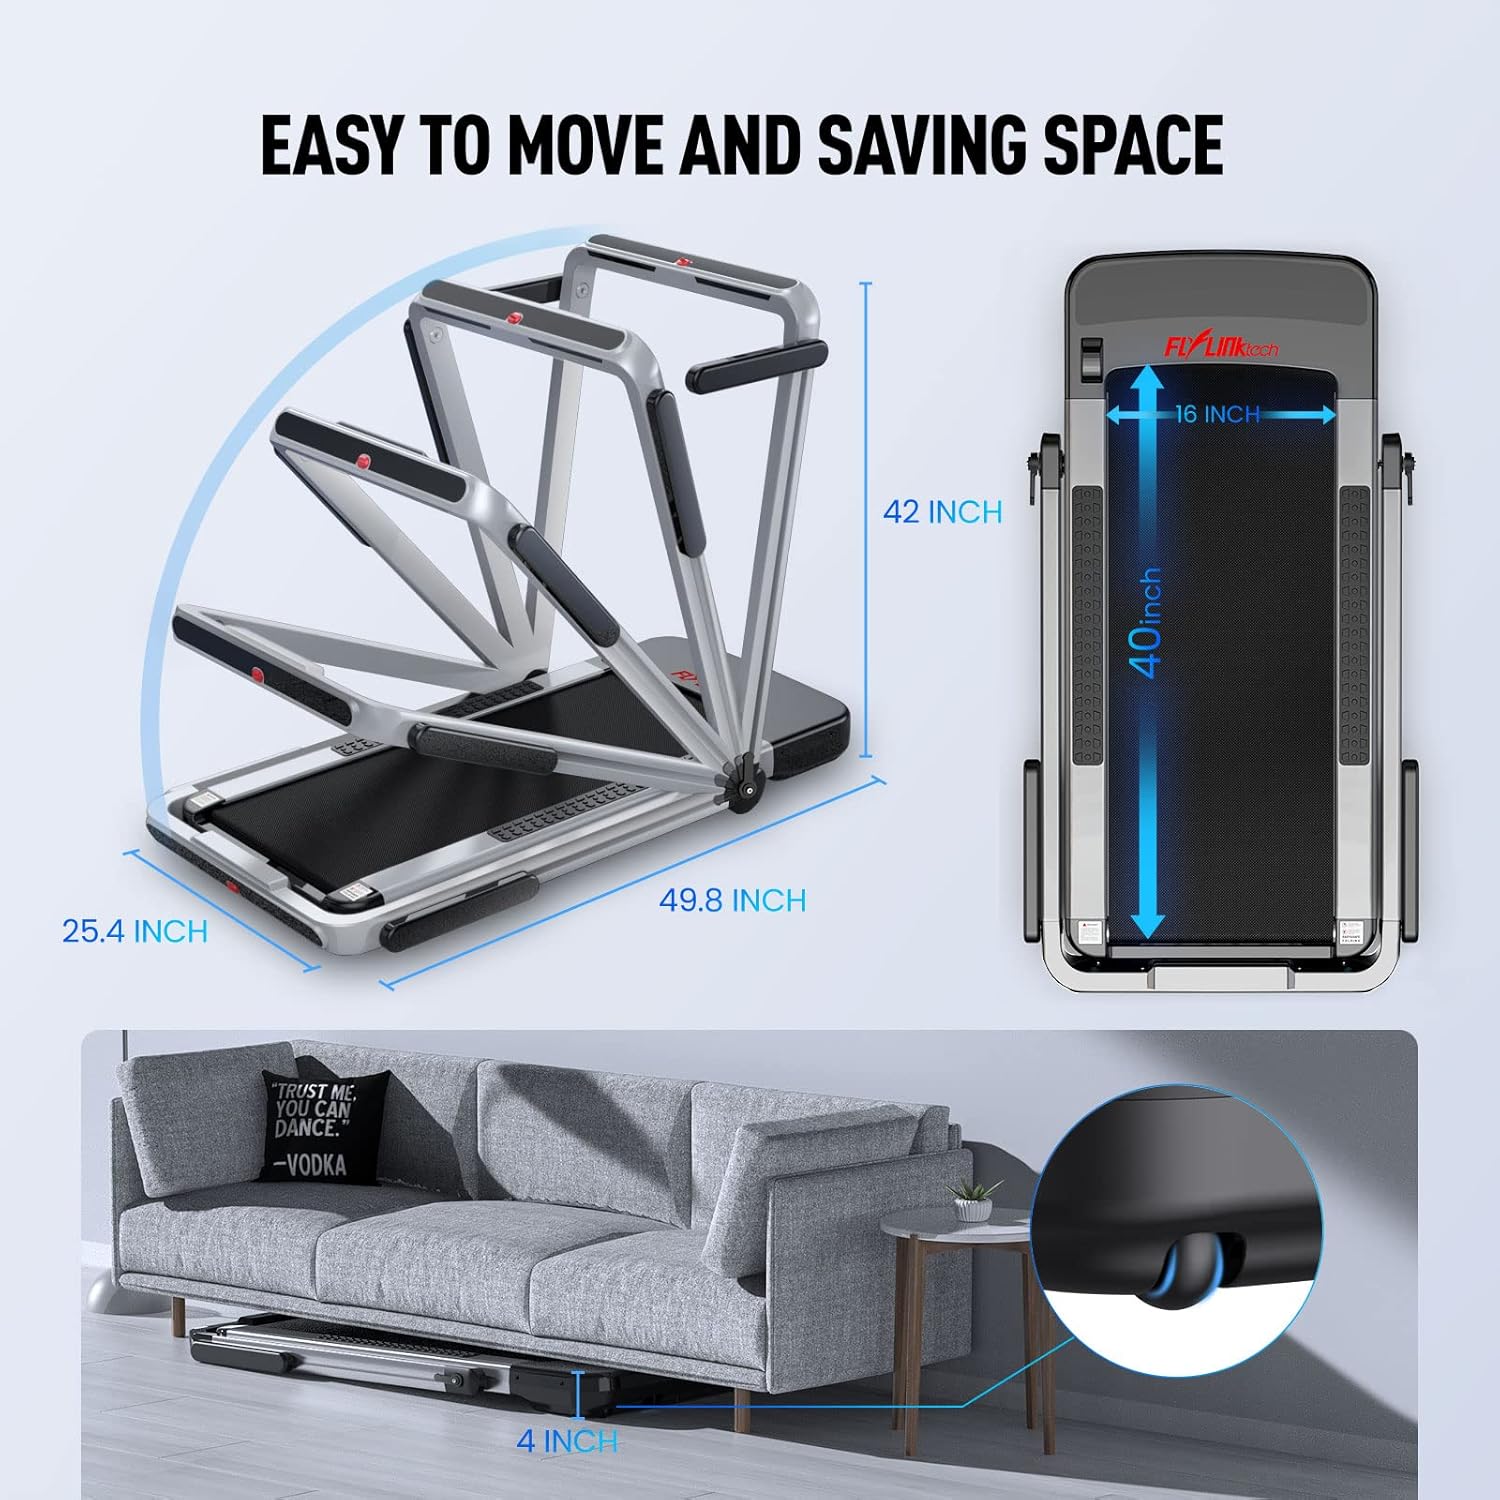
Image: Illustration demonstrating how the treadmill folds for easy movement and space-saving storage, including its folded dimensions (49.8 x 25.4 x 42 inches) and ability to fit under a sofa with 4 inches clearance.
5. Operating Instructions
5.1 Power On/Off
- Plug the power cord into a grounded outlet.
- Flip the main power switch (usually located near the front base of the treadmill) to the "ON" position.
- To turn off, flip the main power switch to "OFF" and unplug the unit.
5.2 Using the Safety Key
The safety key is a critical safety feature. The treadmill will not operate without it. Attach the clip end of the safety key to your clothing, and insert the magnetic end into the designated slot on the control panel. Pulling the safety key out will immediately stop the treadmill.
5.3 Operating Modes and Speed Ranges
The treadmill offers two distinct operating modes:
- Running Mode: With the handrail upright, the speed can be adjusted from 2.5 MPH to 8.7 MPH. This mode is suitable for jogging and running.
- Walking Mode (Under-Desk): With the handrail folded down, the speed range is limited to 0.6 MPH to 2.5 MPH. This mode is ideal for brisk walking while working or for light exercise.
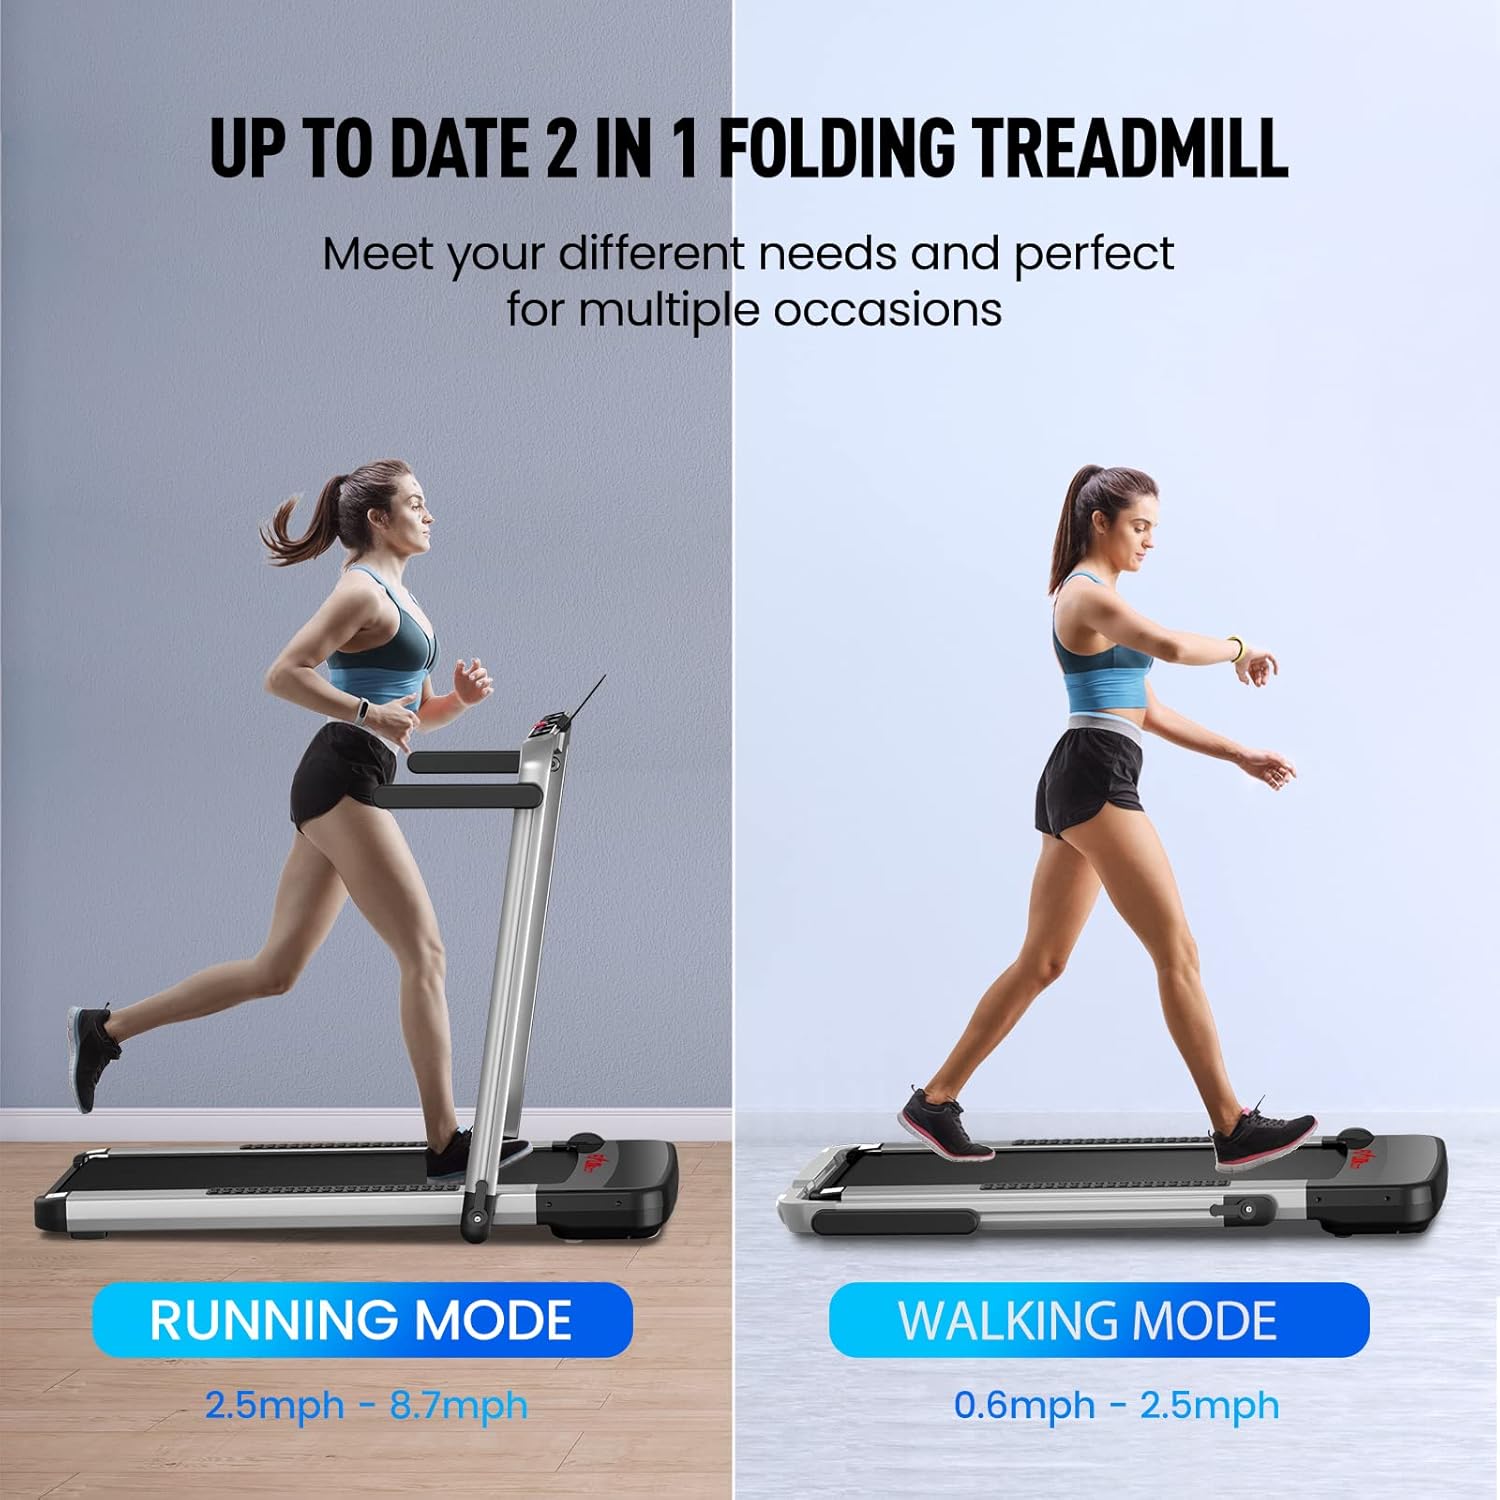
Image: A visual comparison of the treadmill's two modes: Running Mode (2.5mph - 8.7mph) with the handrail up, and Walking Mode (0.6mph - 2.5mph) with the handrail folded down.
5.4 Control Methods
You can control your treadmill using the touch screen buttons on the console, the remote control, or the dedicated mobile application.
5.4.1 Touch Screen Buttons
The LED display provides real-time feedback on speed, distance, time, and calories burned. Use the touch buttons to start/stop, adjust speed, and select programs.
5.4.2 Remote Control
The remote control allows for convenient adjustment of speed and instant stopping. Familiarize yourself with the button layout for quick access during your workout.
5.4.3 Mobile Application (Fit Show App)
Download the "Fit Show" app from your device's app store (Google Play or Apple App Store). Connect the app to your treadmill via Bluetooth to record exercise data, participate in fitness courses, and share your progress with other users.

Image: The remote control for the treadmill is shown alongside a smartphone screen illustrating the "Fit Show" application, which allows for smart control and exercise data recording.
5.5 Pre-set Programs
The treadmill includes 12 pre-set programs designed to simulate various terrains and workout intensities. Select a program from the control panel or app to automatically adjust speed and incline (if applicable) throughout your workout.
5.6 Running Belt Features
The treadmill features a 5-layer shock-absorbing non-slip running belt, providing a spacious area of 40" x 16". This multi-layer design is engineered to cushion joints and muscles effectively, reducing impact during exercise.

Image: A cross-section diagram detailing the five layers of the non-slip and shock-absorbing running belt: Wear-resistant Surface, Noise Reduction Layer, High Strength Reinforcement Layer, EVA Shock Absorption Layer, and High Strength Compression Layer.

Image: A close-up of the treadmill's motor area, highlighting its 2.25HP low noise motor, 180kg weight capacity, <60db noise level, 0.6-8.7 MPH speed range, and 16x40 inch running area.
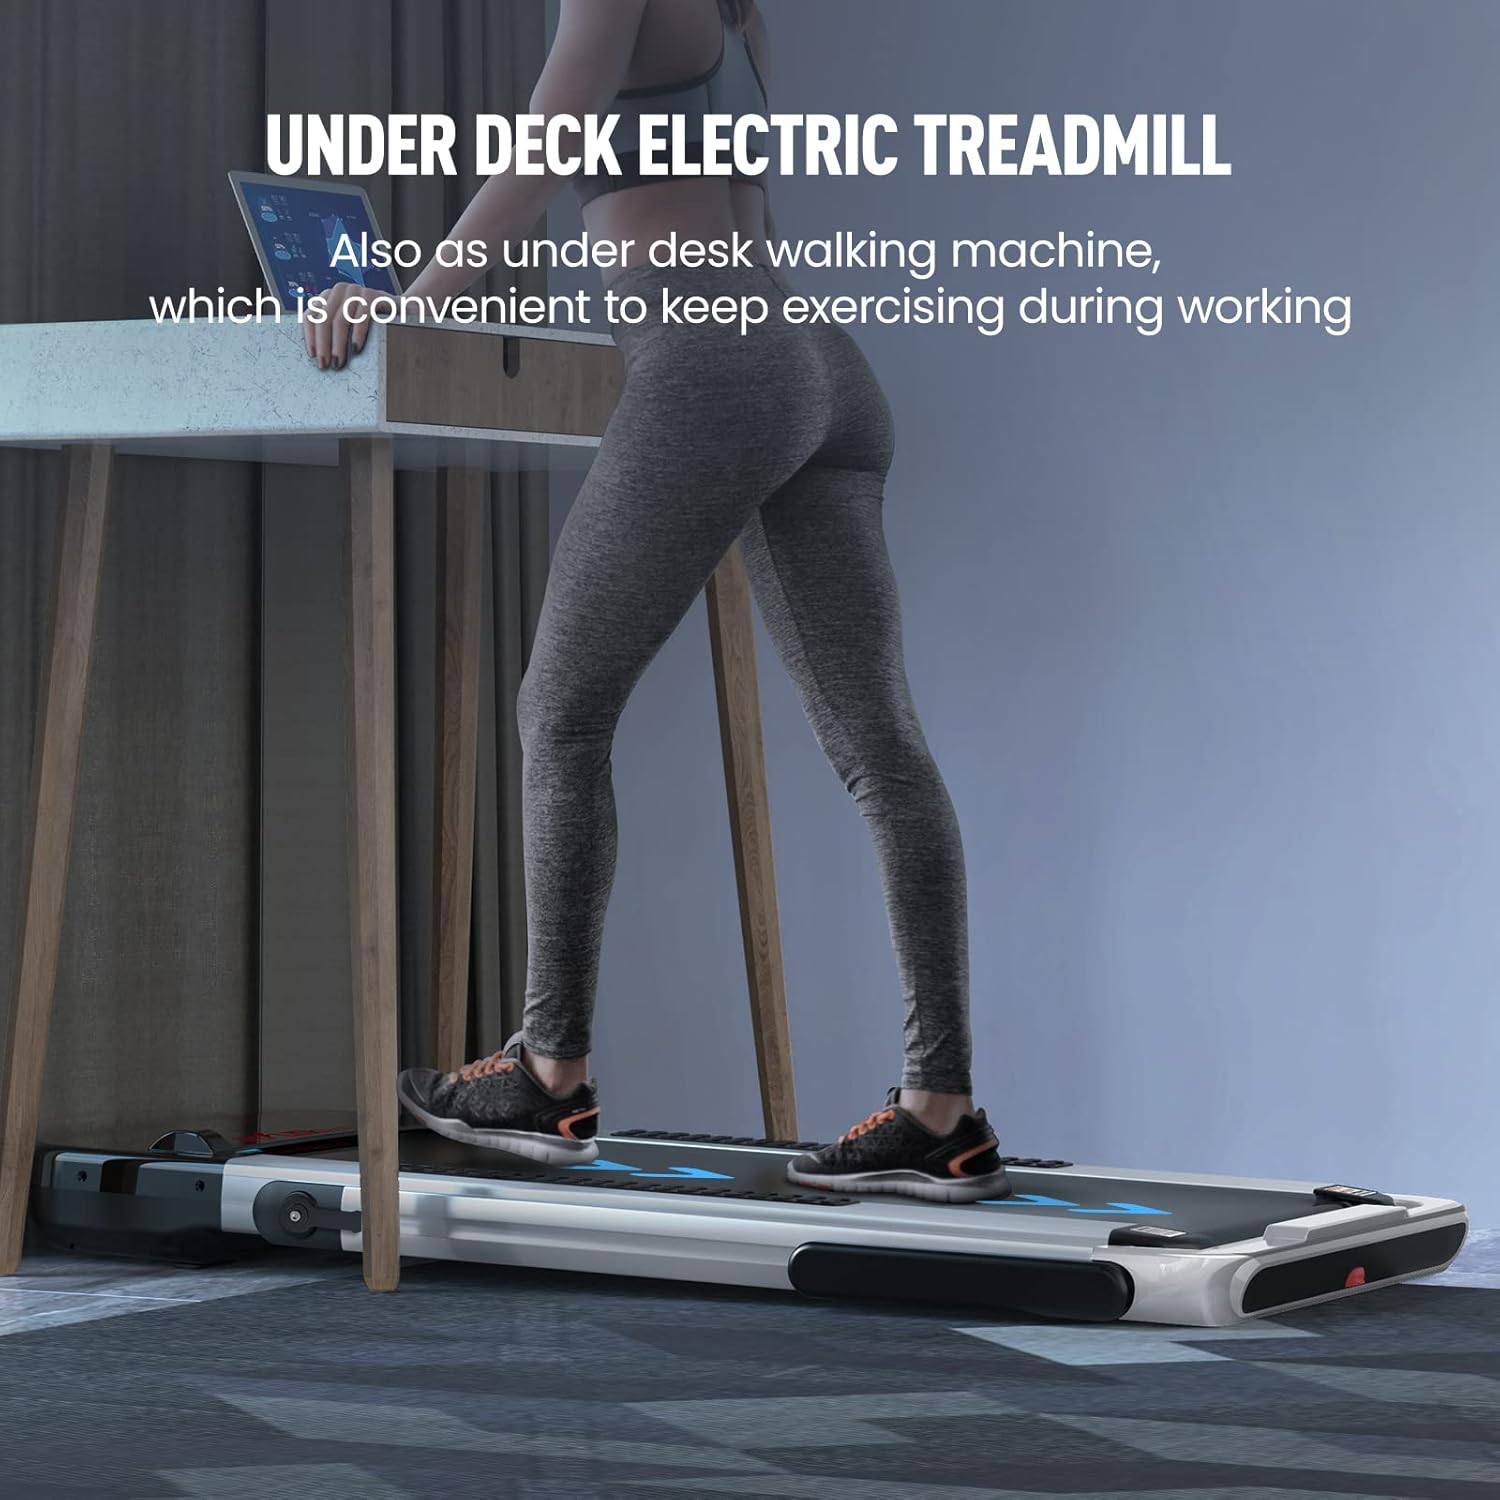
Image: A person is shown using the treadmill in its under-desk walking machine configuration, demonstrating its convenience for exercising while working.
6. Maintenance and Care
Regular maintenance ensures the longevity and optimal performance of your treadmill.
6.1 Cleaning
- Always unplug the treadmill before cleaning.
- Wipe down the surfaces with a damp cloth and mild detergent. Avoid abrasive cleaners or solvents.
- Keep the control panel free of moisture.
- Vacuum under the treadmill periodically to remove dust and debris that can accumulate around the motor.
6.2 Running Belt Lubrication
The running belt requires periodic lubrication to reduce friction and extend its lifespan. Refer to the specific lubrication instructions provided with your treadmill's accessories. Typically, silicone lubricant is applied between the running belt and the deck every few months, depending on usage.
6.3 Belt Tension and Alignment
If the running belt feels loose, slips, or drifts to one side, it may need adjustment. Consult the detailed instructions in the full user manual for proper belt tensioning and alignment procedures. Incorrect adjustment can damage the belt or motor.
7. Troubleshooting
This section addresses common issues you might encounter. For problems not listed here, please contact customer support.
| Problem | Possible Cause | Solution |
|---|---|---|
| Treadmill does not power on. | Power cord not plugged in; Main power switch off; Circuit breaker tripped. | Ensure power cord is securely plugged in. Check main power switch. Reset household circuit breaker if tripped. |
| Treadmill starts but belt does not move. | Safety key not inserted correctly. | Ensure the safety key is fully inserted into its slot on the console. |
| Running belt slips or hesitates. | Belt too loose; Belt needs lubrication. | Adjust belt tension (refer to full manual). Lubricate the running belt. |
| Unusual noise from the treadmill. | Loose parts; Debris under belt; Motor issue. | Inspect for loose screws. Clean under the belt. If noise persists, contact customer support. |
| Remote control not working. | Dead batteries; Not paired. | Replace batteries. Refer to pairing instructions in the full manual if applicable. |
8. Product Specifications
| Feature | Specification |
|---|---|
| Model Number | JF-H-40DC |
| Motor Power | 2.25 HP |
| Speed Range (Running Mode) | 2.5 - 8.7 MPH |
| Speed Range (Walking Mode) | 0.6 - 2.5 MPH |
| Weight Capacity | 180 kg (380 lbs) |
| Running Area Size | 40" x 16" |
| Overall Dimensions (Unfolded) | 1265 x 645 x 1070 mm (49.8 x 25.3 x 42.1 inch) |
| Folding Dimensions | 1320 x 645 x 115 mm (51.9 x 25.3 x 4.53 inch) |
| Product Weight | 33.6 kg (74 lbs) |
| Material | Alloy Steel |
| Display Type | LED Digital Monitor |
| Control Methods | Touch Button, Remote Control, APP Control |
| Pre-set Programs | 12 |
9. Warranty and Customer Support
FLYLINKTECH provides a 12-month warranty for this treadmill, covering manufacturing defects and issues arising from normal use. Please retain your proof of purchase for warranty claims.
For any questions, technical assistance, or warranty claims, please do not hesitate to contact FLYLINKTECH customer service. Our support team is available to assist you.
Contact Information:
- Refer to the contact details provided on the product packaging or the official FLYLINKTECH website.
- Online support may be available through the official product page or dedicated support portal.
Ask a question about this manual
Ask about setup, troubleshooting, compatibility, parts, safety, or missing instructions. Manuals+ will review the question and use this page’s manual context to help answer it.