
1. Introduction
The Makartt Luminoza UV LED Nail Lamp is designed for efficient and convenient gel nail curing at home. This compact and portable device features a flexible gooseneck, smart auto-sensing technology, and multiple timer settings to accommodate various nail art needs. Its rechargeable battery ensures cordless operation, making it ideal for travel and flexible use.

Figure 1: Makartt Luminoza UV LED Nail Lamp.
2. Safety Information
- Keep the product out of the reach of children.
- Avoid direct sunlight and heat exposure to the device.
- Do not look directly into the UV/LED light during operation.
- Ensure the device is fully charged before use for optimal performance.
- Use only the provided USB charging cable.
3. What's in the Box
- 1 x Makartt Luminoza UV LED Nail Lamp
- 1 x USB Charging Cable (Type-C Port)
- 1 x User Manual

Figure 2: Package Contents.
4. Product Features
4.1. Fast Curing & Efficiency
The lamp is equipped with 10 UV+LED dual light source beads, providing 30W of power for fast and even curing. It effectively shortens curing time for various manicure gels. For optimal results, maintain a distance of 5cm from the light source.
- False Nails: Approximately 10 seconds
- Gel Polish Nails: Approximately 60 seconds
- Extension Gel Nails: Approximately 120 seconds
- Nail Rhinestone Glue: Approximately 60 seconds

Figure 3: Dual Light Source for Fast Curing.
4.2. Portable & Flexible Gooseneck
The compact design (Unfolded: 3.7"D x 3.7"W x 12.8"H, Flexible hose: 9.6") and lightweight nature make the lamp highly portable. The gooseneck can be bent 360 degrees, allowing for flexible adjustment of the UV lamp's height and direction to target specific areas.

Figure 4: Flexible Gooseneck Design.
4.3. Auto-Sensing Technology
The lamp features a smart infrared sensor. When a hand is placed under the light, it automatically turns on. When the hand is removed, the light turns off. This open curing space is convenient for false nail tip application, soft gel nail glue curing, and fixing nail charms.
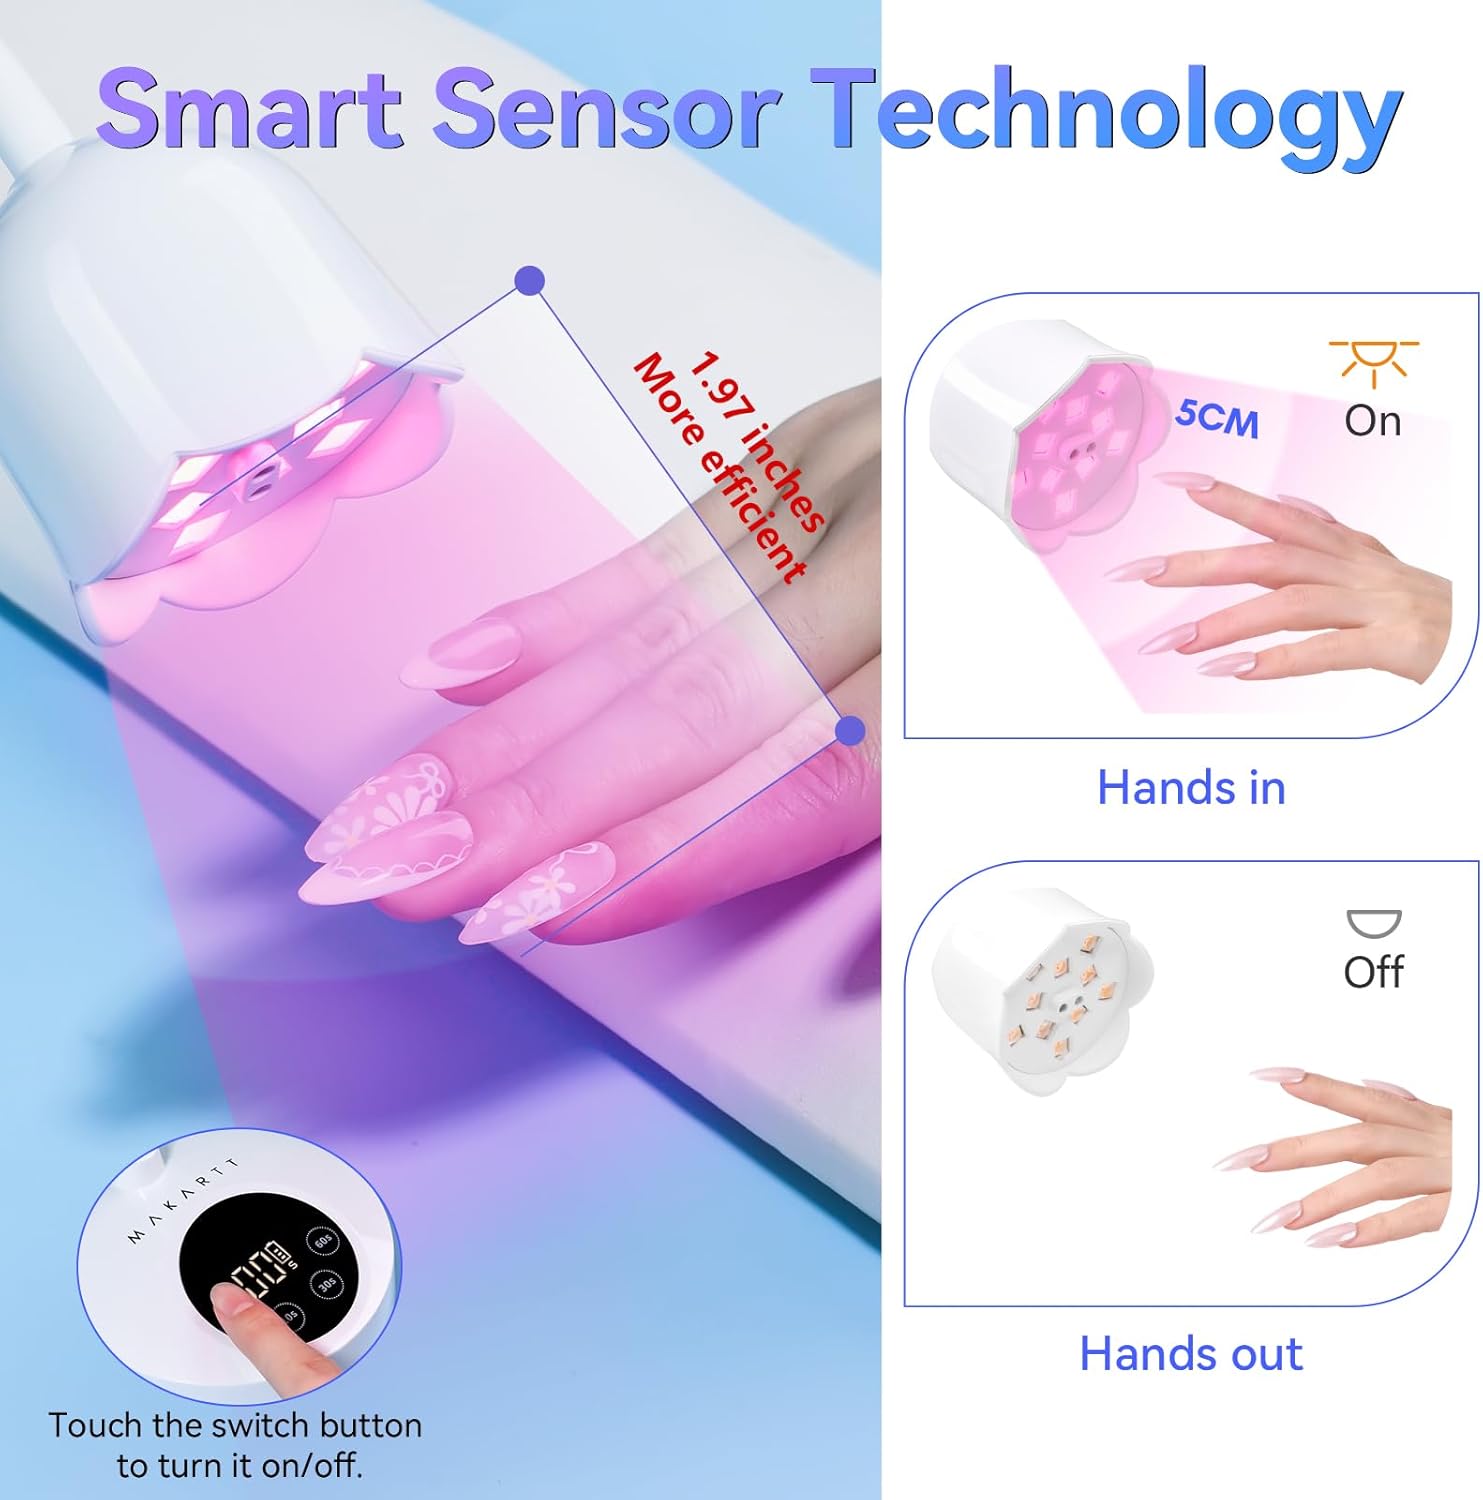
Figure 5: Auto-Sensing Operation.
4.4. 4 Timer Settings & LCD Touch Buttons
The lamp offers four timer settings: 10s, 30s, 60s, and 90s. The 90s setting functions as the default auto-sensing timer when the device is in standby. An integrated LCD screen displays the battery capacity and current timer status.

Figure 6: Timer Settings and LCD Display.
4.5. Rechargeable & Cordless Design
The lamp features a built-in 1800mAh rechargeable battery, providing up to 2.5 hours of continuous use on a full charge. It comes with a Type-C USB charging cable for convenient recharging from various power sources like USB chargers, laptops, computers, or mobile power banks.

Figure 7: Rechargeable Battery and Type-C Charging.
5. Setup Instructions
5.1. Initial Charging
- Connect the provided Type-C USB cable to the charging port on the back of the lamp base.
- Plug the other end of the USB cable into a compatible USB power source (e.g., wall adapter, computer, power bank).
- The LCD display will show the battery charging status. Allow the lamp to fully charge before first use.
5.2. Adjusting the Gooseneck
- Gently bend the flexible gooseneck to position the light head as desired.
- Ensure the light is directed towards the area you intend to cure, maintaining approximately 5cm distance for optimal curing.

Figure 8: Gooseneck Adjustment.
6. Operating Instructions
6.1. Power On/Off
- Press the power button (circular icon) on the base to turn the lamp on or off.
- When powered on, the lamp defaults to auto-sensing mode (90s timer).
6.2. Selecting Timer Settings
- With the lamp on, gently touch the desired timer button (10s, 30s, 60s) to select a specific curing time.
- The LCD display will show the countdown.
- For auto-sensing, ensure no specific timer is selected, and the lamp will activate when a hand is detected.
6.3. Curing Nail Tips
- File and clean your natural nail surface.
- Apply nail tip gel to the inner side of the nail tip.
- Press the nail tip onto your natural nail until no bubbles are visible.
- Flash cure for approximately 5 seconds using the lamp.
- Release the nail tip and cure for an additional 60 seconds for a complete set.

Figure 9: Curing Nail Tips.
6.4. Curing Color Gel Polish
- Trim and polish your nail surface, ensuring it is oil-free.
- Apply a base coat and cure for 60 seconds.
- Apply color gel and cure for 30-60 seconds. Repeat this step for additional coats.
- Apply a top coat and cure for 60 seconds.

Figure 10: Curing Color Gel Polish.
Video 1: Demonstration of Makartt UV LED Nail Lamp for Gel Nail Polish curing.
7. Maintenance
- Cleaning: Wipe the lamp surface with a soft, dry cloth. Do not use abrasive cleaners or solvents.
- Storage: Store the lamp in a cool, dry place away from direct sunlight and moisture. The flexible gooseneck can be folded for compact storage.
- Battery Care: To prolong battery life, avoid fully discharging the battery frequently. Charge the lamp regularly, even if not in use for extended periods.
8. Troubleshooting
- Lamp not turning on: Ensure the lamp is charged. Connect it to a power source using the USB cable.
- Gel not curing properly:
- Check if the curing time is sufficient for the specific gel type.
- Ensure the nail is positioned directly under the light, approximately 5cm away.
- Verify that the gel polish is compatible with UV/LED lamps.
- Apply thin, even coats of gel. Thick coats may not cure completely.
- Auto-sensing not working: Ensure there are no obstructions blocking the infrared sensor.
- Battery draining quickly: The battery may require recharging. If the issue persists after a full charge, contact customer support.
9. Specifications
| Feature | Specification |
|---|---|
| Brand | Makartt |
| Model | A01 |
| Light Source Type | UV+LED |
| Number of Light Sources | 10 |
| Wattage | 10 watts (Note: Product description mentions 30W, specifications list 10W. Please refer to product packaging for exact wattage.) |
| Battery Capacity | 1800mAh |
| Charging Port | Type-C USB |
| Timer Settings | 10s, 30s, 60s, 90s (Auto-sensing) |
| Control Method | Touch |
| Special Features | Cordless, Rechargeable, Portable, Gooseneck, Auto-sensing |
| Product Dimensions (Unfolded) | 3.7"D x 3.7"W x 12.8"H |
| Item Weight | 8.8 ounces |
| Material | Plastic |
10. Warranty and Support
For warranty information or technical support, please refer to the contact details provided on the product packaging or visit the official Makartt website. Keep your purchase receipt for warranty claims.