Introduction
This manual provides comprehensive instructions for the setup, operation, and maintenance of your Singer 287 Sewing Machine. To ensure optimal performance and longevity of your machine, please read this manual thoroughly before initial use and retain it for future reference.
Image: Front cover of the Singer 287 Instruction Manual. The cover is blue with a white line drawing of the sewing machine and the model number '287'.
Enjoy Carefree Sewing!
You are about to discover the wonderful pleasure of sewing with your new SINGER sewing machine. We know you are eager to get started on a sewing project, but we urge you to become familiar with this book before you begin. It is designed to help you get the benefit of all the qualities of this machine. Especially, we recommend that you keep the following points in mind:
- Choose the correct needle and thread for your fabric. If either is the wrong size or type, you may encounter broken or knotted thread or faulty stitching. The Fabric, Thread and Needle table on page 5 will help you make a perfect choice.
- Do not sew with a bent or blunt needle. If the needle is damaged or improperly inserted in the machine, it can cause skipped stitches. See page 6 for instructions.
- Do not forget to read the bobbin section when you rethread the bobbin case (page 8).
- Do become familiar with the instructions for regulating stitch length (page 11), presser foot pressure (page 14), and needle thread tension (page 15). Take advantage of the versatility of your sewing machine.
- Do not allow lint or thread ends to accumulate in the lower thread area. Thread ends, lint, or excessive grease can lead to poor machine regularity, as mentioned on page 39.
- Do remember that expert, dependable SINGER service is always available. If your sewing machine should require maintenance, be sure to call your Singer Sewing Centre or authorized Singer Dealer. You will find the number listed under 'Singer Company' in your telephone book.
Above all, do enjoy sewing!
Setup
Connecting the Machine
Before plugging in your machine, be sure the electrical rating on the motor matches the voltage of your local power supply. To connect the machine, insert the power line plug into the electrical outlet.
Operating the Machine and Controller
To turn on both the machine and sewing light, press the switch located at the top of the machine. CAUTION: We recommend that you turn on the sewing light switch before changing needles and prior to removing needle plate. This will avoid having the machine accidentally operate and the possibility of injury. To control the speed, press the foot speed controller. The harder you press, the faster the machine will sew. To stop the machine from sewing, remove pressure from the speed controller.

Image: Diagram illustrating how to connect the Singer 287 sewing machine to power and use the speed controller.
Operation
Fabric, Thread, Needle, and Stitch Length Table
Refer to this table for guidance on selecting the appropriate fabric, thread, needle size, and stitch length for various sewing tasks. Detailed information can be found on page 5 of the full manual.
Image: A page from the manual displaying a table with recommendations for fabric, thread, needle, and stitch length combinations.
Bobbin Winding and Installation
Proper bobbin winding and installation are crucial for smooth stitching. Detailed instructions for winding the bobbin and correctly installing it into the bobbin case are provided on page 8 of the full manual.
Regulating Pressure
The pressure screw regulates the pressure that the presser foot exerts on the fabric. Correct pressure is important for even feeding and even stitches. Too much pressure may mark the fabric; too little pressure may cause uneven feeding. For very sheer fabrics, it is advisable to use less pressure. For heavy fabrics, use more pressure. Lower the presser foot before adjusting pressure.
- To decrease pressure, turn screw counter-clockwise.
- To increase pressure, turn screw clockwise.
Feed Throw Out Knob
- For regular stitching, turn knob to left position.
- For darning and embroidery, turn knob to right. This will lower the feed dogs below the needle plate so that it will not feed the material.

Image: Manual page showing how to adjust the pressure and feed throw out knob on the sewing machine.
Regulating Thread Tension
Correct tension is important because too much or too little tension will cause an uneven stitch. Make a test sample with your fabric and thread. If the needle thread tension is too tight, it will pull the bobbin thread to the top. If it is too loose, it will pull the needle thread to the bottom. The ideal stitch shows an even interlock of threads between the fabric layers.
- To decrease tension, turn dial to a lower number.
- To increase tension, turn dial to a higher number.
Adjusting Needle Thread Tension
Zig-zag stitching requires less needle-thread tension than straight stitching. The tension dial regulates the degree of tension on the needle thread. Make a test sample with your fabric and thread. If the needle thread is too tight, turn the tension dial to a lower number. If it is too loose, turn the tension dial to a higher number.

Image: Manual page illustrating the adjustment of needle thread tension for zig-zag stitches.
Adjusting Stitch Length
For open zig-zag stitching, choose any stitch length from 8 to 20, depending on the seam. For closely spaced zig-zag stitches, choose a stitch length from 1 to 7. To adjust:
- Move stitch length selector to desired number.
- For fine stitching, reduce speed and gradually tighten thumb nut by turning it clockwise, until stitches are closely spaced and form a satin surface.
NOTE: For best results in producing a smooth, satiny surface, use the darning/embroidery foot furnished with your accessories.
Image: Manual page detailing how to adjust the stitch length for various zig-zag patterns.
Button Sewing
Flat buttons, one inch or more in diameter, can be sewn on by machine using the zig-zag stitch. Turn the feed throw-out knob to the right. Set the stitch width selector at 0 and the needle position at left. Place the button under the presser foot and lower the presser foot. Turn the hand wheel to bring the needle into the left hole of the button. Move the stitch width selector to a position that will cause the needle to enter the right hole of the button. Stitch 5 to 6 zig-zag stitches to attach the button. Stitch a few stitches in the left hole of the button to fasten threads.
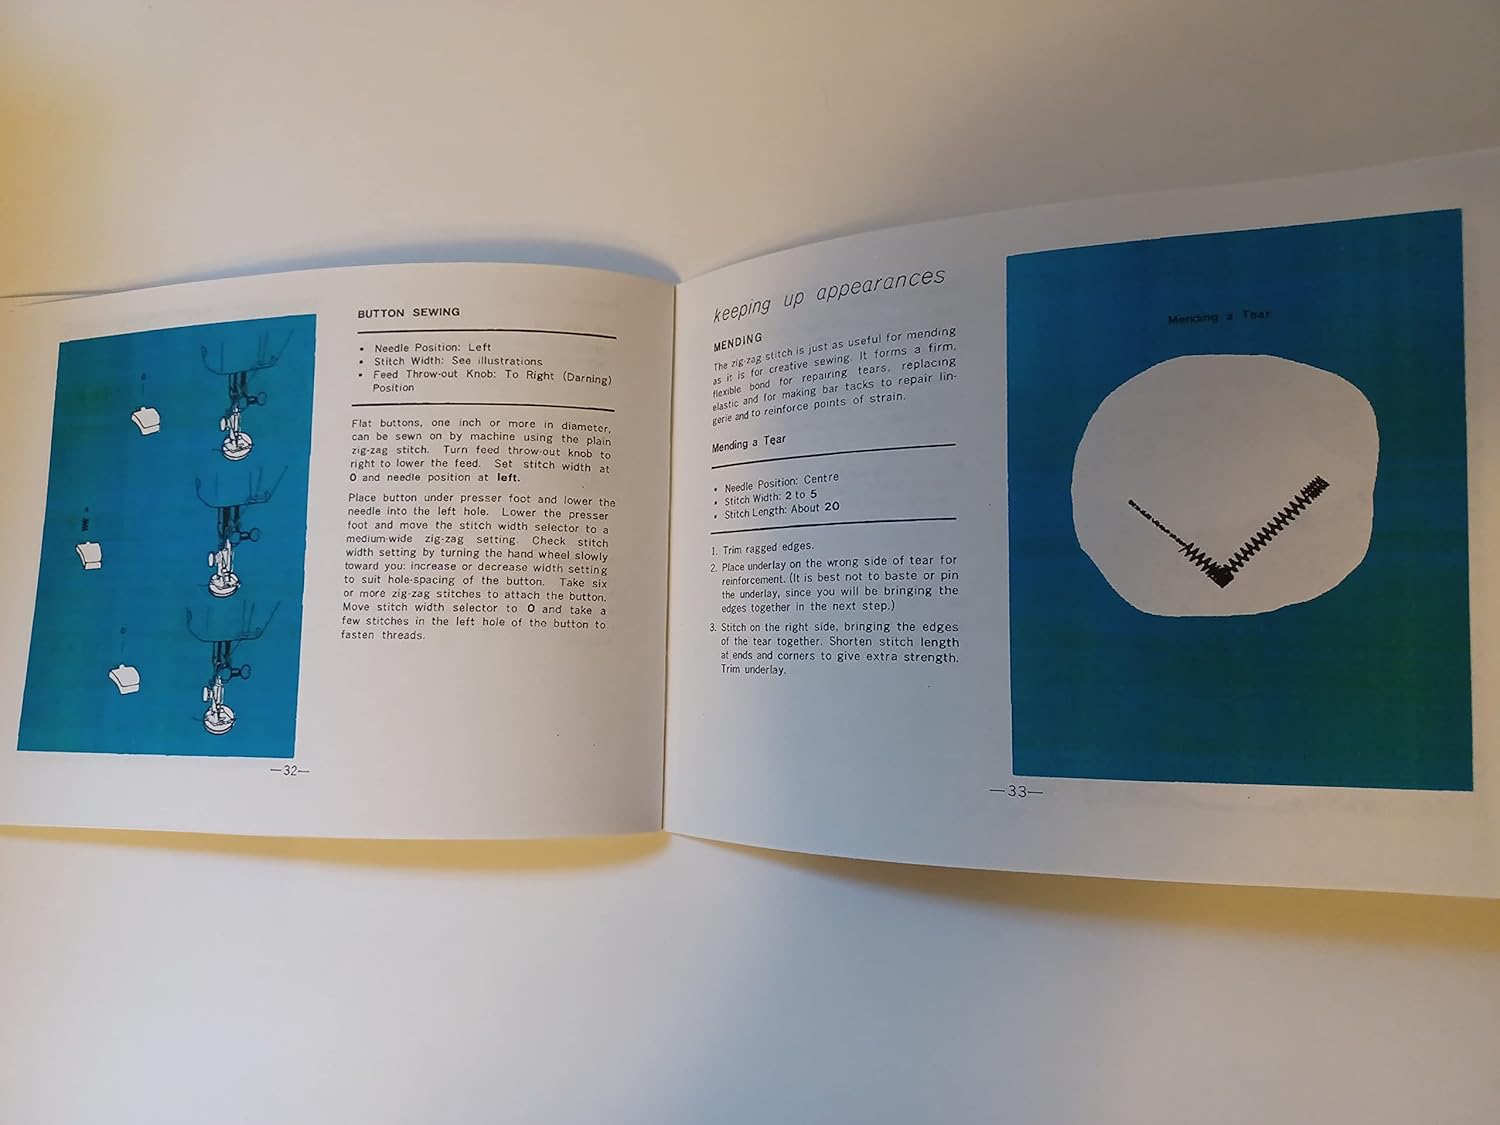
Image: Manual page with step-by-step illustrations for sewing buttons.
Mending
The zig-zag stitch is useful for mending as it provides a firm, flexible bond. For mending, use replacing elastic and for sewing up tears. Trim ragged edges. Place mending on the wrong side of the tear. Bring the edges of the tear together. Shorten stitch length and use zig-zag stitches to give extra strength. Trim underlay.
Image: Manual page illustrating the process of mending fabric tears with the sewing machine.
Twin Needle Sewing
The Singer 287 sewing machine supports twin needle sewing for decorative and functional purposes. For detailed instructions on how to install a twin needle and adjust settings for twin needle stitching, please refer to the relevant section in the complete manual.
Maintenance
Cleaning and Lubricating
Regular cleaning and lubrication are essential for maintaining the smooth operation and longevity of your Singer 287 sewing machine. Refer to the detailed instructions in your manual for specific cleaning points and lubrication schedules. Ensure the machine is unplugged before performing any maintenance. The manual indicates detailed instructions for 'Cleaning and Lubricating' on page 39.

Image: A section of the manual's index, indicating the presence of detailed instructions for cleaning and lubricating the machine.
Troubleshooting
This section addresses common issues you might encounter with your Singer 287 sewing machine. For specific problems, refer to the relevant sections of this manual for detailed solutions.
- Skipped Stitches: Often caused by a bent or blunt needle, incorrect needle insertion, or improper threading. Check your needle and rethread the machine.
- Thread Breakage: Can be due to incorrect tension, poor quality thread, or a burr on the needle plate. Adjust tension, use good quality thread, and inspect the machine for rough spots.
- Uneven Stitches: May result from incorrect presser foot pressure, improper tension, or using the wrong needle/thread for the fabric. Adjust pressure and tension, and ensure correct supplies are used.
- Machine Jamming: Can be caused by lint accumulation, tangled threads in the bobbin area, or a damaged bobbin case. Clean the machine thoroughly and check the bobbin area.
If problems persist after following these steps, it is recommended to contact an authorized Singer service center.
Specifications
- Model: Singer 287
- Product Dimensions: 4 x 6 x 0.1 inches (Manual dimensions, machine dimensions not specified in provided data)
- Type: Zig-Zag Sewing Machine (based on manual cover)
Note: Specific machine dimensions and weight are not detailed in this reproduction manual.
Warranty and Support
This instruction manual is a reproduction for the Singer 287 Sewing Machine. Information regarding original product warranty or specific support contacts for the Singer 287 machine is not included in this reproduction. For service or support related to your Singer 287 machine, please refer to the original documentation that came with your machine or contact an authorized Singer service center.
As stated in the introduction, "expert, dependable SINGER service is always available. If your sewing machine should require maintenance, be sure to call your Singer Sewing Centre or authorized Singer Dealer. You will find the number listed under 'Singer Company' in your telephone book."

Image: Back cover of the manual, encouraging users to enjoy sewing with Singer.


