
ELAMOR M12
ELAMOR M12 Smart Touch & Fingerprint Door Lock User Manual
Comprehensive guide for installation, operation, and maintenance of your ELAMOR M12 Smart Door Lock.
1. Safety Information
Please read all instructions carefully before installing and using the ELAMOR M12 Smart Door Lock. Keep this manual for future reference.
- Do not attempt to disassemble or modify the lock. This may cause damage to the product and void the warranty.
- Use only specified batteries (4 AA batteries). Do not mix old and new batteries or different types of batteries.
- Ensure the door is properly aligned and the deadbolt operates smoothly before installing the smart lock.
- Keep your physical keys in a secure location outside of your home in case of battery failure or electronic malfunction.
- Protect your passwords and fingerprints. Do not share them with unauthorized individuals.
- Regularly check the lock's functionality and battery level.
2. Package Contents
Verify that all components are present before beginning installation:
- Keypad Assembly (Exterior)
- Interior Assembly
- Deadbolt Latch
- Deadbolt Strike Plate
- Buckle Box
- Mounting Plate
- WiFi Gateway
- Entry Keys (2 pcs)
- 1-5/32" (33mm) Screws (2 pcs)
- 3/4" (19mm) Screws (6 pcs)

Image: All components of the ELAMOR M12 Smart Door Lock package.
3. Setup & Installation
3.1 Door Compatibility Check
Ensure your door meets the following dimensions for proper installation:
- Backset: Either 2-3/8" (60mm) or 2-3/4" (70mm)
- Hole in Door Edge: 1" (25mm)
- Hole in Door: 2-1/8" (54mm)
- Door Thickness: Between 1-3/8" (35mm) and 2" (50mm)

Image: Detailed diagram illustrating compatible door dimensions for the smart lock.
3.2 Mechanical Installation
Follow these steps for physical installation of the lock components:
- Prepare the Latch: Twist the latch to adjust the bolt length if necessary. Ensure the latch bolt is fully retracted. Insert the latch bolt into the door edge, making sure the T-shaped hole is in the bottom position.
- Install Strike Plate: Secure the strike plate on the door frame using the two 3/4" (19mm) screws to fix the latch.
- Install Exterior Assembly: Route the cable from the exterior assembly through the door. Ensure the tail of the exterior assembly goes through the T-shaped hole of the latch. Push the stud through the latch. Important: The key must be pulled out when installing and pushing the keypad onto the door.
- Install Mounting Plate: Take off the mounting plate from the interior assembly. Secure the mounting plate to the door using the two 1-5/32" (33mm) screws.
- Install Interior Assembly: Ensure a tight cable connection between the exterior and interior assemblies. Guide the tail of the exterior assembly into the T-shaped hole of the interior assembly. Carefully align and attach the interior assembly.
- Fix Interior Assembly: Secure the interior assembly using two 3/4" (19mm) screws.
- Install Batteries: Open the battery cover on the interior assembly and install 4 AA batteries, ensuring correct polarity.
- Test Functionality: Press the lock key on the keypad; the latch bolt should extend. Enter the default user code (123456) to unlock and ensure the latch retracts. Test manual key operation as well.
Video: A step-by-step guide to installing the ELAMOR M12 Fingerprint Smart Lock. This video demonstrates the process of preparing the latch, installing the strike plate, attaching the exterior and interior assemblies, and securing the lock to the door.
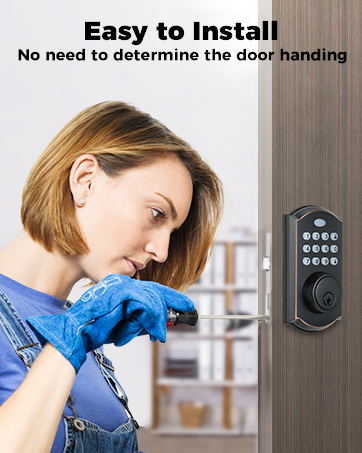
Image: Visual representation of the easy installation process for the smart lock.
3.3 App & Gateway Connection
To enable remote control and smart features, connect your lock to the Smart Life App via the included WiFi Gateway:
- Reset Gateway: Press the reset button on the gateway for 5 seconds until the red light flashes.
- Open Smart Life App: Launch the Smart Life App on your smartphone.
- Add Gateway: In the app, tap "+" to add a new device. Choose the WiFi gateway option and enter your WiFi password.
- Add Smart Lock: Once the gateway is successfully added, open the gateway in the app. Tap "+Add device" and select the smart lock from the list of existing devices. Tap "confirm".
- Control Lock: Open the "smart lock" interface within the app. You can now lock/unlock the door remotely.
Video: This video demonstrates the process of connecting the ELAMOR BLE Gateway to the Smart Life App and then linking the smart lock for remote control.

Image: A user remotely unlocking the door using the Smart Life app, highlighting the convenience of remote access.
4. Operating Instructions
4.1 Multiple Unlock Methods
The ELAMOR M12 Smart Door Lock offers various convenient ways to unlock:
- Fingerprint Recognition: Place your registered finger on the fingerprint sensor for quick access. The lock boasts 0.3s identification and 1s unlock time with a 99% recognition rate.
- Password Entry: Use the touchscreen keypad to enter your personalized passcode.
- Key Access: For traditional backup, use the physical key provided.
- Door Card Unlocking: Tap a registered IC card to the lock for entry.
- App Control: Use the Smart Life App on your smartphone to lock or unlock the door remotely.
- Voice Commands: Integrate with Amazon Alexa or Google Assistant for hands-free control.
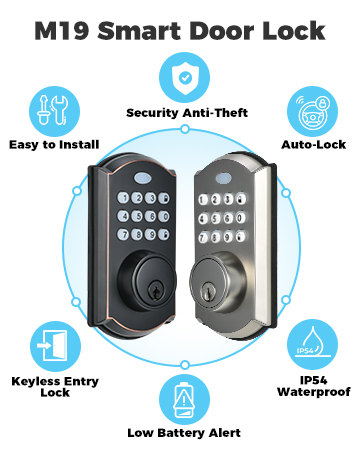
Image: Visual representation of the multiple ways to unlock the ELAMOR M12 Smart Door Lock.

Image: A hand using the fingerprint sensor to unlock the door.

Image: A hand entering a code on the touchscreen keypad.

Image: A hand using an IC card to unlock the door.
4.2 Smart Life App Features
The Smart Life App provides comprehensive control and management of your lock:
- Key Free Operation: Manage access without physical keys.
- Member Management: Easily add, modify, or delete user access permissions for different individuals.
- Temporary Password Sharing: Generate temporary passwords for guests or service providers, which can be set to expire after a specific time.
- Automatic Lock: Configure the auto-lock function to automatically secure the door after a set duration (1-30 seconds) if you forget to close it.
- Unlocking Records: View detailed access logs remotely to know exactly who entered and exited your home.
- Door Lock Alarm: Receive alerts for unusual activity or tampering attempts.

Image: Screenshot of the Smart Life app showing the member management feature.

Image: Screenshot of the Smart Life app displaying unlocking records and activity logs.
Video: A demonstration of the M12 WiFi Smart Lock's features, including remote control via app, temporary passwords, and activity logs.
4.3 Voice Control Integration
The ELAMOR M12 Smart Door Lock works with Amazon Alexa and Google Assistant, allowing for convenient voice control:
- Ensure your WiFi Gateway is properly connected and linked to your Smart Life App.
- Enable the Smart Life skill/action in your Alexa or Google Home app.
- Follow the on-screen instructions in the respective voice assistant app to discover and link your ELAMOR M12 lock.
- You can then use voice commands such as "Alexa, unlock the front door" (a PIN may be required for security).

Image: A user interacting with Alexa to unlock the smart door lock, demonstrating voice control capabilities.
5. Maintenance
5.1 Battery Management
- The lock operates on 4 AA batteries.
- Expect an impressive 10-month standby time under normal usage.
- The Smart Life App will provide low battery alerts. Replace batteries promptly when notified.
- In case of complete battery exhaustion, an emergency charging port (USB-A) is available on the exterior assembly to temporarily power the lock for entry.

Image: A hand connecting a power bank to the emergency USB-A charging port on the smart lock.
5.2 Durability & Cleaning
- The lock has an IP54 waterproof rating, offering protection against dust and splashing water.
- It is ANSI Class 3 certified, indicating high security and durability.
- Clean the lock's exterior with a soft, damp cloth. Avoid abrasive cleaners or solvents.
- Regularly check screws and connections to ensure they remain tight.

Image: The smart lock with water droplets, illustrating its IP54 waterproof rating.

Image: Infographic detailing the ANSI Grade 3 certification, including usage test times, pressure resistance, salt spray, and humidity tests.
6. Troubleshooting
Common Issues and Solutions:
- Lock not responding / Battery drain:
- Check battery level in the app. Replace all 4 AA batteries if low.
- If completely dead, use the emergency USB-A charging port to temporarily power the lock.
- Ensure proper battery installation and contact points are clean.
- If battery drain is frequent (e.g., every 2 weeks), ensure the lock is properly installed and not experiencing excessive friction or misalignment, which can cause the motor to work harder.
- Fingerprint reader not recognizing:
- Ensure your finger is clean and dry.
- Try different angles or re-register your fingerprint if issues persist.
- Ensure the protective film has been completely removed from the sensor.
- Keypad not responding:
- Ensure the keypad is clean and free of debris.
- Verify the lock has power.
- Remote control not working:
- Check if the WiFi Gateway is powered on and connected to your home network.
- Ensure the gateway is within range of the smart lock.
- Verify your smartphone has an active internet connection.
- Confirm the lock is properly linked to the gateway in the Smart Life App.
- Voice control (Alexa/Google) not working:
- Ensure the Smart Life skill/action is enabled in your voice assistant app.
- Verify the lock is linked and online in the voice assistant app.
- Check your internet connection and the voice assistant device's power.
- Factory Reset: If persistent issues occur or you need to clear all settings, locate the reset button on the gateway and press it for 5 seconds (refer to "App & Gateway Connection" section for visual). Note that this will erase all user data and settings.
7. Specifications
| Feature | Detail |
|---|---|
| Brand | ELAMOR |
| Model Number | M12 |
| Lock Type | Biometric |
| Special Features | Auto-Lock, Fingerprint, Passcode Unlock, Touchscreen, Weather Resistant |
| Item Dimensions (L x W x H) | 7.55 x 5.59 x 4.4 inches |
| Material | Zinc |
| Color | Matte Black |
| Connectivity Protocol | Bluetooth (with WiFi Gateway for remote access) |
| Control Method | App, Keypad, Fingerprint, Key, IC Card, Voice (Alexa/Google) |
| Power Source | 4 AA Batteries (approx. 10 months standby) |
| Waterproof Rating | IP54 |
| Certification | ANSI Class 3 |
8. Warranty & Support
ELAMOR provides the following support for your M12 Smart Door Lock:
- Warranty: 1 year manufacturer warranty.
- Technical Support: Lifetime service and technical support.
- Replacements: Replacements available within 12 months.
- Customer Service: Quick replies within 24 hours for inquiries.
For assistance, please refer to the contact information provided in your product packaging or visit the official ELAMOR website.
Related documentsM12


Ask a question about this manual
Ask about setup, troubleshooting, compatibility, parts, safety, or missing instructions. Manuals+ will review the question and use this page’s manual context to help answer it.