
1. Introduction
This manual provides detailed instructions for the installation, operation, and maintenance of your SYLVANIA TruWave White LED Retrofit Recessed Lighting, Model 40. This 14-watt LED fixture is designed to easily convert existing recessed housings into energy-efficient LED lighting with selectable color temperatures.
2. Safety Information
Please read and understand all instructions before beginning installation. Failure to follow these instructions may result in electric shock, fire, or other hazards that could cause personal injury or property damage.
- WARNING: Risk of electric shock. Disconnect power at the fuse or circuit breaker before installing or servicing.
- This product must be installed in accordance with the applicable installation code by a person familiar with the construction and operation of the product and the hazards involved.
- Ensure the supply voltage is 120V AC.
- Do not use with dimmers not specifically designed for LED lighting. Consult a qualified electrician if unsure.
- Suitable for damp locations and outdoor usage.
- Do not modify or alter the fixture.
3. Package Contents
Verify that all components are present before proceeding with installation:
- SYLVANIA TruWave White LED Retrofit Recessed Lighting 14 W unit (1)
- Edison screw base adapter (pre-attached to the fixture)

Image: The SYLVANIA TruWave White LED Retrofit Recessed Lighting unit shown alongside its retail packaging, illustrating the complete product as received.
4. Installation Instructions
4.1. Before You Begin
- Turn off power at the circuit breaker or fuse box to avoid electrical shock.
- Ensure the existing recessed housing is compatible with a 5/6-inch retrofit fixture.
- Remove the existing light bulb and trim from the recessed housing.
4.2. Step-by-Step Installation
- Screw in the Adapter: Carefully screw the pre-attached Edison screw base adapter into the existing socket of your recessed housing. Ensure it is securely tightened.
- Connect Wiring: The fixture comes with quick connectors. Ensure the wiring is properly connected to the adapter.
- Select Color Temperature: Before pushing the fixture into the ceiling, locate the color temperature selection switch on the side of the fixture. Choose your desired color temperature (2700K, 3000K, 3500K, 4000K, or 5000K).
- Secure the Fixture: Gently push the LED retrofit fixture up into the recessed housing. The torsion springs on the sides of the fixture will hold it securely in place.
- Restore Power: Once the fixture is securely installed, restore power at the circuit breaker or fuse box.
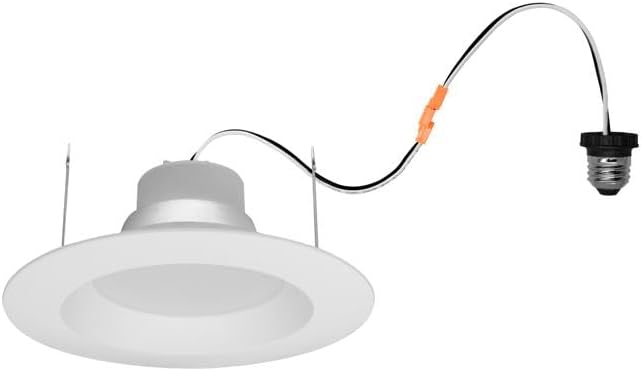
Image: A close-up view of the SYLVANIA TruWave LED Retrofit light, highlighting the integrated Edison screw base adapter ready for installation into a standard light socket.
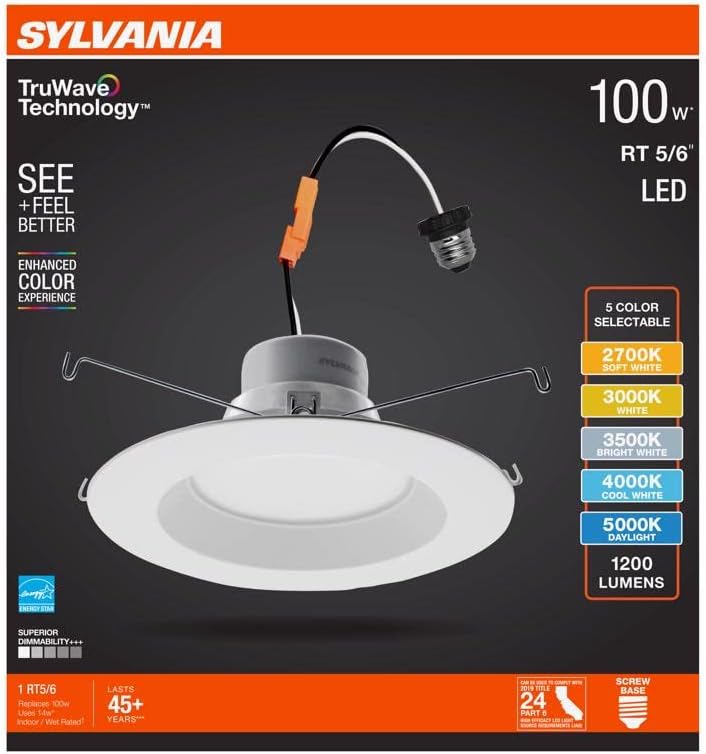
Image: The SYLVANIA TruWave LED Retrofit light viewed from the side, clearly showing the small switch used to select one of five different color temperature settings.
5. Operating Instructions
The SYLVANIA TruWave LED Retrofit Recessed Lighting operates like a standard light fixture once installed. Use your wall switch to turn the light on and off.
5.1. Color Temperature Selection
This fixture features a selectable color temperature switch, allowing you to choose from five different white light options:
- 2700K: Soft White
- 3000K: Warm White
- 3500K: Bright White
- 4000K: Cool White
- 5000K: Daylight
To change the color temperature, you must first turn off the power to the fixture, then carefully remove it from the housing to access the switch. Adjust the switch to your desired setting, then reinstall the fixture and restore power.
6. Maintenance
The SYLVANIA TruWave LED Retrofit Recessed Lighting is designed for long-lasting, maintenance-free operation.
- Cleaning: To clean the fixture, ensure power is off. Wipe the surface with a soft, dry, or slightly damp cloth. Do not use abrasive cleaners or solvents.
- LEDs: The LED light source is integrated and not user-replaceable. Do not attempt to open or service the LED module.
7. Troubleshooting
If you experience issues with your LED retrofit light, refer to the following table for common problems and solutions:
| Problem | Possible Cause | Solution |
|---|---|---|
| Light does not turn on. | No power to the fixture. Loose wiring connection. Faulty fixture. | Check circuit breaker/fuse. Ensure adapter is screwed in tightly and wiring is secure (power off). Contact customer support if other solutions fail. |
| Light flickers. | Incompatible dimmer switch. Loose connection. Voltage fluctuations. | Ensure dimmer is LED compatible. Check all connections (power off). Consult an electrician if voltage issues persist. |
| Incorrect color temperature. | Color temperature switch set incorrectly. | Turn off power, remove fixture, adjust color temperature switch to desired setting, then reinstall. |
8. Specifications
| Brand | SYLVANIA |
| Model | 40 |
| Wattage | 14 Watts |
| Brightness | 1200 Lumens |
| Efficiency | 85.71 lumens per watt |
| Voltage | 120 Volts (AC) |
| Light Source Type | LED |
| Material | Plastic |
| Product Dimensions | 8.39"L x 7.6"W x 3.54"H |
| Indoor/Outdoor Usage | Outdoor |
| Water Resistance Level | Water Resistant |
| Control Method | Push Button (for color selection) |
| Installation Type | Flush Mount |
| Fixture Type | Non Removable |
9. Warranty and Support
This SYLVANIA product comes with a manufacturer's warranty. Please refer to the product packaging or the official SYLVANIA website for specific warranty terms and conditions.
For technical support, troubleshooting assistance, or warranty claims, please contact SYLVANIA customer service through their official website or the contact information provided on your product packaging.


