
VANPO VP013
VANPO Digital Torque Screwdriver
User Manual
Product Overview
The VANPO Digital Torque Screwdriver is an advanced tool designed for precise torque applications, featuring a digital display, multiple measurement modes, and intelligent feedback systems. This manual provides detailed instructions for its setup, operation, and maintenance to ensure optimal performance and longevity.

Image: The VANPO Digital Torque Screwdriver set, including the main unit, various bits, and a protective carrying case.
Key Features:
- Data Storage: Features a preset mode and data storage function, offering 8 groups of preset data and 500 groups of stored data for frequently used settings.
- Mode Switch: Allows switching between TRACK mode (real-time value display) and PEAK mode (displays maximum applied torque).
- Multiple Measurement Units: Supports four measurement modes: kg.cm, N.m, in.lb, and ft.lb.
- Audible and Visual Indicators: Equipped with a buzzer and LED indicator. The LED turns green when approaching the target torque and red with a buzzer sound when the target torque is reached.
- High Accuracy: Torque range of 0.15-5Nm with an accuracy of ±2% clockwise and ±3% counter-clockwise.
- Included Bits: Comes with 10 long bits for various applications.
Setup
- Unboxing: Carefully remove all components from the packaging. Verify that all items listed in the product contents are present.
- Battery Installation: The device is battery-powered and includes alkaline batteries. Locate the battery compartment, typically at the base of the handle, and ensure batteries are correctly inserted according to polarity markings.
- Initial Power-On: Press and hold the power button (usually marked with a power symbol) to turn on the device. The digital display should illuminate.
- Bit Attachment: Select the appropriate bit for your task. Insert the bit firmly into the chuck of the screwdriver until it clicks into place.
Operating Instructions
1. Power On/Off
To power on, press and hold the power button. To power off, press and hold the power button again until the display turns off. The device may also have an auto-off feature after a period of inactivity.
2. Mode Selection (TRACK / PEAK)
Press the 'M' button to cycle between TRACK mode and PEAK mode.
- TRACK Mode: Displays the torque value in real-time as force is applied. This is useful for monitoring live torque.
- PEAK Mode: Captures and displays the maximum torque value applied during the operation. This is useful for verifying the highest torque achieved.

Image: Comparison of TRACK mode, which shows real-time torque, and PEAK mode, which holds the maximum torque value.
3. Unit Selection
Press the 'U' button to cycle through the available measurement units: kg.cm, N.m, in.lb, and ft.lb. Select the unit appropriate for your task.

Image: The screwdriver's display showing various torque units: N.m, in.lb, ft.lb, and kg.cm.
4. Setting Target Torque and Preset Modes
Use the 'Λ' (Up) and 'V' (Down) buttons to adjust the target torque value. The device supports 8 groups of preset values (P1-P8) and can store up to 500 groups of data.
- To access preset modes, press the 'C' button. Use 'Λ' and 'V' to navigate through P1-P8.
- To save a current setting as a preset, refer to the detailed instructions in the full manual (not provided in this summary).
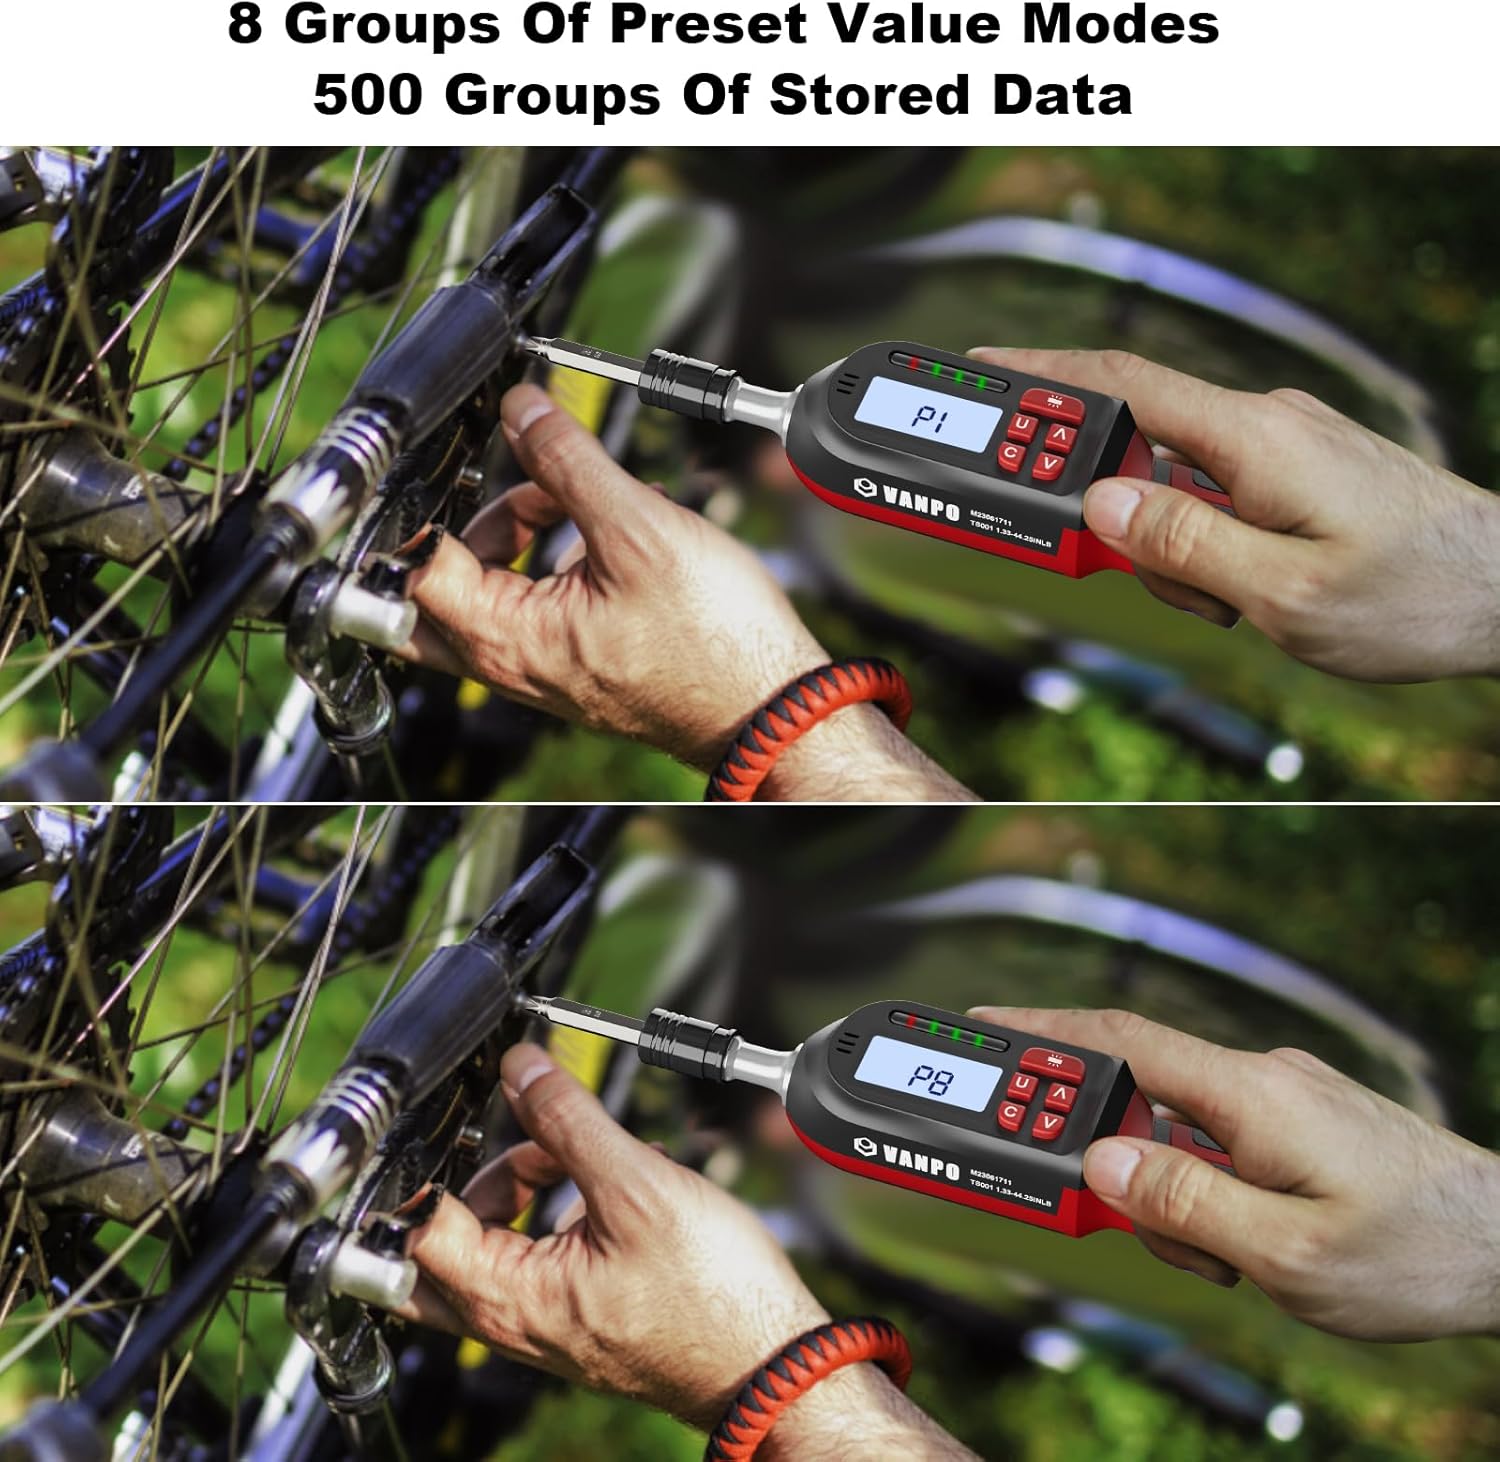
Image: The screwdriver's display indicating preset value modes, such as P1 and P8, for quick recall of common torque settings.
5. Applying Torque and Indicator Feedback
Apply torque to the fastener. As you approach the preset target torque value, the LED indicator will light up green. Once the target torque value is reached, the LED will turn red, and the buzzer will sound, indicating that the desired torque has been achieved.
Important: The loading torque should not exceed 120% of the maximum torque value to prevent damage to the tool.
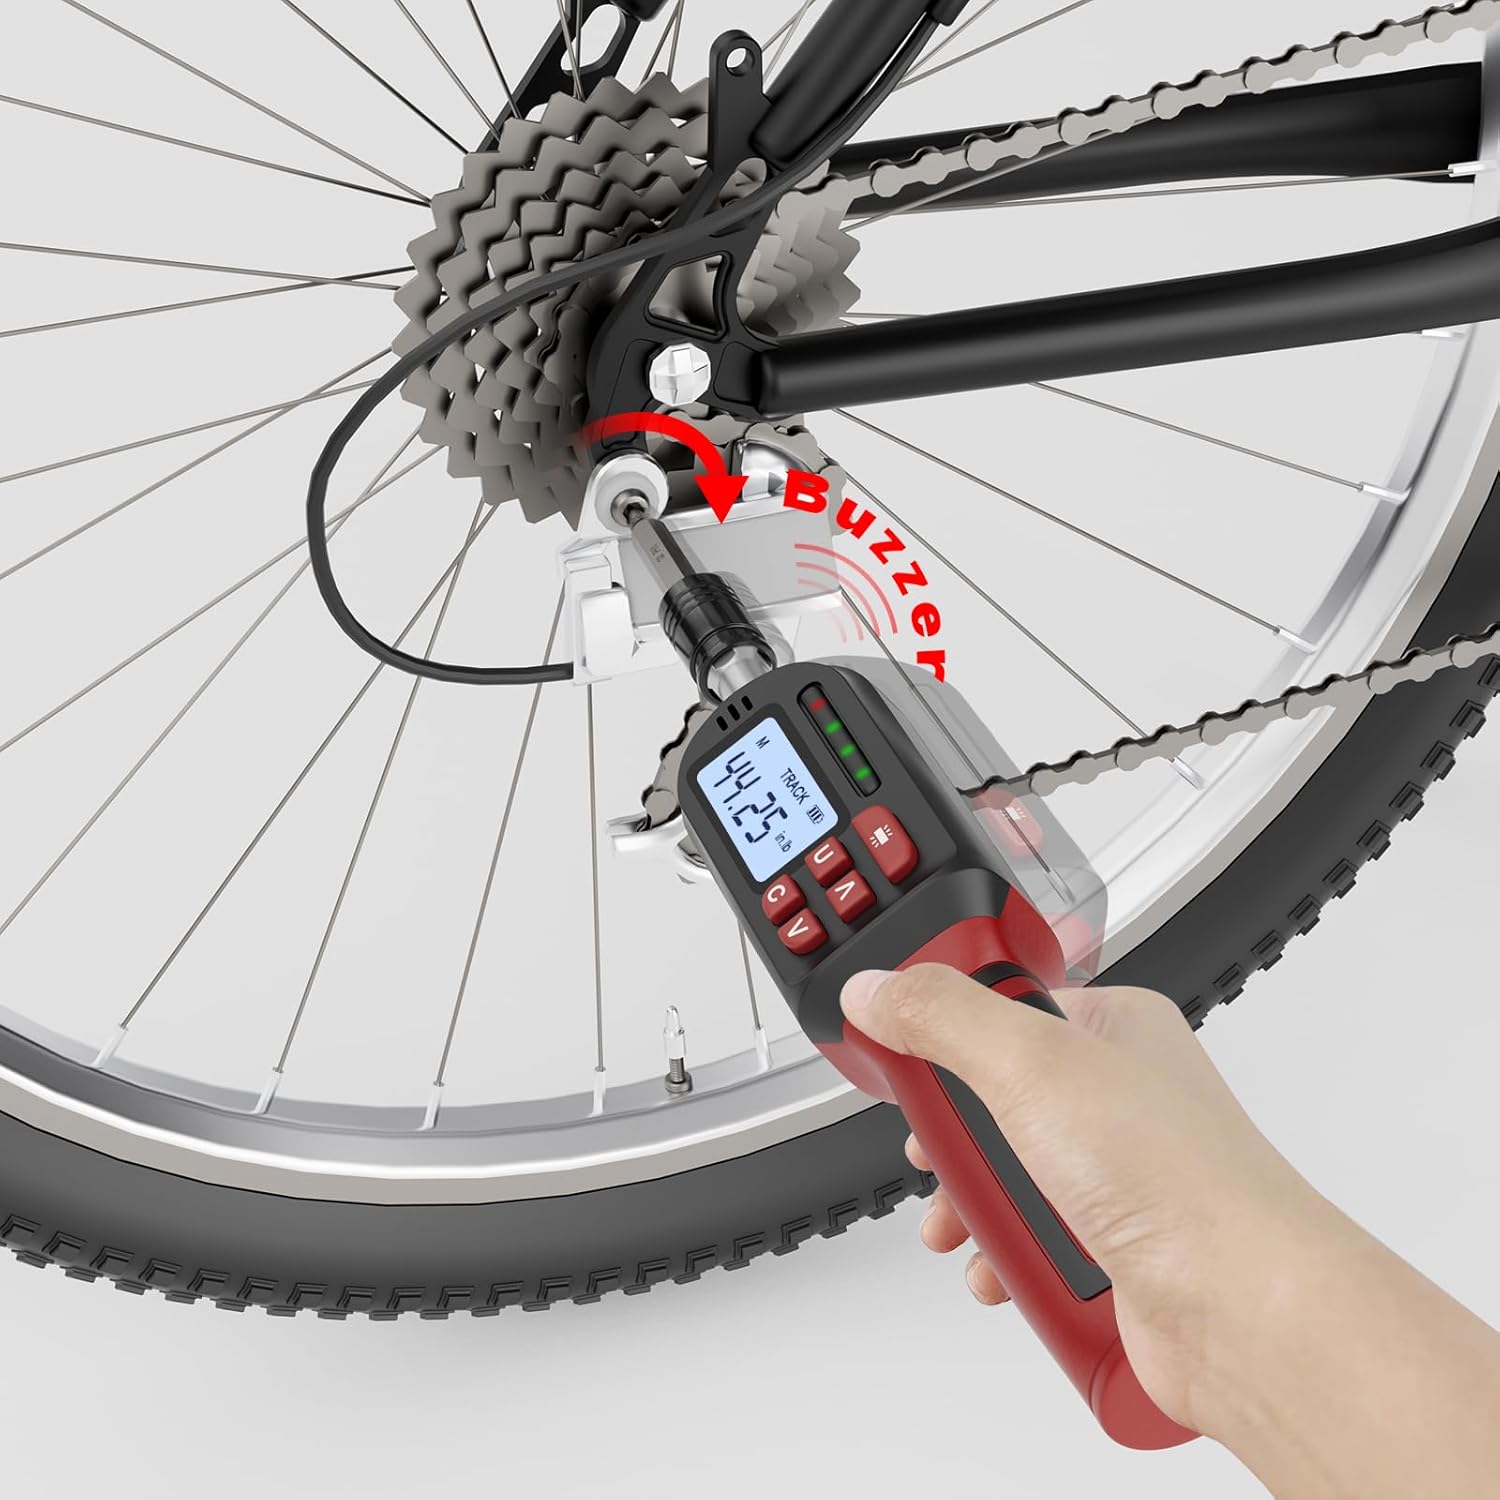
Image: The digital torque screwdriver in action, showing the LED indicator turning red and the buzzer activating upon reaching the target torque.

Image: Visual representation of the screwdriver's accuracy: ±2% clockwise (CW) and ±3% counter-clockwise (CCW).

Image: Collage showing the versatility of the digital torque screwdriver in various applications, including bicycle repair, precision instrument work, and automotive maintenance.
Maintenance
- Cleaning: Wipe the screwdriver with a clean, dry, or slightly damp cloth after each use. Do not use abrasive cleaners or solvents. Ensure no liquids enter the electronic components.
- Storage: Store the device in its protective case in a dry, cool place, away from direct sunlight and extreme temperatures. Remove batteries if storing for extended periods to prevent leakage.
- Battery Replacement: When the battery indicator shows low power, replace the alkaline batteries promptly to ensure accurate readings and proper operation.
- Calibration: While the device is factory calibrated, professional recalibration may be required periodically, especially after heavy use or if accuracy is suspected to be compromised. Consult a qualified service center for calibration services.
Troubleshooting
| Problem | Possible Cause | Solution |
|---|---|---|
| Device does not power on. | Low or dead batteries; incorrect battery installation. | Replace batteries with new ones. Check battery polarity. |
| Inaccurate torque readings. | Device needs recalibration; improper usage; damaged bit. | Ensure proper technique. Replace worn bits. Consider professional recalibration. |
| Buzzer/LED not working. | Settings issue; internal malfunction. | Check device settings. If problem persists, contact customer support. |
| Display shows error code. | Specific internal error. | Refer to the full product manual for specific error code meanings, or contact customer support. |
Specifications
| Feature | Detail |
|---|---|
| Brand | VANPO |
| Model Number | VP013 |
| Torque Range | 0.15-5 Nm (1.33-44.25 in.lb) |
| Accuracy | ±2% Clockwise, ±3% Counter-clockwise |
| Measurement Units | kg.cm, N.m, in.lb, ft.lb |
| Product Dimensions | 33 x 12 x 6 cm |
| Weight | 948 g |
| Material | Stainless Steel |
| Power Source | Battery-Powered (Alkaline) |
| Special Features | Preset Mode, Data Storage (8 groups preset, 500 groups stored) |
| Included Components | Digital Torque Screwdriver, 10 long bits |
Warranty and Support
For warranty information and customer support, please refer to the documentation included with your purchase or visit the official VANPO website. Keep your proof of purchase for any warranty claims.
If you encounter any issues not covered in this manual or require further assistance, please contact VANPO customer service.
Ask a question about this manual
Ask about setup, troubleshooting, compatibility, parts, safety, or missing instructions. Manuals+ will review the question and use this page’s manual context to help answer it.