
Adviace S853544
Adviace 4-Burner Grill Repair Kit Instruction Manual
Model: S853544
Brand: Adviace
1. Introduction
Thank you for choosing the Adviace 4-Burner Grill Repair Kit. This kit is designed to replace worn-out or rusted components in your Charbroil grill, restoring its performance and extending its lifespan. By replacing key parts such as burners, heat tents, and igniters, you can ensure efficient and safe grilling.
This manual provides detailed instructions for the installation, maintenance, and troubleshooting of your new grill repair parts. Please read it thoroughly before beginning the installation process.

Image 1.1: Compatible Charbroil Grill Models. This kit is designed to fit a range of Charbroil Performance series grills, including 2-burner, 3-burner, 4-burner, 5-burner, and 6-burner models. Please verify your grill's model number against the compatibility list provided in the product description.
2. Safety Information
Always prioritize safety when working with gas grills and their components. Failure to follow these safety guidelines could result in property damage, injury, or death.
- Ensure the grill is completely cool and disconnected from its gas supply (propane tank or natural gas line) before beginning any repair or maintenance.
- Wear appropriate personal protective equipment, such as gloves, to protect your hands from sharp edges and grease.
- Perform all work in a well-ventilated area.
- Keep children and pets away from the work area.
- After installation, always perform a leak test on all gas connections before lighting the grill. Refer to your grill's original manual for proper leak testing procedures.
- Do not operate the grill if you smell gas. Immediately turn off the gas supply and ventilate the area.
3. Package Contents
Your Adviace 4-Burner Grill Repair Kit includes the following components:
- 4 x Stainless Steel Grill Burners (Original part number: G327-2100-W1)
- 4 x Stainless Steel Heat Plates / Heat Tents (Original part number: G325-0002-W1)
- 3 x Stainless Steel Crossover Tubes (Adjustable from 5" - 9.5")
- 2 x Grill Igniters

Image 3.1: Complete Adviace 4-Burner Grill Repair Kit. This image displays all the components included in your repair kit: four burners, four heat tents, three crossover tubes, and two igniters.
4. Setup and Installation
Follow these steps to install the new repair parts into your Charbroil grill. It is recommended to refer to your grill's original manual for specific disassembly instructions if needed.
4.1. Preparation
- Ensure the grill is completely cool.
- Disconnect the gas supply (propane tank or natural gas line).
- Open the grill lid and remove the cooking grates and heat diffusers (if applicable).
- Carefully remove the old heat tents and burners. Note how they are positioned for reassembly.
- Clean any debris, grease, or rust from the grill's firebox before installing new parts.
4.2. Installing Burners
- Align the new stainless steel burners with the gas valve orifices at the back of the firebox.
- Gently push each burner onto its respective orifice. Ensure a snug fit.
- Secure the front end of each burner to the grill's support bracket, typically with a pin or screw (re-use existing hardware if necessary, or use provided if applicable).

Image 4.1: Burner Features and Connection. This image highlights the high hardness stainless steel construction, strong rust-resistance, corrosion-resistance, and sturdy/durable design of the burners. It also shows the connection point for the igniter.
4.3. Installing Crossover Tubes
- Place the crossover tubes between the burners, connecting them to allow flame propagation.
- These tubes are adjustable; extend or retract them as needed to fit snugly between the burner ports.
4.4. Installing Heat Tents (Flame Tamers)
- Position the new heat tents directly over each burner.
- Ensure the heat tents rest securely on the designated support ledges within the grill firebox.

Image 4.2: Installed Components. This image shows the burners and heat tents correctly installed within the grill's firebox, demonstrating a perfect fit.
4.5. Connecting Igniters
- Attach the new igniters to the designated mounting points near the burners.
- Connect the igniter wires to the grill's ignition module. Ensure connections are secure.

Image 4.3: Igniter Installation. This image illustrates the easy installation of the igniters without screws, and highlights the 39.5-inch long braided cable for flexible routing.
4.6. Installation Video Guide
For a visual guide on the installation process, please watch the official product video below:
Video 4.1: Adviace Grill Repair Kit Installation Guide. This video demonstrates the step-by-step process of installing the burners, crossover tubes, heat tents, and igniters into a Charbroil grill, ensuring a smooth and correct setup.
4.7. Final Assembly
- Once all new components are installed, replace the heat diffusers and cooking grates.
- Close the grill lid.
5. Post-Installation Check
After installing the new parts, perform these checks before regular use:
- Leak Test: Reconnect the gas supply. Apply a soapy water solution to all gas connections. If bubbles appear, there is a leak. Tighten connections or replace faulty parts as necessary. Do not proceed until all leaks are resolved.
- Ignition Test: With the lid open, turn on one burner control knob to the 'HIGH' position and press the igniter button. The burner should light within a few seconds. Repeat for all burners.
- Flame Appearance: Observe the flame. It should be predominantly blue with minimal yellow or orange tips, indicating proper combustion.
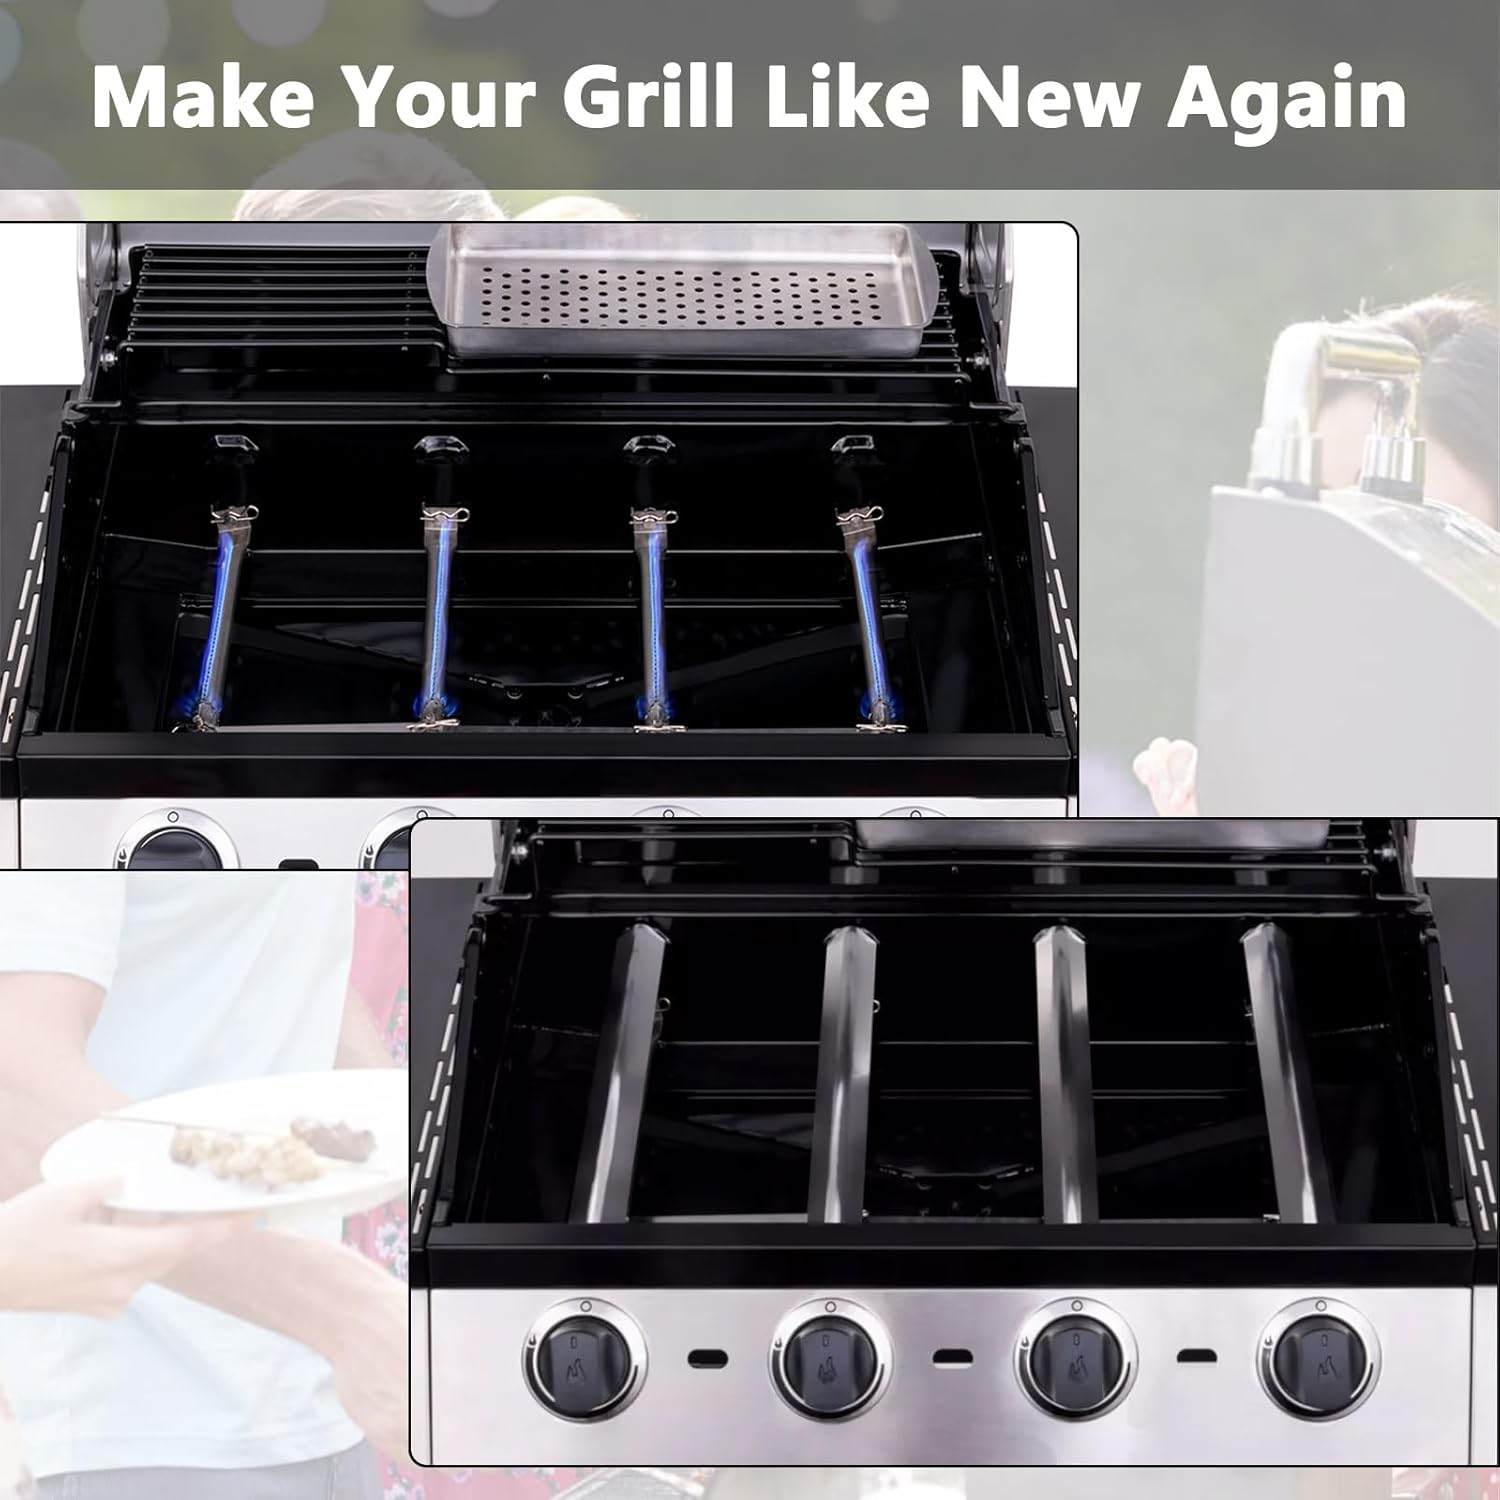
Image 5.1: Grill Operating with New Parts. This image shows the grill with its burners lit, demonstrating how the new repair kit components help make your grill perform like new again.
6. Maintenance
Regular maintenance will ensure the longevity and optimal performance of your new grill parts.
- Cleaning Burners: Periodically inspect burner ports for blockages. Use a wire brush or a stiff wire to clear any debris. Ensure gas orifices are clear.
- Cleaning Heat Tents: Scrape off any accumulated grease or food residue from the heat tents using a grill brush or scraper. For stubborn residue, remove and wash with warm soapy water.
- General Cleaning: Keep the grill firebox clean to prevent grease fires and maintain airflow.
- Storage: If storing the grill for an extended period, ensure all components are clean and dry. Consider covering the grill to protect it from the elements.

Image 6.1: Premium Stainless Steel Quality. The heat tents are made from premium quality stainless steel, offering rustproof, anti-corrosion, heat-resistant, and easy-to-clean properties, which contribute to their durability and ease of maintenance.
7. Troubleshooting
| Problem | Possible Cause | Solution |
|---|---|---|
| Burner not lighting | No gas flow; clogged burner ports; faulty igniter; loose igniter wire. | Check gas supply; clear burner ports; check igniter spark; secure igniter wire connections. |
| Uneven heat distribution | Clogged burner ports; misaligned heat tents; worn-out crossover tubes. | Clean burner ports; ensure heat tents are properly seated; check crossover tubes for damage. |
| Yellow or orange flames | Improper air-to-gas mixture; clogged burner ports. | Clean burner ports; consult grill's original manual for air shutter adjustments if applicable. |
If you encounter issues not listed here or if the solutions do not resolve the problem, please contact Adviace customer support.
8. Specifications
- Product Dimensions: 15 x 2 x 2 inches (approximate, for individual components)
- Item Weight: 2.64 pounds (total kit)
- Manufacturer: Adviace
- Item Model Number: S853544
- Burner Material: Stainless Steel (Original part number: G327-2100-W1)
- Heat Plate Material: Stainless Steel (Original part number: G325-0002-W1)
- Crossover Tube Dimensions: Adjustable, extends from 5" - 9.5"
- Crossover Tube Material: Stainless Steel
9. Warranty and Support
Adviace stands behind the quality of its products. For any questions, concerns, or warranty claims regarding your grill repair kit, please contact Adviace customer support through the retailer where you purchased the product or visit the official Adviace store online.
For additional resources and product information, you may visit the Adviace Store on Amazon.
Ask a question about this manual
Ask about setup, troubleshooting, compatibility, parts, safety, or missing instructions. Manuals+ will review the question and use this page’s manual context to help answer it.