
Introduction
This manual provides detailed instructions for the DWEII DC 3V-5V FM Transmitter Module. This module utilizes advanced digital audio signal processing (DSP) technology and FM modulation phase-locked loop (PLL) to deliver stable and high-quality audio transmission. It features an LCD display for intuitive operation and supports multiple audio input methods, including Line, USB, and Microphone.
Safety Precautions
For safe and optimal use, please follow these precautions:
- Use quality power sources (DC 3.0V-5.0V) and ensure correct polarity. Avoid unfiltered power supplies, such as low-quality phone chargers, as they can cause interference.
- Keep the device away from other wireless transmitters to minimize signal interference.
- Avoid exposing the module to extreme temperatures, high humidity, or direct contact with liquids.
- Do not touch the back part of the module when it is operating to prevent short circuits or burns.
Product Overview
The DWEII FM Transmitter Module is a compact and versatile device designed for various audio transmission applications. It integrates several key features for enhanced performance and user convenience.
Key Features:
- PLL Digital Phase Lock for stable frequency.
- 16-level Digital Volume Control.
- Wide Frequency Range: 87.0-108.0 MHz (configurable to 76.0-108.0 MHz).
- LCD Screen for clear display of frequency and settings.
- USB Computer Audio Broadcasting capability.
- Digital Regulator and Digital Noise Reduction for improved audio quality.
- Approaching CD-quality sound.
- Power-off memory for frequency and volume settings.
- On-board 2X3W stereo audio amplifier chip.
Module Components:

Image Description: This image displays the DWEII FM Transmitter Module, highlighting its various connection points and components. Key labels include Power 3-5V (Power + and Power -), USB audio input, MIC input, LINE input, and ANT (antenna) port. It also shows the 'M' and 'G' solder points for stereo/mono configuration.

Image Description: A top-down view of the DWEII FM Transmitter Module, showing its compact size with dimensions of 25.8mm/1.01in (width of LCD section) and 16.6mm/0.65in (height of LCD section). The LCD screen clearly displays '87.5 MHz'. The overall module dimensions are approximately 26.6mm/1.04in by 49.2mm/1.93in.
Setup
1. Power Supply Connection
Connect the module's "-" and "+" ports to the negative and positive terminals of your DC 3.0V-5.0V power source, respectively. A battery or a stabilized power supply is recommended. Ensure the voltage does not exceed 5.0V.
2. Antenna Connection
Connect an FM antenna to the ANT port. For optimal signal transmission, it is recommended to use a bar antenna approximately 75 cm in length. Position the antenna as far as possible from obstructions.
3. Initial Frequency Range Setting (Optional)
By default, the module operates in the 87-108 MHz frequency range. To enable the wider 76-108 MHz range (including campus broadcast frequencies), perform the following:
- Ensure the module is powered off.
- Press and hold both the VOL+ and VOL- buttons simultaneously.
- While holding the buttons, connect the power supply to the module.
- The LCD will display "C1" to indicate campus broadcast mode is enabled, or "C0" if disabled. Release the buttons. The setting takes effect after a restart.
Operating Instructions
Button Functions:
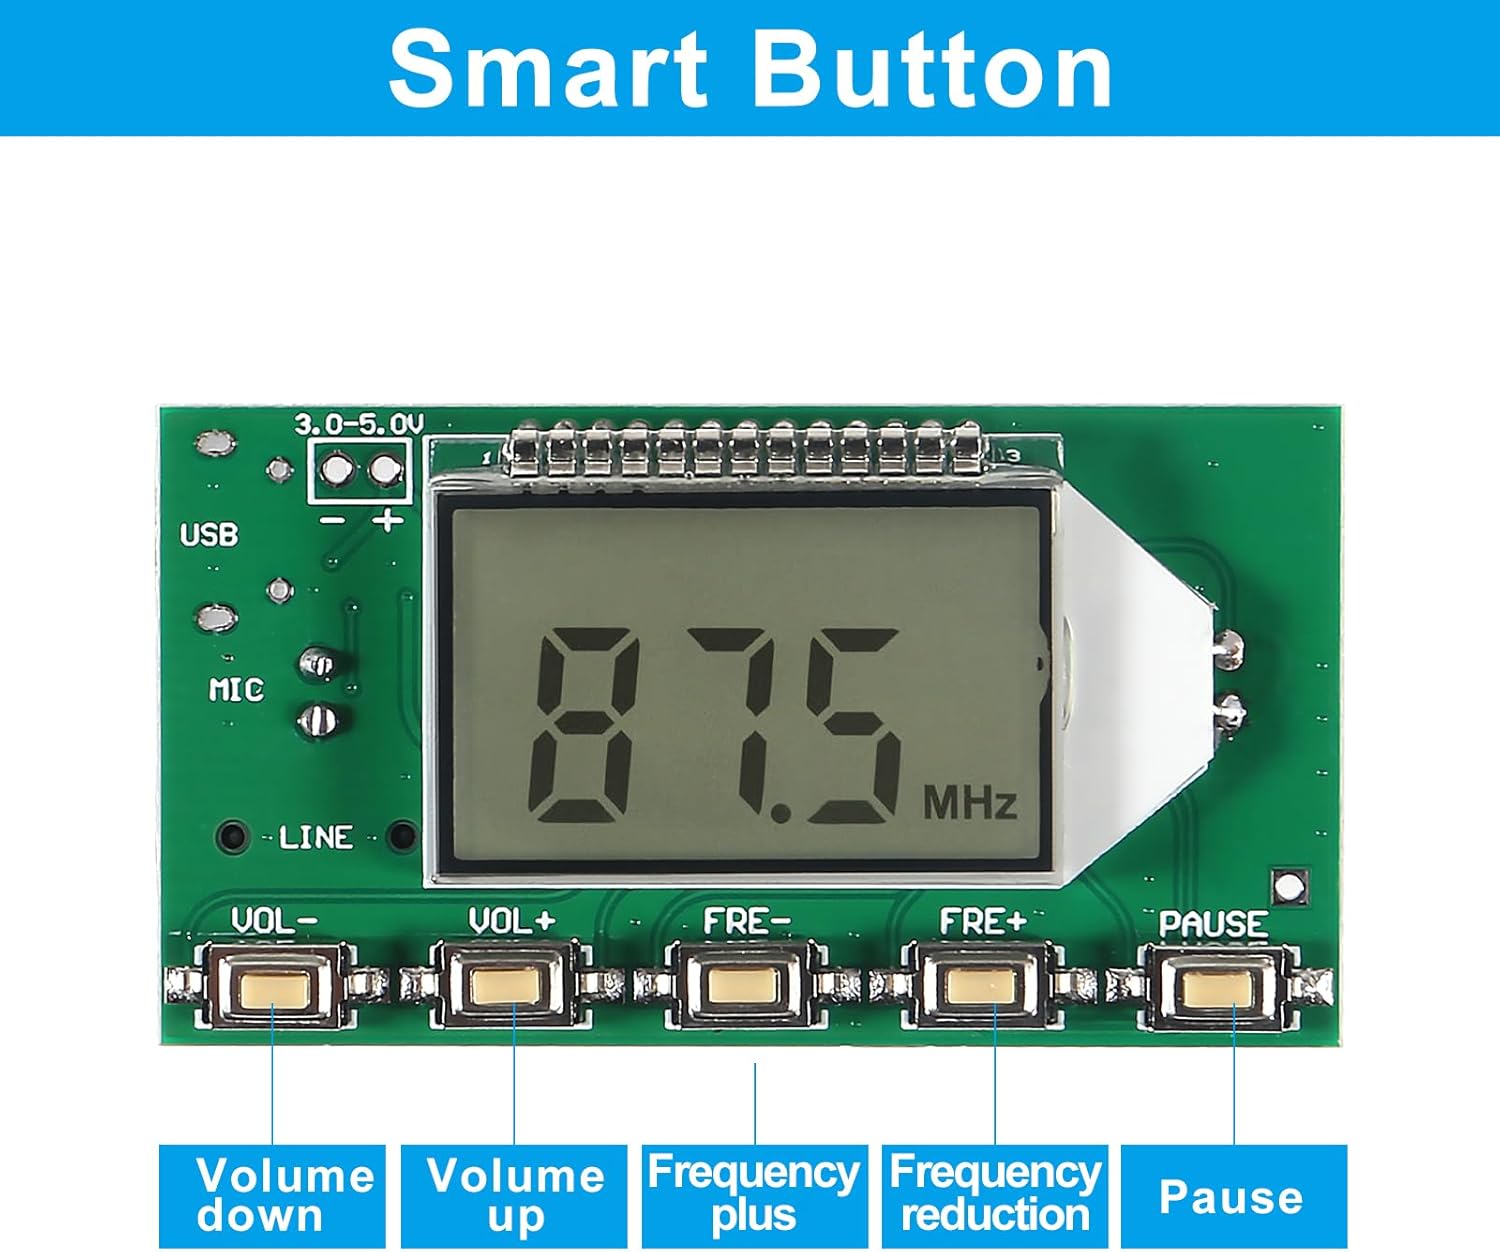
Image Description: This image provides a detailed view of the control buttons on the DWEII FM Transmitter Module. From left to right, the buttons are labeled: 'VOL -' (Volume down), 'VOL +' (Volume up), 'FRE -' (Frequency reduction), 'FRE +' (Frequency plus), and 'PAUSE'.
- Volume +/-: Short press to adjust volume by 1 level. Long press for continuous adjustment.
- Frequency +/-: Short press to adjust frequency by 0.1 MHz. Long press for continuous adjustment by 1.0 MHz.
- Mute (PAUSE button): Short press to toggle mute/unmute.
Audio Input Modes:
1. USB Audio Connection (PC Broadcast)
To use the module for USB audio broadcasting, connect the module to your computer using a USB cable. The USB port also supplies power to the module. Once connected, the module will automatically enter PC audio broadcast mode, and the LCD will display "PC". Your computer will install the necessary driver, recognizing the module as a sound card device named "CD002". Enable "CD002" in your computer's audio settings. Any audio played on your computer will then be transmitted via FM.
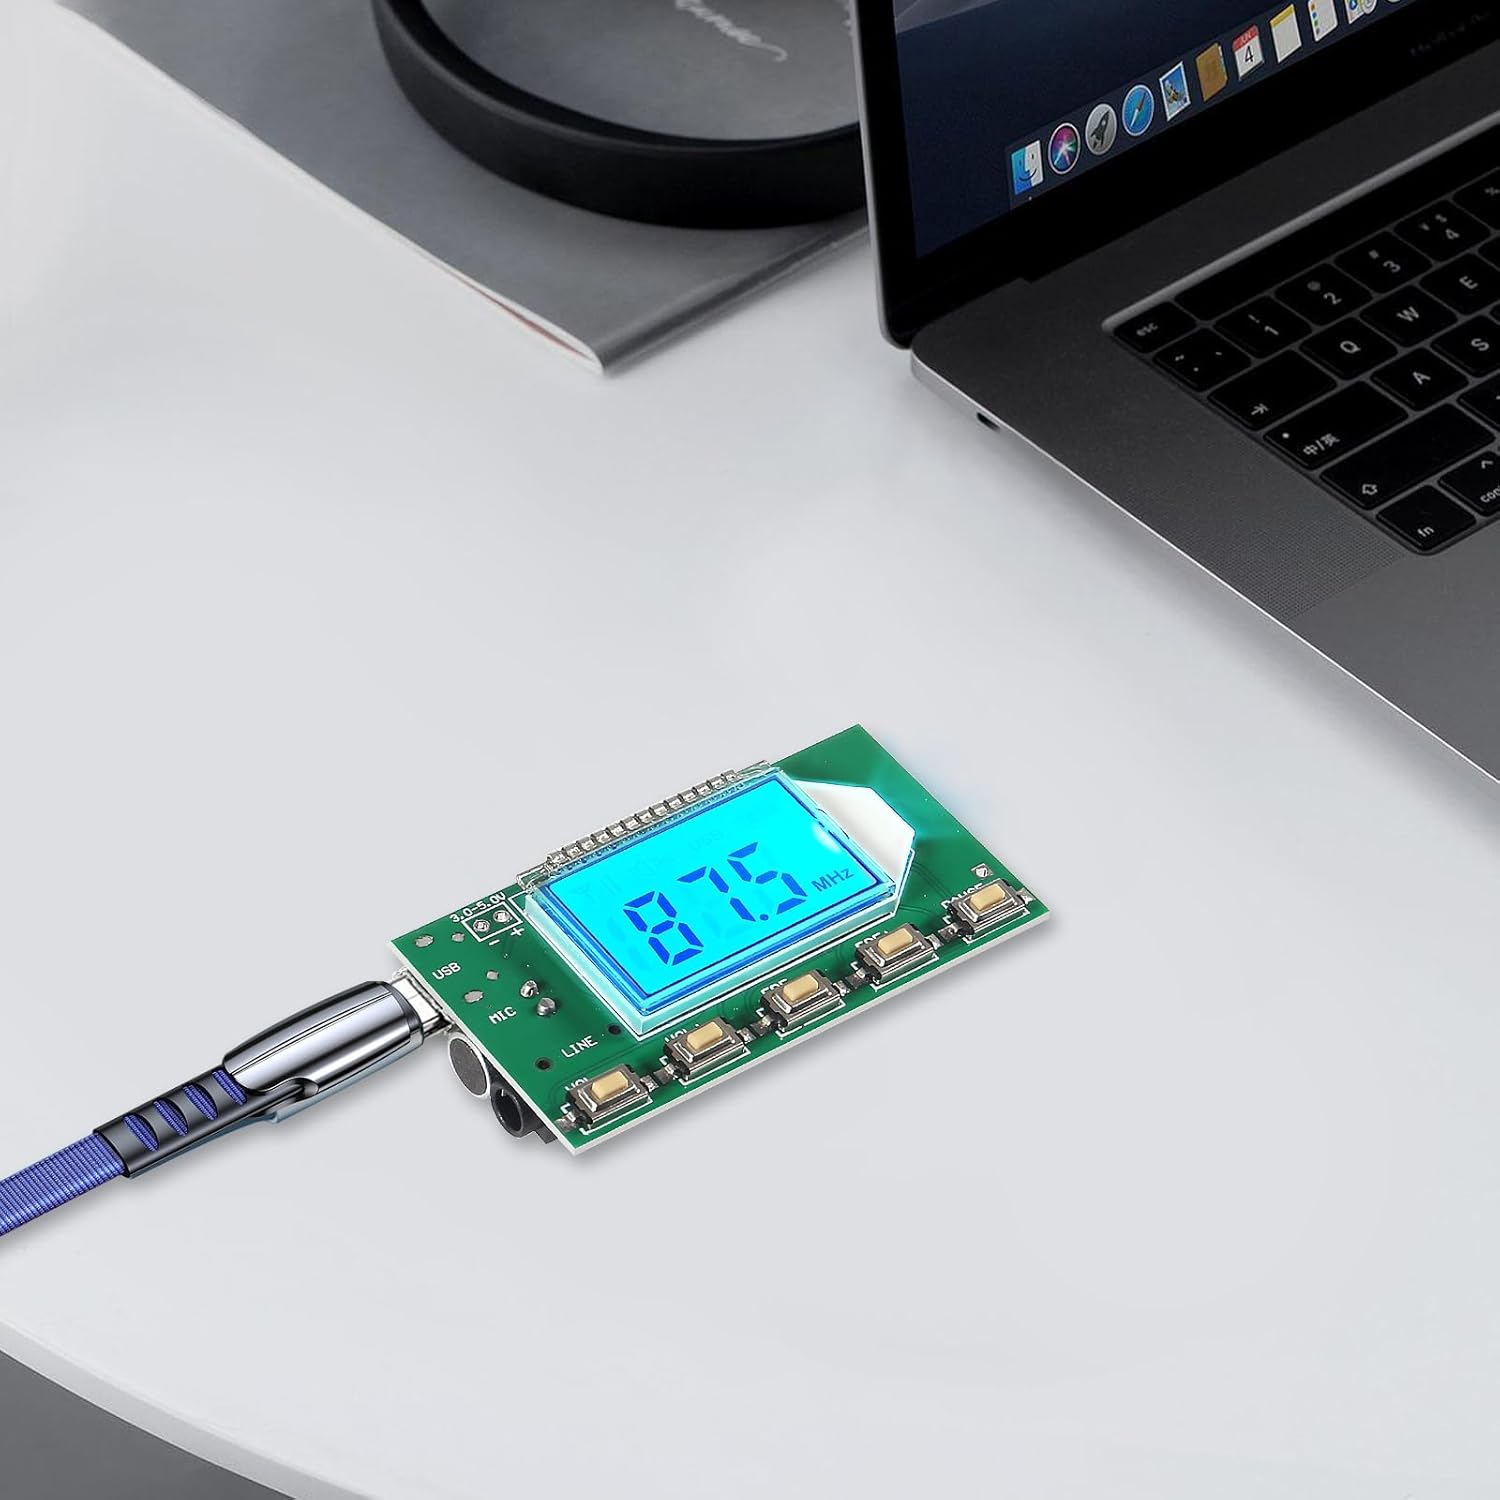
Image Description: The DWEII FM Transmitter Module is shown connected to a laptop via a USB cable, illustrating its use for PC audio broadcasting. The module's LCD screen displays '87.5 MHz', indicating an active FM transmission frequency.
2. LINE Audio Connection
To use the LINE input, insert one end of a 3.5mm audio cable into the module's LINE jack and the other end into your audio device (e.g., mobile phone headphone jack). The module will automatically switch to LINE input as the FM audio source. Tune a nearby FM radio to the module's frequency to hear the audio.
3. FM Wireless Microphone
To use the built-in microphone, ensure both the LINE and USB cables are disconnected. The module will automatically switch to the MIC channel as the FM transmitting audio source. This mode is suitable for wireless microphone applications or monitoring. Adjust the module's volume to achieve optimal sound pickup.

Image Description: This image demonstrates potential applications of the DWEII FM Transmitter Module. It shows the module alongside a vintage radio and a modern studio microphone, suggesting its use for FM wireless audio broadcasting and as a wireless microphone.
Serial Port Control (Advanced Users)
The module includes a TTL level serial port control interface (UART_RX, UART_TX, GND). This allows for external MCU or computer serial port control. This feature requires specific computer expertise and is not recommended for general users without prior knowledge of serial communication.
User-Defined Settings
1. Backlight LED Mode
To change the backlight behavior:
- Ensure the module is powered off.
- Press and hold both the FRE- and FRE+ buttons simultaneously.
- While holding the buttons, connect the power supply.
- The LCD will display "B1" for always-on backlight or "B0" for backlight off after 20 seconds (factory default). Release the buttons. The setting takes effect after a restart.
2. Campus Radio Frequency Band
To enable or disable the campus radio frequency band (76.0MHz-87.0MHz):
- Ensure the module is powered off.
- Press and hold both the VOL+ and VOL- buttons simultaneously.
- While holding the buttons, connect the power supply.
- The LCD will display "C1" to enable or "C0" to disable (factory default). Release the buttons. The setting takes effect after a restart.
3. Stereo/Mono Transmission Mode
The module supports both stereo and mono transmission. This setting is configured via two solder joints labeled 'M' and 'G' on the back of the module:
- Short connecting 'M' and 'G': Configures the module for monophonic transmission.
- Disconnecting 'M' and 'G' (factory default): Configures the module for stereo transmission.
Note: For a true stereo effect, both the audio source input to the module and the receiving radio must be stereo capable. If using a single speaker (monophonic) radio or a mono audio input, the stereo effect will not be achieved.
Specifications
| Parameter | Value |
|---|---|
| Power Supply Voltage | DC 3.0V - 5.0V |
| Output Power | 100mW |
| Operating Current | 35mA |
| Equivalent Noise | >=30dB |
| Modulation Mode | Standard FM |
| Adaptive Antenna | 75 cm bar antenna (recommended) |
| Transmission Frequency | 88.0~108.0 MHz (default), 76.0~108.0 MHz (configurable) |
| Frequency Response Range | 50~18 KHz |
| Sound Track | LINE/USB channel (stereo); MIC channel (single channel) |
| Frequency Adjustment Stepping | 0.1 MHz (short press), 1.0 MHz (long press) |
| Package Dimensions | 3.11 x 2.32 x 0.67 inches |
| Item Weight | 0.634 ounces |
Troubleshooting
- Interference/Noise: Ensure a stable and filtered DC power supply. Keep the module away from other electronic devices that may emit electromagnetic interference.
- Poor Transmission Range: Verify the antenna is properly connected and is approximately 75 cm in length. Ensure there are no major obstructions between the transmitter and receiver.
- No Audio Output: Check that the correct audio input mode (USB, LINE, or MIC) is active. Ensure the volume is not muted and is set to an audible level.
- No Stereo Effect: Confirm that the module is configured for stereo transmission (M and G solder points disconnected) and that both your audio source and receiving radio are stereo capable.
- Frequency Offset: Some users have reported minor frequency offsets. While not user-adjustable, ensure your receiving radio is fine-tuned to the module's exact output frequency.
Maintenance
The DWEII FM Transmitter Module requires minimal maintenance. Keep the module clean and free from dust. Use a soft, dry cloth for cleaning. Avoid using harsh chemicals or abrasive materials. Store the module in a dry environment away from extreme temperatures when not in use.
Warranty and Support
For warranty information and technical support, please refer to the retailer or manufacturer's official website where the product was purchased. Keep your purchase receipt as proof of purchase for any warranty claims.