
1. Introduction
This instruction manual provides detailed guidance for the installation and maintenance of your Adviace Repair Kit for Charbroil 5-Burner Grills. This kit is designed to replace worn or rusted components, restoring your grill's performance. Please read all instructions carefully before beginning installation.
2. Safety Information
- Always ensure the grill is completely cool and disconnected from its fuel source (propane tank or natural gas line) before performing any maintenance or installation.
- Wear appropriate safety gear, such as gloves, to protect your hands from sharp edges or debris.
- Keep children and pets away from the work area during installation.
- After installation, perform a leak test on all gas connections before operating the grill. Refer to your grill's original manual for leak testing procedures.
3. Package Contents
Your Adviace Repair Kit for Charbroil 5-Burner Grills includes the following components:
- 5 x Stainless Steel Grill Burners (Original parts number: G327-2100-W1)
- 5 x Stainless Steel Heat Tents (Original parts number: G325-0002-W1)
- 4 x Stainless Steel Crossover Tubes (Adjustable length: 5" - 9.5")
- 2 x Grill Igniters

Image 3.1: Overview of the Adviace Repair Kit components.
4. Compatibility
This repair kit is compatible with various Charbroil Performance grill models. Please verify your grill model number against the list below:
For Charbroil Performance 5-Burner Grills:
- 463448021
- 463449021
- 463455021
- 463466522
- 463451022
- 463450022
- 463459021
- 463458021
- 463456022
- 463468021
- 463468421
- 463465022
- 463468221
Also compatible with some Charbroil Performance 2, 3, 4, and 6-Burner Grills:
- 2-Burner: 463655421, 463655621, 463655021, 463654022
- 3-Burner: 463732623, 463732823
- 4-Burner: 463365021, 463331221, 463366022, 463351021, 463350722, 463354021, 463330521, 463352521, 463341421, 463351221, 463331021, 463331422, 463341021, 463353021, 463351521, 463344523, 463341221, 463345022
- 6-Burner: 463229521, 463229021, 463284022, 463228622, 463284422, 463259223

Image 4.1: Examples of compatible Charbroil grill models.
5. Installation Instructions
Follow these steps to replace the components of your Charbroil grill. It is recommended to replace all components in the kit for optimal performance.
5.1. Removing Old Components
- Ensure the grill is cool and disconnected from the gas supply.
- Open the grill lid and remove the cooking grates and heat tents.
- Carefully detach the old burners and crossover tubes. Note how they are connected to the gas valves and secured at the back of the firebox.
- Disconnect any old igniter wires from the igniter electrodes on the burners.
5.2. Installing New Burners and Crossover Tubes
- Insert the new stainless steel burners into the gas valve openings at the front of the firebox. Ensure the burner tube slides fully onto the valve.
- Secure the rear end of each burner to the back wall of the firebox using the provided clips or existing hardware, if applicable.
- Connect the crossover tubes between adjacent burners. These tubes are adjustable to fit various burner spacings.

Image 5.2.1: Detail of the stainless steel burner construction.

Image 5.2.2: Igniter and crossover tube details.
5.3. Installing New Igniters
- Attach the new igniter electrodes to the designated mounting points on the burners.
- Route the igniter wires to the igniter module, ensuring they are securely connected. The wires are 39.5 inches long, providing ample length for connection.
5.4. Installing New Heat Tents
- Place the new stainless steel heat tents over the installed burners. Ensure they sit properly on their supports, covering the burners.

Image 5.4.1: Detail of the stainless steel heat tent material.
5.5. Final Assembly
- Replace the cooking grates.
- Reconnect the grill to its gas supply.
- Perform a leak test on all gas connections.
- Test the igniters and burners to ensure proper operation.

Image 5.5.1: Grill interior with new components installed.
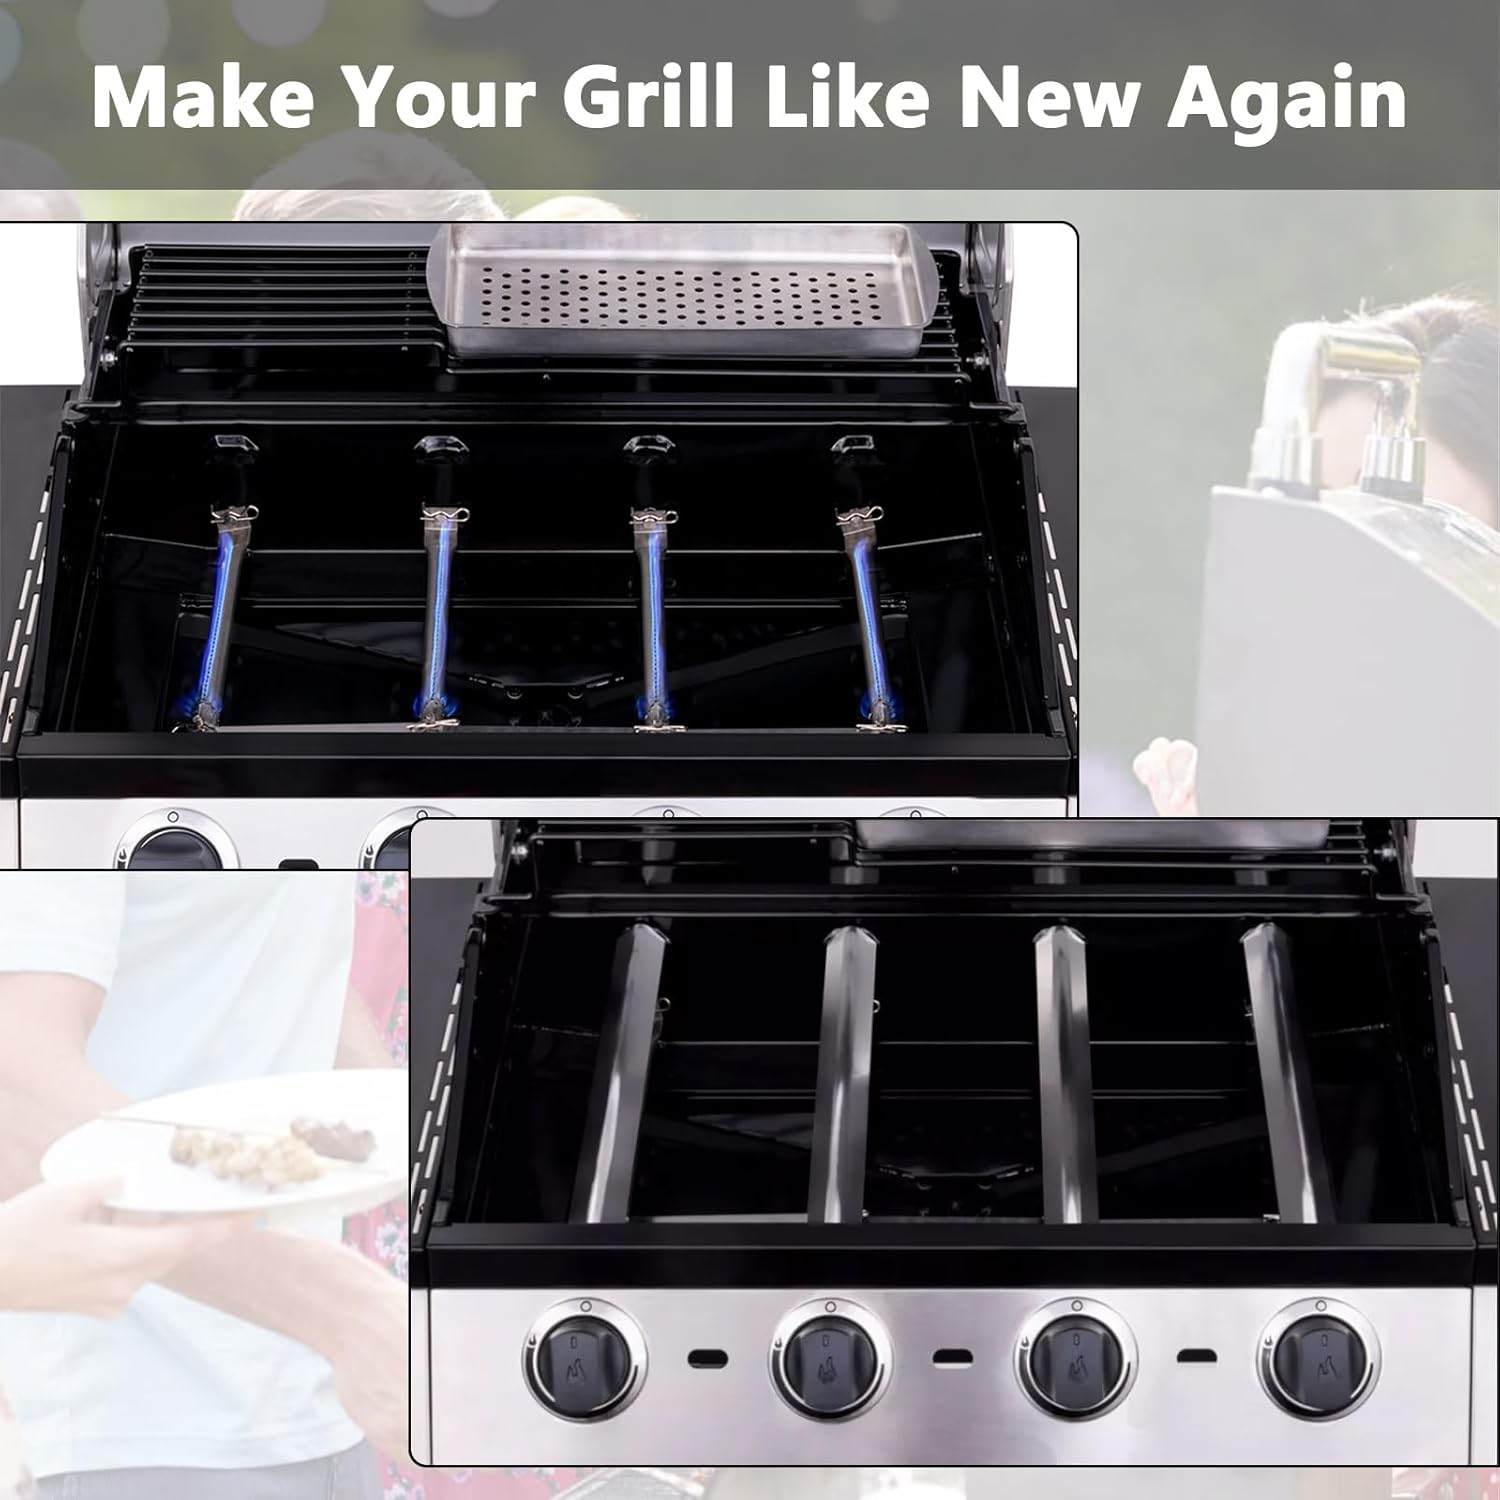
Image 5.5.2: Visual comparison of old versus new grill components.
5.6. Installation Video Guide
For a visual guide on installing the repair kit components, please watch the video below:
Video 5.6.1: Detailed installation steps for the Adviace grill repair kit, demonstrating how to replace burners, crossover tubes, and heat tents.
6. Operating Instructions (Post-Installation)
After successfully installing the repair kit and performing a leak test, your grill should operate as intended. Refer to your original grill manufacturer's manual for specific operating instructions, including lighting procedures and temperature control.
- Lighting the Grill: Ensure the lid is open. Turn on the gas supply. Turn one burner control knob to HIGH. Press the igniter button until the burner lights. Once lit, turn on adjacent burners.
- Preheating: Close the lid and allow the grill to preheat for 10-15 minutes on medium-high heat.
- Temperature Control: Adjust burner control knobs to achieve desired cooking temperatures.
7. Maintenance
Regular maintenance of your grill components will extend their lifespan and ensure safe operation.
- Cleaning Burners: Periodically inspect burner ports for blockages. Use a wire brush or a stiff wire to clear any debris.
- Cleaning Heat Tents: Scrape off any accumulated grease or food residue from the heat tents. They can be washed with warm, soapy water.
- General Cleaning: Keep the firebox clean of excessive grease buildup to prevent flare-ups.
- Inspection: Regularly check gas connections for leaks and inspect all components for signs of wear or damage.
8. Troubleshooting
If you encounter issues after installing the repair kit, consider the following common problems and solutions:
- Burner Not Lighting:
- Check gas supply: Ensure the propane tank valve is fully open or natural gas line is active.
- Igniter connection: Verify igniter wires are securely connected to both the electrode and the igniter module.
- Spark: Check for a visible spark at the igniter electrode. If no spark, the igniter may be faulty or the battery (if applicable) needs replacement.
- Gas flow: Ensure burner tubes are correctly seated over the gas valve orifices.
- Uneven Heating:
- Clean burners: Clogged burner ports can cause uneven flame. Clean as described in the Maintenance section.
- Heat tent placement: Ensure heat tents are correctly positioned over the burners.
- Low Flame:
- Gas supply: Check for low gas in the tank or a partially closed valve.
- Regulator bypass: If using propane, the regulator may have entered bypass mode. Turn off all burner knobs and the tank valve. Disconnect the regulator, wait 30 seconds, then reconnect. Slowly open the tank valve fully, then open one burner knob and light.
9. Specifications
| Product Dimensions | 15 x 2 x 2 inches |
| Item Weight | 3.39 pounds |
| Item Model Number | S853554 |
| Manufacturer | Adviace |
| Burner Material | Stainless Steel (Original parts number: G327-2100-W1) |
| Heat Tent Material | Stainless Steel (Original parts number: G325-0002-W1) |
| Crossover Tube Dimensions | Adjustable from 5" - 9.5" |
10. Warranty and Support
For warranty information or technical support regarding your Adviace Repair Kit, please contact the seller or manufacturer directly. Keep your purchase receipt as proof of purchase.
Manufacturer: Adviace
Seller: Bigbox