1. Introduction
Thank you for choosing the TJPD Wireless Game Controller, Model Crack-Q600. This controller is designed to provide an enhanced gaming experience across multiple platforms, including PlayStation 4, PlayStation 3, iOS (13.4+), PC, and Android devices. It features advanced functionalities such as programmable back buttons, adjustable Turbo speeds, 6-axis gyroscope, HD dual vibration, and customizable LED lighting.

Figure 1: Front view of the TJPD Wireless Game Controller, showcasing its unique crack pattern design and illuminated elements.
2. Setup
2.1 Charging the Controller
Before first use, fully charge the controller. Connect the included USB charging cable to the controller's charging port and to a USB power source (e.g., console, PC, or USB wall adapter). The LED indicator will show charging status and turn off when fully charged.
2.2 Initial Pairing and Connection
The controller supports wireless Bluetooth connection across various platforms.
- For PS4/PS3: Turn on your console. Press and hold the SHARE button and the PS button simultaneously on the controller until the light bar flashes. Connect the controller to the console using the USB cable. Once recognized, press the PS button to complete pairing. You can then disconnect the cable for wireless play.
- For iOS (13.4+)/Android: Enable Bluetooth on your device. On the controller, press and hold the SHARE button and the PS button until the light bar flashes. Search for "Wireless Controller" or similar on your device's Bluetooth settings and select to pair.
- For PC: Connect the controller to your PC using a USB cable. The PC should automatically detect and install the necessary drivers. For wireless connection, ensure your PC has Bluetooth enabled. Press and hold the SHARE button and the PS button on the controller until the light bar flashes, then pair via PC Bluetooth settings. The controller is recognized as an XBOX controller by default but can switch to DS4 mode.

Figure 2: The controller is compatible with various PlayStation 4 models, including PS4, PS4 Slim, and PS4 Pro.
3. Operating Instructions
3.1 Basic Button Functions
The controller features standard PlayStation layout buttons (X, Circle, Square, Triangle), D-pad, L1/L2/R1/R2 triggers, two analog sticks, a clickable touchpad, SHARE, OPTIONS, and PS buttons.
3.2 Programmable Back Buttons (M1/M2)
The controller includes two programmable back buttons (M1 and M2) located on the underside. These buttons can be customized to replicate single button presses or a sequence of up to 60 seconds of operations, providing a competitive advantage.
- Programming Mode: Press and hold the PROGRAM button (usually a small button near the back paddles) until the indicator light changes.
- Assigning Buttons: Press the M1 or M2 button you wish to program, then press the button(s) or perform the sequence you want to assign. Press the PROGRAM button again to save and exit.
- Clearing Assignment: Refer to the detailed instructions in the included quick start guide for specific steps to clear programmed functions.

Figure 3: The rear of the controller highlights the M1 and M2 programmable back buttons, offering enhanced control.
3.3 Turbo Function
The Super-Turbo function allows for rapid, continuous input of a button press. It supports three frequencies: 8 times/sec, 15 times/sec, and 25 times/sec, and also features continuous Turbo (auto-turbo).
- Activating Turbo: Press and hold the TURBO button, then press the action button you wish to apply Turbo to.
- Adjusting Turbo Speed: While holding the TURBO button, move the right analog stick up or down to cycle through the three speed settings.
- Auto-Turbo: To enable continuous Turbo without holding the button, press the TURBO button and the action button once, then release both. Press them again to disable.

Figure 4: Illustration of the controller's Turbo function, showing adjustable shot frequencies for enhanced gameplay.
3.4 Gyroscope and Vibration
The controller features a highly sensitive 6-axis gyroscope for motion control in supported games, enabling precise aiming and direction control. Dual vibration motors provide immersive haptic feedback for in-game actions like attacks and explosions.
3.5 LED Indicator and Lighting Modes
The controller features an LED light bar and internal lighting that can display various colors and breathing effects. These lights indicate connection status, player number, and can be customized for aesthetic preference.
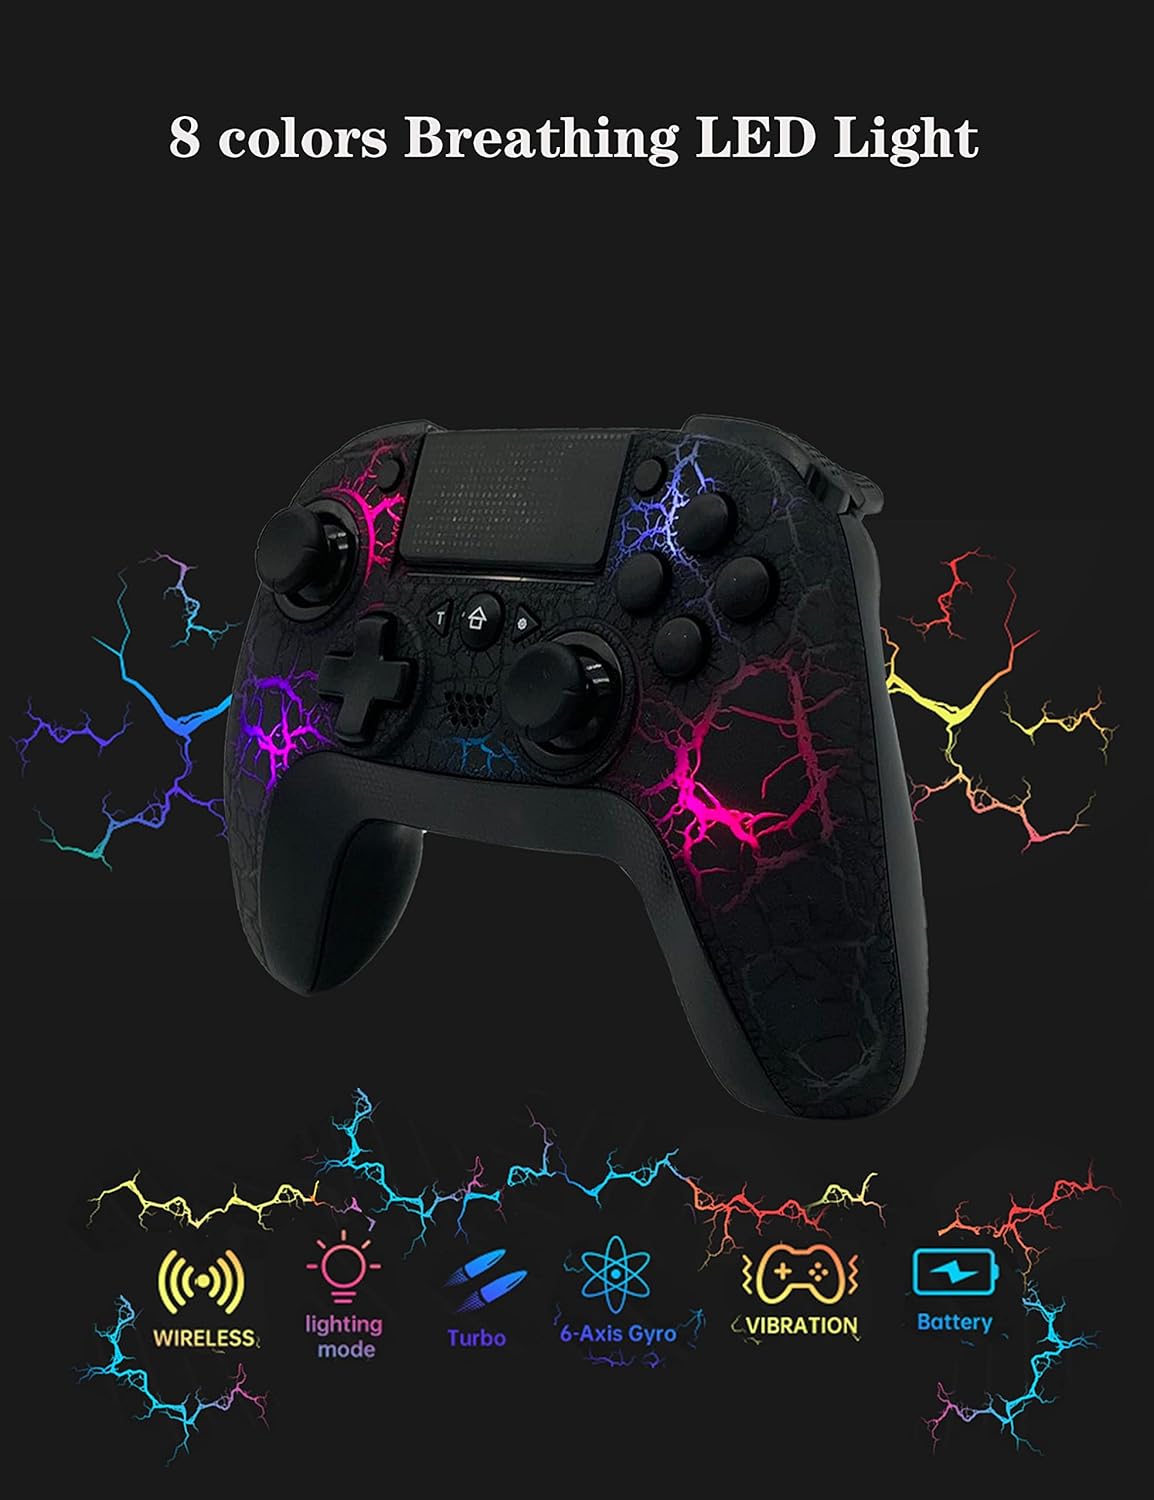
Figure 5: The controller features 8-color breathing LED lights, along with indicators for wireless connectivity, lighting mode, Turbo, 6-Axis Gyro, Vibration, and Battery status.
4. Maintenance
4.1 Cleaning
To clean the controller, use a soft, dry cloth. For stubborn dirt, slightly dampen the cloth with water or a mild, non-abrasive cleaner. Avoid using harsh chemicals or abrasive materials that could damage the surface or internal components.
4.2 Storage
Store the controller in a cool, dry place away from direct sunlight, extreme temperatures, and high humidity. Protect it from dust and physical impact when not in use.
4.3 Battery Care
To prolong battery life, avoid fully discharging the controller frequently. Charge it regularly, even if not in constant use. If storing for an extended period, charge the battery to about 50% before storage.
5. Troubleshooting
5.1 Controller Not Connecting/Pairing
- Ensure the controller is charged.
- Verify Bluetooth is enabled on your device/console.
- Try resetting the controller (locate a small reset button, often in a pinhole on the back, and press with a thin object).
- Attempt to re-pair the controller following the steps in Section 2.2.
- If connecting to PC, ensure drivers are up to date or try a different USB port.
5.2 Buttons/Analog Sticks Not Responding or Drifting
- Perform a controller reset.
- Ensure the controller's firmware is up to date (check the manufacturer's website for updates).
- Clean around the affected buttons or analog sticks to remove any debris.
- If stick drift persists, it may indicate a hardware issue.
5.3 Short Battery Life
- Ensure the controller is fully charged before use.
- Reduce the brightness of the LED lighting or disable it if possible, as this consumes battery.
- Ensure the controller is turned off when not in use.
6. Specifications
| Feature | Detail |
|---|---|
| Model Number | Crack-Q600 |
| Compatibility | PS4, PS4 Pro, PS4 Slim, PS3, iOS (13.4+), PC, Android |
| Connectivity | Wireless (Bluetooth 5.0), Wired (USB) |
| Dimensions | 6.69 x 4.33 x 1.18 inches |
| Weight | 11.99 ounces |
| Battery | 1200 mAh (rechargeable) |
| Special Features | 2 Programmable Back Buttons, Turbo Function (3 speeds), 6-Axis Gyroscope, HD Dual Vibration, Clickable Touch Pad, LED Indicator |
7. Warranty and Support
For warranty information and detailed support, please refer to the official TJPD website or contact their customer service directly. Keep your purchase receipt as proof of purchase for any warranty claims.
Manufacturer: TJPD COWBOX
Date First Available: May 19, 2023


