1. Introduction
Thank you for purchasing the AceGamer Wireless Switch Controller. This manual provides instructions for setting up, operating, and maintaining your controller. Please read this manual thoroughly before use to ensure proper functionality and a satisfying gaming experience.
This controller is compatible with all Nintendo Switch systems, including Switch, Switch OLED, and Switch Lite. It also supports PC (Windows 7+), Android, Stadia, Luna, and Steam PC gaming platforms.
2. Product Features
- Universal Compatibility: Supports Nintendo Switch (all models), PC (Windows 7+), Android, Stadia, Luna, and Steam.
- Wireless Connectivity: Enjoy gaming without cables.
- Macro Programming: Customize back buttons to execute complex command sequences with a single press.
- 6-Axis Gyro Sensor: Provides precise motion control for immersive gameplay.
- HD Vibration: Built-in dual vibration motors with 4 adjustable levels for realistic feedback.
- TURBO Continuous Fire: Adjustable auto-fire function with speeds up to 20 shots/second.
- One-Key Wake-up: Quickly wake up your Switch console from sleep mode.
- Ergonomic Design: Lightweight and grip-friendly with anti-slip treatment for comfortable extended play.
- High-Precision Buttons: Enhanced D-pad recognition chip for faster and more accurate input.
- Long Battery Life: Equipped with a 1000mAh battery for extended gaming sessions.

Image: Overview of the AceGamer Wireless Switch Controller and its main features.
3. Setup Instructions
3.1 Connecting to Nintendo Switch
- From the HOME Menu, select Controllers.
- Select Change Grip/Order.
- On the controller, press and hold the HOME button (house icon) for more than 2 seconds until the LED indicators start flashing.
- Once connected successfully, the LED indicators on the controller will stop flashing and remain lit, indicating the player number.

Image: Visual guide for connecting the controller to a Nintendo Switch console.
3.2 Connecting to PC/Android
Refer to the specific connection instructions provided with your PC or Android device for Bluetooth pairing. The controller will appear as a standard Bluetooth gamepad.
4. Operating Instructions
4.1 Macro Programming Function
The controller features programmable back buttons for macro functions. You can record a sequence of button presses and assign them to a single back button.
- Setup Method: Press and hold the M key and the + key simultaneously. The controller's light will flash rapidly, indicating that action memory recording has started.
- Perform the desired sequence of button presses (single keys, combination keys, or directional keys).
- Press the M key again to save the macro. The light will stop flashing.
- To use the macro, simply press the assigned back button.
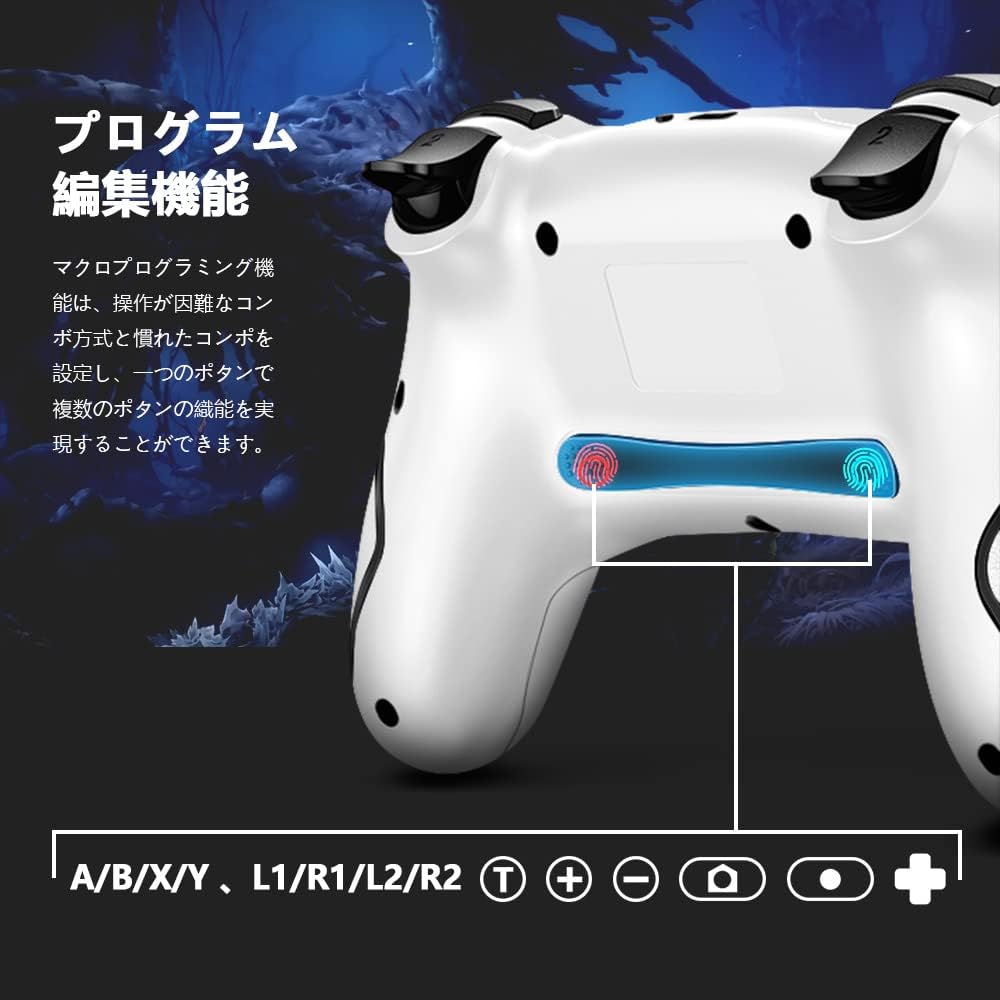
Image: Illustration of the back buttons and macro programming setup.
4.2 TURBO Continuous Fire Function
The TURBO function allows for automatic rapid firing of buttons, reducing hand fatigue during intense gameplay.
- Activating TURBO: Press and hold the T button and then press the desired action button (A/B/X/Y/L/R/ZL/ZR) to enable TURBO for that button.
- Adjusting TURBO Speed: While holding the T button, press the Up directional button to increase speed or the Down directional button to decrease speed. There are 3 speed levels (5 shots/sec, 12 shots/sec, 20 shots/sec).
- Deactivating TURBO: Repeat the activation step (hold T button and press the action button) to turn off TURBO for that specific button.

Image: The Turbo button and speed adjustment indicators on the controller.
4.3 HD Vibration Adjustment
The controller features 4 levels of HD vibration feedback.
- To adjust vibration intensity, press and hold the Vibration button (usually located near the HOME button) and use the Up/Down directional buttons to cycle through the vibration levels.
4.4 6-Axis Gyro Sensor
The built-in 6-axis gyro sensor allows for precise motion control in compatible games. The controller detects tilt and movement, enabling intuitive control for an enhanced gaming experience.

Image: The controller with an overlay indicating 6-axis gyro sensor functionality.
4.5 One-Key Wake-up Function
Press the HOME button on the controller to wake up your Nintendo Switch console from sleep mode.

Image: The controller with a visual representation of the one-key wake-up function.
5. Maintenance
- Keep the controller clean by wiping it with a soft, dry cloth.
- Avoid exposing the controller to extreme temperatures, humidity, or direct sunlight.
- Do not disassemble the controller, as this will void the warranty.
- Store the controller in a safe place when not in use to prevent damage.

Image: The controller highlighting its wireless connection and anti-slip grip for comfortable use.
6. Troubleshooting
- Controller not connecting: Ensure the controller is charged. Re-attempt the pairing process as described in Section 3.1. Make sure no other Bluetooth devices are interfering.
- Input lag or disconnection: Ensure the controller is within range of the console/device. Check for potential wireless interference.
- Buttons not responding: Check if the controller is properly connected. If the issue persists, try resetting the controller (refer to the manufacturer's website for specific reset instructions if not in this manual).
- Vibration not working: Ensure vibration is enabled in your game settings and on the console. Check the vibration intensity level.
7. Specifications
| Brand | AceGamer |
| Model Number | sw001 |
| Connectivity Technology | Wireless |
| Compatible Devices | Nintendo Switch, Android, iOS |
| Controller Type | Gamepad |
| Special Features | Motion Sensor, Ergonomic |
| Package Dimensions | 17.4 x 11.5 x 7.2 cm |
| Item Weight | 280 g |
8. Warranty and Support
AceGamer provides a 1-year warranty for this product. If any defects occur with eligible products purchased from our store within this period, we will replace the defective parts or exchange the product for a new one free of charge.
For technical support or warranty claims, please contact AceGamer customer service through the retailer where you purchased the product or visit our official website.


