
Product Overview
The Coleman Evanston Screened Camping Tent is designed for comfort and convenience during your outdoor adventures. This tent offers a spacious interior suitable for 6 people, accommodating two queen-size airbeds. It features Coleman's WeatherTec System for superior weather protection, including patented welded floors and inverted seams to keep you dry. A unique screened-in porch provides an additional bug-free lounging area. The tent also includes an electrical port for easy power access and comes with a rainfly and carry bag for portability.
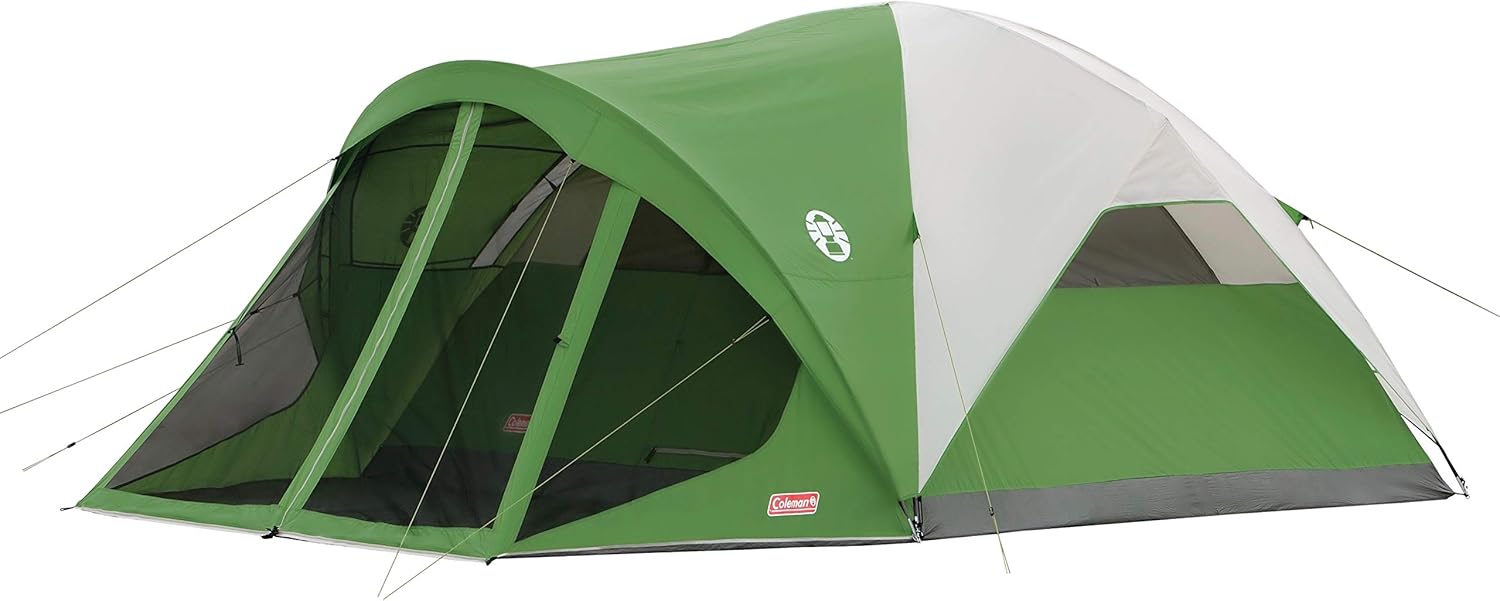
Figure 1: The Coleman Evanston Screened Camping Tent, showcasing its spacious design and integrated screened porch.
Setup Instructions
Setting up your Coleman Evanston tent is designed to be quick and straightforward, typically taking around 15 minutes. Follow these steps for optimal assembly:
- Prepare the Area: Choose a flat, clear area free of rocks, branches, and other sharp objects. Lay out the tent body with the door facing the desired direction.
- Assemble Poles: Connect the fiberglass poles. Identify the two longest black poles for the main tent body and the gray pole for the screened porch.
- Insert Main Tent Poles: Slide the two black poles through the continuous pole sleeves on the tent body. Secure each pole end into the metal pins located at the tent's corners.
- Attach Tent Clips: Clip the tent body to the poles using the attached Insta-Clip attachments. This helps to secure the tent structure.
- Insert Screen Porch Pole: Slide the gray pole through the sleeve at the front of the tent (screened porch area). Secure its ends into the corresponding pins.
- Drape Rainfly: Orient the rainfly with the green section over the screened porch and the white section over the main tent body. Drape it evenly over the tent.
- Secure Rainfly: Attach the S-hooks on the rainfly to the rings at the base of the tent poles. Ensure the rainfly is taut and covers the tent adequately.
- Stake Down Tent: Use the provided stakes to secure the tent's base to the ground. Insert stakes through the webbing loops at each corner and along the sides.
- Guy Out Tent: Extend and stake out the pre-attached guylines from the rainfly. This provides additional stability against wind.
Operating Instructions
Maximize your tent's functionality with these operating tips:
- Screened Porch Use: The separate screen room is ideal for bug-free lounging, storing gear, or as a mudroom to keep the main tent clean. Utilize the zippered entry for easy access.
- Electrical Port: Locate the electrical port on the tent wall. This allows you to run an extension cord into the tent for power, keeping your devices charged and accessible. Ensure the port is properly sealed when not in use or during rain.
- Ventilation: The tent features multiple windows and a mesh back wall for excellent airflow. Open or close the zippered windows as needed for ventilation or privacy. The angled rainfly allows for light entry while preventing water.
- WeatherTec System: Trust the WeatherTec System's welded floors and inverted seams to keep the interior dry during wet conditions. Ensure all zippers are fully closed during rain.
Maintenance and Care
Proper care will extend the life of your tent:
- Cleaning: Hand wash the tent fabric as needed. Avoid using harsh detergents or bleach.
- Drying: Always ensure the tent is completely dry before packing it away to prevent mildew and odors.
- Storage: Store the tent in a clean, dry area. All poles and stakes should be placed in the storage bag to prevent damage to the fabric.
- Seam Sealing: While the tent features protected seams, consider applying a seam sealer to the floor seams and corners, especially if expecting prolonged heavy rain, for added protection.
Troubleshooting
Here are solutions to common issues you might encounter:
- Water in Screened Porch: The rainfly does not fully cover the screened porch, so water may enter this area during rain. Be prepared with towels or a small broom to sweep water out. Consider an additional tarp or canopy for this area if full protection is desired.
- Condensation Inside Tent: Condensation can form on the inside of your tent, especially in cold or humid conditions. Ensure adequate ventilation by keeping windows open (if weather permits) and using the mesh back wall. Avoid storing wet clothing inside the tent.
- Pole Breakage: If a pole breaks, replacement kits are available. Ensure poles are not over-stressed during setup or takedown.
- Drafts from Back Wall: The entire back wall is mesh without a zip-up privacy window. While covered by the rainfly, strong winds might cause drafts. Ensure the rainfly is properly secured and guylines are taut.
Technical Specifications
| Feature | Detail |
|---|---|
| Brand | Coleman |
| Model Name | 2000007825 |
| Occupancy | 6 Person |
| Product Dimensions | 28"L x 10.25"W x 9"H |
| Item Weight | 20.9 Pounds |
| Floor Width | 120 Inches |
| Maximum Height | 6.5 Feet |
| Vestibule Area | 50 Square Feet |
| Material | Polyester Taffeta 75D |
| Water Resistance Level | Waterproof |
| Assembly Time | 15 minutes |
| Number of Doors | 1 |
Warranty and Support
The Coleman Evanston Screened Camping Tent comes with a 1-year limited warranty. For warranty claims, product support, or replacement parts, please refer to the contact information provided in your product packaging or visit the official Coleman website.


