
Introduction
This manual provides detailed instructions for the installation, operation, and maintenance of your JVC KD-T92MBS Single DIN Marine Bluetooth CD Stereo Receiver System. Please read this manual thoroughly before use to ensure proper functionality and safety. Keep this manual for future reference.
Product Overview
The JVC KD-T92MBS system is designed for marine environments, offering a comprehensive audio solution. The system includes the following main components:
- JVC KD-T92MBS Single DIN Marine Bluetooth CD Stereo Receiver
- Four (4) 6.5-inch 260 Watt Peak White Boat Audio Speakers with Multicolor LED
- One (1) 10-inch 1300 Watt LED Subwoofer
- Mono Amplifier with Wiring Kit
- Marine Antenna
- Speaker Wire

Figure 1: JVC KD-T92MBS Marine Stereo Receiver highlighting key features like Bluetooth, CD Player, Front Aux, Front USB, 3 RCA Out, Water Resistant, AM FM Radio, Indoor/Outdoor, LED Lighting, Spotify, SiriusXM, Remote App, Dual Phone connection, Conformal Coating, LCD Display, Rapid Charging, Wireless Music Browsing, Spanish Menu, and 13 Band EQ.
Setup and Installation
Safety Precautions
- Always disconnect the vehicle's battery negative terminal before starting any electrical work.
- Ensure all wiring is properly insulated to prevent short circuits.
- Use appropriate fuses as specified in the individual component manuals.
- Consult a professional installer if you are unsure about any installation steps.
Component Placement
Careful placement of each component is crucial for optimal performance and longevity, especially in a marine environment.
- Receiver: Install the KD-T92MBS in a location that is easily accessible and protected from direct water exposure, though it is water-resistant.
- Speakers: Mount the 6.5-inch speakers in suitable locations on your boat, ensuring clear sound projection and secure fastening.
- Subwoofer: Position the 10-inch subwoofer in an area that allows for effective bass reproduction, typically in a sealed or ported enclosure if not already integrated.
- Amplifier: Install the mono amplifier in a dry, well-ventilated area, away from heat sources and direct sunlight.
- Antenna: Mount the marine antenna in a location that provides clear reception, typically high and unobstructed.

Figure 2: JVC 6.5-inch marine speakers with integrated multicolor LED lighting.
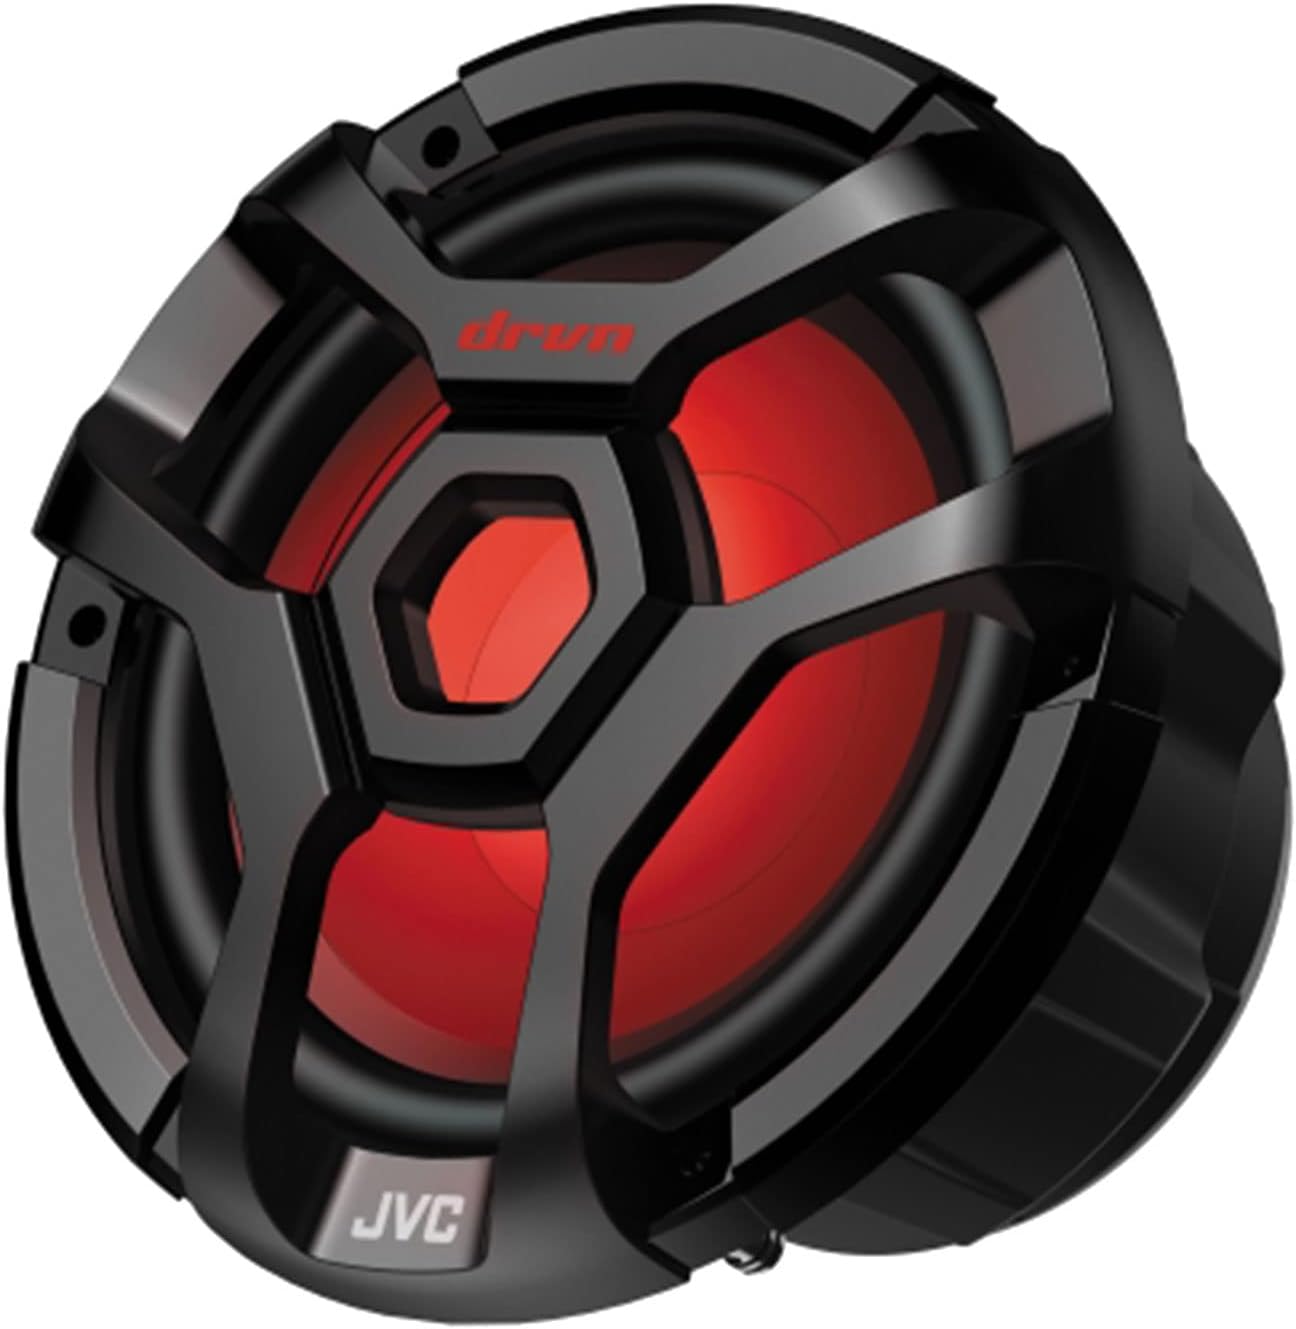
Figure 3: JVC 10-inch marine subwoofer with integrated LED lighting.

Figure 4: JVC mono amplifier, designed to power the subwoofer.
Wiring Connections
Refer to the individual manuals for detailed wiring diagrams for each component. General connections include:
- Power and Ground: Connect the main power wire (typically red or yellow) to a fused constant 12V source and the ground wire (black) to a clean chassis ground. The amplifier will have its own power and ground connections, often requiring a separate, heavier gauge wire directly from the battery.
- Remote Turn-On: Connect the remote turn-on wire (blue/white) from the receiver to the amplifier to activate it when the receiver is turned on.
- Speaker Connections: Connect the speaker wires from the receiver to the 6.5-inch speakers. The subwoofer will connect to the mono amplifier, which in turn receives its signal from the receiver's RCA outputs.
- Antenna: Connect the marine antenna to the designated antenna input on the receiver.
- RCA Outputs: Use RCA cables to connect the receiver's pre-outs to the amplifier's inputs for the subwoofer.

Figure 5: Example of a wiring kit, including power cables, fuse holder, and various connectors for installation.

Figure 6: Marine antenna for radio reception.
Operating Instructions
Basic Controls

Figure 7: Front panel of the JVC KD-T92MBS receiver, showing controls and display.
- Power Button (SRC): Press to turn the unit ON. Press and hold to turn OFF.
- Volume Knob: Rotate clockwise to increase volume, counter-clockwise to decrease.
- Source Button (SRC): Press repeatedly to cycle through available audio sources (CD, Tuner, Bluetooth, USB, AUX).
- Menu/Settings Button: Access audio settings, display settings, and system options.
Audio Sources
- CD Player: Insert a CD into the slot. Playback will begin automatically. Use track skip buttons to navigate.
- AM/FM Radio: Select "Tuner" source. Use the seek buttons to find stations. Press and hold to auto-seek. Save favorite stations using preset buttons.
- Bluetooth Audio:
- Ensure Bluetooth is enabled on your mobile device.
- Select "Bluetooth" source on the receiver.
- On your device, search for "JVC KD-T92MBS" and pair.
- Once paired, you can stream audio wirelessly.
- USB Input: Connect a USB storage device to the front USB port. The unit will automatically detect and play compatible audio files.
- AUX Input: Connect an external audio device using a 3.5mm stereo cable to the front AUX input.
Sound Adjustments
Access the audio menu to adjust settings such as:
- Equalizer (EQ): Select from preset EQ curves or customize the 13-band graphic equalizer.
- Bass/Treble: Fine-tune bass and treble levels.
- Balance/Fader: Adjust audio distribution between left/right and front/rear speakers.
- Subwoofer Level: Control the output level of the connected subwoofer.
LED Lighting Control
The speakers and subwoofer feature multicolor LED lighting. Refer to the receiver's menu or a dedicated remote control (if included) for options to change colors, patterns, or brightness.
Maintenance
- Cleaning: Use a soft, dry cloth to wipe the receiver's front panel and speaker grilles. For stubborn dirt, a slightly damp cloth can be used, but ensure no moisture enters the unit. Avoid abrasive cleaners or solvents.
- Water Resistance: While the unit is designed to be water-resistant, avoid direct high-pressure water jets. Ensure all covers and caps are securely closed to maintain water resistance.
- Conformal Coating: The receiver features a conformal coating on its circuit boards, providing enhanced protection against moisture and corrosion in marine environments. This requires no special user maintenance.
Troubleshooting
| Problem | Possible Cause | Solution |
|---|---|---|
| No power | Blown fuse; incorrect wiring; loose power connection. | Check and replace fuses; verify power and ground connections; ensure wiring is secure. |
| No sound from speakers | Volume too low; incorrect source selected; speaker wires disconnected; amplifier not powered. | Increase volume; select correct source; check all speaker connections; verify amplifier power and remote turn-on. |
| Bluetooth not connecting | Bluetooth not enabled on device; device not in pairing mode; interference. | Ensure Bluetooth is ON on your device; put receiver in pairing mode; try re-pairing; move device closer to receiver. |
| CD playback errors | Dirty or scratched CD; incorrect disc format. | Clean CD with a soft cloth; try a different CD; ensure disc is compatible. |
| Poor radio reception | Antenna not connected; antenna damaged; poor signal area. | Check antenna connection; inspect antenna for damage; try moving to an area with better signal. |
Specifications
| Feature | Specification |
|---|---|
| Model Number | JVC KD-T92MBS |
| Brand | JVC |
| Item Weight | 33 pounds (Total system weight) |
| Connectivity Technology | Auxiliary, Bluetooth, USB |
| Controller Type | Ring |
| Compatible Devices | Speaker |
| Connector Type | 3.5mm Jack, USB |
| Audio Output Mode | Mono, Stereo |
| Surround Sound Channel Configuration | 5.1 (Note: This typically refers to the system's capability, not necessarily the head unit's direct output) |
| Output Power | 600 Watts (Likely amplifier output) |
| Number of Channels | 2 (For receiver's internal amplification, external amplifier provides additional channels) |
Warranty and Support
For detailed warranty information, please refer to the warranty card included with your product or visit the official JVC website. Keep your proof of purchase for warranty claims.
For technical support, troubleshooting assistance beyond this manual, or service inquiries, please contact JVC customer support through their official website or the contact information provided in your product packaging.


