
1. Introduction
The PHOTONTEK XT 1000W CO2 Pro LED is a high-performance grow light designed for professional indoor cultivation. This fixture delivers a balanced, full-spectrum light with high Photosynthetic Photon Flux Density (PPFD) levels, optimized for plant growth cycles. It is engineered for use in 5'x5' coverage areas, particularly when supplemented with CO2, but can also be adapted for 6'x6' areas without CO2 supplementation. This manual provides essential information for the safe and effective installation, operation, and maintenance of your PHOTONTEK XT 1000W CO2 Pro LED grow light.
2. Safety Information
Please read all safety warnings and instructions carefully before installing or operating the PHOTONTEK XT 1000W CO2 Pro LED. Failure to follow these instructions may result in electric shock, fire, or other serious injury.
- Always disconnect power before installation, maintenance, or moving the fixture.
- Do not operate the fixture with a damaged cord or plug.
- Ensure the fixture is securely mounted to prevent falling.
- Do not look directly at the operating LEDs; prolonged exposure can cause eye damage.
- Maintain adequate ventilation around the fixture to prevent overheating.
- This product is designed for indoor use only.
- Keep away from water and other liquids.
3. What's in the Box
Upon unpacking, verify that all components are present and undamaged.
- PHOTONTEK XT 1000W CO2 Pro LED Panel
- Power Cord
- Hanging Kit (typically includes hangers/ratchets)
- Instruction Manual (this document)
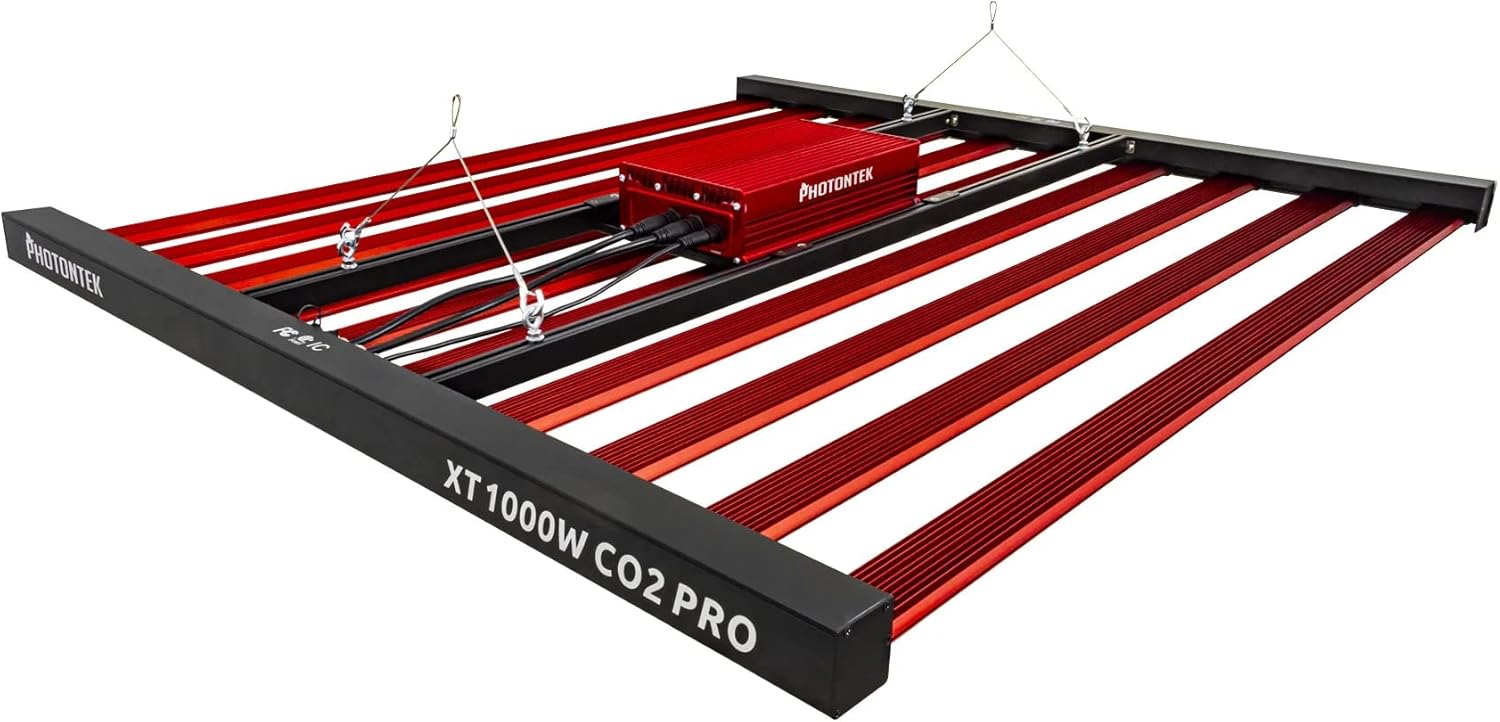
Figure 1: The PHOTONTEK XT 1000W CO2 Pro LED grow light, showing the multi-bar design and central driver box. This image illustrates the complete fixture as it would appear when assembled and ready for hanging.
4. Setup and Installation
4.1 Unpacking and Inspection
- Carefully remove all components from the packaging.
- Inspect the fixture for any signs of damage during transit. Contact your supplier immediately if any damage is found.
- Ensure all listed components in "What's in the Box" are present.
4.2 Mounting the Fixture
The PHOTONTEK XT 1000W CO2 Pro LED is designed to be suspended above your plant canopy.
- Identify a sturdy overhead structure capable of supporting the weight of the fixture (approximately 39.7 pounds or 17.999 kg).
- Attach the provided hanging cables or ratchets to the designated hanging points on the fixture.
- Securely attach the other end of the hanging system to your overhead structure.
- Adjust the hanging height to achieve the desired distance from the plant canopy. Refer to the "Operating Instructions" section for recommended hanging heights based on CO2 usage.

Figure 2: Side profile of the PHOTONTEK XT 1000W CO2 Pro LED, illustrating its slim design and the distribution of LED bars. This view helps in understanding the fixture's dimensions for proper placement.
4.3 Electrical Connection
Ensure the power source matches the voltage requirements of the fixture (277 Volts AC).
- Connect the power cord to the input port on the fixture's driver box. Ensure a secure connection.
- Plug the other end of the power cord into a grounded electrical outlet.
- If using a dimmer or external controller (Control Method: App, Switch Style: Dimmer, Push Button), connect it according to its specific instructions to the designated dimming ports on the fixture.
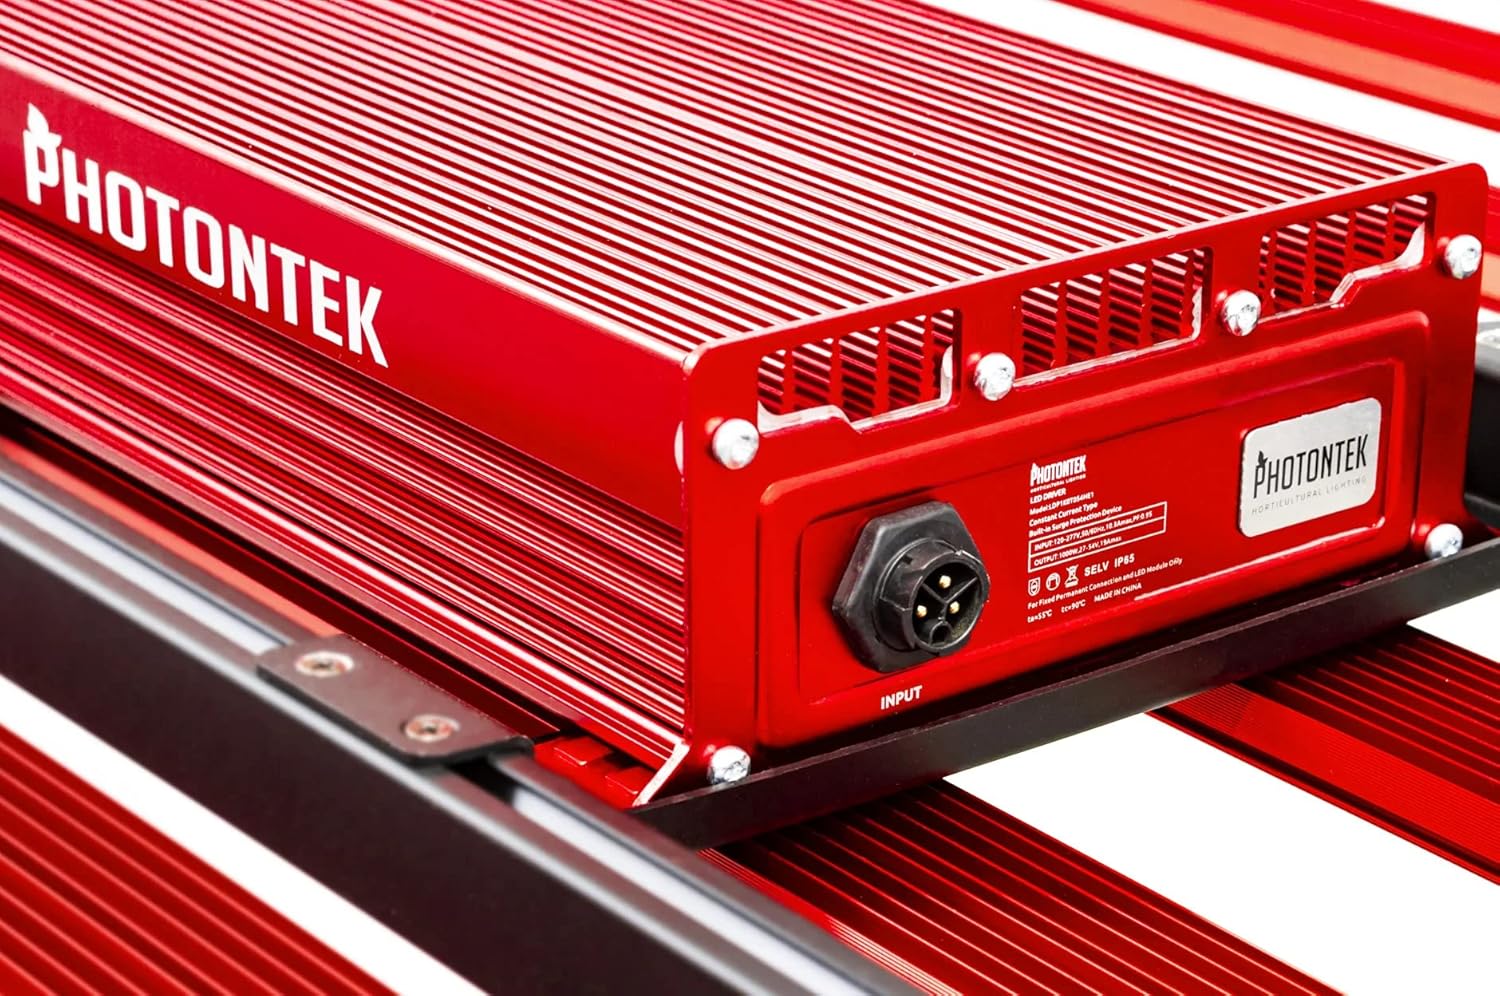
Figure 3: Detailed view of the PHOTONTEK XT 1000W CO2 Pro LED driver box, highlighting the input port and product labeling. This shows where the main power connection is made.
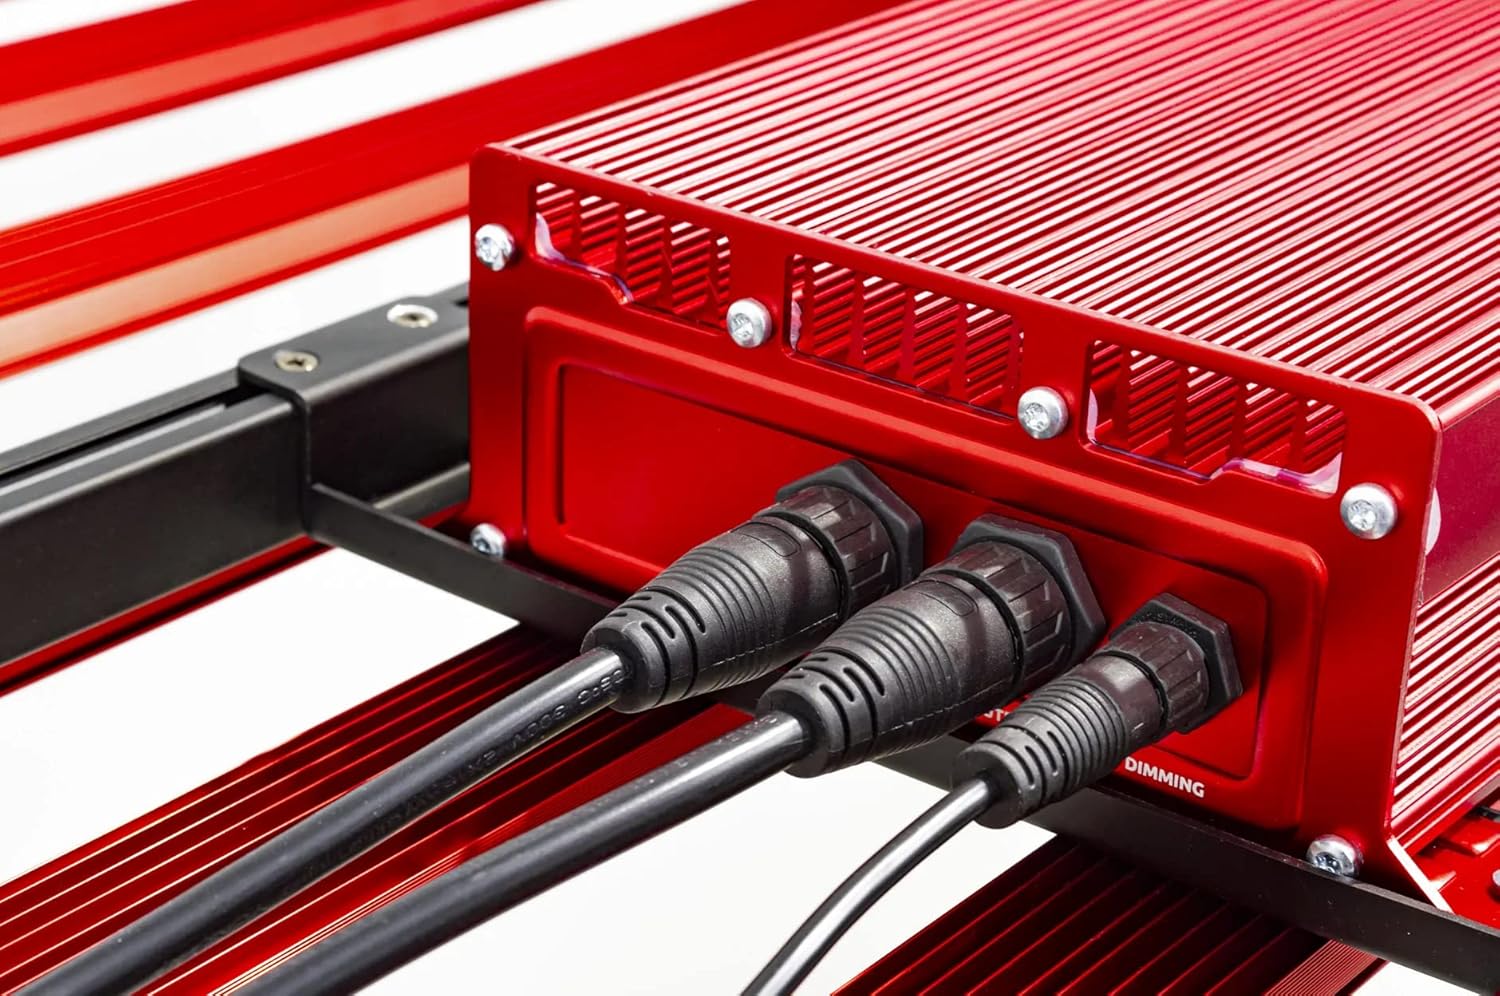
Figure 4: Close-up of the connection ports on the PHOTONTEK XT 1000W CO2 Pro LED driver, showing both power input and dimming control ports. This image clarifies where to connect the power cord and any optional dimming accessories.
5. Operating Instructions
5.1 Powering On/Off
Once the fixture is securely mounted and connected to power, it can be turned on.
- To power on, ensure the power cord is plugged into a live outlet. If using a timer, set the desired light cycle.
- To power off, disconnect the power cord from the outlet or use a connected timer/controller.
5.2 Light Intensity and Spectrum
The PHOTONTEK XT 1000W CO2 Pro LED provides a full spectrum light. The intensity can be adjusted using the integrated dimmer or an external app/controller.
- Dimmer Control: Use the push-button dimmer switch (if present) or the app control to adjust light output from 0-100%.
- Recommended PPFD Levels:
- For 5'x5' coverage with CO2 supplementation: Aim for PPFD levels up to 1500 µmol/s/m². Maintain CO2 levels up to 1500 PPM, matching PPFD levels 1:1 once exceeding 1000 µmol/s/m².
- For 6'x6' coverage without CO2 supplementation: Increase the distance between the fixture and the plant canopy to achieve optimal PPFD levels for the specific growth stage. This will result in lower overall PPFD intensity compared to CO2-supplemented setups.

Figure 5: Close-up view of the individual LED diodes on one of the light bars of the PHOTONTEK XT 1000W CO2 Pro LED. This illustrates the quality and density of the light-emitting components.
6. Maintenance
Regular maintenance ensures optimal performance and longevity of your PHOTONTEK XT 1000W CO2 Pro LED.
- Cleaning: Periodically clean the LED bars and driver box with a soft, dry cloth to remove dust and debris. Ensure the fixture is unplugged and cool before cleaning. Do not use abrasive cleaners or solvents.
- Inspection: Regularly inspect the power cord, hanging cables, and all connections for any signs of wear or damage. Replace any damaged components immediately.
- Ventilation: Ensure that the ventilation openings on the driver box are not obstructed to allow for proper heat dissipation.
7. Troubleshooting
If you encounter issues with your PHOTONTEK XT 1000W CO2 Pro LED, refer to the following common problems and solutions.
| Problem | Possible Cause | Solution |
|---|---|---|
| Fixture does not turn on. | No power supply; loose connection; faulty power cord/outlet. | Check power cord connection; verify outlet is live; try a different outlet; inspect power cord for damage. |
| Light output is dim or flickering. | Dimmer setting too low; loose connection; power supply issue. | Adjust dimmer setting; check all electrical connections; ensure stable power supply. |
| Fixture is overheating. | Poor ventilation; obstructed vents. | Ensure adequate airflow around the fixture; clear any obstructions from vents. |
| App control not working. | Connectivity issue; app malfunction; incorrect setup. | Check Bluetooth/Wi-Fi connection; restart the app and fixture; refer to app-specific instructions. |
If the problem persists after attempting these solutions, please contact PHOTONTEK customer support.
8. Specifications
Detailed technical specifications for the PHOTONTEK XT 1000W CO2 Pro LED.
| Feature | Detail |
|---|---|
| Brand | PHOTONTEK |
| Model | XT 1000W CO2 Pro LED |
| Light Type | LED |
| Special Feature | Full Spectrum |
| Wattage | 1000 watts |
| Light Color | Daylight White |
| Voltage | 277 Volts (AC) |
| Unit Count | 1.0 Count |
| Number of Items | 1 |
| Material | Aluminum, Plastic |
| Indoor/Outdoor Usage | Indoor |
| Power Source | Corded Electric |
| Power Consumption | 1000 Watts |
| Light Source Type | LED |
| Item Weight | 39.7 pounds (17.999 kg) |
| Light Source Wattage | 1000 Watts |
| Control Method | App |
| Average Life | 5 Years |
| Efficiency | 2.9 µmol/J |
| Style | Modern |
| UPC | 751448506226 |
| Part Number | 751448506226 |
| Number of Lights | 1 (fixture) |
| Included Components | LED Panel |
| Shade Material | Plastic |
| Light Direction | LED (Direct) |
| Switch Style | Dimmer, Push Button |
| Switch Installation Type | Wall Mount (for external controller) |
| Date First Available | July 13, 2022 |
9. Warranty and Support
PHOTONTEK products are manufactured to high standards and are designed for durability.
- Warranty Information: Specific warranty terms and conditions are typically provided with your purchase documentation or can be found on the official PHOTONTEK website. Please retain your proof of purchase for warranty claims.
- Customer Support: For technical assistance, troubleshooting beyond this manual, or warranty inquiries, please contact PHOTONTEK customer support directly through their official website or the contact information provided with your product.


