
1. Introduction
This manual provides detailed instructions for the operation and maintenance of your LEKATO Drum Looper Pedal. This versatile device combines a high-quality looper, a drum machine with 30 patterns, and an integrated tuner, designed for guitar and bass players.
Key features include:
- 3-in-1 Functionality: Looper, Drum Machine, and Tuner.
- High-Quality Audio: 44.1 kHz, 24-bit sampling for clean, uncompressed sound.
- Looper Memory: 4 memory slots, 11 minutes total recording time, with up to 5 minutes per loop. Supports unlimited overdubbing.
- Drum Machine: 30 preset drum patterns with customizable and editable grooves via the companion app.
- Smart Tempo Setting: Automatic tempo adjustment and smart fill beats.
- Data Transfer: Easy import/export of WAV audio files to/from PC/Mac via USB.
- Connectivity: 3.5mm headphone output for practice.
2. Package Contents
Please verify that all items are present in your package:
- LEKATO Drum Looper Pedal
- USB-C Cable
- User Manual
Note: A 9V DC power adapter (center negative) is required for operation and is not included in the package. You may also power the unit via the USB-C port using a compatible power bank or USB power supply.
3. Product Overview
3.1 Controls and Connections
Familiarize yourself with the pedal's layout and connections:

Image 3.1.1: Top view of the LEKATO Drum Looper Pedal. This image displays the two footswitches labeled 'LOOPER' and 'DRUM', two volume knobs 'LOOPER VOL' and 'DRUM VOL' with LED indicators, a central digital display, and left/right arrow buttons for navigation. A 'TEMPO' button is located below the display.

Image 3.1.2: Detailed diagram of the pedal's controls and connections. This image highlights the LOOPER volume knob/indicator, LOOPER footswitch, left button, LOOP channel indicators (I, II, III, IV), display screen, TEMPO button, DRUM volume knob/indicator, DRUM footswitch, right button, 1/4" MONO audio input (IN), Type-C Jack for USB data transmission, Earphone output jack, Power jack for 9V adapter, and 1/4" MONO audio output (OUT).
- LOOPER Footswitch: Controls recording, playback, and overdubbing for the looper.
- DRUM Footswitch: Controls the drum machine start/stop.
- LOOPER VOL Knob: Adjusts the playback volume of the recorded loops.
- DRUM VOL Knob: Adjusts the volume of the drum machine.
- Display Screen: Shows current drum pattern number, tempo, or tuner information.
- Left/Right Buttons (Arrow Buttons): Used for navigating drum patterns, loop slots, and adjusting tempo.
- TEMPO Button: Used for tap tempo input and activating the tuner.
- IN (Input Jack): 1/4" mono input for connecting your instrument (guitar, bass, etc.).
- OUT (Output Jack): 1/4" mono output for connecting to an amplifier or audio interface.
- USB-C Port: For connecting to a computer for data transfer and firmware updates, or for power supply.
- Headphone Jack: 3.5mm stereo output for private monitoring.
- DC 9V Power Jack: For connecting a 9V DC, center-negative power adapter.
4. Setup
4.1 Power Connection
The pedal requires a 9V DC power supply with a center-negative polarity. An appropriate power adapter is not included. Alternatively, you can power the unit via the USB-C port using a standard USB power adapter or power bank.
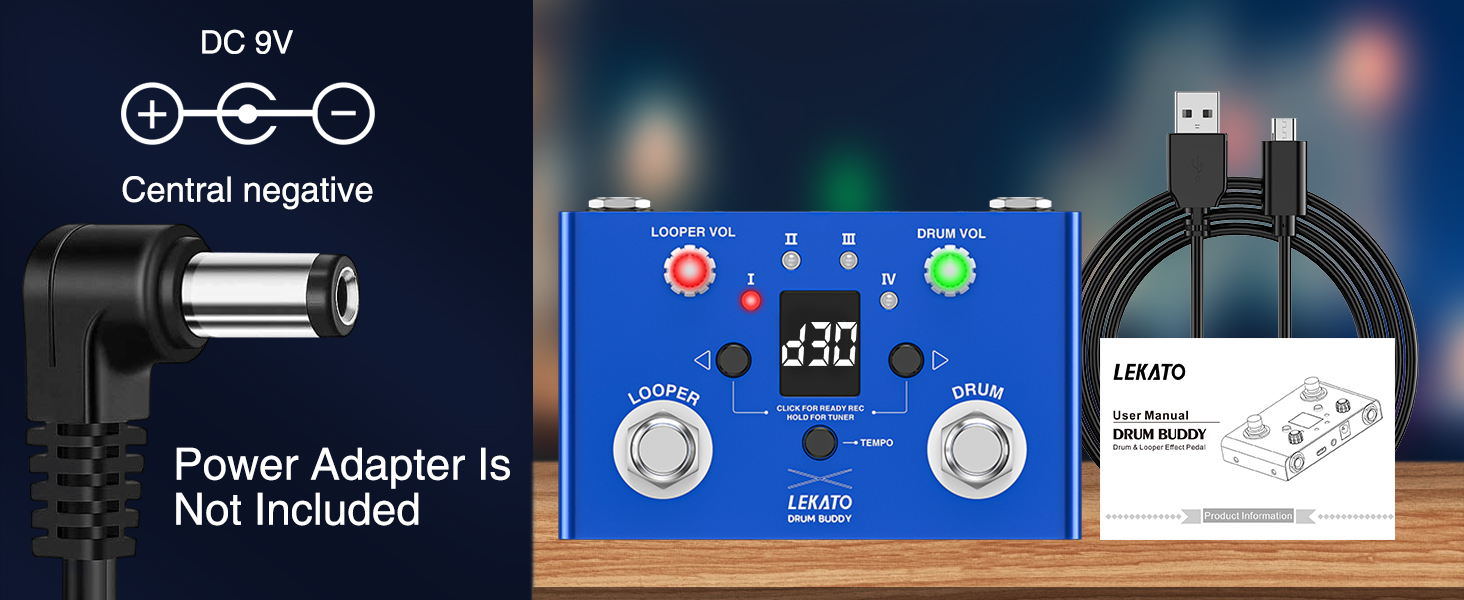
Image 4.1.1: Power adapter specifications. The image illustrates the required 9V DC, center-negative power input and explicitly states that the power adapter is not included.
4.2 Instrument and Amplifier Connections
- Connect your instrument (guitar, bass) to the IN jack on the pedal using a 1/4" mono instrument cable.
- Connect the OUT jack of the pedal to your amplifier or audio interface using another 1/4" mono instrument cable.
- For private practice, connect headphones to the 3.5mm Headphone Jack. Adjust headphone volume using the LOOPER VOL and DRUM VOL knobs.
5. Operating Instructions
5.1 Looper Function
The looper allows you to record and layer musical phrases. It features 4 independent memory slots, each capable of storing up to 5 minutes of audio, with a total recording capacity of 11 minutes.

Image 5.1.1: The pedal's display showing the 4 loop channel indicators (I, II, III, IV) and the LOOPER VOL knob with its red LED indicator.
- Recording a Loop: Press the LOOPER footswitch once. The red LED will illuminate, indicating recording has started.
- Stopping Recording/Starting Playback: Press the LOOPER footswitch again to stop recording. The recorded loop will immediately begin playback.
- Overdubbing: While a loop is playing, press the LOOPER footswitch once to enter overdub mode. The red LED will blink. Play your new phrase. Press the footswitch again to stop overdubbing and return to playback. You can overdub indefinitely.
- Stopping Playback: Double-press the LOOPER footswitch to stop playback.
- Deleting a Loop: While the looper is stopped, press and hold the LOOPER footswitch for 2 seconds. The display will confirm deletion.
- Switching Loop Slots: Use the Left/Right Arrow buttons to select one of the 4 loop memory slots (I, II, III, IV). The active slot is indicated by the corresponding LED.
5.2 Drum Machine Function
The drum machine provides 30 diverse drum patterns to accompany your playing. You can adjust the tempo and volume independently.

Image 5.2.1: Representation of the 30 drum rhythms available, which can be customized and edited via the companion software.
- Starting/Stopping Drums: Press the DRUM footswitch once to start or stop the drum pattern. The green LED will illuminate when active.
- Selecting Drum Patterns: Use the Left/Right Arrow buttons to cycle through the 30 available drum patterns when the drum machine is stopped. The current pattern number will be shown on the display.
- Adjusting Drum Volume: Use the DRUM VOL knob to set the desired volume for the drum patterns.
- Setting Tempo (Tap Tempo): Press the TEMPO button repeatedly (at least twice) at your desired pace to set the tempo. The display will show the BPM.
- Fine-tuning Tempo: After setting the tempo with the TEMPO button, use the Left/Right Arrow buttons to incrementally adjust the BPM.
- Smart Fill Beats: The pedal can automatically adjust and match the drum cycle, providing smart fill beats for seamless transitions.
5.3 Tuner Function
The integrated tuner allows for quick and accurate instrument tuning.
- Activating the Tuner: Press and hold the TEMPO button for 2 seconds. The display will switch to tuner mode.
- Tuning: Play a single note on your instrument. The display will show the note name and an indicator for pitch accuracy. Adjust your instrument until the indicator is centered.
- Exiting Tuner: Press the TEMPO button again, or any footswitch, to exit tuner mode and return to the previous function.
5.4 Data Transfer and Customization
The pedal supports WAV audio file transfer and drum pattern customization via a computer application.

Image 5.4.1: The LEKATO Drum Looper Pedal connected to a laptop via its USB-C port, illustrating the capability to import and export WAV audio files.
- Connecting to PC/Mac: Connect the pedal to your computer using the provided USB-C cable.
- Using the "Cube Suite" App: Download and install the "Cube Suite" application from the LEKATO website. This software allows you to:
- Import and export WAV audio files for your loops.
- Customize, edit, and save drum grooves.
- Share drum codes with other users of the same product.
6. Maintenance
Proper care ensures the longevity and optimal performance of your pedal.
- Cleaning: Use a soft, dry cloth to clean the pedal's surface. Avoid abrasive cleaners or solvents.
- Storage: Store the pedal in a dry environment, away from extreme temperatures, direct sunlight, and high humidity.
- Power: Always use the specified 9V DC center-negative power supply or a compatible USB power source. Disconnect power when not in use for extended periods.
- Footswitches: The footswitches are designed for durability, but avoid excessive force.
7. Troubleshooting
If you encounter issues, refer to the following common problems and solutions:
| Problem | Possible Cause | Solution |
|---|---|---|
| No power/Unit does not turn on | Incorrect power adapter; loose connection; no power from USB. | Ensure a 9V DC center-negative adapter is used or a functional USB power source. Check all connections. |
| No sound output | Incorrect cable connections; volume knobs set to zero; instrument/amp issues. | Verify instrument and amplifier connections. Check LOOPER VOL and DRUM VOL settings. Test instrument and amp independently. |
| Looper not recording/playing back | Incorrect footswitch operation; memory full. | Refer to Looper Function instructions (Section 5.1). Ensure you are in the correct mode (recording/playback). Try switching to a different loop slot. |
| Drum machine not working | Drum footswitch not engaged; DRUM VOL set to zero. | Press the DRUM footswitch to activate. Adjust DRUM VOL. |
| Tuner not accurate | Background noise; incorrect activation. | Ensure a quiet environment. Pluck strings clearly. Re-activate tuner mode by holding the TEMPO button. |
| USB data transfer issues | Faulty USB cable; driver issues; incorrect software usage. | Try a different USB cable. Ensure "Cube Suite" app is correctly installed and running. Refer to app instructions. |
If the problem persists after attempting these solutions, please contact LEKATO customer support.
8. Specifications
| Feature | Specification |
|---|---|
| Model Number | ef257cd5-a197-4e08-9c35-2ce7fd40ac10 |
| Dimensions | 11 x 8.5 x 3.5 cm |
| Weight | 220 grams |
| Body Material | Metal/Plastic |
| Sampling Rate | 44.1 kHz / 24-bit |
| Looper Memory Slots | 4 |
| Total Looping Time | 11 minutes |
| Max. Looping Time per Slot | 5 minutes |
| Drum Patterns | 30 |
| Power Supply | 9V DC (center negative) or USB-C (5V) |
| Current Draw | 300 Milliampere |
| Connectivity | 1/4" Mono Input, 1/4" Mono Output, 3.5mm Headphone Jack, USB-C Port |
9. Warranty and Support
For warranty information and customer support, please refer to the documentation included with your purchase or visit the official LEKATO website. Keep your purchase receipt as proof of purchase for any warranty claims.