
FLYLINKTECH BD10
FLYLINKTECH BD10 Car Jump Starter User Manual
Model: BD10
Brand: FLYLINKTECH
Introduction
This manual provides comprehensive instructions for the safe and effective operation, maintenance, and troubleshooting of your FLYLINKTECH BD10 Car Jump Starter. Please read this manual thoroughly before using the device to ensure proper function and safety.

Image: The BD10 Car Jump Starter unit with its attached red and black jumper cables, ready for use. The unit features a large digital display showing 100% charge.
Safety Information
Always observe the following safety precautions to prevent injury or damage to the device and vehicle:
- Do not attempt to jump start a frozen battery.
- Ensure proper polarity connection (red clamp to positive, black clamp to negative) to avoid sparks or damage.
- Do not connect the positive and negative clamps together.
- Keep the device away from children.
- Do not expose the device to rain or immerse it in water. The device has an IP65 water resistance rating, but prolonged exposure should be avoided.
- Operate the device within the specified temperature range of -20°C to 60°C (-4°F to 140°F).
- If the device becomes excessively hot during use, discontinue operation and allow it to cool down.
- Do not disassemble the device. Refer all servicing to qualified personnel.
- Wear eye protection when working with batteries.

Image: Diagram illustrating the high safety features of the BD10 Jump Starter, including Spark-Proof, Reverse Polarity Protection, Over Voltage Protection, Short Circuit Protection, Over Charge Protection, and High Temperature Protection.
What's in the Box
Upon opening the package, verify that all the following items are included:
- FLYLINKTECH BD10 Car Jump Starter Unit
- Smart Jumper Cables with Clamps
- USB-C to USB-C Charging Cable
- USB-A to USB-C Charging Cable
- DC Car Charger Adapter
- User Manual (this document)
- Storage Case

Image: A flat lay of all items included in the product box: the jump starter unit, jumper cables, charging cables, DC adapter, user manual, and storage case.
Product Overview
The BD10 jump starter features a robust design with multiple functionalities:
- Digital LED Display: Shows battery level, power status (IN/OUT), and error indicators.
- Boost Button: For initiating the jump start function.
- Power Button: To turn the device on/off and cycle through flashlight modes.
- USB-C Port (PD45W): Bi-directional port for charging the unit and charging other devices.
- USB-A Ports (x2, 18W max each): For charging mobile devices.
- DC Output Port (15V/10A): For powering 12V DC devices.
- Jump Start Port: For connecting the smart jumper cables.
- Integrated LED Flashlight: With illumination, fast flashing, and SOS modes.
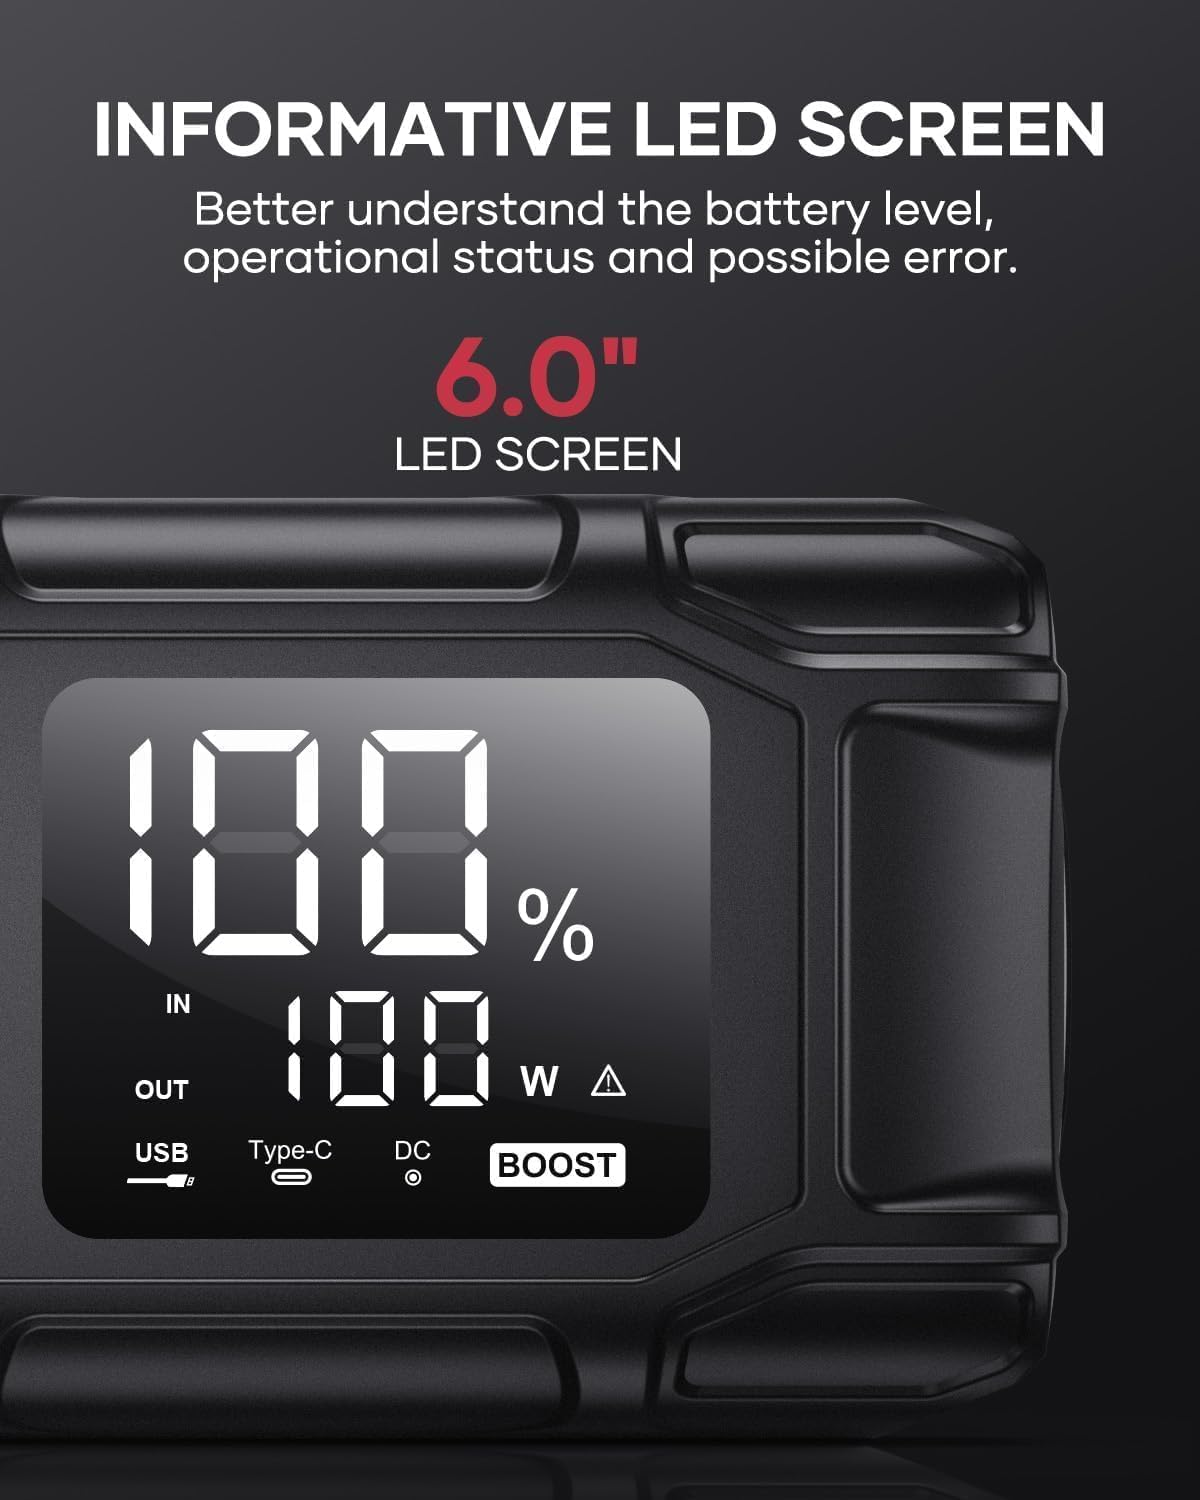
Image: Close-up of the BD10's informative 6.0-inch LED screen, clearly showing the battery percentage (100%), input/output status, and wattage.

Image: The BD10 Jump Starter with its integrated LED flashlight active, demonstrating its utility as an emergency light source with flashlight, SOS, and strobe modes.
Setup
Charging the Jump Starter
Before first use, fully charge the BD10 jump starter. It is recommended to keep the device charged above 50% for optimal performance and battery longevity.
- Connect the provided USB-C cable to the USB-C input port on the jump starter.
- Connect the other end of the USB-C cable to a compatible USB wall charger (not included, 45W PD charger recommended for fastest charging).
- The LED display will show "IN" and the charging percentage. The device is fully charged when the display shows 100%.
Note: A 45W PD charger can fully charge the unit in approximately 2 hours. Lower wattage chargers will take longer.

Image: The BD10 Jump Starter connected via its USB-C port for fast charging, with a table showing estimated charge times based on charger wattage (5W, 18W, 45W).
Operating Instructions
Jump Starting a Vehicle
The BD10 is designed to jump start 12V vehicles with all gas engines or diesel engines up to 12.0L.
- Ensure the jump starter is sufficiently charged (at least 50%).
- Turn off the vehicle's ignition and all accessories (lights, radio, etc.).
- Insert the blue plug of the smart jumper cables into the jump start port on the BD10 unit. Ensure it is fully seated.
- Connect the red positive (+) clamp to the positive (+) terminal of the vehicle's battery.
- Connect the black negative (-) clamp to the negative (-) terminal of the vehicle's battery.
- Observe the indicator light on the smart jumper cable.
- Solid Green: Ready to jump start.
- Solid Red with Beeping: Reverse polarity detected. Disconnect clamps and re-attach correctly.
- Flashing Green: Battery voltage is too low. Press the "BOOST" button on the jump starter. The indicator will turn solid green.
- Once the indicator is solid green, start the vehicle's engine.
- Once the vehicle starts, immediately remove the clamps from the vehicle battery, first the black negative clamp, then the red positive clamp.
- Disconnect the smart jumper cables from the BD10 unit.

Image: The BD10 Jump Starter connected to a car battery under the hood, demonstrating its primary function. The image highlights its 6000A peak current capability and suitability for various engine sizes.

Image: A four-step visual guide on how to start a car using the BD10: 1. Insert the clamp plug, 2. Attach clamps, 3. Power ON (Boost), 4. Start Vehicle.
Using as a Power Bank
The BD10 can charge various electronic devices via its USB-A and USB-C ports.
- Connect your device's charging cable to one of the USB-A ports or the USB-C port on the BD10.
- The BD10 will automatically begin charging your device. The LED display will show "OUT" and the wattage being output.
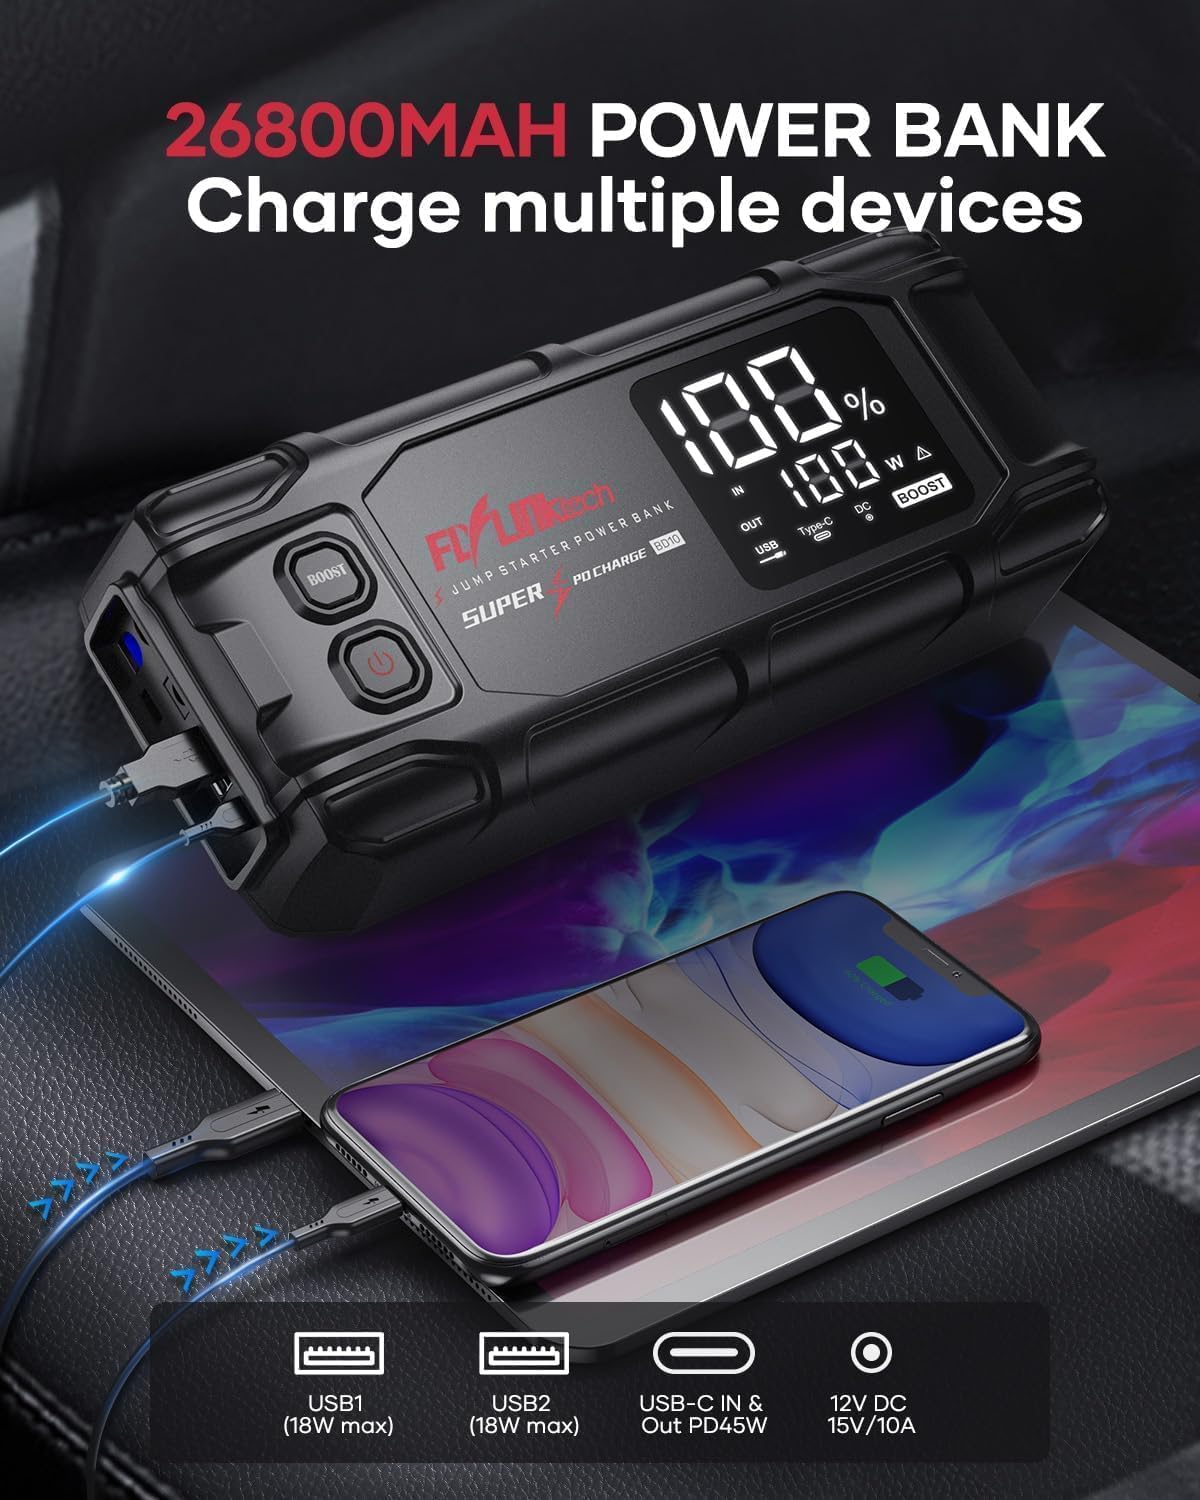
Image: The BD10 Jump Starter functioning as a power bank, simultaneously charging a smartphone and a tablet via its USB-A and USB-C ports, highlighting its 26800mAh capacity.
Using the LED Flashlight
The integrated LED flashlight has three modes: illumination, fast flashing, and SOS.
- Press and hold the Power button for 3 seconds to turn on the flashlight (illumination mode).
- Press the Power button once to switch to fast flashing mode.
- Press the Power button again to switch to SOS mode.
- Press the Power button one more time to turn off the flashlight.
Maintenance
- Charging: Recharge the unit every 3-6 months, even if not used, to maintain battery health.
- Cleaning: Wipe the unit with a dry, soft cloth. Do not use harsh chemicals or abrasive cleaners.
- Storage: Store the jump starter in a cool, dry place, away from direct sunlight and extreme temperatures. Use the provided storage case for protection.
- Battery Care: Avoid fully discharging the battery frequently to prolong its lifespan.
Troubleshooting
If you encounter issues with your BD10 jump starter, refer to the following common problems and solutions:
| Problem | Possible Cause | Solution |
|---|---|---|
| Jump starter does not turn on. | Battery is fully discharged. | Charge the jump starter fully. |
| Smart clamp indicator is red and beeping. | Reverse polarity connection. | Disconnect clamps and re-attach correctly (red to positive, black to negative). |
| Smart clamp indicator is flashing green. | Vehicle battery voltage is too low. | Press the "BOOST" button on the jump starter. |
| Vehicle does not start after jump starting. | Vehicle battery is severely damaged or other vehicle issues. | Attempt jump start again. If unsuccessful, consult a mechanic. |
| Device not charging other electronics. | Jump starter battery low; incorrect cable; device not compatible. | Charge jump starter; ensure correct cable is used; check device compatibility. |

Image: Diagram showing various alarm situations and their corresponding beeping patterns or display indicators, such as low voltage, external voltage too high, short circuit, safety mode, overcurrent, temperature issues, and reverse connection.
Specifications
| Feature | Detail |
|---|---|
| Model | BD10 |
| Peak Current | 6000A |
| Battery Capacity | 26800mAh |
| Start Voltage | 12V |
| Engine Compatibility | All Gas Engines, up to 12.0L Diesel Engines |
| USB-C Input/Output | PD45W (5V3A, 9V3A, 12V3A, 15V3A, 20V2.25A) |
| USB-A Output (USB1 & USB2) | 18W Max each |
| DC Output | 15V/10A |
| Operating Temperature | -20°C to 60°C (-4°F to 140°F) |
| Water Resistance Rating | IP65 |
| Dimensions | 239.5 x 100 x 57.5mm (9.45 x 3.94 x 2.36 inches) |
| Weight | 920 grams (2.03 pounds) |

Image: A visual representation of the BD10's capability to jump start various engine sizes, from 1.5L to 12.0L, emphasizing its 8000A peak current. The image also highlights 12V, All Gas, 12.0L Diesel, and 26800mAh Battery Capacity.
Warranty and Support
FLYLINKTECH provides a limited warranty for the BD10 Car Jump Starter. Please refer to the warranty card included in your package for specific terms and conditions. For technical support, troubleshooting assistance, or warranty claims, please contact FLYLINKTECH customer service through the following channels:
- Email: Refer to your product packaging or warranty card for the most current contact email.
- Website: Visit the official FLYLINKTECH website for support resources and contact information.
- Amazon Store: You can also reach out via the FLYLINKTECH Store on Amazon.
Please have your product model number (BD10) and purchase date ready when contacting support.
Related documentsBD10


Ask a question about this manual
Ask about setup, troubleshooting, compatibility, parts, safety, or missing instructions. Manuals+ will review the question and use this page’s manual context to help answer it.