
1. Introduction
This manual provides detailed instructions for the assembly, operation, and maintenance of your GreenForest 70-inch L-Shaped Desk. Please read this manual thoroughly before assembly and use to ensure proper function and longevity of your product. This desk is designed for home office use, offering ample workspace, integrated power solutions, and versatile storage options.
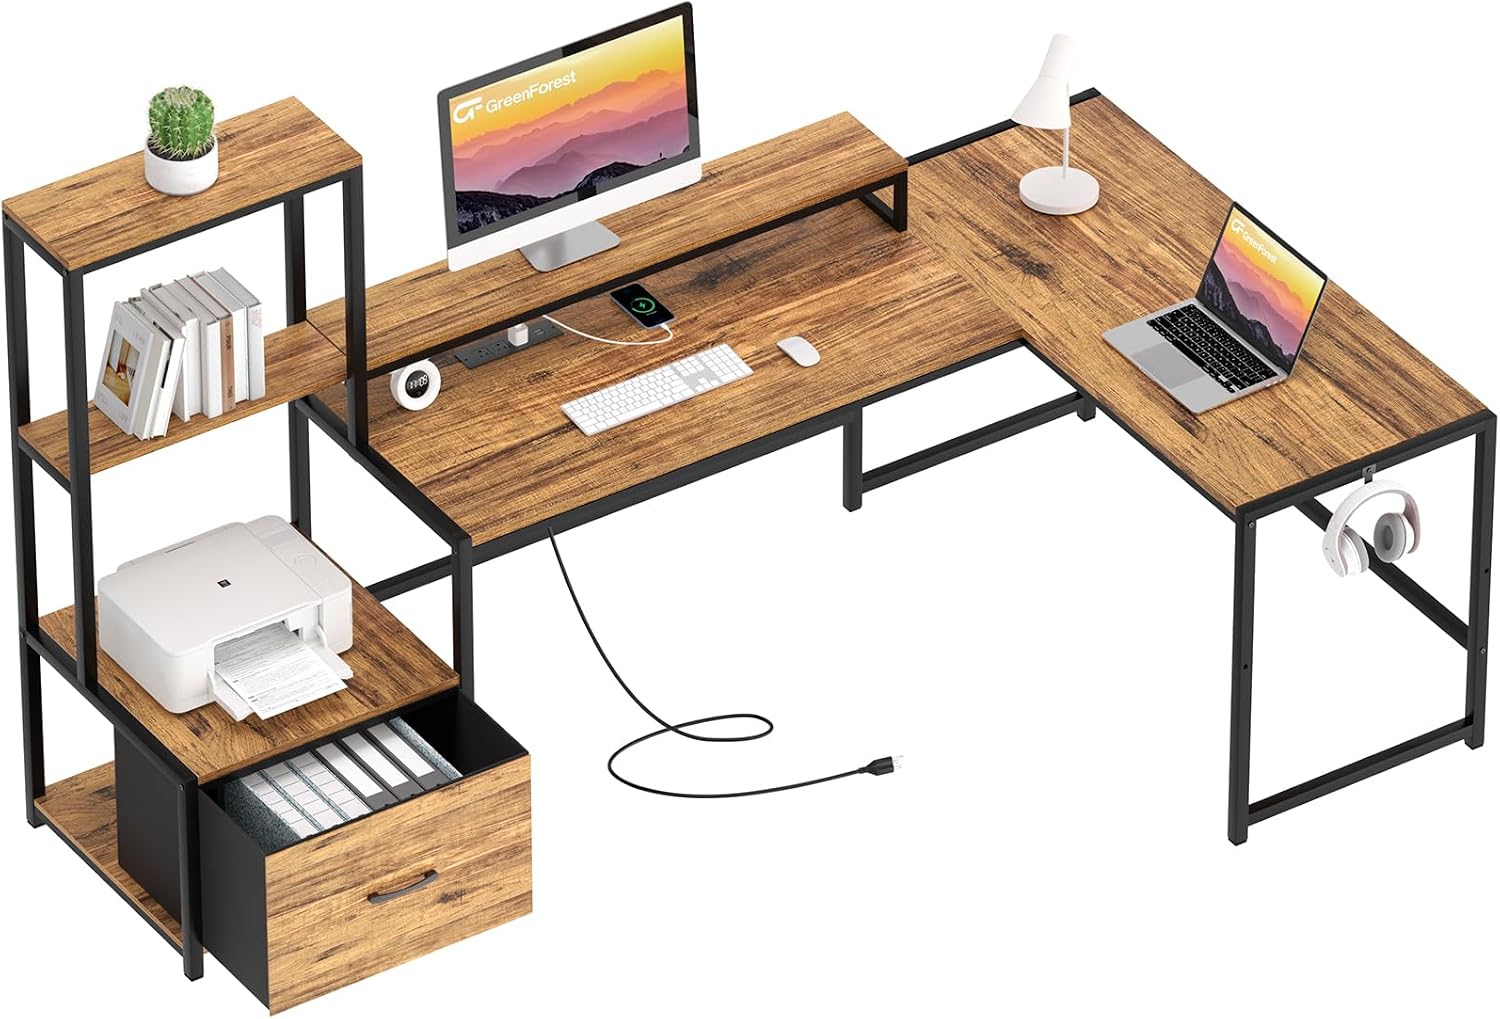
Figure 1: Overview of the GreenForest L-Shaped Desk.
2. Safety Information
Please observe the following safety guidelines to prevent injury or damage to the product:
- Weight Limit: Do not exceed the recommended weight limit for the desk surfaces and shelves. Overloading can cause structural failure.
- Stability: Ensure the desk is placed on a level surface. If necessary, secure the desk to a wall using appropriate anchoring hardware (not included) to prevent tipping, especially in households with children or pets.
- Assembly: Follow all assembly instructions carefully. Do not skip steps or use unauthorized parts. Ensure all fasteners are tightened securely before use.
- Electrical Safety: The integrated power outlets and USB ports are designed for standard electronic devices. Do not overload the power strip. Avoid spilling liquids near electrical components.
- Maintenance: Regularly check all connections and fasteners to ensure they remain tight.
3. Package Contents
Before beginning assembly, verify that all components are present and undamaged. Refer to the parts list provided in the packaging for exact quantities. Typical components include:
- Desk panels (L-shaped main desk, monitor stand, printer shelf, side shelves)
- Metal frame components (legs, support bars)
- Fabric drawer(s)
- Integrated power outlet unit with USB ports
- Assembly hardware (screws, bolts, Allen wrench)
- Instruction manual
4. Setup and Assembly
Assembly typically requires two people. Follow the numbered steps in the included assembly guide. Ensure you have adequate space for assembly.
4.1. Reversible Design
The GreenForest L-Shaped Desk features a reversible design, allowing the storage shelves and printer stand to be installed on either the left or right side of the main desk. Decide on your preferred configuration before starting assembly.

Figure 2: The desk's reversible design allows for left or right side shelf placement.
4.2. Assembly Steps (General Overview)
- Unpack and Identify Parts: Lay out all components and hardware. Compare them with the parts list.
- Assemble Frame: Attach the metal legs and support bars according to the chosen left or right configuration. Do not fully tighten screws until all major components are in place.
- Attach Desk Panels: Secure the main L-shaped desk panels to the assembled frame.
- Install Storage Unit: Assemble and attach the side shelves, printer stand, and monitor stand.
- Insert Fabric Drawer: Place the fabric drawer into its designated slot.
- Install Power Outlet: Secure the integrated power outlet unit into its cutout on the desk surface.
- Final Tightening: Once all components are in place and aligned, fully tighten all screws and bolts.
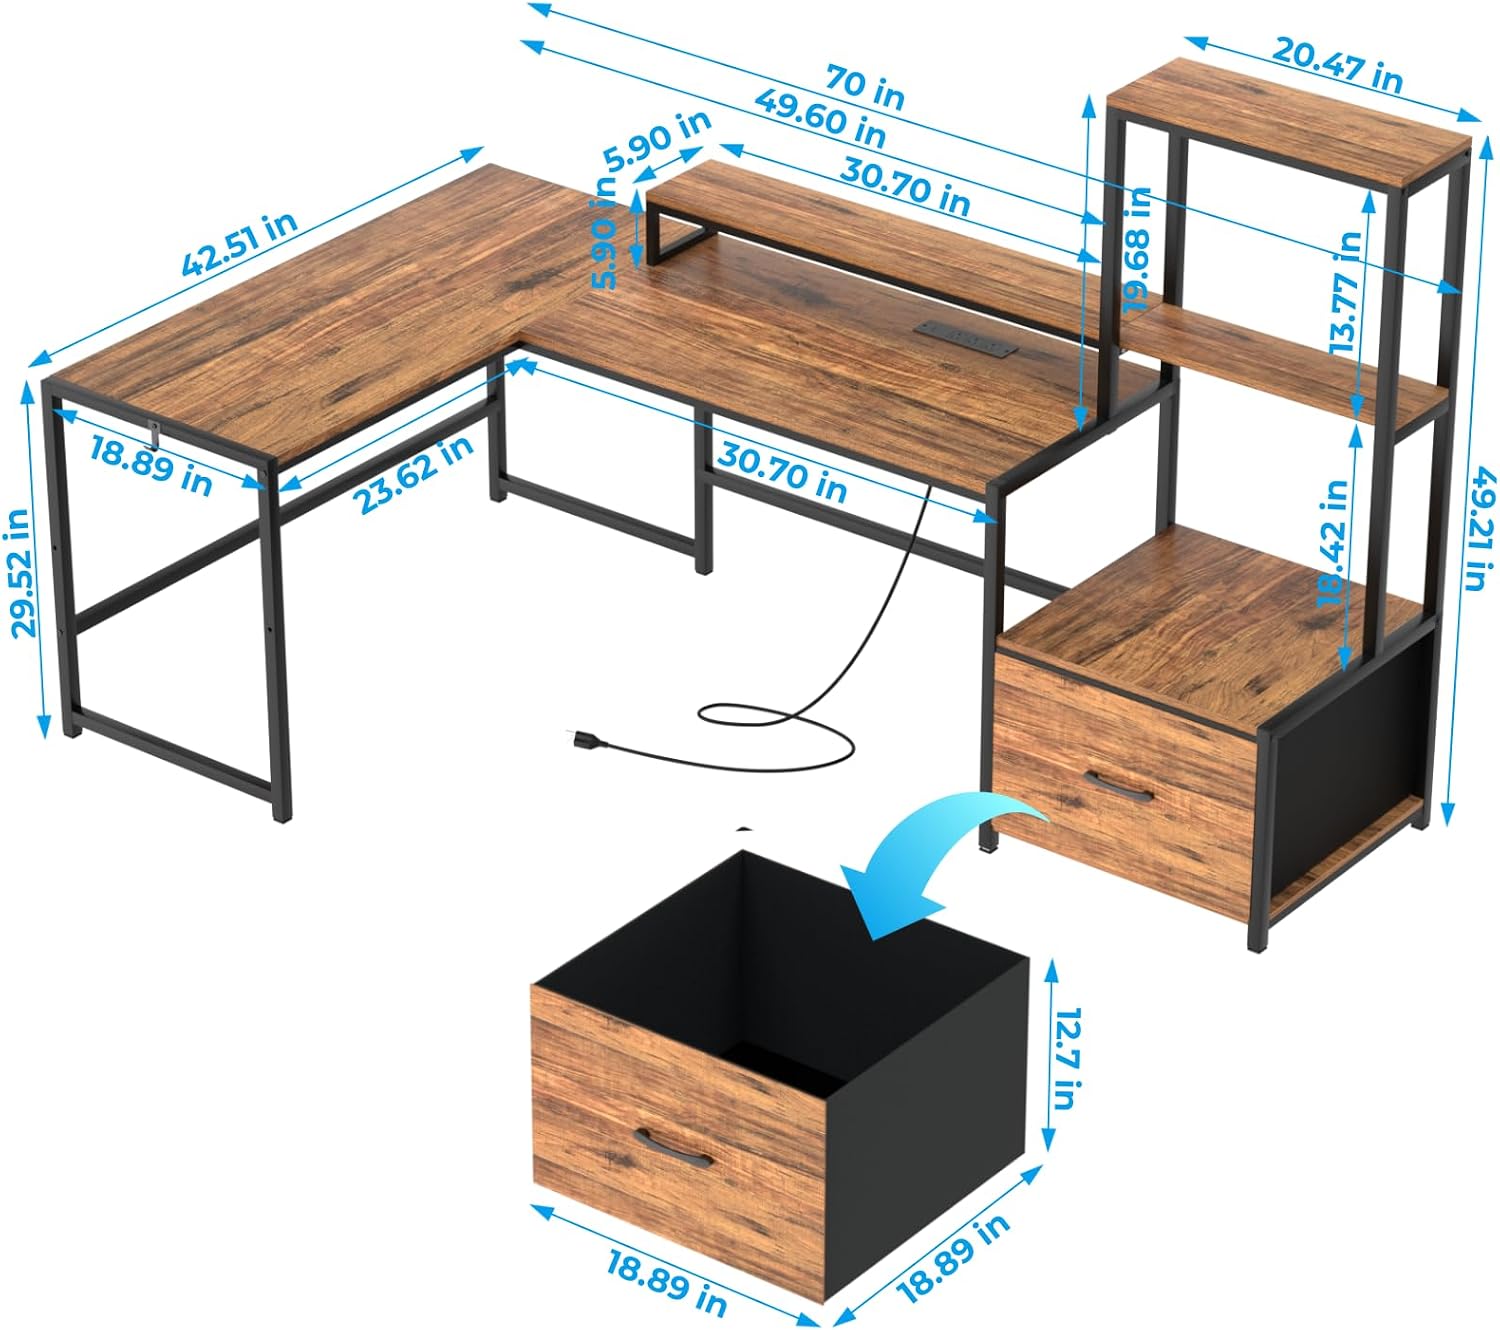
Figure 3: Desk dimensions for planning your space.
5. Operation
5.1. Integrated Power Outlets and USB Charging Ports
The desk includes a built-in power strip with 3 AC outlets (125V/12A) and 2 USB charging ports (5V/2A). Connect the desk's power cord (6.5-foot) to a wall outlet. You can then plug in your electronic devices directly into the desk for convenient power access.

Figure 4: Integrated power and USB charging for your devices.
5.2. Monitor Stand
The elevated monitor stand helps to raise your screen to an ergonomic height, promoting better posture and reducing neck strain. Utilize the space underneath for keyboard storage or other small items.
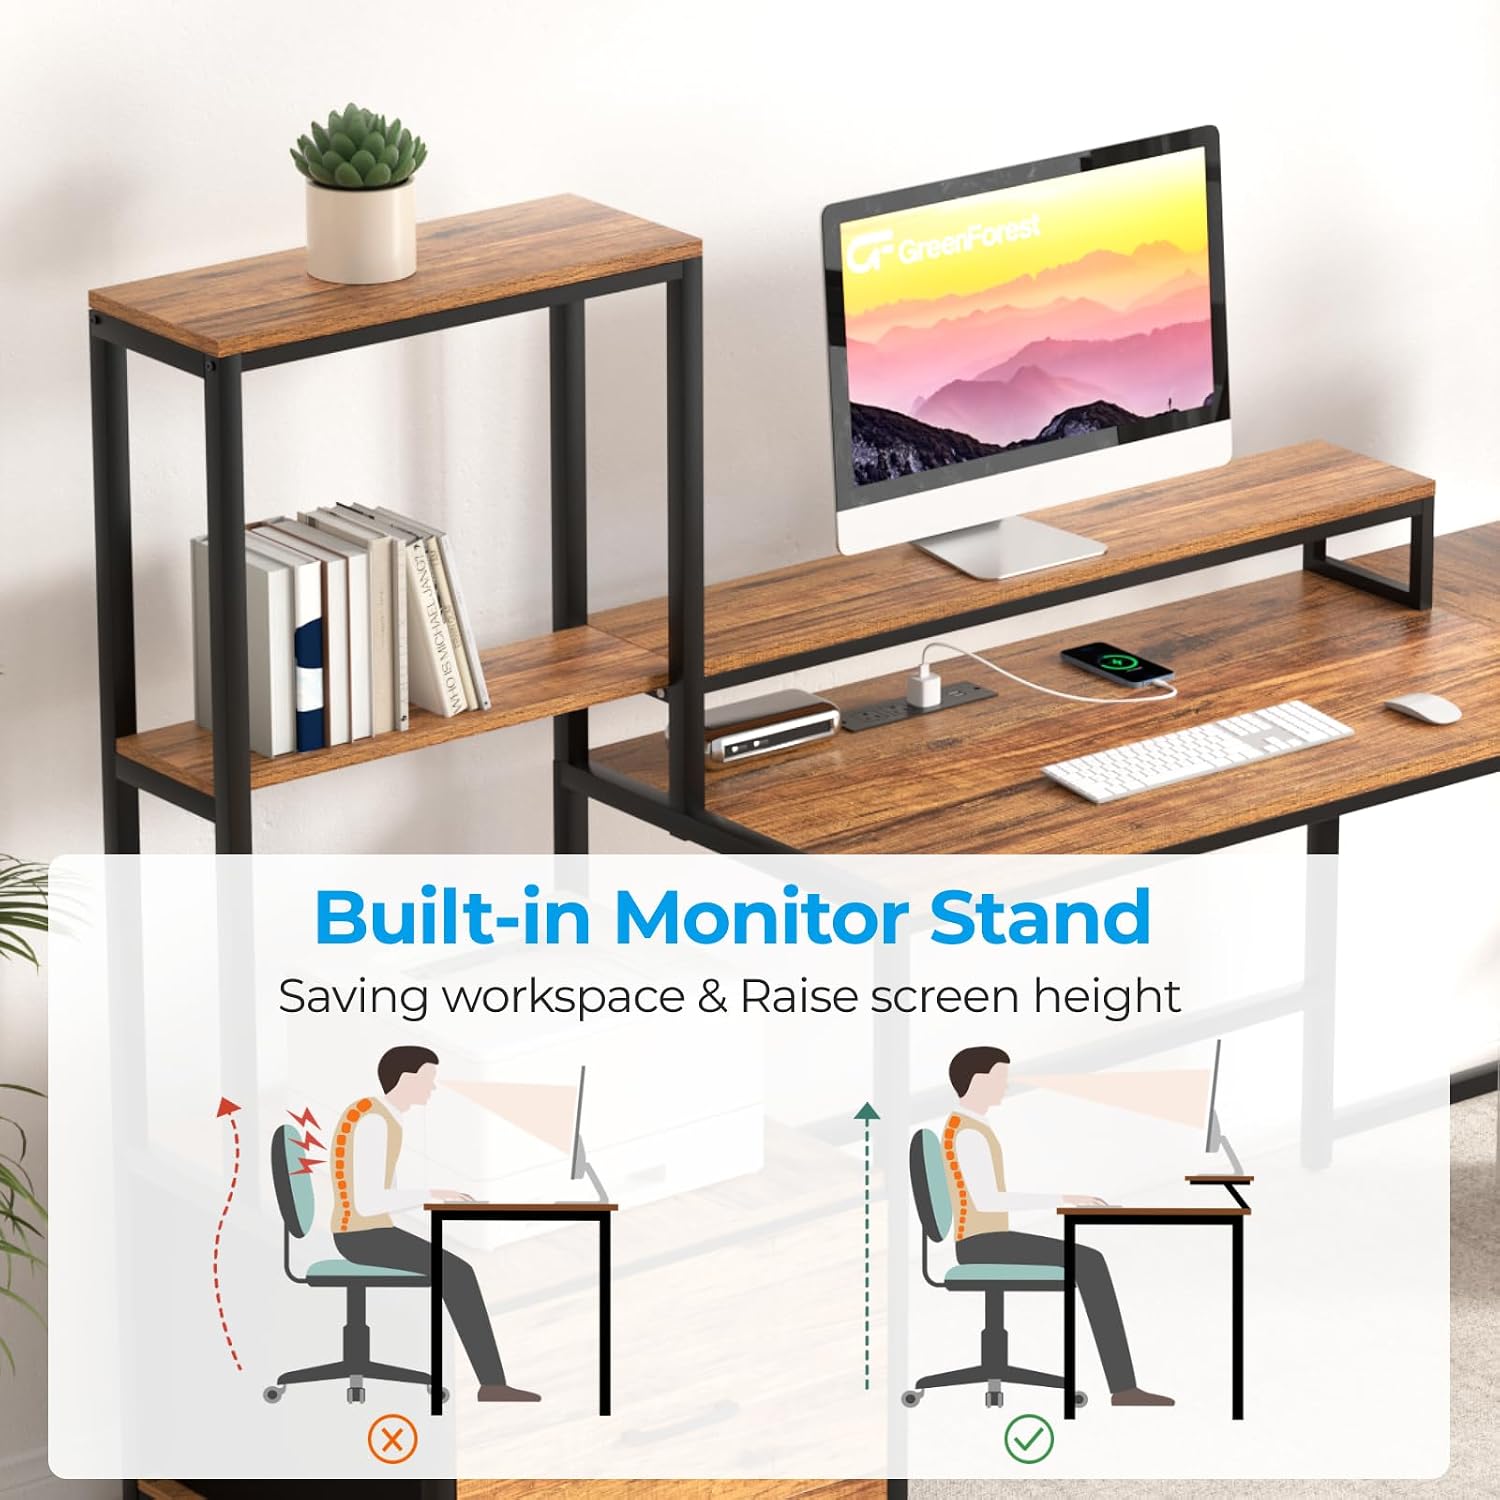
Figure 5: Ergonomic benefits of the built-in monitor stand.
5.3. Printer Stand and Storage Shelves
The dedicated printer stand provides a convenient location for your printer, freeing up main desk space. The two open shelves offer additional storage for books, office supplies, or decorative items. The fabric drawer is suitable for storing documents, charging devices, or other personal items.

Figure 6: Dedicated printer stand and versatile storage shelves.
6. Maintenance
- Cleaning: Wipe surfaces with a soft, damp cloth. Avoid harsh chemicals or abrasive cleaners that could damage the finish.
- Fasteners: Periodically check all screws and bolts to ensure they are tight. Re-tighten as necessary to maintain stability.
- Fabric Drawer: The fabric drawer can be spot cleaned with a mild detergent and water. Allow to air dry completely.
- Electrical Components: Keep the power outlets and USB ports free from dust and debris. Do not attempt to disassemble or repair the electrical unit yourself.
7. Troubleshooting
| Problem | Possible Cause | Solution |
|---|---|---|
| Desk wobbles after assembly. | Loose fasteners; uneven floor. | Ensure all screws and bolts are fully tightened. Adjust leveling feet (if present) or place shims under legs on uneven floors. |
| Power outlets/USB ports not working. | Desk power cord not plugged in; circuit breaker tripped; device malfunction. | Verify the desk's power cord is securely plugged into a functional wall outlet. Check your home's circuit breaker. Test devices in a different outlet. |
| Parts do not align during assembly. | Incorrect orientation of parts; screws overtightened prematurely. | Review the assembly instructions carefully for correct part orientation. Loosen all fasteners slightly, align parts, then re-tighten. |
8. Specifications
| Brand | GreenForest |
| Model | B0C53JYXRL |
| Color | Walnut |
| Overall Dimensions (L x W x H) | 70 inches x 18.8 inches x 29.5 inches (approx. 177.8 cm x 47.75 cm x 74.93 cm) |
| Material | Engineered Wood, Metal |
| Special Features | Monitor Stand, Integrated Power Outlets (3 AC, 2 USB), Printer Shelf, Storage Drawer, Reversible Design |
| Power Outlet Specifications | AC: 125V/12A (3 outlets), USB: 5V/2A (2 ports) |
| Power Cord Length | 6.5 feet |
| Product Weight | Approximately 26.8 kg (59 lbs) |
9. Warranty and Support
For warranty information, missing parts, or technical assistance, please contact GreenForest customer support through the retailer's platform or the official GreenForest website. Please have your model number (B0C53JYXRL) and purchase date available when contacting support.


