
EXTRALINK 12U 600MM Depth
EXTRALINK 12U 19-inch Rack Cabinet User Manual
Model: 12U 600MM Depth, Grey
1. Introduction
Thank you for choosing the EXTRALINK 12U 19-inch Rack Cabinet. This manual provides essential information for the safe and efficient assembly, installation, operation, and maintenance of your rack cabinet. Please read these instructions carefully before use and retain them for future reference.
This rack cabinet is designed for organizing network devices such as switches, servers, patch panels, and CCTV recorders in a secure and tidy environment. It offers flexible installation options, allowing for both wall-mounted and freestanding configurations.
2. Safety Information
- Always ensure the rack is installed on a stable and level surface if freestanding, or securely mounted to a suitable wall structure if wall-mounted.
- Do not exceed the maximum load capacity of 60 kg. Distribute weight evenly within the cabinet.
- Use appropriate tools for assembly and installation. Wear protective gloves to avoid cuts from metal edges.
- Keep children and pets away from the assembly area.
- Ensure proper ventilation around the cabinet to prevent overheating of installed equipment.
- Handle the tempered glass door with care to prevent breakage.
3. Package Contents
Verify that all components are present before beginning assembly. If any parts are missing or damaged, contact your supplier immediately.
- Rack Cabinet Frame (disassembled)
- Tempered Glass Front Door with Lock
- Removable Side Panels
- Mounting Rails (19-inch standard)
- Assembly Hardware (screws, nuts, washers)
- Keys for Door Lock
- User Manual (this document)
4. Product Overview
Key Features:
- 19-inch Standard Compatibility: Designed to house standard 19-inch rack-mountable equipment.
- Durable Construction: Made from steel alloy for robust support and protection.
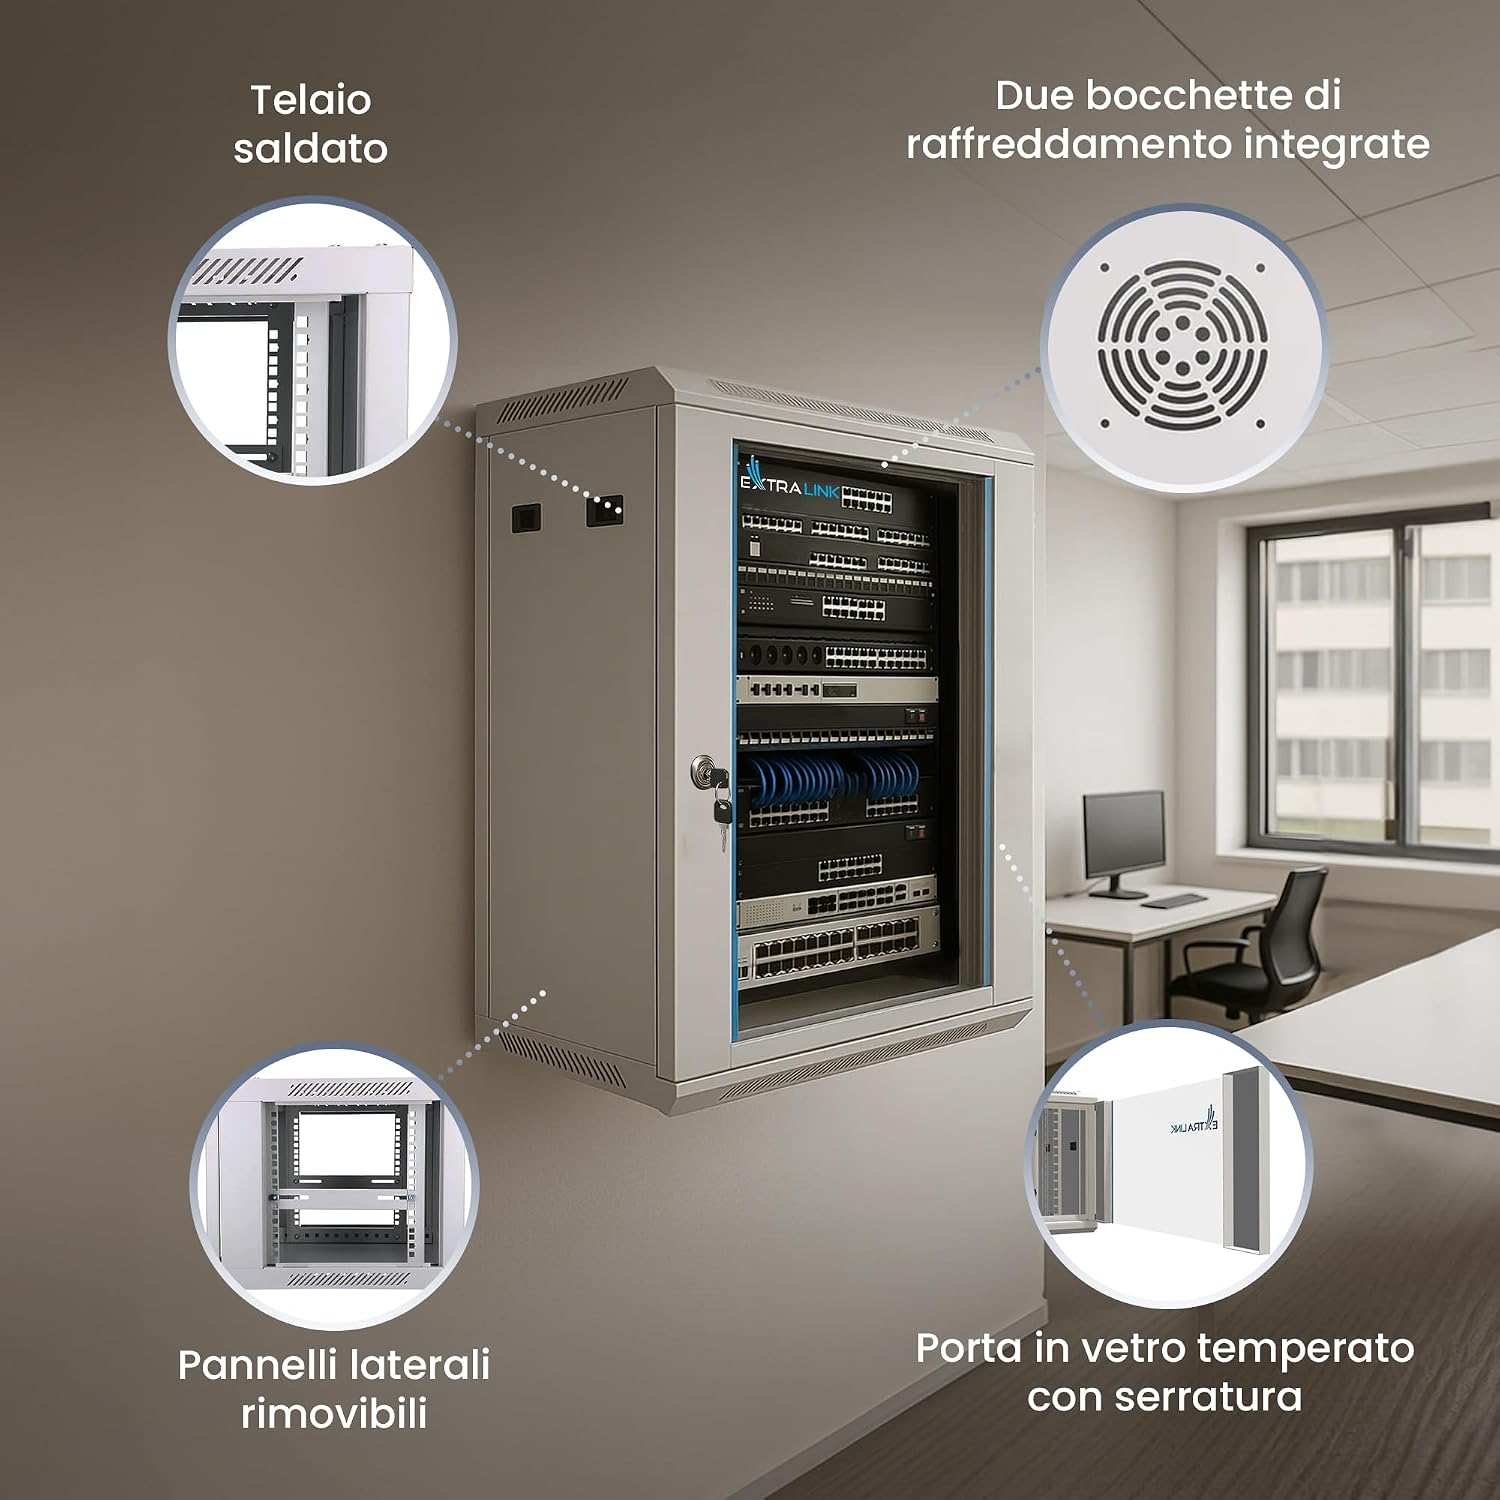
- Tempered Glass Door: Provides visibility of equipment while offering security with a key lock. The door opens 180 degrees for easy access.
- Removable Side Panels: Facilitate easy access for installation and maintenance.
- Ventilation System: Features ventilation slots and a compartment for optional fan installation to ensure optimal cooling.
- Cable Management: Integrated cable pass-throughs for neat and organized cabling.
- Flexible Installation: Suitable for both wall-mounting and freestanding applications.
- High Load Capacity: Supports up to 60 kg of equipment.
Components Diagram:


5. Setup and Assembly
The EXTRALINK rack cabinet is designed for straightforward assembly. Follow these steps carefully for quick and stress-free setup.
5.1 Tools Required:
- Screwdriver set (Phillips and flathead)
- Wrench or socket set
- Measuring tape
- Level
- Drill (for wall mounting)
- Safety gloves
5.2 Assembly Steps:
- Unpack all components and verify against the package contents list.
- Assemble the main frame using the provided screws and nuts. Ensure all connections are secure.
- Attach the 19-inch mounting rails to the desired depth within the frame. These rails are adjustable to accommodate various equipment sizes.
- Install the tempered glass front door. Ensure the hinges are properly aligned and the lock mechanism functions correctly.
- Attach the removable side panels. These typically slide into place and may have latches or screws for securing.
- For wall mounting, identify a suitable wall location capable of supporting the cabinet's weight plus equipment (up to 60 kg). Mark and drill holes according to the cabinet's mounting points. Securely fasten the cabinet to the wall using appropriate anchors and screws (not included).
- For freestanding installation, ensure the cabinet is placed on a stable, level surface.


6. Operating Instructions
6.1 Installing Equipment:
- Open the front door and remove the side panels for easier access.
- Mount your 19-inch compatible equipment (e.g., switches, servers, patch panels) onto the mounting rails using appropriate rack screws (often supplied with your equipment).
- Ensure equipment is securely fastened and evenly distributed to maintain balance.
- Utilize the cable pass-throughs at the top and bottom of the cabinet to route power and data cables neatly.
- Once all equipment is installed and cabled, reattach the side panels and close the front door.
- Lock the front door using the provided keys to secure your equipment.


6.2 Ventilation:
The cabinet includes ventilation slots. For enhanced cooling, an optional fan unit can be installed in the designated compartment at the top of the cabinet. Ensure airflow is not obstructed by cables or other equipment.
7. Maintenance
- Cleaning: Wipe the exterior surfaces with a soft, damp cloth. Avoid abrasive cleaners or solvents. For the glass door, use a standard glass cleaner.
- Inspection: Periodically check all screws and fasteners to ensure they remain tight. Verify that the door hinges and lock mechanism operate smoothly.
- Ventilation: Ensure ventilation openings are free from dust and obstructions to maintain optimal airflow. Clean dust from fan filters if an optional fan unit is installed.
- Cable Management: Regularly inspect cables for wear or damage and ensure they are neatly routed to prevent strain or interference.
8. Troubleshooting
| Problem | Possible Cause | Solution |
|---|---|---|
| Cabinet feels unstable after assembly. | Loose fasteners; uneven floor/mounting surface. | Tighten all assembly screws. Ensure the floor is level or use shims if necessary. Re-check wall mounting security. |
| Equipment overheating inside the cabinet. | Insufficient airflow; blocked vents; no fan installed. | Ensure all ventilation slots are clear. Consider installing an optional fan unit. Verify proper cable routing to avoid blocking airflow. |
| Door not closing or locking properly. | Misaligned hinges; obstruction; damaged lock. | Check hinge alignment and adjust if necessary. Remove any obstructions. If the lock is damaged, contact support. |
| Difficulty assembling components. | Incorrect orientation; missing parts; bent components. | Refer to the assembly steps and diagrams. Verify all parts are present. If components are bent, gently straighten them or contact support for replacements. |
9. Specifications
- Brand: EXTRALINK
- Model: 12U 600MM Depth
- Size: 12U
- Color: Grey
- Product Dimensions (D x W x H): 60 cm x 60 cm x 63.2 cm (approximate height for 12U)
- Material: Steel Alloy
- Weight Capacity: 60 kg
- Item Weight: 20 Kilograms
- Compatible Devices: Servers, Switches, Patch Panels, CCTV Recorders, etc.
- Mounting Type: Wall Mount or Freestanding
- Door Type: Tempered Glass, 180° opening, Lockable
- Assembly Required: Yes
10. Warranty and Support
10.1 Warranty Information:
This EXTRALINK rack cabinet comes with a 24-month warranty from the date of purchase. The warranty covers manufacturing defects and material faults under normal use. It does not cover damage caused by improper installation, misuse, accidents, unauthorized modifications, or natural disasters.
Please retain your proof of purchase for warranty claims.
10.2 Customer Support:
For technical assistance, missing parts, or warranty inquiries, please contact your retailer or EXTRALINK customer support. Refer to the contact information provided with your purchase documentation or visit the official EXTRALINK website.
When contacting support, please have your product model (12U 600MM Depth) and purchase date ready.
Related documents12U 600MM Depth


Ask a question about this manual
Ask about setup, troubleshooting, compatibility, parts, safety, or missing instructions. Manuals+ will review the question and use this page’s manual context to help answer it.