
CCYLEZ CCYLEZx7ps4qhv8b-11
50KHz - 2GHz DSP SDR Receiver User Manual
Model: CCYLEZx7ps4qhv8b-11 | Brand: CCYLEZ
1. Product Overview
The CCYLEZ 50KHz - 2GHz DSP SDR Receiver is a versatile Software Defined Radio (SDR) designed for a wide range of radio reception. Featuring a 3.5-inch IPS display, a powerful STM32H743 processor, and a built-in 3600mAh battery, this device offers excellent portability and performance. It includes advanced features such as noise reduction, variable filters, and dual antenna inputs for enhanced sensitivity.
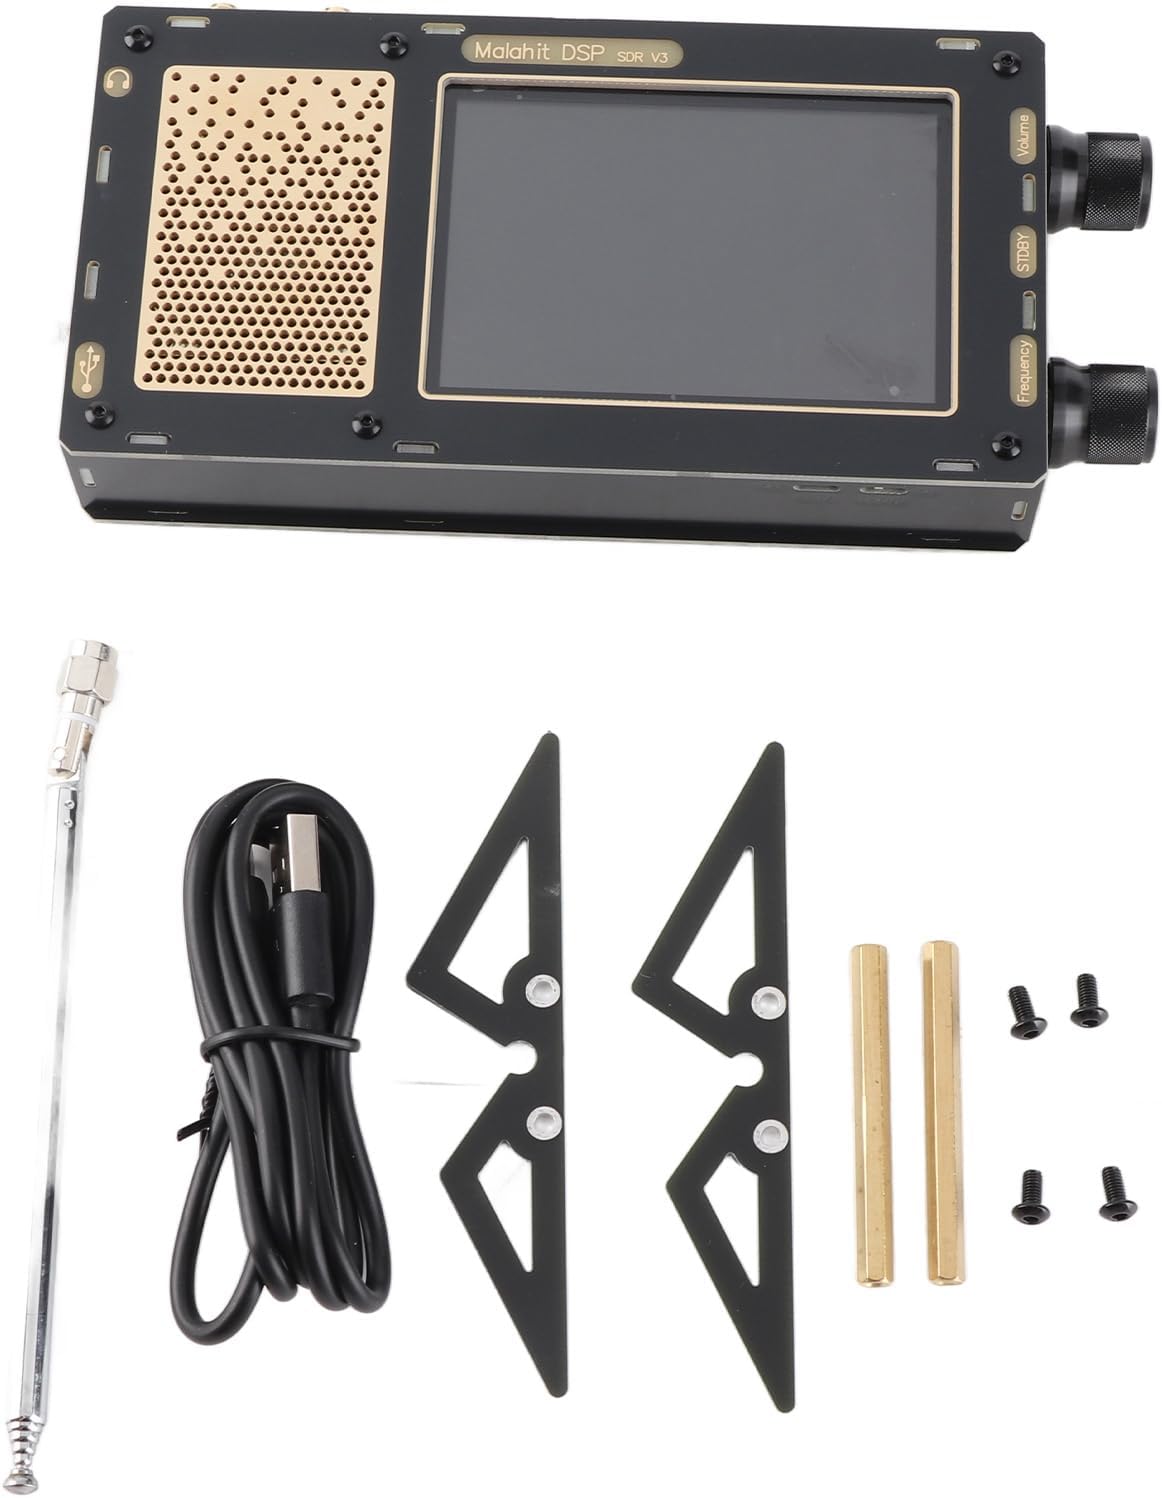
The DSP SDR Receiver unit along with its essential accessories, including antennas and cables.

The 3.5-inch IPS capacitive touchscreen display provides a clear interface for frequency spectrum analysis and settings adjustment.

The receiver features dual antenna input options and an attenuation filter module for improved shortwave sensitivity.
2. Specifications
| Feature | Description |
|---|---|
| Item Type | Digital Signal Processor Software Defined Radio Receiver |
| Material | PCB, LCD |
| Screen | 3.5 Inch IPS Capacitive Touchscreen with Backlight Adjustment |
| Processor | STM32H743 (480MHz main frequency) |
| Sampling Rate | 12 Bit |
| Sampling Bandwidth | 160KHz |
| Receiving Frequency Range | 50KHz-2GHz (50 kHz to 49.999 MHz, 50.001 MHz to 249.999 MHz, 400 MHz to 2 GHz) |
| Demodulation Types | AM, SSB, NFM, WFM, CW |
| Battery Type | 3600mAh Li-Ion Battery (Built-in) |
| Connectivity | USB (for CAT and sound communication) |
| Weight | 1.01 pounds (approx. 458g) |
| Dimensions | 8.27 x 5.91 x 1.97 inches (approx. 21 x 15 x 5 cm) |
| Special Features | Variable filter, adaptive noise reduction, threshold noise reduction, noise suppressor, AGC, front-end attenuation filter module (up to 30dB) |

The receiver covers a broad frequency spectrum from 50 kHz to 2 GHz, enabling reception of various radio signals.
3. Package Contents
Please verify that all items are present in the package:
- 1 x Receiver Host (DSP SDR V3)
- 1 x Type-C USB Cable
- 2 x Antenna
- 2 x Expansion Board
- 4 x Screw
- 2 x Metal Studs

A complete view of the receiver and all accessories provided in the box.
4. Setup
- Charging the Battery: Before first use, fully charge the built-in 3600mAh Li-Ion battery using the provided Type-C USB cable and a compatible USB power adapter (not included). The charging indicator will typically show status.
- Attaching Antennas: Carefully screw the provided antennas into the antenna input ports on the receiver. Ensure a secure connection. The device supports dual antenna inputs.
- Powering On: Locate the power button on the side of the unit. Press and hold the power button for a few seconds until the display illuminates.

The side of the receiver with the power button and rotary encoders for control.

Detail of the two antenna input ports, designed for secure connection.
5. Operating Instructions
The DSP SDR Receiver features an intuitive touchscreen interface for navigation and control.
5.1 Basic Navigation
- Touchscreen: Tap icons and menus on the 3.5-inch IPS display to select functions and adjust settings.
- Rotary Encoders: Use the physical knobs on the side for fine-tuning frequency, volume, and navigating menus.
5.2 Frequency Tuning and Demodulation
- Frequency Input: Use the on-screen keypad or rotary encoder to enter the desired receiving frequency within the 50KHz-2GHz range.
- Demodulation Modes: Select the appropriate demodulation type (AM, SSB, NFM, WFM, CW) based on the signal you wish to receive. This can typically be changed via an on-screen menu option.
5.3 Advanced Features
- Noise Reduction: The receiver includes adaptive noise reduction, threshold noise reduction, and a noise suppressor. Access these settings through the display menu to improve signal clarity in noisy environments.
- Variable Filter: Adjust the bandwidth of the received signal using the variable filter option to isolate desired frequencies and reduce interference.
- AGC (Automatic Gain Control): The AGC function automatically adjusts the receiver's gain to maintain a consistent audio output level, preventing signal overload or too weak reception.
- USB Connection: Connect the receiver to a computer via the Type-C USB port for CAT (Computer Aided Transceiver) control and sound communication, allowing for advanced software integration.

The compact design allows for convenient operation and monitoring in various settings.

The USB connectivity enables integration with computer software for enhanced control and audio processing.
6. Maintenance
- Cleaning: Use a soft, dry cloth to clean the exterior of the receiver. Do not use liquid cleaners or abrasive materials.
- Battery Care: To prolong battery life, avoid fully discharging the battery frequently. If storing for extended periods, charge the battery to approximately 50% and recharge every few months.
- Storage: Store the receiver in a cool, dry place away from direct sunlight, extreme temperatures, and high humidity.
- Antenna Care: Handle antennas carefully to prevent bending or damage. Disconnect them when transporting the device to avoid stress on the connectors.
7. Troubleshooting
- Device does not power on:
- Ensure the battery is sufficiently charged. Connect the device to a power source using the Type-C cable.
- Press and hold the power button firmly for several seconds.
- Poor reception or no signal:
- Check that antennas are securely connected.
- Ensure you are using the correct antenna for the frequency range you are trying to receive.
- Verify the selected demodulation type (AM, SSB, NFM, WFM, CW) matches the signal.
- Adjust the variable filter and noise reduction settings.
- Move to an area with less electromagnetic interference.
- USB connection issues with computer:
- Ensure the Type-C USB cable is properly connected to both the receiver and the computer.
- Check if necessary drivers are installed on your computer (refer to manufacturer's website for driver downloads if needed).
- Try a different USB port on your computer.
8. Warranty and Support
For warranty information and technical support, please refer to the product packaging or contact CCYLEZ customer service directly. Keep your purchase receipt as proof of purchase.
Ask a question about this manual
Ask about setup, troubleshooting, compatibility, parts, safety, or missing instructions. Manuals+ will review the question and use this page’s manual context to help answer it.