
1. Important Safety Information
Please read all instructions carefully before assembly and installation. Failure to follow these instructions may result in injury or damage to the product. Keep this manual for future reference.
- Ensure all parts are present and undamaged before beginning assembly.
- Assembly should be performed by at least two adults.
- Use appropriate tools and follow all local building and plumbing codes for installation.
- Securely fasten the wall-mounted units to a solid wall structure. Consult a professional if unsure about wall type or mounting methods.
- Do not overload drawers or shelves.
- Keep small parts away from children during assembly.
- Avoid using abrasive cleaners or harsh chemicals on any surfaces.
2. Package Contents
Verify that all components listed below are included in your package. If any parts are missing or damaged, contact customer support immediately.
- 1 x SELITA Wall-Mounted Vanity Unit (120 cm)
- 1 x MOTIAC Double Built-in Ceramic Sink
- 1 x STEFANIE Wall-Mounted Bathroom Column
- Assembly Hardware Kit (screws, dowels, brackets, etc.)
- Instruction Manual (this document)

Image 2.1: Individual components of the SELITA bathroom set.
3. Setup and Installation
This section provides general guidelines for assembly and installation. Refer to the detailed diagrams and specific instructions included with your hardware kit for precise steps.
3.1 Tools Required
- Phillips head screwdriver
- Flathead screwdriver
- Drill with appropriate drill bits (for wall mounting)
- Level
- Measuring tape
- Pencil
- Silicone sealant (for sink installation)
3.2 Vanity Unit Assembly (SELITA)
- Unpack all vanity unit components and lay them out on a clean, soft surface to prevent scratches.
- Assemble the main cabinet structure according to the provided diagrams, ensuring all panels are correctly oriented.
- Install the drawer slides into the cabinet frame.
- Assemble the four drawers, attaching the soft-close mechanisms.
- Insert the assembled drawers into the cabinet slides. Adjust as necessary for smooth operation.
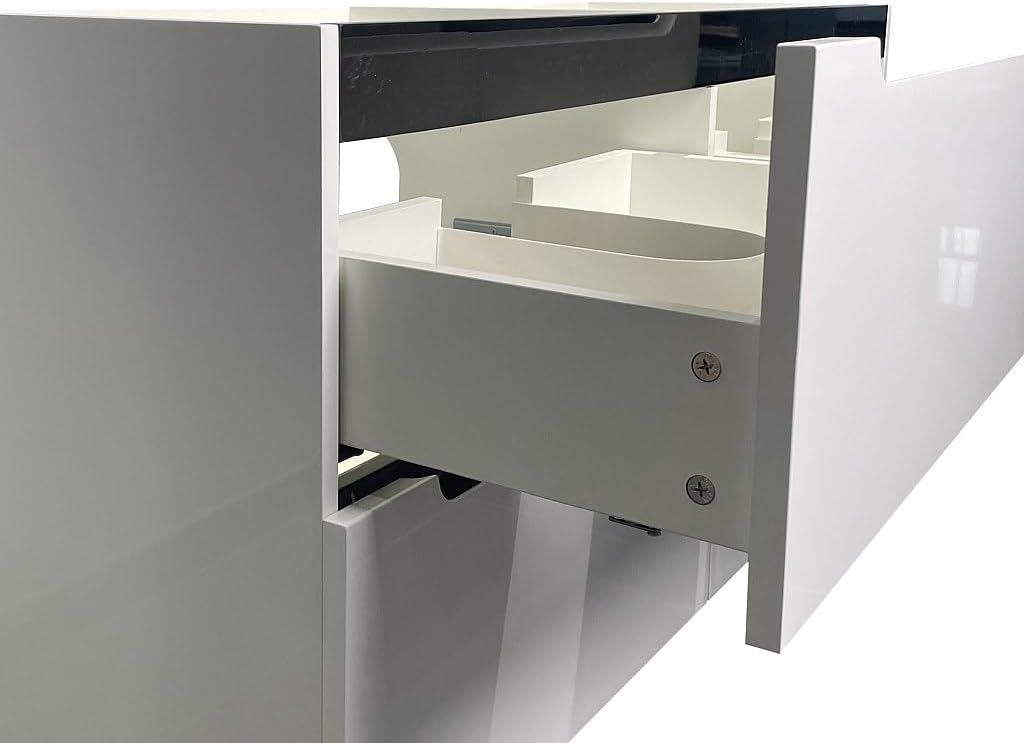
Image 3.1: Detail of an open soft-close drawer.
3.3 Bathroom Column Assembly (STEFANIE)
- Unpack all column components and inspect for damage.
- Assemble the column frame, ensuring door hinges are correctly positioned.
- Install the internal shelves at desired heights.
- Attach the doors to the hinges. Adjust hinges for proper alignment and closure.
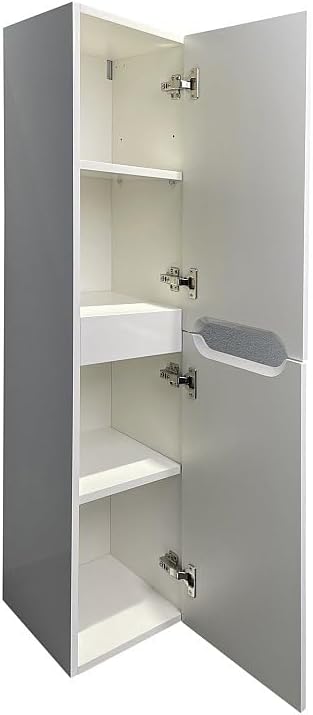
Image 3.2: Interior view of the STEFANIE column.
3.4 Wall Mounting
- Determine the desired height and position for both the vanity unit and the column. Use a level to mark mounting points accurately on the wall.
- Drill pilot holes at the marked locations. Ensure you are drilling into wall studs or using appropriate wall anchors for your wall type.
- Attach the mounting brackets to the wall.
- Carefully lift and hang the vanity unit onto the wall brackets. Secure it firmly.
- Repeat the process for the bathroom column.
3.5 Sink Installation (MOTIAC)
- Place the ceramic double sink onto the vanity unit. Ensure it aligns correctly with the cabinet and any pre-drilled holes for plumbing.
- Apply a bead of silicone sealant around the edges where the sink meets the vanity unit to create a watertight seal.
- Install faucets and drain assemblies (not included) according to their respective manufacturer's instructions.
- Connect the plumbing lines. Check for leaks after turning on the water supply.

Image 3.3: Fully assembled and installed SELITA bathroom set.
4. Operating Instructions
The Vente-unique SELITA bathroom set is designed for straightforward use and storage.
- Drawers: The vanity unit features four soft-close drawers. To open, gently pull the integrated handle. To close, push the drawer until the soft-close mechanism engages, allowing it to close smoothly and silently.
- Column Doors: The bathroom column has two hinged doors. Use the integrated handles to open and close.
- Sink Usage: The ceramic double sink is designed for daily washing. Ensure proper drainage and avoid placing excessively hot items directly on the ceramic surface.

Image 4.1: Detail of soft-close drawer handle.
5. Maintenance and Care
Proper care will ensure the longevity and appearance of your Vente-unique SELITA bathroom set.
- Cleaning Surfaces: Wipe all lacquered and glossy surfaces with a soft, damp cloth. For stubborn marks, use a mild, non-abrasive cleaner specifically designed for furniture. Dry immediately with a clean cloth.
- Ceramic Sink: Clean the ceramic sink with standard bathroom cleaners. Avoid abrasive pads or harsh chemicals that could scratch or damage the finish. Rinse thoroughly after cleaning.
- Spills: Immediately wipe up any water spills or moisture to prevent damage to the MDF and particle board components, especially around edges and seams.
- Avoid: Do not use ammonia-based cleaners, abrasive powders, steel wool, or furniture polish containing silicone.
- Hardware: Periodically check all screws and fittings to ensure they remain tight. Tighten if necessary.
6. Troubleshooting
This section addresses common issues you might encounter.
| Problem | Possible Cause | Solution |
|---|---|---|
| Drawers do not close smoothly or are misaligned. | Loose drawer slides or incorrect adjustment. | Check that drawer slides are securely fastened. Adjust the soft-close mechanisms and drawer fronts as per assembly instructions. |
| Vanity unit or column feels unstable. | Improper wall mounting or loose brackets. | Ensure the unit is securely fastened to wall studs or appropriate anchors. Tighten all mounting screws. If unsure, consult a professional. |
| Water leaks from the sink area. | Improperly sealed sink or loose plumbing connections. | Check the silicone sealant around the sink for gaps. Ensure all plumbing connections (faucets, drains) are tight and properly sealed. |
| Doors on the column are misaligned. | Hinges require adjustment. | Adjust the screws on the hinges to align the doors. Refer to the hinge adjustment instructions in the assembly guide. |
7. Specifications
| Feature | Detail |
|---|---|
| Brand | Vente-unique |
| Model | SELITA (Vanity Unit), MOTIAC (Sink), STEFANIE (Column) |
| Color | White |
| Materials | Vanity Unit/Column: MDF, Particle Board (Lacquered, Glossy finish) Sink: Ceramic (Polished, Glossy finish) |
| Vanity Unit Dimensions (L x H x D) | 120 cm x 57 cm x 46 cm |
| Sink Dimensions (L x H x D) | 122 cm x 17 cm x 46.5 cm |
| Column Dimensions (L x H x D) | 30 cm x 120 cm x 30 cm |
| Weight (Total) | Approximately 90.5 kg |
| Storage | 4 soft-close drawers (vanity), 2 doors with internal shelves (column) |
| Installation Type | Wall-mounted |
| Special Features | Moisture resistant, Soft-close system |
8. Warranty Information
Specific warranty details for the Vente-unique SELITA bathroom vanity unit are not provided within this manual. Please refer to your purchase documentation, the product listing on the retailer's website, or contact Vente-unique customer service directly for information regarding warranty coverage and terms.
9. Customer Support
If you have any questions, require assistance with assembly, or need to report missing/damaged parts, please contact Vente-unique customer support through the following channels:
- Website: Visit the official Vente-unique website for support resources and contact forms.
- Retailer: Contact the retailer from whom you purchased the product.
- Purchase Documentation: Check your order confirmation or packaging for specific contact details.


