
Introduction
This manual provides instructions for the assembly, operation, and maintenance of your TRIUMPHKEY Height Adjustable Desk. Please read this manual thoroughly before use to ensure proper function and safety.

Image: The TRIUMPHKEY Height Adjustable Desk, showcasing its spacious white desktop, dual monitor setup, laptop, and integrated USB charging port.

Image: A user seated at the TRIUMPHKEY desk, demonstrating its suitability for comfortable sitting work positions.
Safety Information
- Do not exceed the maximum weight capacity of 70 kg (154 lbs).
- Ensure no obstacles are in the path of the desk during height adjustments to prevent collisions.
- Keep children and pets away from the desk during operation.
- Do not sit or stand on the desk.
- Only use the desk for its intended purpose as a workstation.
- Disconnect power before cleaning or maintenance.
Package Contents
Please verify that all components are present before beginning assembly.
- Desktop (4 parts)
- Desk Frame (Galvanized Steel Legs)
- Control Panel with USB Charging Port
- Power Adapter and Cable
- Headphone Hook
- Cable Management Tray
- Assembly Hardware (screws, tools)
- Instruction Manual

Image: An exploded diagram illustrating the various components of the TRIUMPHKEY desk, including the four-part desktop, steel frame, control panel, headphone hooks, and cable management system.
Setup and Assembly
Follow these steps to assemble your height-adjustable desk. It is recommended to have two people for certain assembly steps, especially when flipping the desk.
- Unpack Components: Carefully remove all parts from the packaging and lay them out on a clean, soft surface to prevent scratches.
- Assemble Desktop: Connect the four desktop parts using the provided dowels and fasteners. Ensure they are securely aligned.
- Attach Desk Legs: Secure the galvanized steel legs to the desktop frame using the provided screws. Ensure all connections are tight.
- Install Control Panel: Mount the control panel to the underside of the desktop in the designated area. Connect the necessary cables to the motor and power supply.
- Attach Accessories: Install the headphone hook and cable management tray as shown in the diagrams.
- Connect Power: Plug the power adapter into the desk and then into a wall outlet.
- Initial Calibration: Perform an initial calibration as per the control panel instructions (usually by pressing and holding the down button until the desk reaches its lowest point and slightly retracts).

Image: A detailed diagram illustrating the desk's dimensions (180cm width, 80cm depth, 72-118cm height) and its construction from a four-part desktop and galvanized steel legs.
Operating Instructions
Control Panel Functions

Image: The intelligent control panel featuring three memory preset buttons (1, 2, 3), a digital height display, up/down adjustment arrows, and an integrated USB-A fast charging port.
- Up/Down Arrows: Press and hold the up or down arrow to adjust the desk height manually. Release to stop.
- Memory Presets (1, 2, 3):
- Adjust the desk to your desired height.
- Press the 'M' button (or similar 'Set' button, if present, otherwise assume direct press).
- Press one of the number buttons (1, 2, or 3) within 3 seconds to save the current height to that preset.
- To recall a saved height, simply press the corresponding number button (1, 2, or 3). The desk will automatically move to the saved position.
- USB Charging Port: Located on the control panel, this USB-A port provides fast charging for mobile phones and other electronic devices.
- Sedentary Reminder: The control panel may include a function to remind you to change positions after a set period. Refer to the specific control panel manual for activation and settings.
Height Adjustment
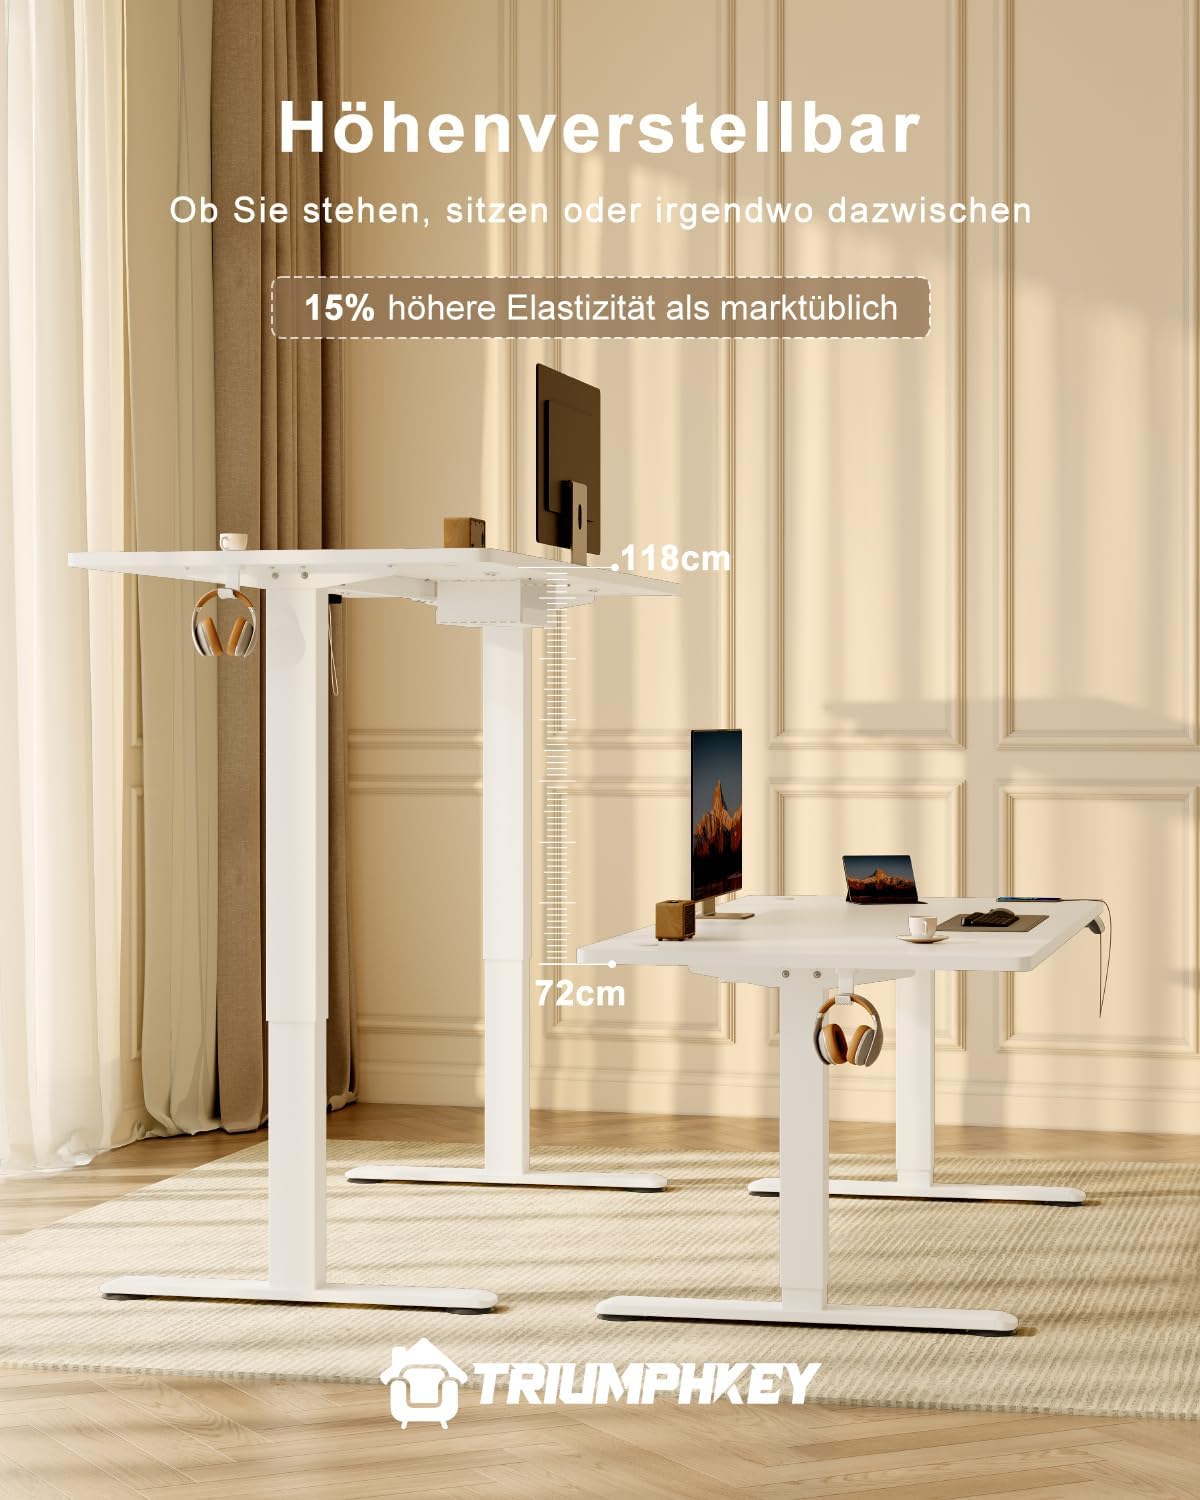
Image: A visual representation of the desk's height adjustment capabilities, demonstrating its range from a minimum of 72 cm to a maximum of 118 cm.

Image: A user standing at the TRIUMPHKEY desk, illustrating the ergonomic benefits of its height adjustment feature for standing work.
The desk can be adjusted electrically between 72 cm and 116 cm. Use the up/down arrows for manual adjustment or the memory presets for quick changes between sitting and standing positions.
Anti-Collision System
The desk is equipped with an anti-collision system. If the desk encounters an obstacle during height adjustment, it will automatically stop and reverse slightly to prevent damage or injury. Ensure the area around the desk is clear before and during operation.
Maintenance
- Cleaning: Wipe the desktop and frame with a soft, damp cloth. Avoid abrasive cleaners or harsh chemicals.
- Cable Management: Regularly check and organize cables using the integrated cable management system to prevent tangles and damage.
- Inspections: Periodically check all screws and fasteners to ensure they are tight. Retighten if necessary.
- Motor Care: The motor is designed for long-term use. Avoid overloading the desk beyond its 70 kg capacity.

Image: The integrated cable management tray, designed to keep power cords and data cables organized and out of sight, contributing to a tidy workspace.
Troubleshooting
| Problem | Possible Cause | Solution |
|---|---|---|
| Desk does not move. | Power cable disconnected; motor error; overload. | Check power connections. Unplug and replug the power cable. Reduce load on the desk. Perform a reset (refer to control panel manual). |
| Desk moves unevenly or makes unusual noise. | Loose connections; uneven load; motor issue. | Ensure all assembly screws are tight. Distribute weight evenly on the desktop. Contact customer support if the issue persists. |
| Anti-collision system triggers frequently. | Obstacles in the desk's path; sensitivity setting. | Clear the area around the desk. Check control panel manual for anti-collision sensitivity adjustment. |
| Memory presets not working. | Presets not saved correctly; power cycle. | Re-save the memory presets following the operating instructions. Disconnect and reconnect power to reset the system. |
Specifications
| Brand | TRIUMPHKEY |
| Model Number | 0287 |
| Desktop Dimensions (L x W) | 180 cm x 80 cm |
| Height Adjustment Range | 72 cm - 116 cm |
| Material | Alloy Steel Frame, Four-part Desktop |
| Color | White+white |
| Load Capacity | 70 kg (154 lbs) |
| Noise Level | <50 dB |
| Special Features | 3 Memory Presets, USB Charging Port, Anti-Collision System, Sedentary Reminder, Headphone Hook, Cable Management |
| Item Weight | 15.5 kg |

Image: The desk supporting a 70 kg weight, highlighting its robust construction and stability provided by the 80x50mm thick legs.

Image: A close-up view of the desk's sturdy legs, indicating their dimensions of 80x50mm, which contribute to the desk's overall stability.
Warranty and Support
For warranty information or technical support, please refer to the documentation included with your purchase or contact TRIUMPHKEY customer service directly. Contact details can typically be found on the manufacturer's website or your purchase receipt.
Online Support: Visit the TRIUMPHKEY Store on Amazon for additional product information and support resources.


