
1. Introduction
Thank you for choosing the Armocity L-Shaped Desk. This versatile and modern desk is designed to optimize your workspace, whether for gaming, studying, or home office use. It features a reversible design, integrated LED lighting, and convenient power outlets to enhance your productivity and comfort. Please read this manual carefully before assembly and use to ensure proper installation and safe operation.

Image: The Armocity L-Shaped Desk, showcasing its design with integrated LED lighting and a typical monitor setup.
2. Safety Information
WARNING: Failure to follow these safety instructions could result in injury or damage to the product.
- Always follow assembly instructions carefully.
- Handle heavy components with care during assembly to prevent injury.
- Ensure the desk is stable and level before placing items on it.
- Do not allow children to climb on the desk.
- Use only the correct screws as indicated in the assembly guide. Using incorrect screws can damage the desk board.
- Keep all electrical components (LED lights, power outlets) away from liquids.
3. Included Components
Before beginning assembly, verify that all parts are present and undamaged. The package typically includes:
- Desk panels (various sizes for L-shape configuration)
- Metal frame components and legs
- 2 Ample Space Fabric Drawers
- Long Monitor Shelf
- 2 Storage Shelves
- Built-in Power Outlets
- LED Light Strip and Controller
- Assembly hardware (screws, bolts, connectors)
- Assembly instructions manual

Image: Detailed view of the desk's features, including the fabric drawers, storage shelves, and integrated power outlets.
4. Setup and Assembly
The Armocity L-Shaped Desk is designed for reversible configuration, allowing you to set up the longer side and storage units on either the left or right, depending on your space and preference. Assembly typically requires two people.
4.1. Preparation
- Clear a spacious area for assembly.
- Unpack all components and lay them out, identifying each part using the provided labels.
- Gather necessary tools. An electric screwdriver can significantly shorten installation time.
4.2. Assembly Steps
Refer to the detailed step-by-step diagrams in the included assembly guide for precise instructions. Key considerations:
- Reversible Design: Decide on your preferred L-shape orientation (left or right) before starting. The assembly guide will provide specific steps for each configuration.
- Screw Selection: Pay close attention to screw lengths and types. Using an incorrect screw can cause damage to the desk panels.
- Frame Assembly: Begin by assembling the metal frame components, ensuring all connections are secure but not overtightened until the desk is fully assembled.
- Panel Attachment: Carefully attach the desk panels to the frame.
- Drawer Installation: Assemble and install the fabric drawers into their designated slots.
- LED Light Installation: Adhere the LED light strip to the designated area, typically under the monitor shelf or along the desk edge. Connect the controller.
- Power Outlet Installation: Secure the built-in power outlet unit.
- Final Tightening: Once all components are in place and the desk is stable, fully tighten all screws.

Image: Dimensional diagram and illustration of the reversible L-shaped desk configuration options.

Image: Visual representation of the desk's reversible design, showing both left and right configurations.
5. Operation
5.1. LED Lighting System
The integrated LED lighting system can be controlled via a remote control or a mobile application. A QR code for the app is typically included in the packaging or on the LED controller itself.
- Remote Control: Use the provided remote to change colors, adjust brightness, and select lighting modes.
- Mobile App Control: Download the recommended app. Pair your device with the LED controller via Bluetooth. The app offers advanced features such as custom color mixing, music synchronization, and timer functions.

Image: The desk with its LED lighting active, illustrating control options via a mobile app and a physical remote.
5.2. Built-in Power Outlets
The desk includes integrated power outlets for convenient access to power for your devices. Ensure the desk's power cord is plugged into a grounded wall outlet.
- Plug your computer, monitor, phone charger, and other electronics directly into the desk's outlets.
- Do not overload the power strip. Refer to the power strip's specifications for maximum wattage.
5.3. Monitor Shelf and Storage
The long monitor shelf provides an elevated platform for your monitor(s), promoting better ergonomics and freeing up desk space. The integrated drawers and shelves offer ample storage for office supplies, books, and other items, helping to keep your workspace organized.
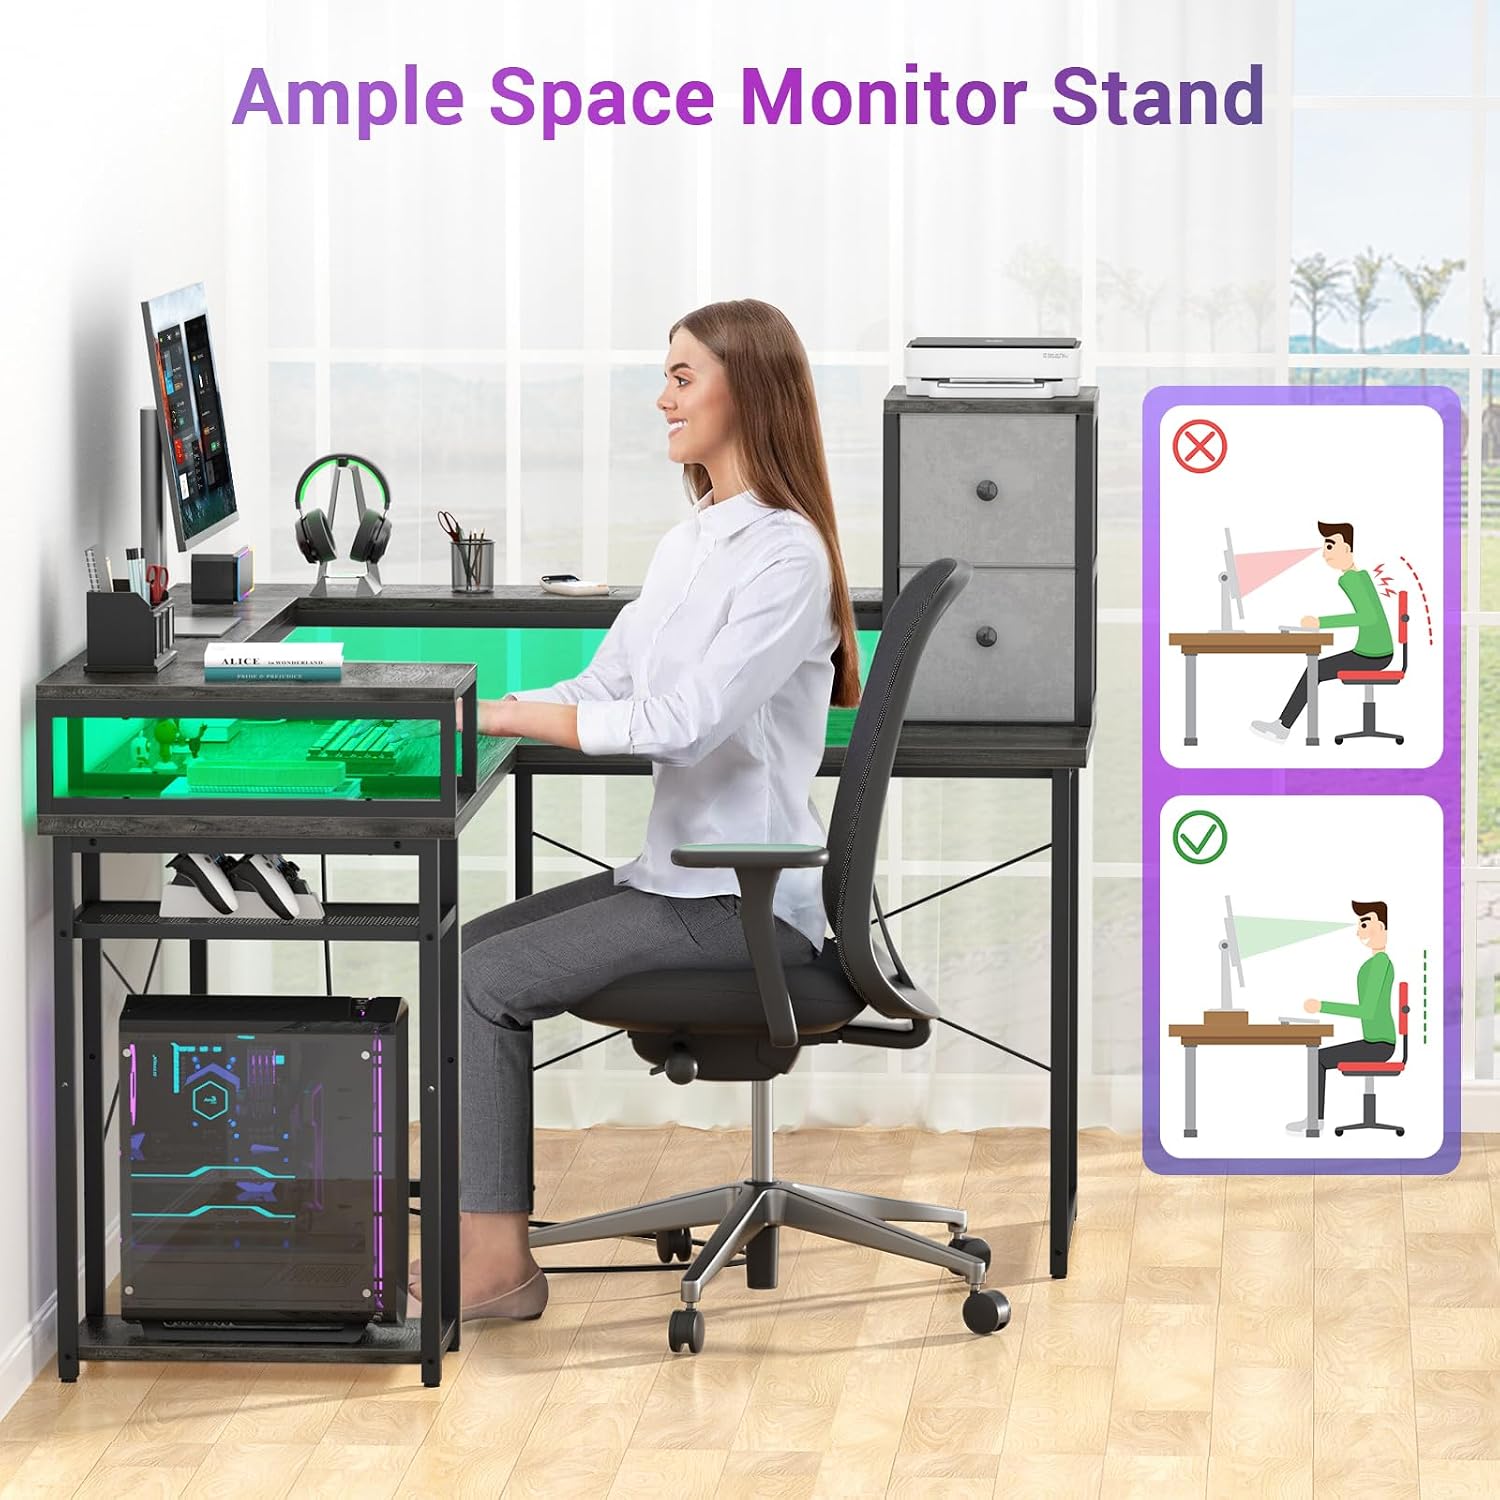
Image: A user demonstrating proper ergonomic posture while using the desk's elevated monitor shelf.
6. Maintenance
- Cleaning: Wipe the desk surfaces with a soft, damp cloth. Avoid harsh chemicals or abrasive cleaners that could damage the finish.
- Hardware: Periodically check all screws and bolts to ensure they remain tight. Retighten if necessary to maintain stability.
- Electrical Components: Keep the LED light strip and power outlets free from dust and debris. Do not attempt to repair electrical components yourself.
- Fabric Drawers: Clean fabric drawers with a lint roller or a slightly damp cloth. Do not machine wash.
7. Troubleshooting
- LED Lights Not Working:
- Check if the power adapter is securely plugged into both the wall outlet and the LED controller. Ensure the remote control battery is functional. If using the app, ensure Bluetooth is enabled and the device is paired correctly.
- Desk Wobbles After Assembly:
- Ensure all screws are fully tightened. Check that the desk is on a level surface. Adjust leveling feet if present.
- Parts Do Not Align During Assembly:
- Double-check the assembly instructions to ensure you are using the correct parts for each step and that they are oriented correctly. Some parts may appear similar but have subtle differences. Do not force parts together.
- Power Outlets Not Functioning:
- Verify the desk's main power cord is securely plugged into a live wall outlet. Check if the wall outlet itself is working by plugging in another device.
8. Specifications
| Feature | Detail |
|---|---|
| Brand | Armocity |
| Model | L-Shaped Gaming Desk (55.2'' size) |
| Color | Grey |
| Style | Modern |
| Base Material | Engineered Wood Composite or Metal |
| Finish Type | Wood Grain Finish (Lacquer or Varnish) |
| Special Feature | Reversible, LED Light, Power Outlet, Drawers, Monitor Shelf |
| Room Type | Office |
| Mounting Type | Freestanding |
| Item Height | 29.2 inches |
| Number of Drawers | 2 |
| Number of Shelves | 2 |
| Required Assembly | Yes |
9. Warranty Information
This product comes with a manufacturer's warranty. For specific details regarding the warranty period, coverage, and claims process, please refer to the documentation included with your purchase or contact Armocity customer support directly.
10. Customer Support
If you encounter any issues during assembly or operation, or if you have questions about your Armocity L-Shaped Desk, please do not hesitate to contact our customer support team. For the most up-to-date contact information, please visit the official Armocity website or refer to your purchase documentation.
Online Resources:
- Armocity Store on Amazon: Visit Store