
1. Introduction
This manual provides essential information for the proper setup, operation, and maintenance of your Bushnell LPX350 Walkie Talkie Radios. Designed for clear and reliable two-way communication, these radios are built to withstand various outdoor conditions.
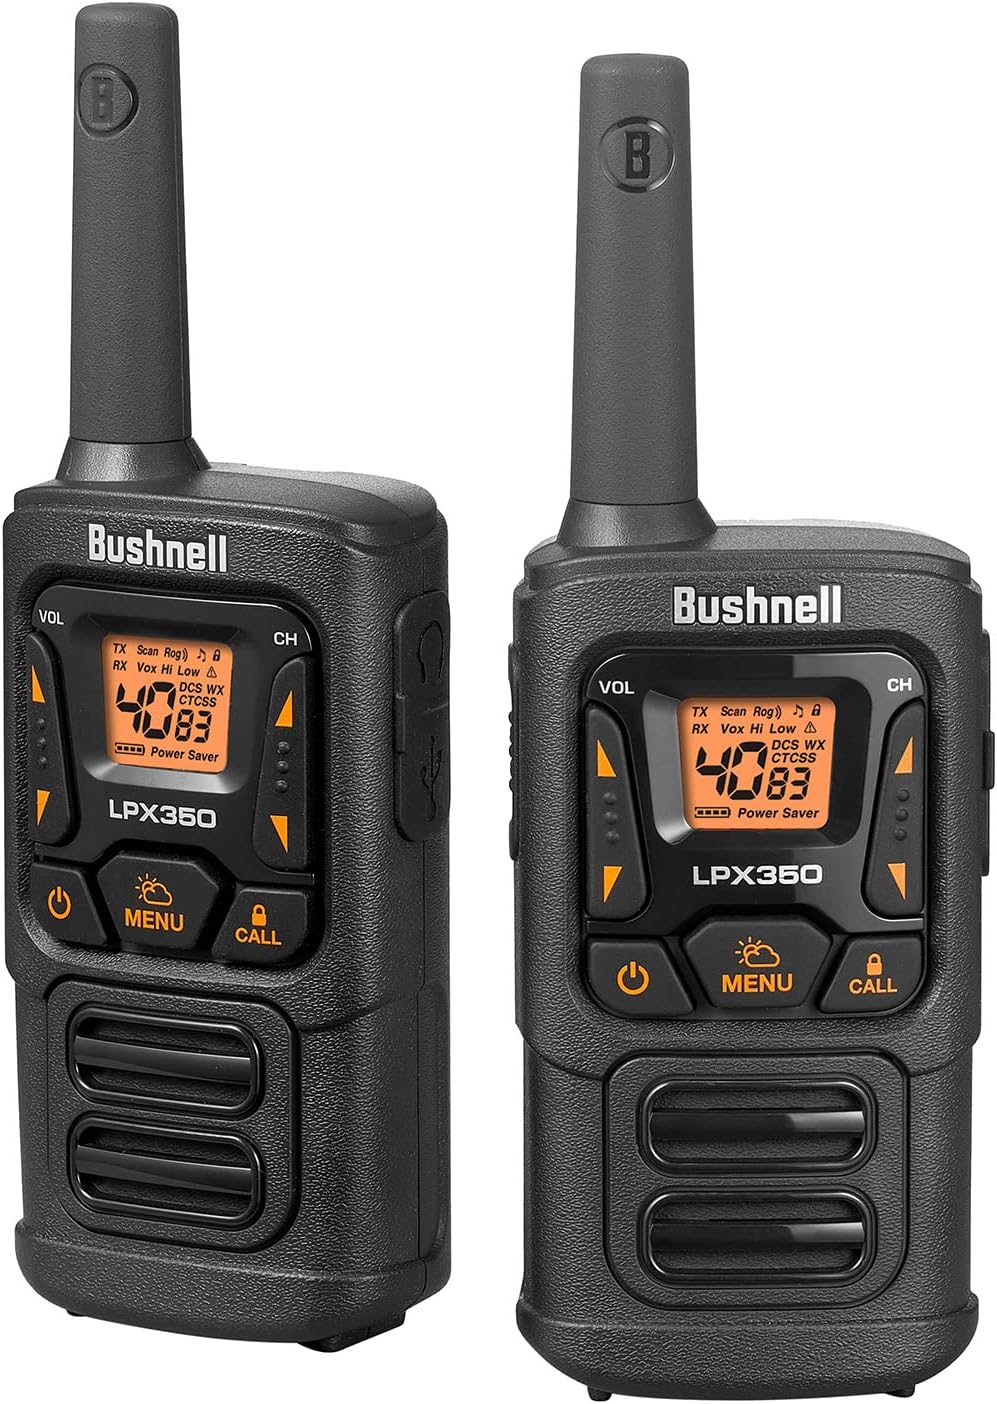
Figure 1: Bushnell LPX350 Walkie Talkie Radios
A pair of black and orange Bushnell LPX350 walkie talkie radios, showcasing their compact and rugged design.
2. What's in the Box
Your Bushnell LPX350 package includes the following items:
- 2x LPX350 Walkie Talkie Two Way Radios
- 6x 650mAH NiMH Rechargeable Batteries
- 2x Belt Clips
- 1x USB-C Charging Cable
- 1x User Guide (this document)
Note: Radios can also be used with 3 AA alkaline batteries (not included) per radio.

Figure 2: Package Contents
The image displays the two LPX350 radios, rechargeable batteries, belt clips, and a USB-C charging cable, laid out on a surface.
3. Product Features
The Bushnell LPX350 radios offer a range of features designed for optimal performance:
- Ultra Clear Long Distance Reception: 1 Watt of power provides clear communication up to 36 miles (57 kilometers) in optimal conditions.
- Privacy with Preset Channels: Features 40 channels and 121 privacy codes to minimize interference.
- Rugged Water-Resistant Construction: Built to withstand the elements with an IPX2 rating, offering protection against splashing water.
- Hands-Free Operation (VOX): Allows for voice-activated transmission without pressing the PTT button.
- Shock Resistant: Designed to endure impacts up to 1.5 meters.
- USB-C Charging: Convenient and modern charging solution.
- Roger Beep Tone: Audible tone indicates when transmission is complete.
- Key Lock: Prevents accidental changes to settings.
- Power Saver Mode: Extends battery life during periods of inactivity.
- Auto Squelch: Automatically mutes weak transmissions and unwanted noise.
- Speaker / Microphone Jack: For connecting external audio accessories.
- Compatibility: Works with other FRS Walkie Talkies.
- NOAA Weather Radio: Provides 24/7 access to 10 different NOAA weather channels for emergency alerts and updates.
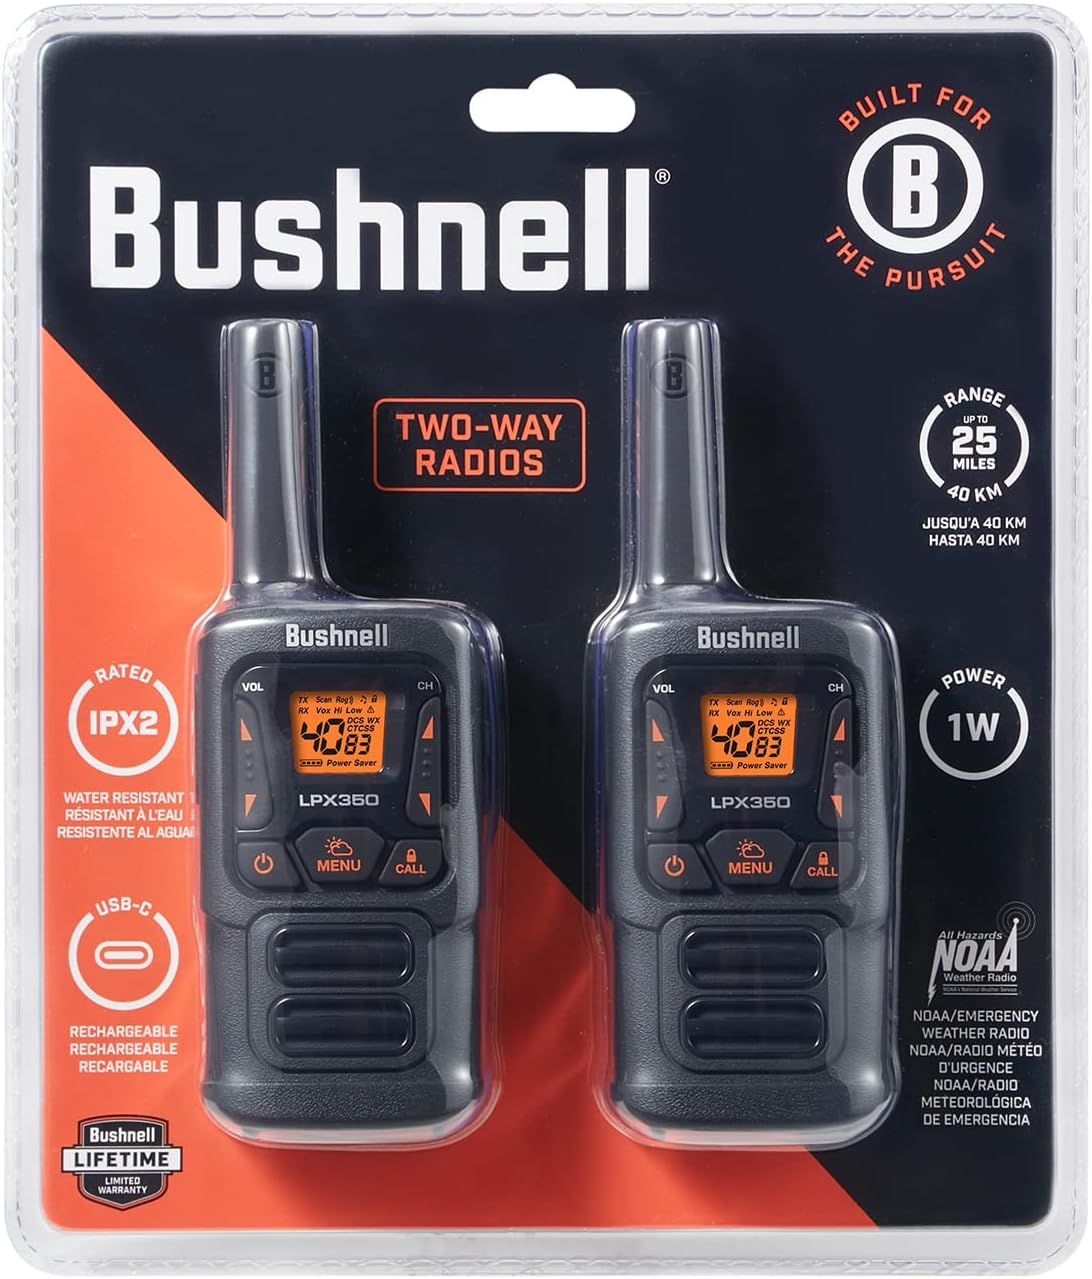
Figure 3: Radio Front Panel
A detailed view of the LPX350's front panel, showing the display, volume, channel, menu, call, and power buttons.

Figure 4: Radio Side View
The side of the LPX350 radio, highlighting the Push-to-Talk (PTT) button and the attached belt clip.
Video 1: Product Overview
This video provides a general overview of the Bushnell LPX350 Walkie Talkie Radio, demonstrating its key features and design.
4. Setup
4.1 Battery Installation
- Ensure the radio is powered off.
- Locate the battery compartment cover on the back of the radio.
- Press down on the tab and slide the cover downwards to remove it.
- Insert the 3 included NiMH rechargeable batteries into the compartment, observing the polarity markings (+/-). Alternatively, you may insert 3 AA alkaline batteries (not included).
- Replace the battery compartment cover by sliding it upwards until it clicks securely into place.
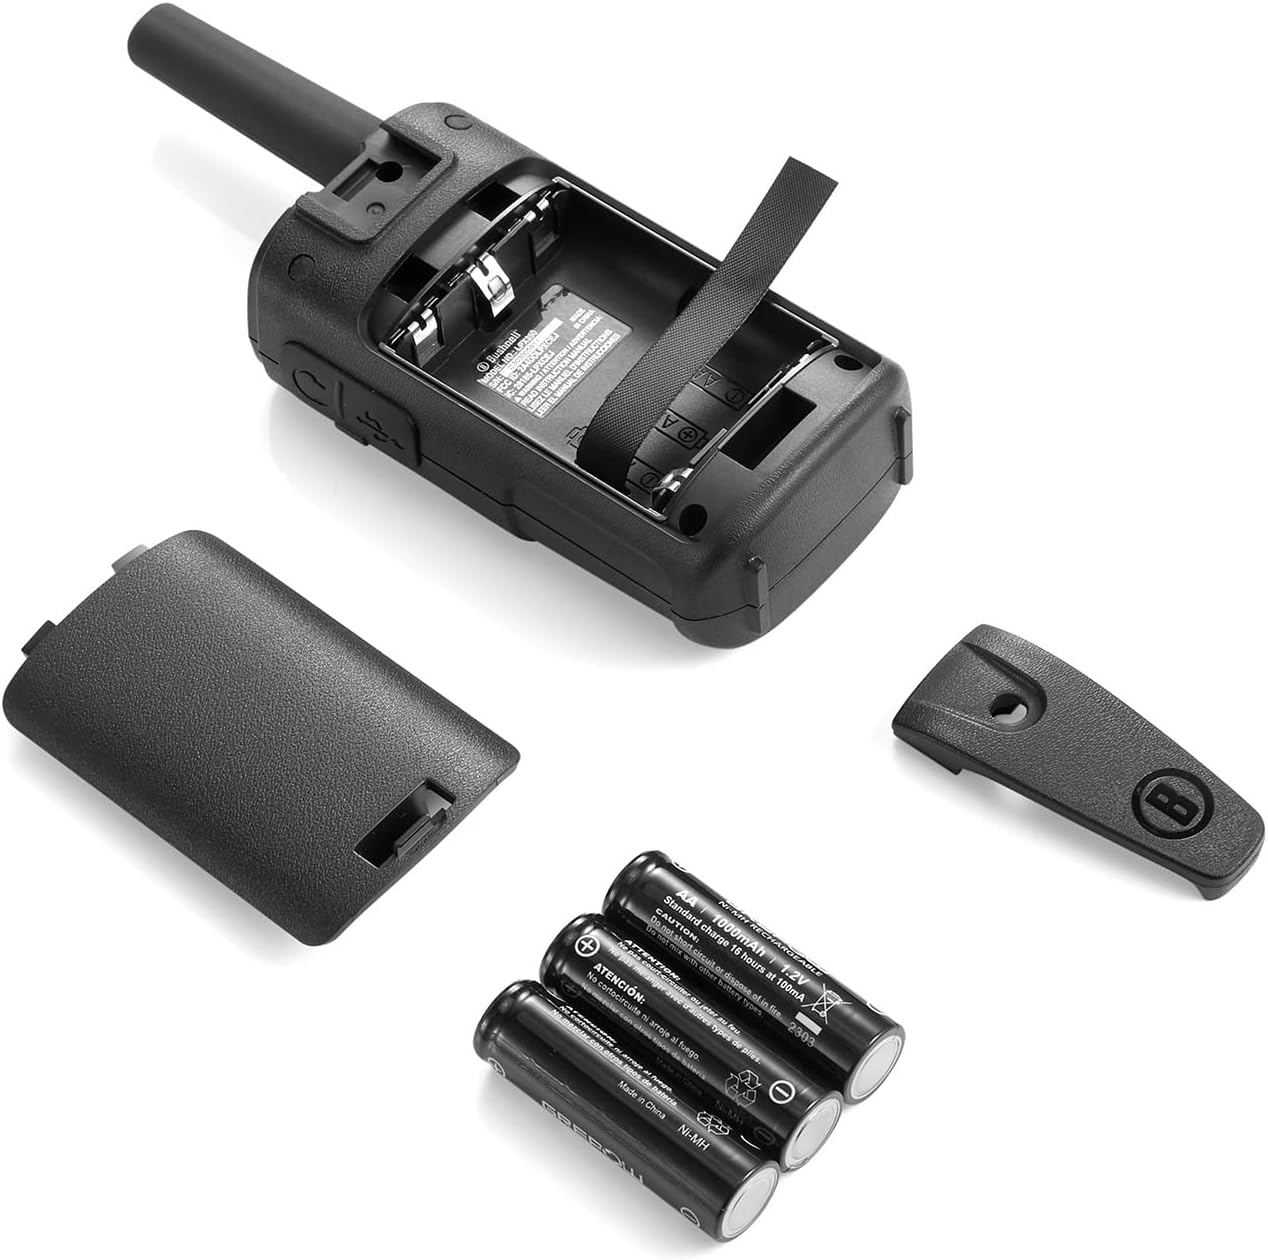
Figure 5: Battery Installation
The image shows the back of the LPX350 radio with the battery compartment open, revealing the slots for three AA-sized batteries.
4.2 Charging the Batteries
- Connect the USB-C charging cable to the USB-C port on the side of the radio.
- Connect the other end of the USB-C cable to a compatible USB power source (e.g., wall adapter, computer USB port).
- The battery indicator on the radio display will show charging status.
- Charging typically takes several hours. Disconnect the cable once charging is complete.

Figure 6: USB-C Charging Port
A close-up of the side of the LPX350 radio, showing the USB-C charging port and the speaker/microphone jack, both protected by a rubber flap.
4.3 Attaching the Belt Clip
- Align the belt clip with the grooves on the back of the radio.
- Slide the belt clip upwards until it locks securely into place.
- To remove, push the release tab on the belt clip and slide it downwards.

Figure 7: Belt Clip Attachment
The back of the LPX350 radio with the belt clip securely attached, ready for hands-free carrying.
5. Operating Instructions
5.1 Power On/Off
Press and hold the Power button (usually located at the bottom center of the front panel) until the display lights up or turns off.
5.2 Channel Selection
- Press the Menu button once. The channel number will flash on the display.
- Use the Up or Down arrow buttons to select your desired channel (1-40).
- Press the Menu button again to confirm the channel selection.
5.3 Privacy Codes
To set a privacy code (CTCSS/DCS):
- After selecting a channel, press the Menu button twice. The privacy code will flash.
- Use the Up or Down arrow buttons to select a privacy code (1-121).
- Press the Menu button again to confirm. Both radios must be on the same channel and privacy code to communicate privately.
5.4 Volume Adjustment
Use the VOL Up or VOL Down buttons on the side of the radio to adjust the listening volume.
5.5 Transmitting and Receiving
To transmit, press and hold the Push-to-Talk (PTT) button on the side of the radio and speak clearly into the microphone. Release the PTT button to receive.
5.6 Call Alert
Press the Call button to send an audible alert tone to other radios on the same channel and privacy code.
5.7 Key Lock
To activate/deactivate the Key Lock feature, press and hold the Lock button (often integrated with the Call button) until the lock icon appears/disappears on the display.
5.8 NOAA Weather Radio
To access NOAA Weather Channels, press the WX button. Use the arrow buttons to cycle through the 10 available weather channels. Press WX again to exit.
Video 2: Bushnell LPX350 Basic Operation
This video demonstrates the basic functions of the Bushnell LPX350, including power on/off, channel selection, and call alert.
6. Maintenance
- Cleaning: Use a soft, damp cloth to clean the exterior of the radio. Do not use harsh chemicals or abrasive cleaners.
- Storage: If storing the radios for an extended period, remove the batteries to prevent leakage. Store in a cool, dry place.
- Battery Care: Always use the recommended NiMH rechargeable batteries or high-quality AA alkaline batteries. Avoid overcharging.
7. Troubleshooting
| Problem | Possible Solution |
|---|---|
| No Power | Check battery installation and charge level. Replace batteries if necessary. |
| Cannot Transmit/Receive | Ensure both radios are on the same channel and privacy code. Check volume levels. Verify PTT button is functioning. |
| Poor Audio Quality | Check for obstructions between radios. Move to a higher elevation. Ensure microphone/speaker are clear of debris. |
| Keypad Locked | Press and hold the Key Lock button to unlock. |
8. Specifications
| Feature | Detail |
|---|---|
| Model Number | LPX350 |
| Dimensions (H x W x D) | 6.93" x 2.32" x 1.38" |
| Weight | 5.8 ounces (0.36 lbs) |
| Power Output | 1 Watt |
| Frequency Range | 400-470 MHz |
| Number of Channels | 40 (including FRS channels) |
| Privacy Codes | 121 |
| Maximum Talking Range | Up to 36 Miles (under ideal conditions) |
| Water Resistance Level | IPX2 (Water Resistant) |
| Shock Resistance | Up to 1.5M |
| Battery Type | 650mAH NiMH Rechargeable (3 per radio, included) or 3 AA Alkaline (not included) |
| Operating Time | Approx. 10 Hours (90% Standby, 10% Talk/Listen) |
| Charging Port | USB-C |
| Color | Black/Orange |
| Manufacturer | Shineflex US LLC |
9. Warranty and Support
Your Bushnell LPX350 Walkie Talkie Radios are backed by a Bushnell Lifetime Limited Warranty, ensuring quality and reliability. The included NiMH rechargeable batteries have a 180-day warranty.
For further assistance or warranty claims, please refer to the contact information provided in your product packaging or visit the official Bushnell website.


