
1. Introduction
Thank you for purchasing the ELUTENG Portable USB Rechargeable Handheld Mini Fan. This manual provides important information regarding the setup, operation, maintenance, and troubleshooting of your new device. Please read this manual thoroughly before use and retain it for future reference.
2. Package Contents
Please check the package contents upon opening. If any items are missing or damaged, please contact customer support.
- 1 x ELUTENG Portable Mini Fan
- 1 x USB Charging Cable (Micro-USB to USB-A)
- 2 x 18650 Rechargeable Batteries (4000mAh total)
- 1 x Lanyard
- 1 x User Manual

Image: Contents of the ELUTENG Portable Mini Fan package, showing the fan, USB cable, two 18650 batteries, and a lanyard.
3. Product Overview
Familiarize yourself with the different parts of your ELUTENG Portable Mini Fan.
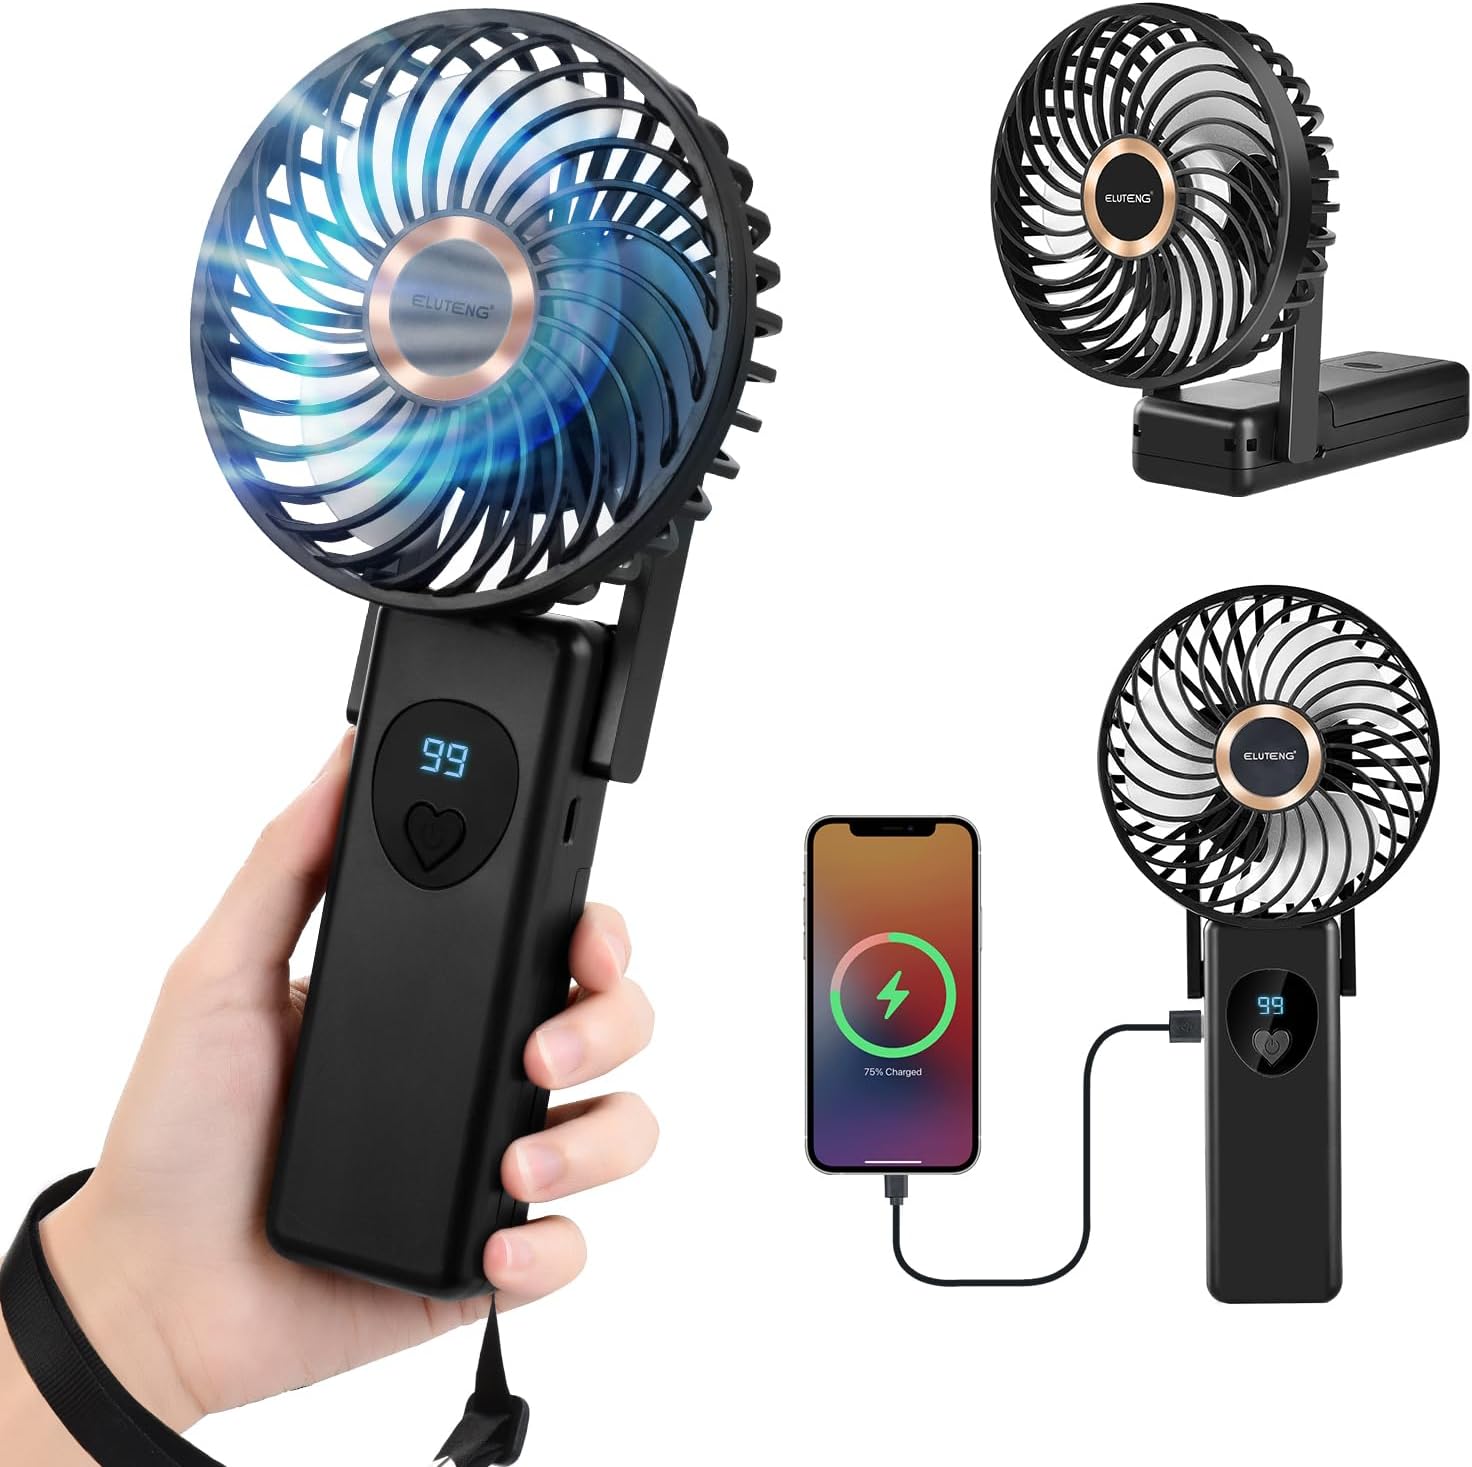
Image: The ELUTENG Portable Mini Fan shown in its handheld form, folded as a desk fan, and demonstrating its ability to charge a smartphone.
- Fan Head: Contains the fan blades and protective grille.
- Handle/Base: Houses the battery compartment and control buttons. Can be folded to act as a stand.
- Control Button: Power on/off and speed adjustment.
- Digital Display: Shows current speed level and battery percentage.
- Micro-USB Charging Port: For recharging the fan.
- USB-A Output Port: (If applicable, for power bank function)
- Phone Holder: Integrated into the base for convenience.
4. Setup
4.1 Battery Installation
- Locate the battery compartment cover on the handle/base of the fan.
- Gently slide or open the cover.
- Insert the two 18650 rechargeable batteries into the compartment, ensuring correct polarity (+/-) as indicated inside.
- Close the battery compartment cover securely.
4.2 Initial Charging
Before first use, it is recommended to fully charge the fan.
- Connect the small end of the Micro-USB charging cable to the charging port on the fan.
- Connect the larger USB-A end of the cable to a USB power source (e.g., computer USB port, USB wall adapter, power bank).
- The digital display will show the charging progress. Charging is complete when the display shows 99% or 100%.
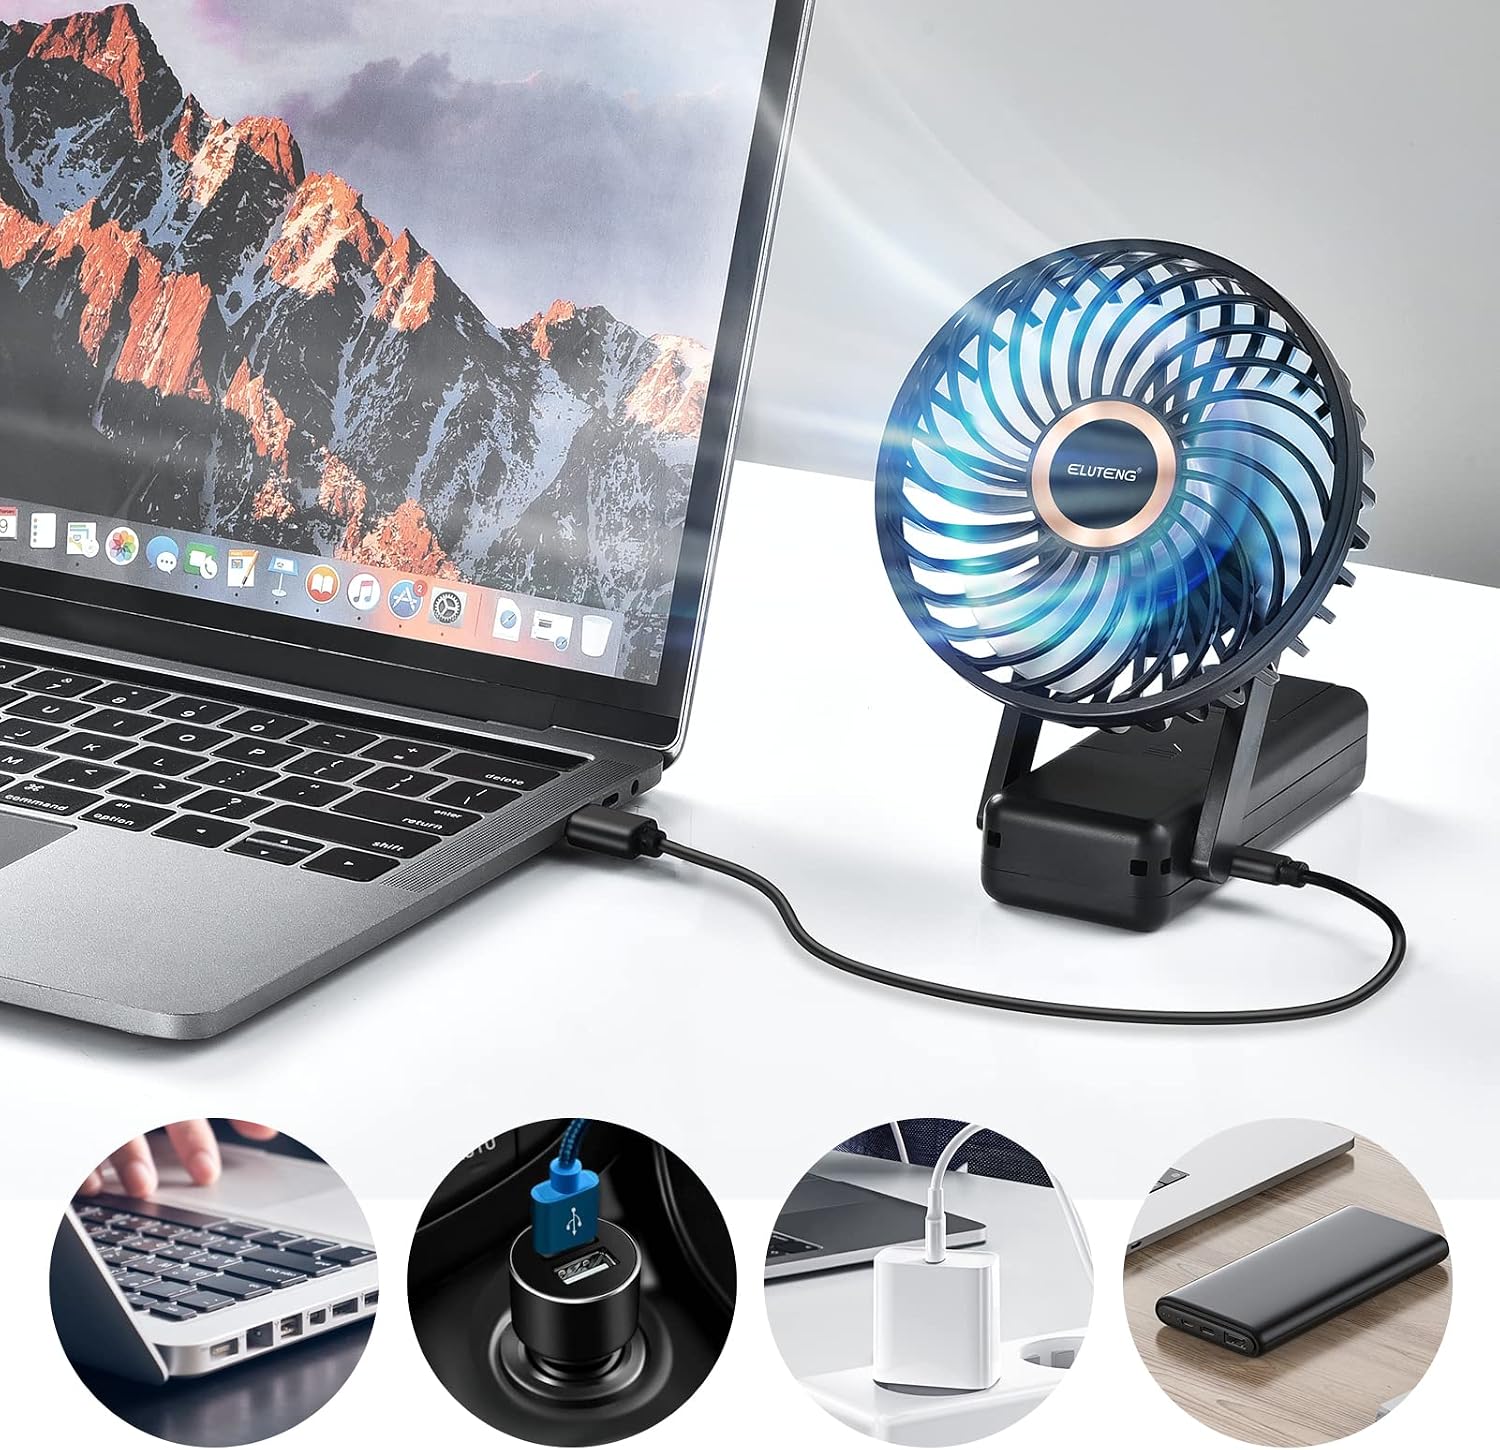
Image: The ELUTENG mini fan connected to a laptop for charging. Insets show other charging methods like car charger, wall adapter, and power bank.
5. Operating Instructions
5.1 Power On/Off and Speed Adjustment
- To Power On: Press the control button once. The fan will start at Speed 1.
- To Adjust Speed: Press the control button repeatedly to cycle through the 5 available speeds (1-5). The digital display will show the current speed level.
- To Power Off: After Speed 5, pressing the button again will turn the fan off. Alternatively, press and hold the control button for approximately 2 seconds to turn off the fan from any speed setting.
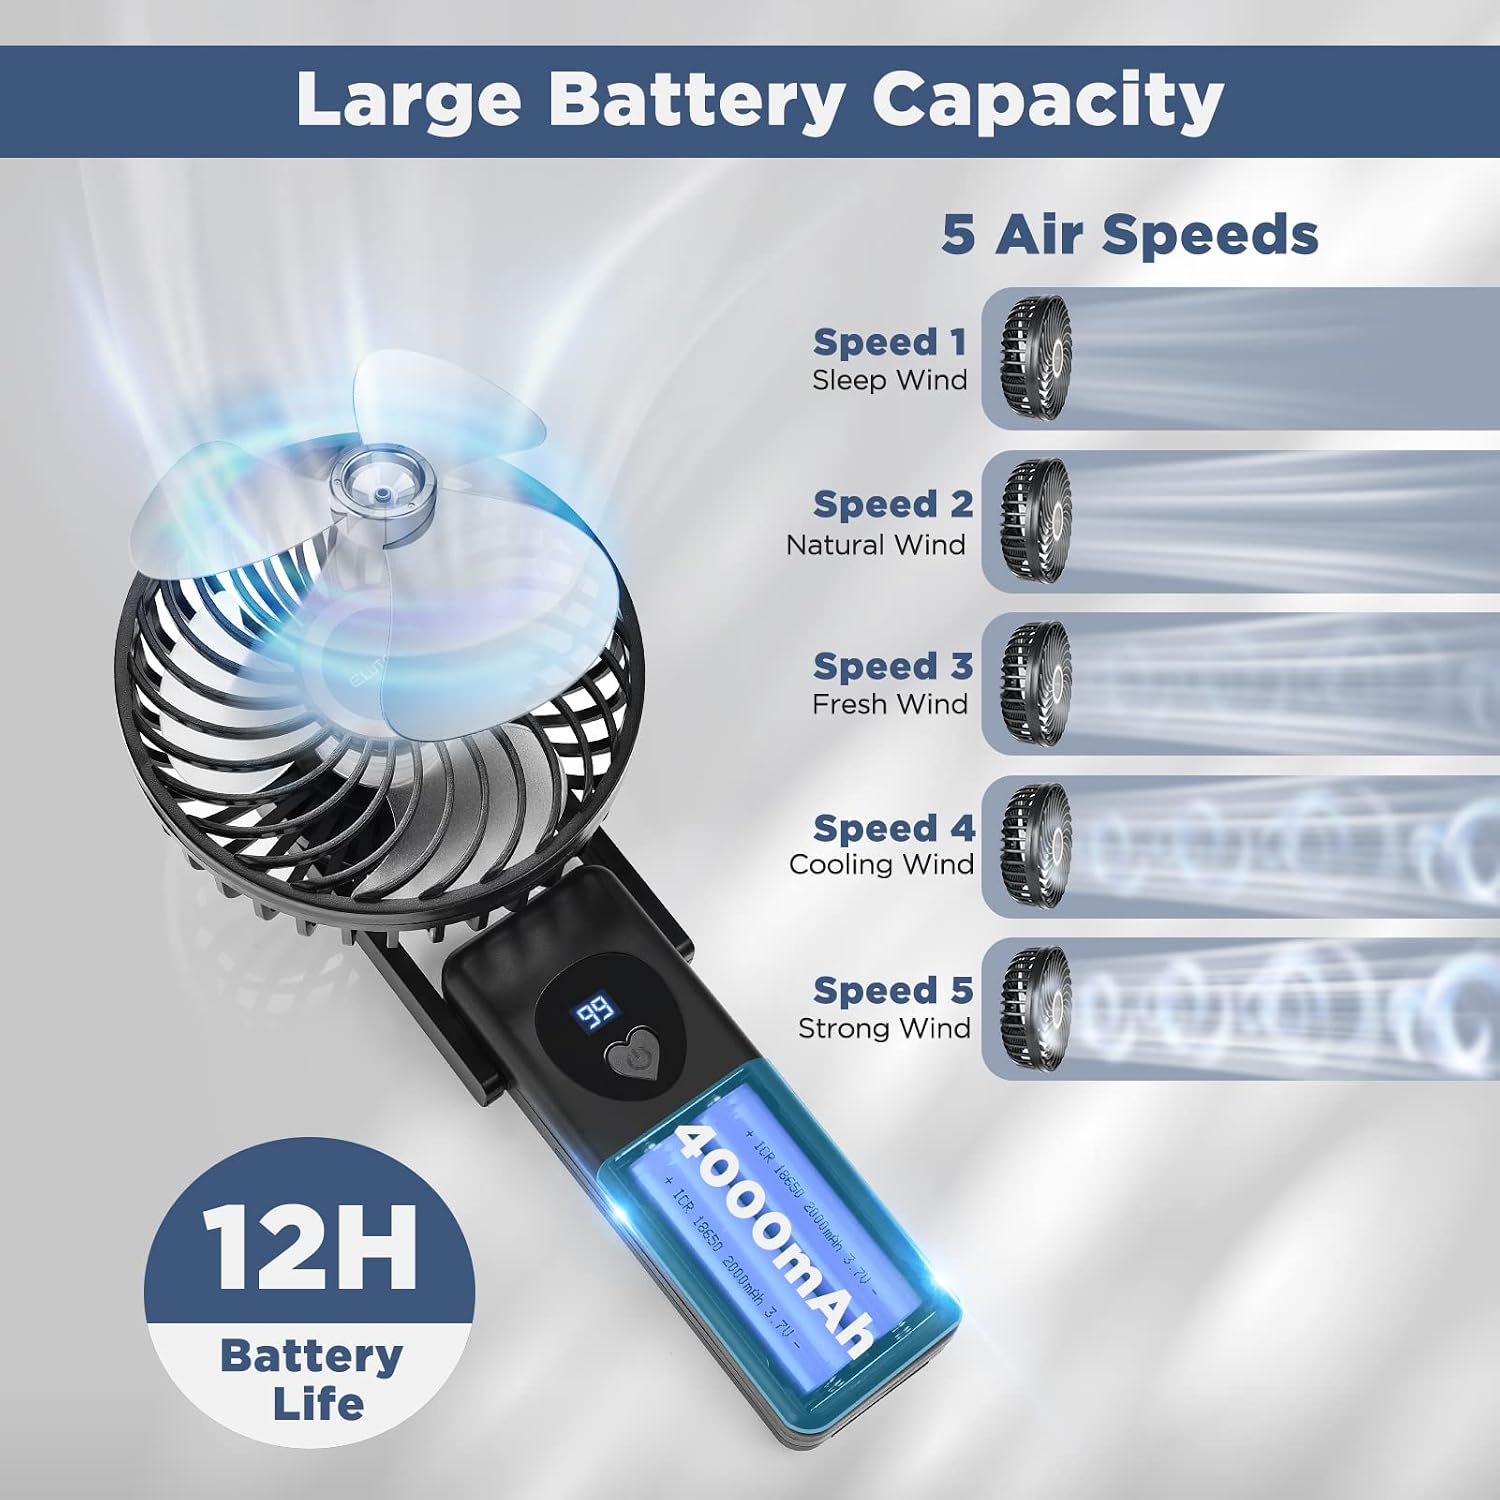
Image: The ELUTENG mini fan's digital display showing "99" for battery percentage and "5" for gear display (speed level).

Image: A visual representation of the five air speed settings: Speed 1 (Sleep Wind), Speed 2 (Natural Wind), Speed 3 (Fresh Wind), Speed 4 (Cooling Wind), and Speed 5 (Strong Wind).
5.2 Using as a Desk Fan
The fan's handle can be folded to convert it into a stable desk fan.
- Gently fold the handle downwards until it forms a stable base.
- Place the fan on a flat, stable surface.
- Adjust the angle of the fan head as desired (up to 270° rotation).
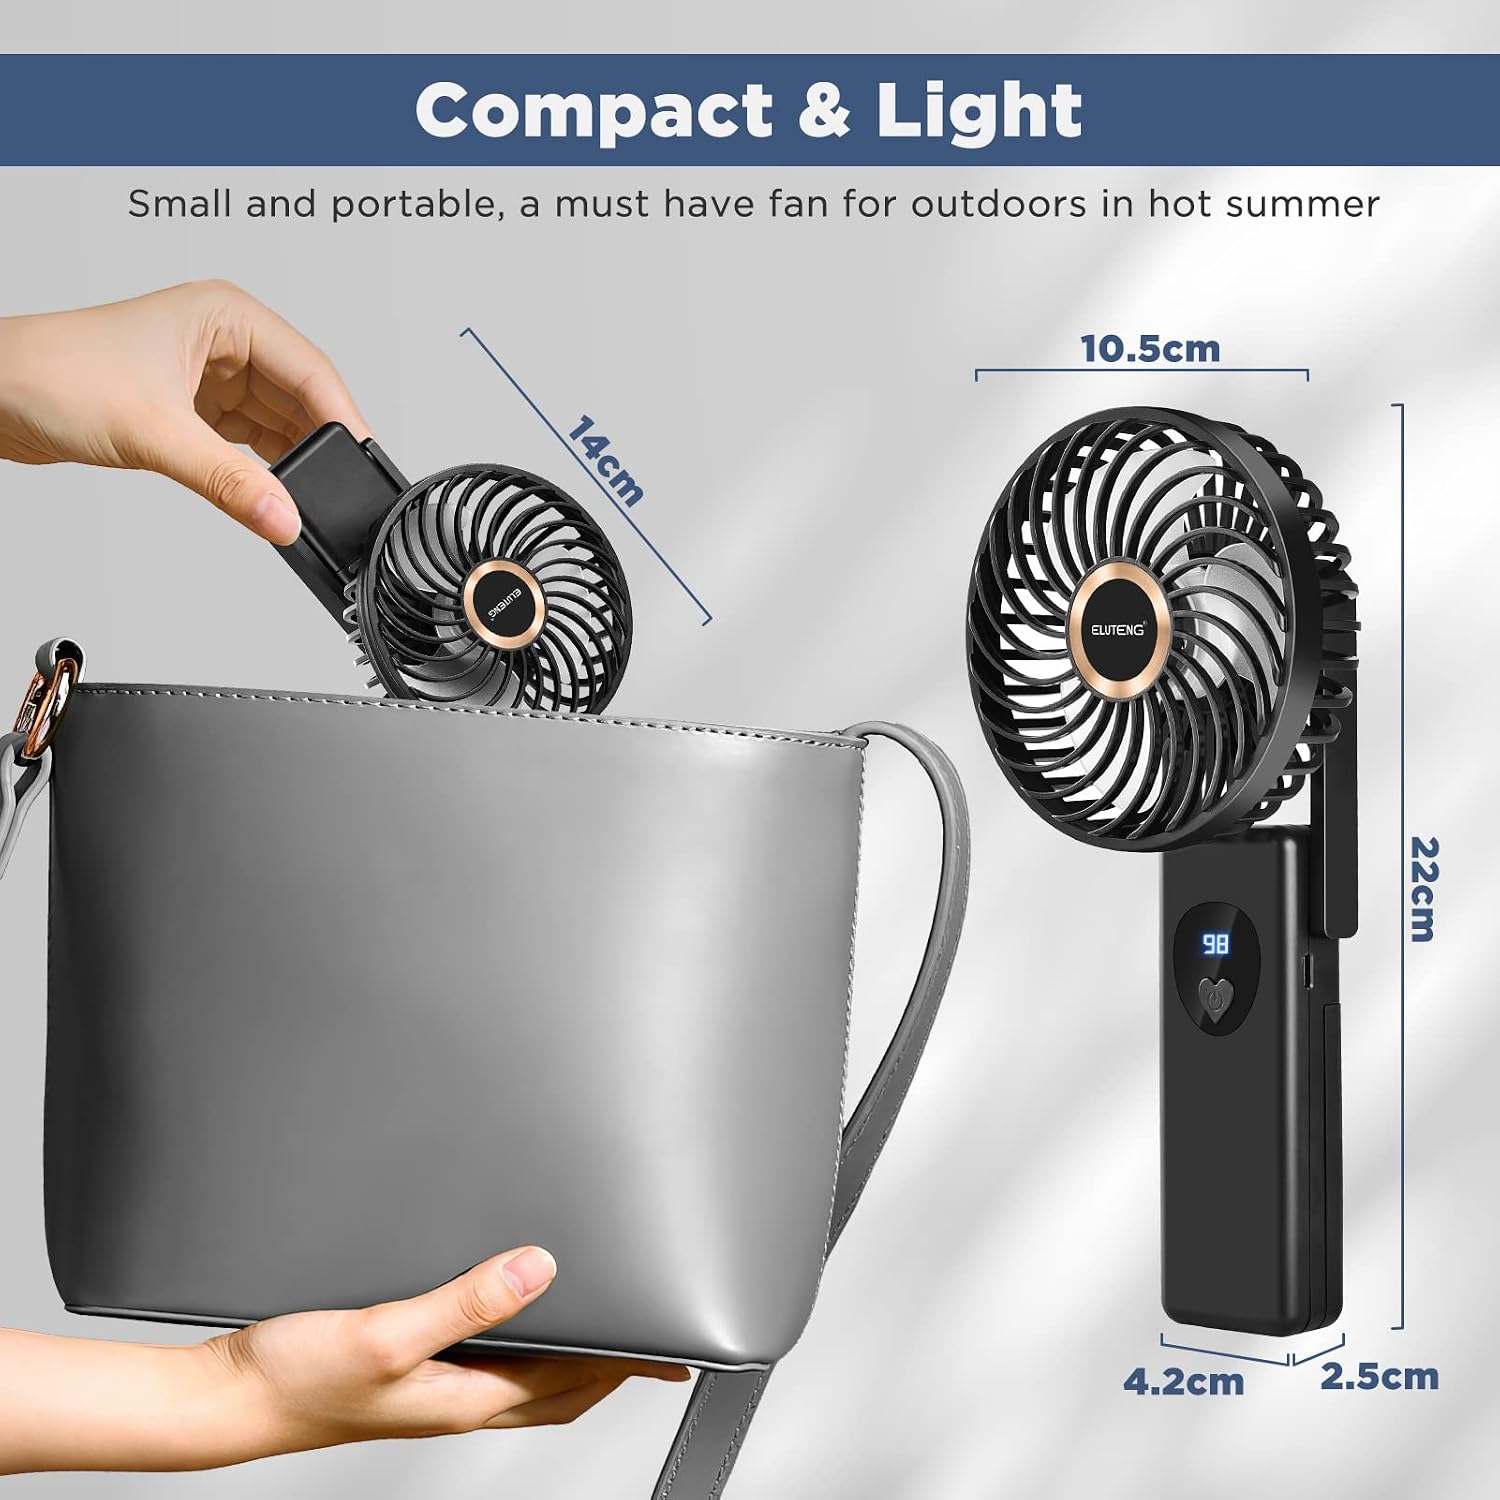
Image: The ELUTENG mini fan positioned as a desk fan, providing airflow while a person works on a laptop.
5.3 Using the Phone Holder
A small pull-out stand is integrated into the base to hold your smartphone.
- Locate the small tab on the side of the fan's base.
- Pull out the tab to extend the phone holder.
- Place your smartphone into the groove of the extended holder.

Image: The ELUTENG mini fan demonstrating its integrated phone holder, with a smartphone placed in the stand.
6. Charging
When the battery level shown on the digital display is low, recharge the fan using the provided Micro-USB cable.
- Connect the Micro-USB end of the cable to the fan's charging port.
- Connect the USB-A end to a 5V/1A USB power adapter, computer USB port, or power bank.
- The display will show the battery percentage increasing during charging.
- A full charge typically takes several hours.
- The fan can be used while charging.
6.1 Power Bank Function (if applicable)
This fan can also serve as a temporary power bank to charge small electronic devices.
- Connect your device's charging cable (USB-A end) to the USB output port on the fan.
- Connect the other end of your device's cable to your electronic device.
- The fan's battery will begin to charge your device. Note that using this feature will deplete the fan's battery faster.
7. Maintenance
7.1 Cleaning the Fan
To ensure optimal performance and hygiene, clean the fan regularly.
- Ensure the fan is turned off and disconnected from any power source before cleaning.
- To clean the fan blades, gently twist the front grille counter-clockwise to remove it.
- Wipe the fan blades and the inside of the grille with a soft, dry cloth. For stubborn dust, a slightly damp cloth can be used, but ensure all parts are completely dry before reassembling.
- Do not use abrasive cleaners, solvents, or immerse the fan in water.
- Reattach the front grille by aligning it and twisting clockwise until secure.
7.2 Battery Care
- Use only the specified 18650 rechargeable batteries.
- If the fan will not be used for an extended period, it is recommended to remove the batteries.
- Store the fan and batteries in a cool, dry place away from direct sunlight and extreme temperatures.
8. Troubleshooting
If you encounter issues with your fan, please refer to the following common problems and solutions.
| Problem | Possible Cause | Solution |
|---|---|---|
| Fan does not turn on. | Battery is depleted. Batteries incorrectly installed. Power button not pressed correctly. | Charge the fan. Check battery polarity and ensure they are seated correctly. Press and hold the power button for 2 seconds. |
| Fan stops unexpectedly. | Low battery. Obstruction in fan blades. | Recharge the fan. Turn off the fan, remove any obstructions, then restart. |
| Fan is noisy. | Dust or debris on blades. Fan not on a stable surface. | Clean the fan blades. Place the fan on a flat, stable surface. |
| Charging is slow or not working. | Faulty cable or adapter. Loose connection. | Try a different USB cable and/or power adapter. Ensure the cable is securely plugged into both the fan and the power source. |
If the problem persists after trying these solutions, please contact ELUTENG customer support.
9. Specifications
| Feature | Detail |
|---|---|
| Model Number | FOLDABLE |
| Dimensions | 7 x 11 x 14 cm (folded) |
| Weight | 270 g |
| Battery Capacity | 4000mAh (2 x 18650 batteries) |
| Charging Port | Micro-USB |
| Speed Settings | 5 levels |
| Special Features | Foldable design, Digital display, Integrated phone holder, Power bank function |
10. Warranty and Support
ELUTENG products are designed and manufactured to the highest quality standards. For warranty information or technical support, please refer to the contact details provided on the product packaging or visit the official ELUTENG website.
Please retain your proof of purchase for warranty claims.