
1. Introduction and Overview
Thank you for choosing Lightbiz LED Wall Mounted Lights. This manual provides essential information for the safe and efficient use of your new lighting product. These versatile LED wall sconces feature a 3000mAh rechargeable battery, three color temperature options (3000K, 4500K, 6000K), dimmable brightness, and a 360° magnetic rotation for flexible illumination. Control is available via both a physical button on the lamp body and an included remote control. Designed for various indoor applications, these lights offer convenience and adaptability.
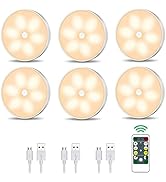
Image 1: Overview of Lightbiz Rechargeable LED Wall Sconces highlighting key features.
2. What's in the Box
- Lamp Body x 2
- Lamp Holder x 2
- USB-C Charging Cable x 1
- Remote Control x 1
- User Manual x 1

Image 2: Contents of the Lightbiz LED Wall Mounted Lights package.
3. Product Features
- Rechargeable Battery: Built-in 3000mAh battery provides up to 24 hours of light at medium brightness or 15 hours at maximum brightness on a single charge. Features a convenient USB-C charging port.
- Dual Control Methods: Operate the lights using the integrated button on the lamp body or the included remote control.
- Adjustable Color Temperature: Choose from three color temperatures: 3000K (Warm Light), 4500K (Natural Light), and 6000K (Cool Light).
- Dimmable Brightness: Stepless dimming is available via a long press on the button or the remote. The remote also offers 4 preset brightness levels (10%, 40%, 80%, 100%).
- 360° Magnetic Rotation: The lamp body attaches magnetically to the lamp holder, allowing for full 360-degree rotation to direct light precisely where needed. The lamp can also be easily detached for portable use.
- Easy Installation: Offers tool-free installation with strong 3M adhesive for smooth surfaces, or screw mounting for permanent fixture (screws included).
- Timer Function: The remote control includes timing options for automatic shut-off.
4. Specifications
| Attribute | Value |
|---|---|
| Brand | Lightbiz |
| Model Name | X100 |
| Color | Black |
| Material | Metal, Plastic |
| Power | 4W |
| Battery Capacity | 3000mAh |
| Voltage | DC 5V 1A |
| Control Method | Button, Remote |
| Full Charge Time | Approx. 4 hours |
| Color Temperature | 3000K-4500K-6000K |
| Brightness | 150 Lumens (Max) |
| Product Dimensions | 3.03"L x 1.77"W x 4.02"H |
| Item Weight | 13.4 ounces |
5. Setup and Installation
The Lightbiz LED Wall Mounted Lights offer two primary installation methods:
- Adhesive Mounting:
- Ensure the installation surface is clean, flat, and smooth for optimal adhesion.
- Tear off the protective film from the 3M adhesive on the back of the lamp holder.
- Firmly press the lamp holder onto the desired surface.
- Allow the adhesive to bond for at least 4 hours before attaching the lamp body.
- Once the holder is secure, the lamp body can be magnetically adsorbed to it.
- Screw Mounting:
- If the surface is uneven, not clean, or if you desire a permanent fixture, use the included screws to reinforce the installation.
- Align the lamp holder with the desired position and mark the screw holes.
- Drill pilot holes if necessary, then secure the lamp holder with the screws.
- Attach the lamp body magnetically to the secured holder.
Important Note: Wet weather, uneven surfaces, or dust can affect the bonding performance of the adhesive. Use screws carefully as they may damage the installation surface.

Image 3: Illustration of magnetic suction and 360° free rotation, along with adhesive and screw installation options.
Video 1: A demonstration of installing the Lightbiz LED Rechargeable Wall Sconces, showing the magnetic attachment and adjustability.
6. Operating Instructions
6.1 Power On/Off and Basic Functions
The lamp can be turned on or off using the power button located on the lamp body or the ON/OFF buttons on the remote control.

Image 4: Detailed view of the lamp components, including the function button.
6.2 Color Temperature Switching
You can switch between three color temperatures:
- Button Control: Short press the button on the lamp body to cycle through 3000K (Warm Light), 4500K (Natural Light), and 6000K (Cool Light).
- Remote Control: Use the dedicated color temperature buttons on the remote (Warm Light, Natural Light, Cool Light icons).

Image 5: Demonstrates color temperature switching and stepless brightness adjustment via the lamp button.
6.3 Brightness Adjustment (Dimming)
Adjust the light intensity to your preference:
- Button Control: Long press the button on the lamp body for stepless dimming. Release when the desired brightness is reached.
- Remote Control: Use the '+' and '-' buttons for stepless dimming. Alternatively, select preset levels: 10%, 40%, 80%, or 100% brightness.
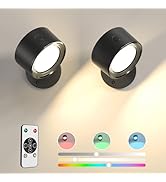
Image 6: Brightness adjustment options, including 4-level and stepless dimming.
6.4 360° Rotation and Portability
The magnetic design allows the lamp body to rotate freely on the holder, enabling you to direct the light in any direction. You can also easily detach the lamp body from the magnetic base to use it as a portable light or flashlight.
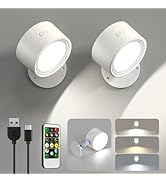
Image 7: Demonstrates the 360° free rotation and various applications of the magnetic ball design.
Video 2: A demonstration of the Lightbiz LED Lights' cordless, rechargeable, and 360-degree adjustable features.
7. Charging
Your Lightbiz LED Wall Mounted Lights are equipped with a 3000mAh rechargeable battery. To charge:
- Detach the lamp body from its magnetic holder.
- Connect the provided USB-C charging cable to the charging port on the lamp body.
- Plug the other end of the USB-C cable into a compatible USB power adapter (not included).
- The charging indicator light will show red during charging and turn green when fully charged.
- A full charge takes approximately 4 hours.
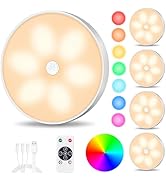
Image 8: Details of the built-in 3000mAh rechargeable battery and Type-C charging port.
8. Remote Control Functions
The included remote control provides convenient access to all light functions:
- ON/OFF: Power the lights on or off.
- Color Temperature: Dedicated buttons for Warm Light (3000K), Natural Light (4500K), and Cool Light (6000K).
- Brightness +/-: Stepless adjustment of brightness.
- Preset Brightness: Buttons for 10%, 40%, 80%, and 100% brightness.
- Timing: Set the lights to automatically turn off after 10, 30, 60, or 120 minutes.

Image 9: Remote control layout and timing function illustration.
9. Maintenance
To ensure the longevity and optimal performance of your Lightbiz LED Wall Mounted Lights:
- Clean the lamp body and holder regularly with a soft, dry cloth.
- Avoid using abrasive cleaners or solvents, as these may damage the finish.
- Keep the charging port free from dust and debris.
- Store the lights in a cool, dry place when not in use for extended periods.
10. Troubleshooting
If you encounter any issues with your Lightbiz LED Wall Mounted Lights, please refer to the following common solutions:
- Light not turning on: Ensure the battery is charged. Connect the USB-C cable and check if the charging indicator light turns red.
- Remote control not working: Check the battery in the remote control. Ensure there are no obstructions between the remote and the lamp.
- Light falling from wall: If using adhesive mounting, ensure the surface was clean, flat, and smooth, and that the adhesive had sufficient time to bond (at least 4 hours) before attaching the lamp body. For unreliable surfaces, consider using screw mounting.
- Short battery life: Battery life varies with brightness settings. Ensure the light is fully charged (green indicator light) before use. Reduce brightness for longer operation.
11. Warranty and Support
Lightbiz offers a Lifetime Warranty for this product, ensuring peace of mind with your purchase. If you experience any product issues or require assistance, please do not hesitate to contact Lightbiz customer service. We are committed to providing excellent support and ensuring your satisfaction. "Better Light, Better Life!"