
1. Introduction
This manual provides essential instructions for the safe installation, operation, and maintenance of your Mabe EMH7602JBS0 Floor Stove. Please read all instructions thoroughly before using the appliance to ensure proper function and to prevent potential hazards. Keep this manual for future reference.
The Mabe EMH7602JBS0 is a 76 cm (30-inch) floor stove designed for cooking with LP gas, convertible to natural gas. It features 6 burners, durable cast iron grates, an oven with Easy Clean Pro coating, electronic ignition for the oven, and a thermocontrol system for precise temperature management.
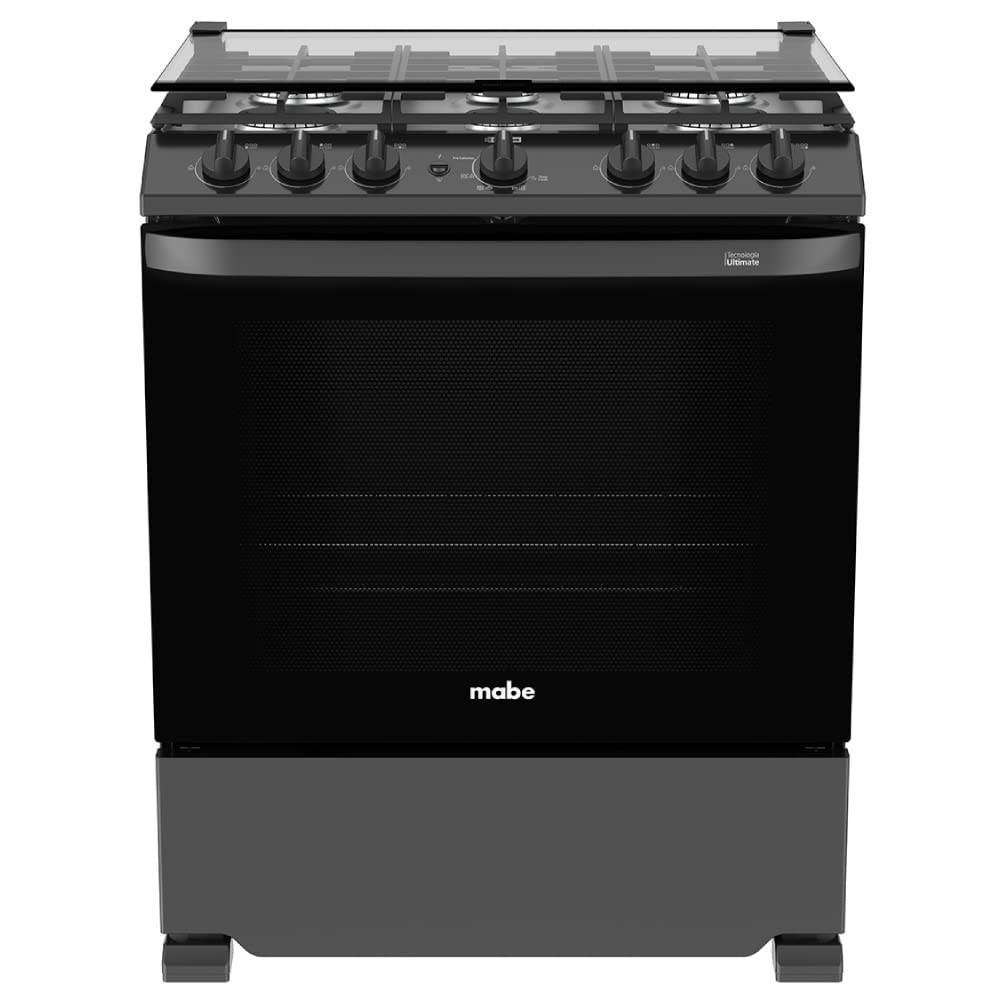
Figure 1.1: Front view of the Mabe EMH7602JBS0 Floor Stove.

Figure 1.2: Angled side view of the Mabe EMH7602JBS0 Floor Stove, showcasing its design.
2. Safety Information
WARNING: Gas appliances can cause carbon monoxide poisoning. Use only in well-ventilated areas. Read all instructions before use.
- Gas Leaks: If you smell gas, immediately shut off the gas supply to the appliance, open windows, and evacuate the area. Do not operate any electrical switches or phones. Contact a qualified technician.
- Ventilation: Ensure adequate ventilation in the kitchen area when operating the stove.
- Children and Pets: Keep children and pets away from the appliance during operation and when it is cooling down. Surfaces can remain hot for an extended period.
- Hot Surfaces: The cooktop, oven, and surrounding areas become hot during use. Use oven mitts or pot holders when handling hot items.
- Flammable Materials: Do not store or use flammable materials near the stove.
- Proper Installation: This appliance must be installed by a qualified technician in accordance with all local codes and regulations.
- Electrical Grounding: Ensure the appliance is properly grounded to prevent electrical shock.
- LP Gas Conversion: If converting from LP gas to natural gas, or vice versa, this procedure must be performed by a qualified service technician.
3. Setup and Installation
3.1 Unpacking
Carefully remove all packaging materials, tape, and protective films from the stove. Inspect the appliance for any damage. Report any damage to your dealer immediately.
3.2 Placement
Position the stove in a location that allows for proper ventilation and clearance from combustible surfaces. Refer to local building codes for specific requirements.
3.3 Gas Connection
WARNING: Gas connection must be performed by a qualified and licensed gas technician.
- Ensure the gas supply line is compatible with the stove's requirements (LP gas, convertible to natural gas).
- Install a manual shut-off valve in an accessible location near the stove.
- Check all connections for leaks using a non-corrosive leak detection solution. Never use an open flame to check for leaks.
3.4 Electrical Connection
The stove requires an electrical connection for the electric ignition system. Ensure the electrical outlet is properly grounded and matches the voltage requirements specified on the appliance's rating plate.
3.5 Leveling
Use the adjustable leveling legs at the bottom of the stove to ensure it is stable and level. A level stove ensures even cooking and prevents spills.

Figure 3.1: Product dimensions for installation planning (Width: 76 cm, Depth: 72 cm, Height: 93 cm).
4. Operating Instructions
4.1 Cooktop Operation
The cooktop features 6 gas burners with electric ignition and durable cast iron grates for stable cookware placement.

Figure 4.1: Control knobs for burners and oven.

Figure 4.2: Cooktop layout with 6 burners and cast iron grates.
4.1.1 Lighting a Burner
- Place your cookware on the grate above the desired burner.
- Push in and turn the corresponding burner knob counter-clockwise to the 'HIGH' position. You will hear a clicking sound as the igniter sparks.
- Once the burner lights, continue to hold the knob in for a few seconds to allow the flame sensor to activate.
- Adjust the flame to your desired cooking level.
- If the burner does not light within 5 seconds, turn the knob to 'OFF', wait for a minute, and try again.
4.1.2 Using the Teflon Comal
The stove includes a Teflon comal. Place it centrally over two burners for even heating. Follow the instructions provided with the comal for best use and care.
4.2 Oven Operation
The oven features electronic ignition, thermocontrol for precise temperature, an oven-sliding grill, and a panoramic door for easy viewing.

Figure 4.3: Oven interior with sliding grill.

Figure 4.4: Oven door with integrated temperature and cooking guide.
4.2.1 Preheating the Oven
- Ensure the oven is empty and clean.
- Push in and turn the oven control knob to the desired temperature setting. The oven has electronic ignition activated by this button.
- Allow the oven to preheat for approximately 10-15 minutes, or until the indicator light (if present) turns off, signaling the set temperature has been reached.
4.2.2 Using the Oven-Sliding Grill
The oven is equipped with a sliding grill for easy access to your dishes. Pull the grill out gently when the oven door is open to check or remove food. Ensure the grill is fully pushed back in before closing the oven door.
5. Maintenance and Cleaning
WARNING: Always ensure the stove is cool and disconnected from the gas and electrical supply before cleaning or performing any maintenance.
5.1 Cooktop Cleaning
- Grates: Remove the cast iron grates and wash them with warm, soapy water. For stubborn stains, use a non-abrasive cleaner. Dry thoroughly before replacing.
- Burner Caps and Bases: Clean burner caps and bases with warm, soapy water. Ensure the burner ports are not clogged. Dry completely before reassembling.
- Cooktop Surface: Wipe the stainless steel or enamel cooktop surface with a soft cloth and mild detergent. Avoid abrasive cleaners that can scratch the surface.
5.2 Oven Cleaning (Easy Clean Pro)
The oven features an Easy Clean Pro coating, designed for simplified cleaning.

Figure 5.1: Easy Clean Pro oven interior for simplified cleaning.
- Allow the oven to cool completely.
- Wipe spills and food residue with a damp cloth and mild dish soap.
- For baked-on spills, a non-abrasive oven cleaner suitable for Easy Clean Pro surfaces can be used. Follow the cleaner manufacturer's instructions carefully.
- Avoid using harsh scouring pads or abrasive cleaners, as these can damage the coating.
5.3 Exterior Cleaning
Clean the exterior surfaces, including the tempered glass hood and panoramic door, with a soft cloth and a glass cleaner or mild detergent. Dry with a clean, soft cloth to prevent streaks.
6. Troubleshooting
Before contacting customer service, review the following common issues and their solutions:
| Problem | Possible Cause | Solution |
|---|---|---|
| Burner does not light | No gas supply Burner ports clogged Igniter dirty or wet Power outage | Check gas valve is open Clean burner ports Clean and dry igniter Check electrical connection/circuit breaker |
| Oven does not heat | No gas supply Electronic ignition failure Incorrect temperature setting | Check gas valve is open Ensure oven knob is pushed in and turned correctly Verify temperature setting |
| Uneven cooking in oven | Oven not level Overcrowding Incorrect rack position | Level the stove Avoid overcrowding the oven Refer to cooking guides for optimal rack positions |
| Gas odor | Minor leak Unlit burner | Ensure all burners are off. If odor persists, shut off gas supply and contact a technician. |
If the problem persists after attempting these solutions, contact Mabe customer support or a qualified service technician.
7. Specifications
- Model: EMH7602JBS0
- Brand: Mabe
- Type: Floor Stove (Gas Range)
- Dimensions (Product): 76 cm (Width) x 72 cm (Depth) x 93 cm (Height)
- Fuel Type: LP Gas (convertible to Natural Gas)
- Cooktop Burners: 6
- Cooktop Grates: Cast Iron
- Cooktop Ignition: Electric
- Oven Ignition: Electronic (button activated)
- Oven Control: Thermocontrol
- Oven Interior: Easy Clean Pro coating
- Oven Features: Sliding grill, Panoramic door
- Included Accessories: Tempered glass hood, Teflon comal
- UPC: 757638400756
8. Warranty and Support
8.1 Warranty Information
Mabe products are covered by a limited warranty. Please refer to the warranty card included with your purchase or visit the official Mabe website for detailed terms and conditions. Keep your proof of purchase for warranty claims.
8.2 Customer Support
For technical assistance, service requests, or questions regarding your Mabe EMH7602JBS0 Floor Stove, please contact Mabe customer support. Contact information can typically be found on the Mabe official website or in your product documentation.
- Have your model number (EMH7602JBS0) and serial number ready when contacting support.
- Describe the issue clearly and provide any relevant details.