
1. Introduction
The HP Smart Tank 5106 is a versatile multifunction inkjet printer designed for efficient printing, scanning, and copying. This printer features an integrated ink tank system for high-volume, low-cost printing. It supports wireless connectivity, allowing for convenient printing from various devices. This manual provides essential information for setting up, operating, maintaining, and troubleshooting your HP Smart Tank 5106 printer.
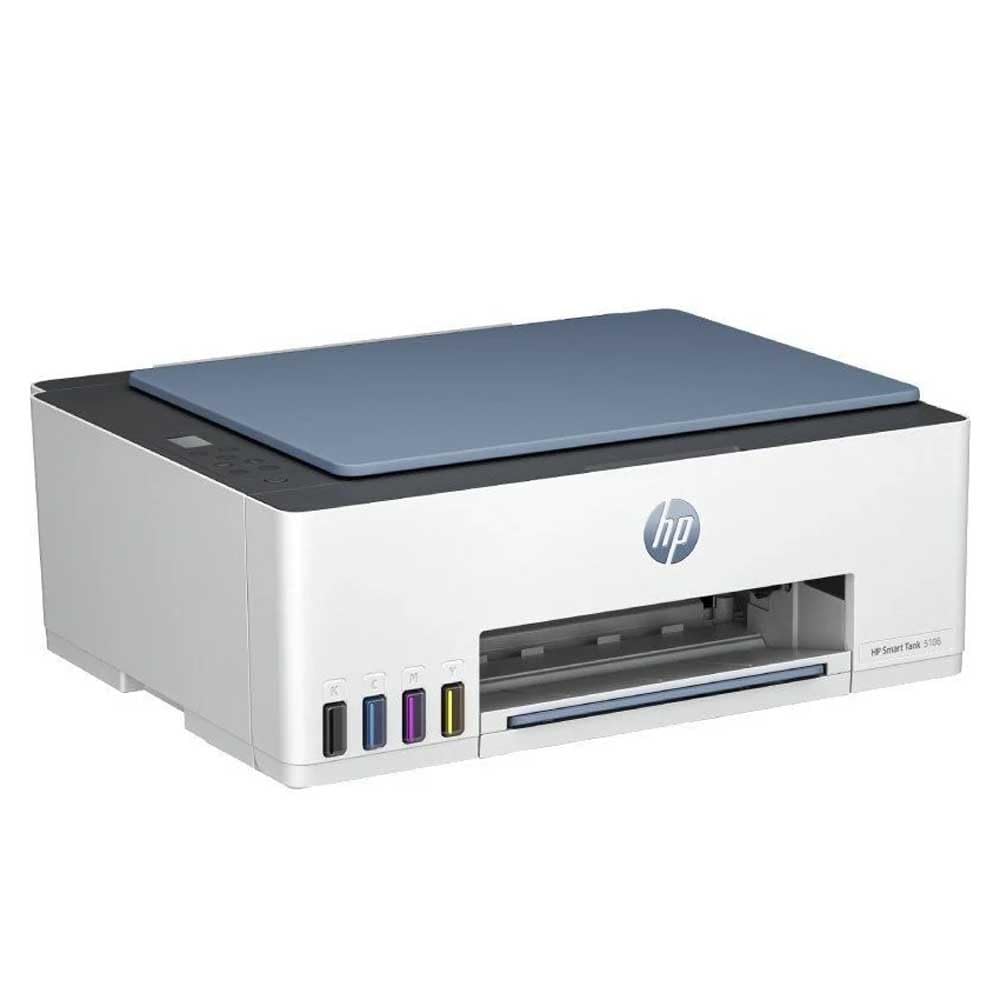
Figure 1: Front view of the HP Smart Tank 5106 Multifunction Printer. This image shows the printer's overall design, including the output tray and the HP logo.
2. Setup
2.1 Unpacking the Printer
- Remove the printer from its packaging.
- Remove all protective tapes and packing materials from the exterior and interior of the printer. Refer to the quick start guide for specific locations.
- Place the printer on a stable, flat surface.
2.2 Filling the Ink Tanks
The HP Smart Tank 5106 uses an integrated ink tank system. Follow these steps to fill the ink tanks:
- Open the ink tank cover located on the left side of the printer.
- Open the cap of the ink tank you wish to fill (Black, Cyan, Magenta, Yellow).
- Uncap the corresponding HP ink bottle and invert it over the tank's nozzle. The ink will flow automatically into the tank. Do not squeeze the bottle.
- Once the tank is full, remove the bottle and close the tank cap securely.
- Repeat for all other ink tanks.
- Close the ink tank cover.
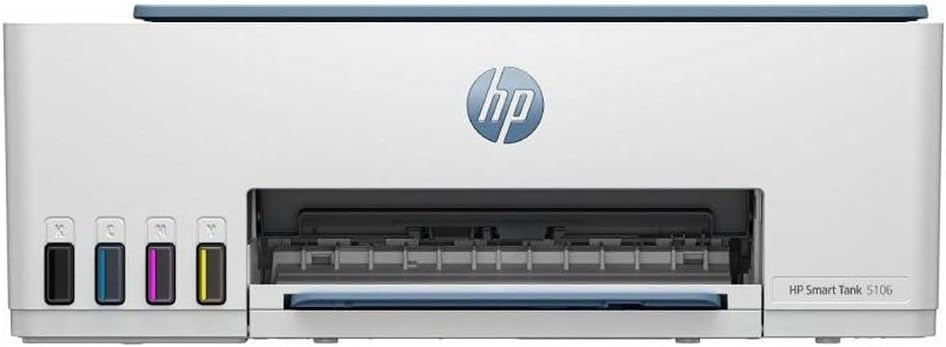
Figure 2: Front view of the HP Smart Tank 5106, highlighting the visible ink tanks on the left side for easy monitoring and refilling.
2.3 Connecting Power and Initial Power On
- Connect the power cord to the printer's power port and then to an electrical outlet.
- Press the Power button to turn on the printer.
- Follow the on-screen instructions on the printer's control panel for initial setup, including language selection and print head alignment.

Figure 3: Rear view of the HP Smart Tank 5106, showing the power input and USB port for connectivity.
2.4 Software Installation and Network Connection
- Download the HP Smart app from your device's app store (iOS, Android) or from hpsmart.com for Windows/macOS.
- Open the HP Smart app and follow the prompts to add your printer.
- Select your Wi-Fi network and enter the password when prompted to connect the printer to your wireless network.
- Alternatively, connect the printer to your computer using a USB cable for a wired connection.
3. Operating Instructions
3.1 Loading Paper
- Pull out the input tray and extend the paper guides.
- Load a stack of plain white paper into the input tray with the print side facing down.
- Adjust the paper guides until they rest gently against the edges of the paper stack.
- Push the input tray back into the printer.
3.2 Printing Documents
- From your computer or mobile device, open the document or image you wish to print.
- Select the Print option (usually found under File menu or by pressing Ctrl+P/Cmd+P).
- Choose your HP Smart Tank 5106 printer from the list of available printers.
- Adjust print settings such as paper size, print quality, and number of copies. For duplex printing, select the two-sided printing option if available in your print dialog.
- Click Print.
3.3 Copying Documents
- Place the document face-down on the scanner glass, aligning it with the guide.
- Close the scanner lid.
- On the printer's control panel, select the Copy option.
- Choose the number of copies and whether you want a color or black-and-white copy.
- Press the Start Copy button.
3.4 Scanning Documents
- Place the document face-down on the scanner glass.
- Close the scanner lid.
- Open the HP Smart app on your computer or mobile device.
- Select the Scan option.
- Adjust scan settings such as resolution, color mode, and destination folder.
- Click Scan to begin the process. The scanned document will be saved to your specified location.
4. Maintenance
4.1 Monitoring and Refilling Ink Levels
Regularly check the ink levels through the transparent ink tanks on the front of the printer or via the HP Smart app. Refill ink tanks as described in Section 2.2 when levels are low to prevent print quality issues.
4.2 Cleaning Print Heads
If you notice streaky or faded prints, the print heads may need cleaning. This can be done through the printer's control panel or the HP Smart app. Refer to the app's maintenance section for detailed instructions.
4.3 Cleaning the Printer Exterior and Scanner Glass
- Wipe the exterior of the printer with a soft, lint-free cloth.
- For the scanner glass, use a soft cloth lightly dampened with glass cleaner. Avoid spraying cleaner directly onto the glass.
4.4 Firmware Updates
Ensure your printer's firmware is up to date for optimal performance and security. Firmware updates can be managed through the HP Smart app.
5. Troubleshooting
5.1 Common Issues and Solutions
- Printer Not Responding: Check power connections, ensure the printer is turned on, and verify network connectivity (Wi-Fi or USB). Restart both the printer and your computer/router.
- Paper Jams: Carefully open all access doors and remove any jammed paper. Ensure paper is loaded correctly and not overfilled.
- Poor Print Quality: Perform print head cleaning and alignment through the HP Smart app or printer control panel. Check ink levels and refill if necessary. Use appropriate paper type and quality settings.
- Connectivity Problems: Ensure your printer and device are on the same Wi-Fi network. Restart your router. If using USB, try a different port or cable.
5.2 Error Messages
If an error message appears on the printer's display or in the HP Smart app, consult the HP support website or the app's help section for specific troubleshooting steps related to that error code.
5.3 Resetting the Printer
In some cases, a factory reset may resolve persistent issues. Refer to the HP support documentation for your specific model for instructions on how to perform a factory reset, as this can vary and may clear network settings.
6. Specifications
| Feature | Specification |
|---|---|
| Model Name | Smart Tank 5106 |
| Product Dimensions | 50.3D x 125.7W x 121.4H centimeters |
| Weight | 7.01 Kilograms |
| Connectivity Technology | USB, Wi-Fi |
| Printing Technology | Inkjet |
| Special Feature | Touchscreen |
| Max Print Speed (Color) | 15 Pages per minute |
| Max Print Speed (Monochrome) | 16 Pages per minute |
| Max Copy Speed (Monochrome) | 16 Pages per minute |
| Max Sheet Capacity | 100 |
| Duplex Printing | Yes |
| Max Media Size | Legal (216 x 356 mm) |
| Scanner Type | Flatbed |
| Max Color Print Resolution | 600 dpi |
| Max Black & White Print Resolution | 1200 x 1200 dpi |
| Compatible Devices | Computers, Laptops, Tablets, Smartphones |
7. Warranty and Support
7.1 Product Warranty
Your HP Smart Tank 5106 printer comes with a standard manufacturer's warranty. Please refer to the warranty card included in your product packaging or visit the official HP website for detailed information regarding warranty terms, conditions, and duration in your region.
7.2 Technical Support
For technical assistance, troubleshooting beyond this manual, or to order replacement parts and supplies, please contact HP Customer Support. You can find contact information and online resources on the official HP support website:
- HP Support Website: support.hp.com
- HP Smart App: The app provides access to troubleshooting tools, support articles, and direct contact options.
When contacting support, please have your printer's model number (Smart Tank 5106) and serial number ready. The serial number is typically located on a label on the back or bottom of the printer.


