
ieGeek ZS-GX4S
Contents
ieGeek 5MP Outdoor Wireless PTZ Camera User Manual
Model: ZS-GX4S
Introduction
This manual provides detailed instructions for the installation, operation, and maintenance of your ieGeek 5MP Outdoor Wireless PTZ Camera (Model ZS-GX4S). This camera features 5MP resolution, 360° pan-tilt-zoom capabilities, a solar panel for continuous power, PIR motion detection with spotlight and siren, color night vision, two-way audio, IP65 weather resistance, and compatibility with Amazon Alexa. Please read this manual carefully before use to ensure proper functionality and safety.
Package Contents
Before proceeding with the installation, please verify that all components are present in the package:

Image: The ieGeek 5MP Outdoor Wireless PTZ Camera, solar panel, mounting accessories, and user manuals are shown laid out, indicating the complete package contents.
- ieGeek 5MP Outdoor Wireless PTZ Camera
- Solar Panel with connecting cable
- Mounting Bracket
- Mounting Screws and Wall Plugs (7x screws, 7x expansion screws)
- User Manual (Camera)
- User Manual (Solar Panel)
Setup Guide
1. Initial Charging
Although the camera is equipped with a solar panel, it is recommended to fully charge the camera's built-in battery via the USB port before the first use. Connect the camera to a 5V/2A USB power adapter (not included) using the provided USB cable. The charging indicator light will show the charging status.
2. App Installation
Download and install the "ieGeek Cam" application on your smartphone. The app is available on both Google Play Store and Apple App Store. Search for "ieGeek Cam" or scan the QR code provided in the quick start guide.

Image: A smartphone displaying the ieGeek Cam app interface with a "Motion detected!" notification, alongside icons for Google Play and the App Store, indicating app availability.
3. Device Pairing and Wi-Fi Connection
- Open the "ieGeek Cam" app and create an account or log in.
- Tap the "+" icon to add a new device.
- Follow the on-screen instructions to power on the camera and put it into pairing mode.
- Select your 2.4GHz Wi-Fi network and enter the password. The camera does not support 5GHz Wi-Fi.
- Scan the QR code displayed on your phone with the camera lens. Ensure the camera is within 15-30 cm (6-12 inches) of the phone.
- Once connected, the camera will indicate successful pairing, and you can name your device.
4. Mounting the Camera and Solar Panel
Choose a suitable outdoor location for mounting the camera and solar panel. Ensure the solar panel receives adequate direct sunlight throughout the day for optimal charging. The camera is designed for wall mounting.

Image: The ieGeek 5MP Outdoor Wireless PTZ Camera is shown mounted outdoors with its accompanying solar panel, illustrating a typical installation setup. A smartphone screen in the foreground displays the camera's live view.
- Use the provided mounting bracket and screws to securely attach the camera to a wall.
- Mount the solar panel in a location that maximizes sun exposure, then connect its cable to the camera's charging port.
- Ensure the camera is positioned to cover the desired monitoring area.
Operation
1. Live View and PTZ Control
Access the live feed of your camera through the "ieGeek Cam" app. You can remotely control the camera's pan (355° horizontal) and tilt (120° vertical) movements to adjust the viewing angle. The camera also supports 4x digital zoom.
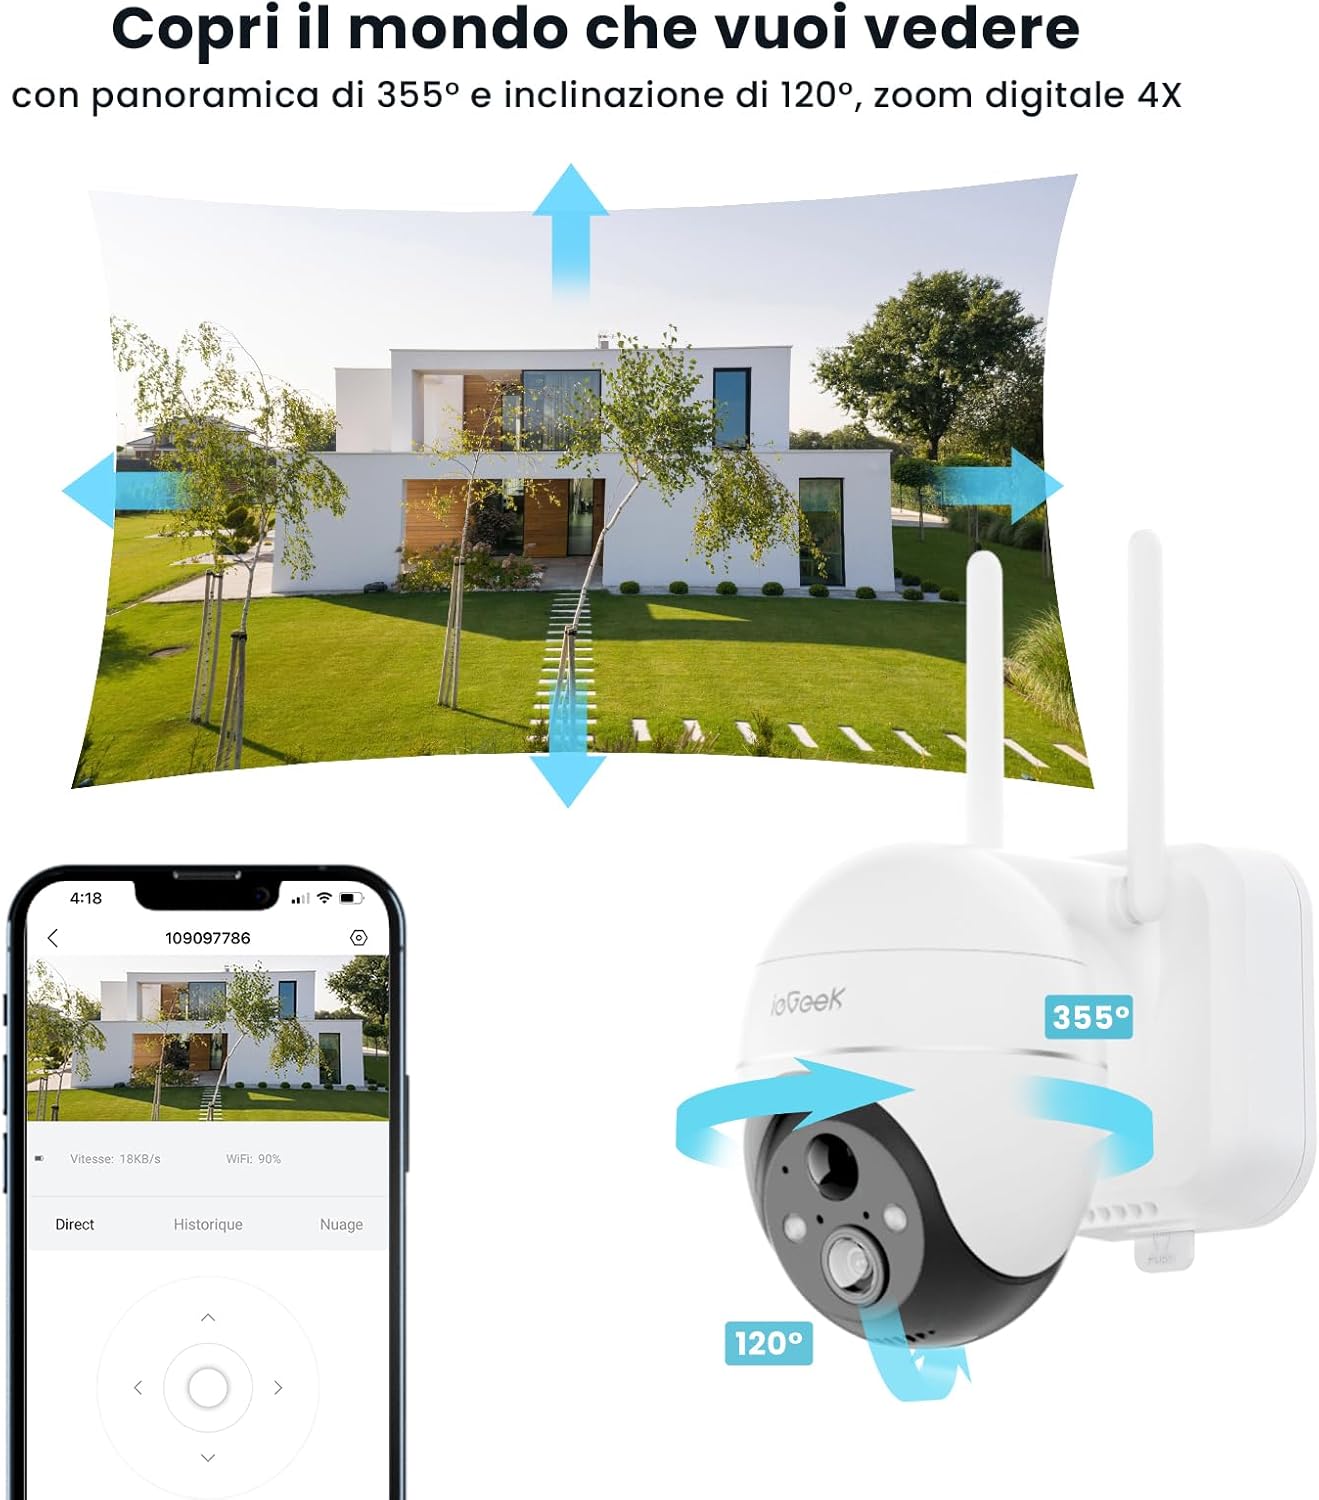
Image: The ieGeek camera is depicted with arrows indicating its 355-degree horizontal pan and 120-degree vertical tilt range, demonstrating its PTZ functionality. A smartphone shows the live camera view, emphasizing remote control.
2. Motion Detection and Alerts
The camera features advanced PIR motion detection with AI enhancement to reduce false alarms. When motion is detected, the camera can:
- Immediately illuminate the area with its spotlight.
- Activate a loud siren to deter intruders.
- Send instant notifications to your smartphone via the "ieGeek Cam" app.
You can customize motion detection zones and sensitivity settings within the app.

Image: An illustration showing the ieGeek camera detecting a person at night, with the spotlight activated and red waves indicating the siren, demonstrating its active deterrence features.
3. Two-Way Audio
Utilize the built-in microphone and speaker for real-time two-way communication. This allows you to speak with visitors, family members, or even pets directly through the camera via the app.

Image: A hand holding a smartphone showing the ieGeek Cam app with a "Hold to Talk" button, indicating the two-way audio feature. Speech bubbles above suggest a conversation, highlighting its communication capability.
4. Night Vision
The camera provides clear 5MP color night vision up to 15 meters (50 feet) using its 4 infrared lights. It automatically switches to night vision mode in low-light conditions, ensuring continuous monitoring day and night.

Image: A scene at night showing a car parked in a driveway, with an inset magnifying a clear view of the license plate, demonstrating the camera's 5MP ultra-clear color night vision capability.
5. Recording and Storage
The camera supports two storage options for recorded footage:
- Cloud Storage: Enjoy 7 days of free cloud storage. Paid plans are available for extended storage.
- Local Storage: Insert a Micro SD card (up to 128GB, not included) into the camera's slot for local recording.

Image: A close-up view of the ieGeek camera's underside, highlighting the Micro SD card slot with a 128GB card being inserted, illustrating the local storage option.

Image: A smartphone displaying the ieGeek Cam app interface with a cloud icon and text indicating "FREE 7 days cloud service," demonstrating the cloud storage feature.
6. Alexa Integration
The ieGeek camera is compatible with Amazon Alexa. You can use voice commands to view the camera's live feed on compatible Alexa-enabled devices, such as an Echo Show.

Image: An Amazon Echo Show device displaying the live video feed from the ieGeek camera, with the "Works with Alexa" logo, illustrating its compatibility with Amazon's voice assistant.
Maintenance
- Cleaning: Regularly wipe the camera lens and solar panel with a soft, damp cloth to ensure clear images and efficient solar charging. Avoid abrasive cleaners.
- Battery Management: The solar panel is designed to keep the battery charged. In periods of prolonged cloudy weather or low sunlight, you may need to manually charge the camera via its USB port to maintain optimal performance.
- Firmware Updates: Check the "ieGeek Cam" app periodically for firmware updates. Keeping your camera's firmware up-to-date ensures the latest features, security patches, and performance improvements.
Troubleshooting
| Problem | Possible Cause | Solution |
|---|---|---|
| Camera fails to connect to Wi-Fi. | Incorrect Wi-Fi password, 5GHz network selected, camera too far from router, weak signal. |
|
| Motion detection alerts are too frequent or not triggered. | Sensitivity settings too high/low, environmental factors (e.g., swaying trees, shadows), incorrect detection zone. |
|
| Battery drains quickly. | Insufficient sunlight for solar panel, frequent motion triggers, extreme temperatures. |
|
| No image or poor image quality. | Dirty lens, network issues, low light conditions. |
|
Specifications
| Feature | Detail |
|---|---|
| Model Number | ZS-GX4S |
| Resolution | 5MP (2560x1920) |
| Pan Angle | 355 Degrees |
| Tilt Angle | 120 Degrees |
| Night Vision Range | 15 Meters (50 feet) |
| Power Source | Solar Powered |
| Battery Type | Lithium Ion |
| Connectivity | Wi-Fi (2.4GHz only) |
| Storage Options | Cloud Storage, Micro SD Card (up to 128GB) |
| Motion Detection | PIR Sensor with AI Humanoid Detection |
| Audio | Two-Way Audio |
| Weather Resistance | IP65 |
| Compatible Devices | Smartphones, Amazon Alexa |
| Dimensions (LxWxH) | 18 x 17 x 12.6 cm |
| Weight | 1.03 Kilograms |
Warranty and Support
ieGeek products are designed for reliability and performance. For any technical assistance, warranty claims, or product inquiries, please contact ieGeek customer support. They offer 24/7 service via email and provide maintenance and return support.

Image: Four circular icons representing customer support options: email contact, 24/7 service, maintenance, and product returns, indicating comprehensive support.
Please refer to your purchase documentation or the official ieGeek website for specific warranty terms and contact information.
Ask a question about this manual
Ask about setup, troubleshooting, compatibility, parts, safety, or missing instructions. Manuals+ will review the question and use this page’s manual context to help answer it.