
1. Product Overview
The Lightswim C30M Industrial HD Digital Borescope is a versatile inspection camera designed for examining hard-to-reach areas. It features a 4.3-inch IPS screen, 1080P resolution, 8 adjustable LED lights, and a 16.5ft semi-rigid cable. This device is IP67 waterproof, making it suitable for various challenging environments.

Figure 1: Lightswim C30M Industrial HD Digital Borescope with included accessories.
This image displays the main unit of the Lightswim C30M borescope, featuring its 4.3-inch screen and control buttons. The flexible semi-rigid cable with the camera and LED lights is coiled next to it. Various accessories, including hooks and a mirror, are visible at the top, indicating their utility for different inspection tasks.
2. Setup
2.1 Initial Inspection
Upon receiving your Lightswim C30M borescope, carefully unbox all components and inspect them for any visible damage. Ensure all listed accessories are present. The main unit, semi-rigid cable with camera, USB-C charging cable, and accessory kit (hooks, magnet, mirror) should be included.
2.2 Charging the Device
The borescope is powered by a rechargeable battery. Before first use, fully charge the device. Locate the USB-C charging port, typically protected by a silicone plug to maintain its IP67 waterproof rating. Connect the provided USB-C cable to the borescope and plug the other end into a compatible USB power adapter (not included) or a computer's USB port.

Figure 2: Internal view of the borescope's battery and charging port.
This image illustrates the internal battery compartment and the USB-C charging port of the borescope. It highlights the device's rechargeable nature, emphasizing the convenience of not needing disposable batteries. Ensure the silicone plug is securely reinserted after charging to maintain water resistance.
2.3 Attaching Accessories
The borescope comes with several useful accessories that can be attached to the camera tip for enhanced functionality. These include a hook for retrieving objects, a magnet for metallic items, and a side-view mirror for inspecting angles. To attach an accessory:
- Select the desired accessory.
- Align the accessory with the camera tip.
- Gently push and clip the accessory onto the camera head until it is securely fastened.
Figure 3: Included accessories for the borescope.
This image shows the various accessories that come with the borescope, including different types of hooks and a mirror. These attachments are designed to clip onto the camera head, expanding the borescope's utility for retrieving dropped items or viewing objects from different angles in confined spaces.
3. Operating Instructions
3.1 Powering On/Off
To power on the borescope, press and hold the "POWER" button located on the control panel until the screen illuminates. To power off, press and hold the "POWER" button again until the screen turns off.

Figure 4: The 4.3-inch IPS display of the borescope.
This image highlights the 4.3-inch IPS full-view color screen of the borescope, emphasizing its wide 170° viewing angle and 1920x1080P resolution. The clear display is crucial for detailed visual inspections in various applications.
3.2 Display Controls
The control panel features intuitive buttons for adjusting the display and camera settings:
- Zoom: Use the zoom in (+) and zoom out (-) buttons to adjust the magnification of the image.
- Brightness: The light bulb icon buttons control the intensity of the 8 adjustable LED lights on the camera tip, improving visibility in dark environments.
- Contrast: Adjust the contrast of the image for better clarity in different lighting conditions. This can also switch to black and white mode for enhanced detail.
- Rotation: The rotation button allows you to flip the image 180 degrees, which is useful when navigating the camera in confined spaces.
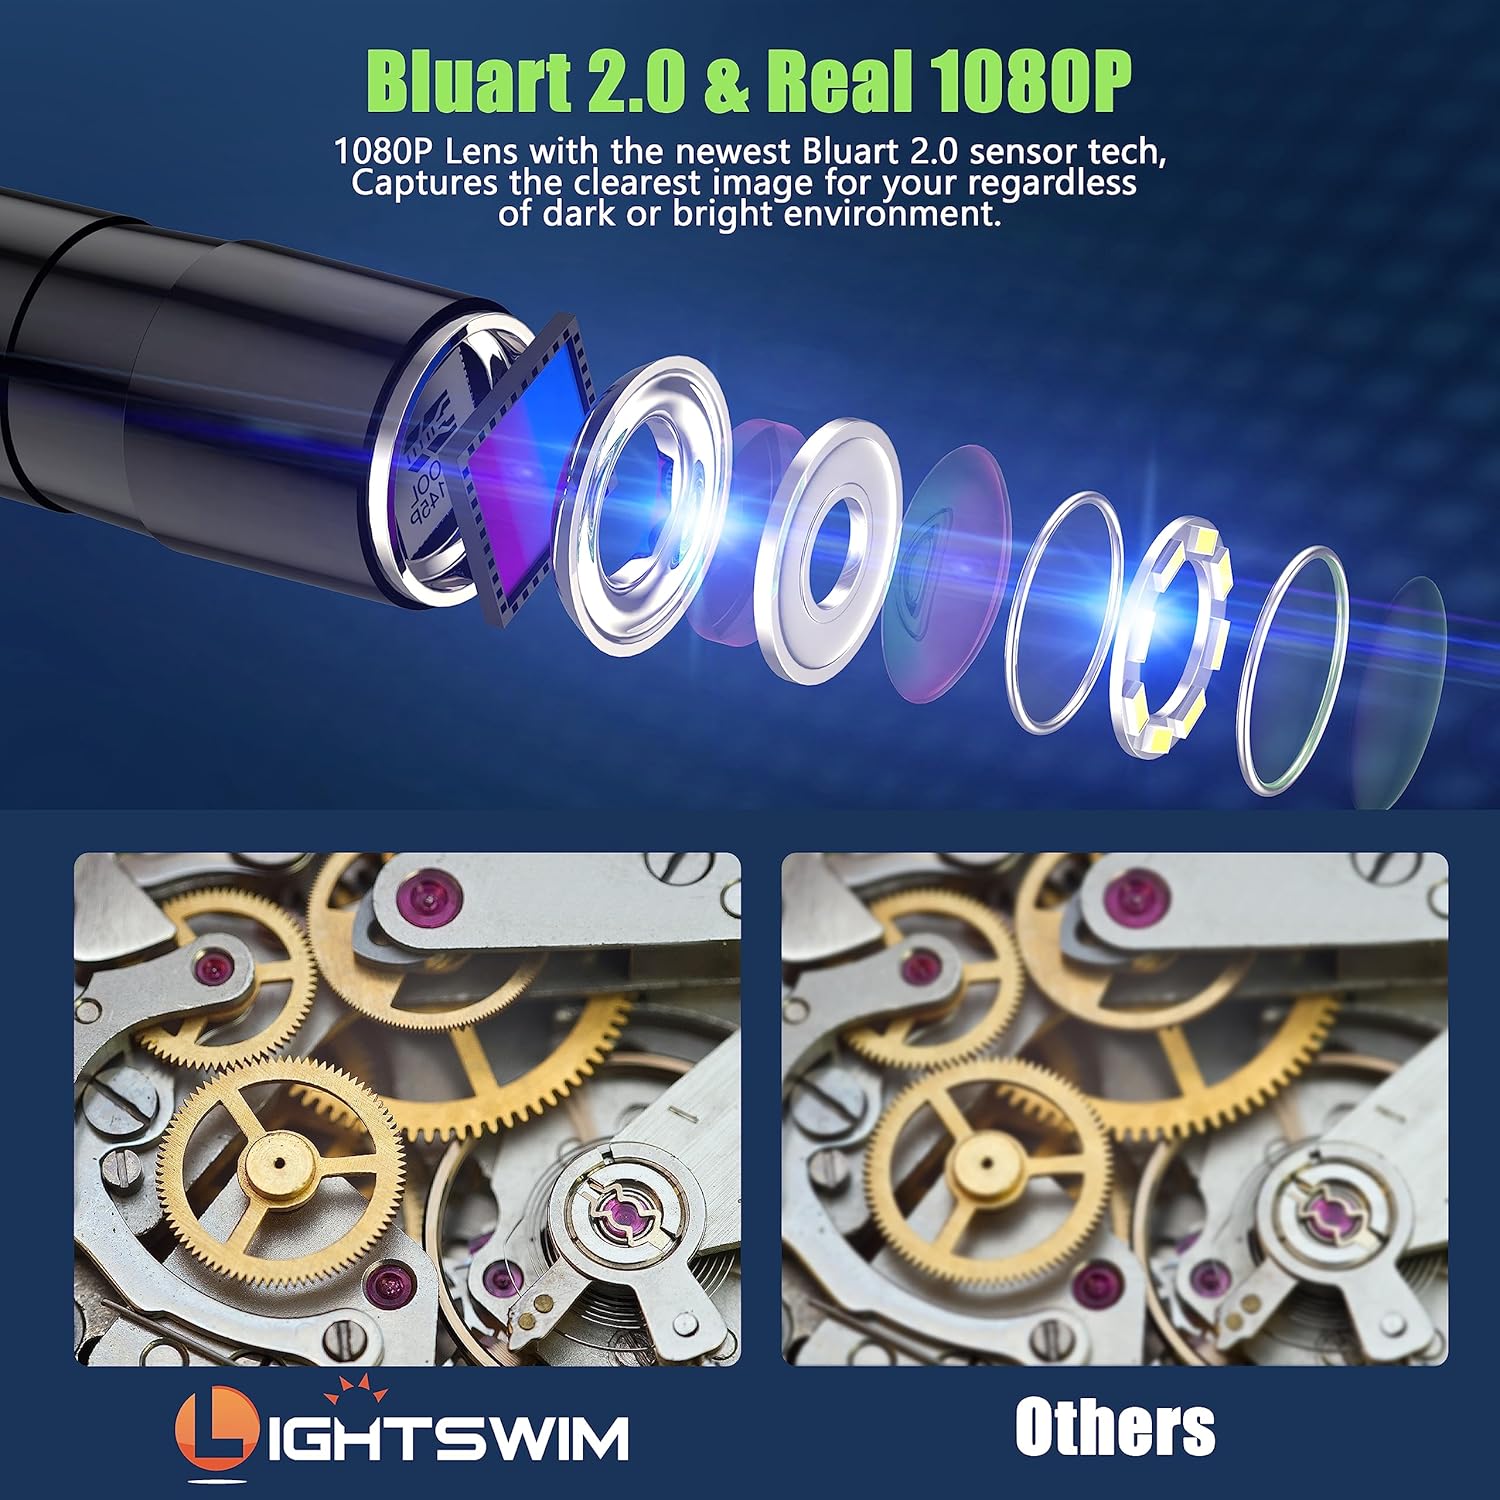
Figure 5: Borescope lens and image quality.
This image illustrates the 1080P lens with Bluart 2.0 sensor technology, designed to capture clear images in both dark and bright environments. It visually compares the clarity of images produced by the Lightswim borescope versus other models, highlighting its superior image quality.

Figure 6: Adjustable LED lights and waterproof feature.
This image demonstrates the 8 adjustable LED lights on the camera tip, providing illumination in dark areas. It also highlights the IP67 waterproof rating, showing the camera submerged in water, indicating its suitability for wet and damp inspection environments.
3.3 Usage Scenarios
The Lightswim C30M borescope is an ideal tool for various inspection tasks where direct visual access is limited. Its semi-rigid cable allows for flexible navigation through pipes, vents, and tight spaces. Common applications include:
- Automotive Maintenance: Inspecting engine components, internal parts of a car, or hard-to-reach areas under the hood.
- Pipe and Drain Inspection: Examining clogs, corrosion, or damage within plumbing systems and sewer lines.
- Household Appliance Inspection: Checking the interior of washing machines, dryers, or refrigerators for issues.
- Home Maintenance: Inspecting wall structures, HVAC ducts, or finding dropped items in floor vents.

Figure 7: Borescope in use for different applications.
This image showcases the borescope being used in various practical scenarios, including inspecting a car engine, a sewer pipe, and an air conditioning unit. It demonstrates the device's versatility and utility across different professional and household inspection needs.
4. Maintenance
4.1 Cleaning the Camera Lens
After each use, especially in dirty or dusty environments, gently wipe the camera lens with a soft, lint-free cloth. For stubborn grime, slightly dampen the cloth with water or a mild, non-abrasive cleaning solution. Ensure the lens is completely dry before storage.
4.2 Waterproofing Considerations
The camera cable and tip are IP67 waterproof. However, the main display unit is not. Always ensure the silicone plug covering the charging port is securely closed before exposing the cable to water or damp environments. Avoid submerging the main unit.
4.3 Battery Care
To prolong battery life, avoid fully discharging the battery frequently. Charge the device regularly, even if not in constant use. Store the borescope in a cool, dry place away from extreme temperatures.
5. Troubleshooting
- No Image on Screen:
- Ensure the device is fully charged and powered on.
- Check the connection between the camera cable and the main unit.
- Poor Image Quality:
- Clean the camera lens as described in the Maintenance section.
- Adjust the LED brightness using the control panel buttons.
- Adjust the contrast settings.
- Ensure the camera is within the optimal focal distance (2cm-10cm).
- Battery Not Charging:
- Verify the USB-C cable is properly connected to both the borescope and the power source.
- Try a different USB power adapter or USB port.
6. Specifications
| Feature | Detail |
|---|---|
| Product Dimensions | 8.66 x 5.12 x 3.15 inches |
| Item Weight | 1.17 pounds |
| Item Model Number | C30M |
| Batteries | 1 LR44 batteries required (included) |
| Macro Focus Range | 2-10 cm |
| Video Capture Resolution | 1080p |
| Display Screen | 4.3" IPS Color LCD |
| Waterproof Rating | IP67 (for camera and cable) |
| LED Lights | 8 adjustable |
7. Warranty and Support
For detailed warranty information and customer support, please refer to the official Lightswim product documentation included with your purchase or visit the manufacturer's official website. Keep your proof of purchase for warranty claims.