Introduction
This user manual provides comprehensive instructions for the installation, operation, and maintenance of your Capture Advance R2-HDDVR8C2T 8-Channel HD DVR. This Digital Video Recorder is designed for robust surveillance applications, supporting up to 5MP resolution recording across various video inputs including CVI, TVI, AHD, CVBS, and IP cameras. It features H.265 video compression and comes with a pre-installed 2TB HDD, with support for up to two 8TB HDDs. Please read this manual thoroughly before using the device to ensure proper setup and functionality.
Safety Information
- Ensure the DVR is placed in a well-ventilated area to prevent overheating.
- Use only the power adapter supplied with the device.
- Do not expose the DVR to water or moisture.
- Avoid placing heavy objects on top of the DVR.
- Disconnect power before performing any maintenance or connection changes.
- Refer all servicing to qualified personnel.
Package Contents
Verify that all items are present in the package:
- Capture Advance R2-HDDVR8C2T 8-Channel HD DVR Unit
- 2TB Hard Drive (pre-installed)
- Power Adapter
- USB Mouse
- Remote Control (optional, may vary by package)
- Screws for additional HDD installation
- Quick Start Guide
Product Overview
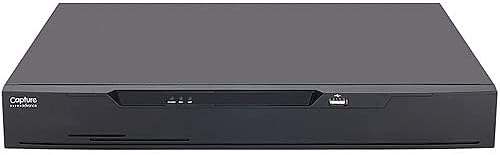
The image displays the front panel of the Capture Advance R2-HDDVR8C2T DVR. It is a black, rectangular unit with a sleek design. On the left side of the front panel, the "Capture Advance" logo is visible. Towards the center, there are three small indicator lights, likely for power, HDD activity, and network status. On the right side, a USB port is present for connecting a mouse or USB drive. The overall appearance is compact and suitable for desk, rack, or wall mounting.
The R2-HDDVR8C2T is an 8-channel Digital Video Recorder designed for high-definition surveillance. It supports various camera types and offers advanced recording and playback features. The front panel provides essential indicators and a USB port for user interaction, while the rear panel (not shown in image) houses all video input/output, audio, network, and power connections.
Setup
1. Initial Connections
- Connect Cameras: Connect your surveillance cameras to the BNC video input ports on the rear of the DVR. Ensure secure connections.
- Connect Monitor: Connect a monitor to the DVR's HDMI or VGA output port.
- Connect Mouse: Plug the USB mouse into one of the USB ports on the DVR (front or rear).
- Connect Network (Optional): For remote viewing and network features, connect an Ethernet cable from the DVR's LAN port to your router or network switch.
- Connect Power: Plug the power adapter into the DVR's power input and then into a power outlet. The DVR will power on automatically.
2. First-Time Setup Wizard
Upon first boot, the DVR will typically launch a setup wizard. Follow the on-screen prompts to:
- Set language and region.
- Configure date and time.
- Set up administrator password.
- Configure network settings (DHCP recommended for most users).
- Initialize the hard drive if prompted (this will erase all data on the HDD).
Operating
Live View
After setup, the DVR will display the live view from connected cameras. You can switch between single-camera view and multi-camera grid view using the on-screen controls or mouse right-click menu.
Recording
The DVR is configured to record continuously by default. You can adjust recording schedules, motion detection settings, and other parameters through the main menu: Main Menu > Record > Schedule.
Playback
To review recorded footage, navigate to Main Menu > Playback. Select the date and camera channel to view recordings. The smart search feature allows for quick retrieval of specific events.
Remote Access
To access your DVR remotely via a mobile app or web browser, ensure the DVR is connected to the internet. Refer to the specific instructions provided with your DVR's software for setting up remote access, which typically involves port forwarding or P2P cloud services.
Maintenance
- Cleaning: Use a soft, dry cloth to clean the exterior of the DVR. Do not use liquid cleaners or aerosols.
- Firmware Updates: Periodically check the Capture Advance website for firmware updates. Keeping your DVR's firmware up-to-date ensures optimal performance and security.
- Hard Drive Health: Monitor the health of your hard drive through the DVR's system settings. Replace the HDD if any errors or warnings are reported to prevent data loss.
- Password Management: Regularly change your DVR's administrator password to enhance security.
Troubleshooting
No Video Output
- Check HDMI/VGA cable connections to the monitor and DVR.
- Ensure the monitor is powered on and set to the correct input source.
- Try a different monitor or cable.
No Camera Image
- Verify camera power supply.
- Check BNC cable connections at both the camera and DVR ends.
- Ensure the camera type (AHD, TVI, CVI, CVBS, IP) is compatible with the DVR channel settings.
- Test with a known working camera.
Remote Access Not Working
- Confirm the DVR is connected to the internet (check network status in DVR settings).
- Verify network settings, including IP address, gateway, and DNS.
- Check port forwarding rules on your router if using direct IP access.
- Ensure the P2P/Cloud service is enabled on the DVR and the device is online.
Specifications
| Feature | Detail |
|---|---|
| Product Model | R2-HDDVR8C2T |
| Total Channels | 8 (up to 12CH IP camera inputs) |
| Video Inputs Supported | AHD, TVI, CVI, CVBS, IP |
| Max. Recording Resolution | 5MP |
| Video Compression | H.265 |
| Hard Drive Capacity | 2TB (pre-installed), supports up to two 8TB HDDs |
| Video Outputs | HDMI, VGA |
| Remote Management | Yes |
| Mount Type | Desk mountable, rack mountable, wall mountable |
| Dimensions (L x W x H) | 13.78 x 12.01 x 1.93 inches |
| Weight (w/o HDD) | 3.97 LB |
| NDAA Compliant | Yes |
Warranty Information
Capture Advance products are covered by a manufacturer's warranty. For specific warranty terms and conditions, please refer to the warranty card included with your product or visit the official Capture Advance website. Optional extended protection plans may be available for purchase separately.
Technical Support
For technical assistance, troubleshooting, or any inquiries regarding your Capture Advance R2-HDDVR8C2T DVR, please contact Capture Advance Technical Support. Contact information can typically be found on the Capture Advance website or in the documentation included with your product.


