
Dcorn 20230412002
Dcorn 10-inch LCD HDMI Digital Microscope User Manual
Model: 20230412002
Introduction
This manual provides detailed instructions for the setup, operation, and maintenance of your Dcorn 10-inch LCD HDMI Digital Microscope. Please read this manual thoroughly before using the device to ensure proper functionality and to maximize your viewing experience.

Figure 1: Dcorn 10-inch LCD HDMI Digital Microscope. This image displays the complete microscope unit, including the 10-inch LCD screen, the adjustable stand, the microscope lens, two flexible LED side lights, a remote control, and a 32GB SD card.
Package Contents
Verify that all items listed below are included in your package:
- 1 x Dcorn 10-inch Digital Microscope Unit
- 1 x Aluminum Stand
- 1 x Extension Tube
- 1 x Remote Control
- 1 x 32GB Micro SD Card
- 1 x USB Cable
- 1 x HDMI Cable
- 1 x Power Adapter
- 1 x User Manual
- 1 x CD (for PC software/drivers)
Setup Instructions
- Unpack Components: Carefully remove all components from the packaging.
- Assemble the Stand: Attach the microscope unit to the aluminum stand. Ensure it is securely fastened. The stand allows for adjustable height and angle.
- Install Extension Tube (Optional): For viewing larger objects like entire coins, insert the provided extension tube between the lens and the microscope body.

Figure 2: Comparison of microscope setup with and without the extension tube. The image demonstrates how the 4.7-inch extension tube allows for a wider field of view, enabling the observation of an entire coin, compared to a standard setup.
- Insert SD Card: Locate the Micro SD card slot on the microscope unit and insert the included 32GB card. This card is used for storing captured images and videos.
- Connect Power: Connect the power adapter to the microscope and plug it into a power outlet.
- Adjust Lighting: Position the two flexible LED side lights to illuminate your specimen evenly. The main unit also has built-in LEDs.
Operating Instructions
1. Power On/Off
Press the POWER button on the microscope unit to turn it on or off. The LCD screen will display the live view.

Figure 3: The 10-inch LCD screen displaying a magnified image of a butterfly, demonstrating the clear visual output of the microscope.
2. Adjusting Magnification and Focus
- Magnification: The microscope offers a magnification range of 10X to 1500X. Adjust the height of the microscope unit on the stand to change the initial magnification.
- Focus: Use the focus wheel on the microscope lens to achieve a clear image. Fine-tune the focus for optimal detail.

Figure 4: Visual examples of different magnification levels (50X, 500X, 1500X) on various specimens, including a plant, an ant, and a coin, illustrating the microscope's zoom capabilities.
3. Adjusting Illumination
The microscope features 6 main LEDs and 2 adjustable side lights. Use the touch controls on the unit or the remote control to adjust the brightness of the LEDs.

Figure 5: Demonstration of the dimmable LED touch control. The image shows how to adjust the lighting from 0% to 100% using the controls, with examples of a gold coin under different illumination levels (OFF, 20%, 50%, 100%).
4. Capturing Images and Videos
- Photo Capture: Press the OK button on the unit or the corresponding button on the remote control to take a still image. Images are saved to the Micro SD card.
- Video Recording: Press the MENU button and navigate to the video recording option, then press OK to start/stop recording. Videos are saved to the Micro SD card.

Figure 6: Icons representing photo and video capture functions, indicating the microscope's capability to record both still images and moving footage.
- Remote Control: The included remote control allows for hands-free operation, reducing vibrations and ensuring clearer captures.

Figure 7: The remote control for the Dcorn digital microscope, designed to prevent screen flicker and provide a seamless viewing experience by allowing adjustments without touching the main unit.
5. Connecting to External Displays (HDMI/USB)
- HDMI Output: Connect an HDMI cable from the microscope's HDMI port to an external monitor or TV for a larger viewing experience.
- USB Output: Connect the microscope to a PC (Windows/MacOS) via a USB cable. Install the provided software from the CD for live viewing and advanced controls on your computer.
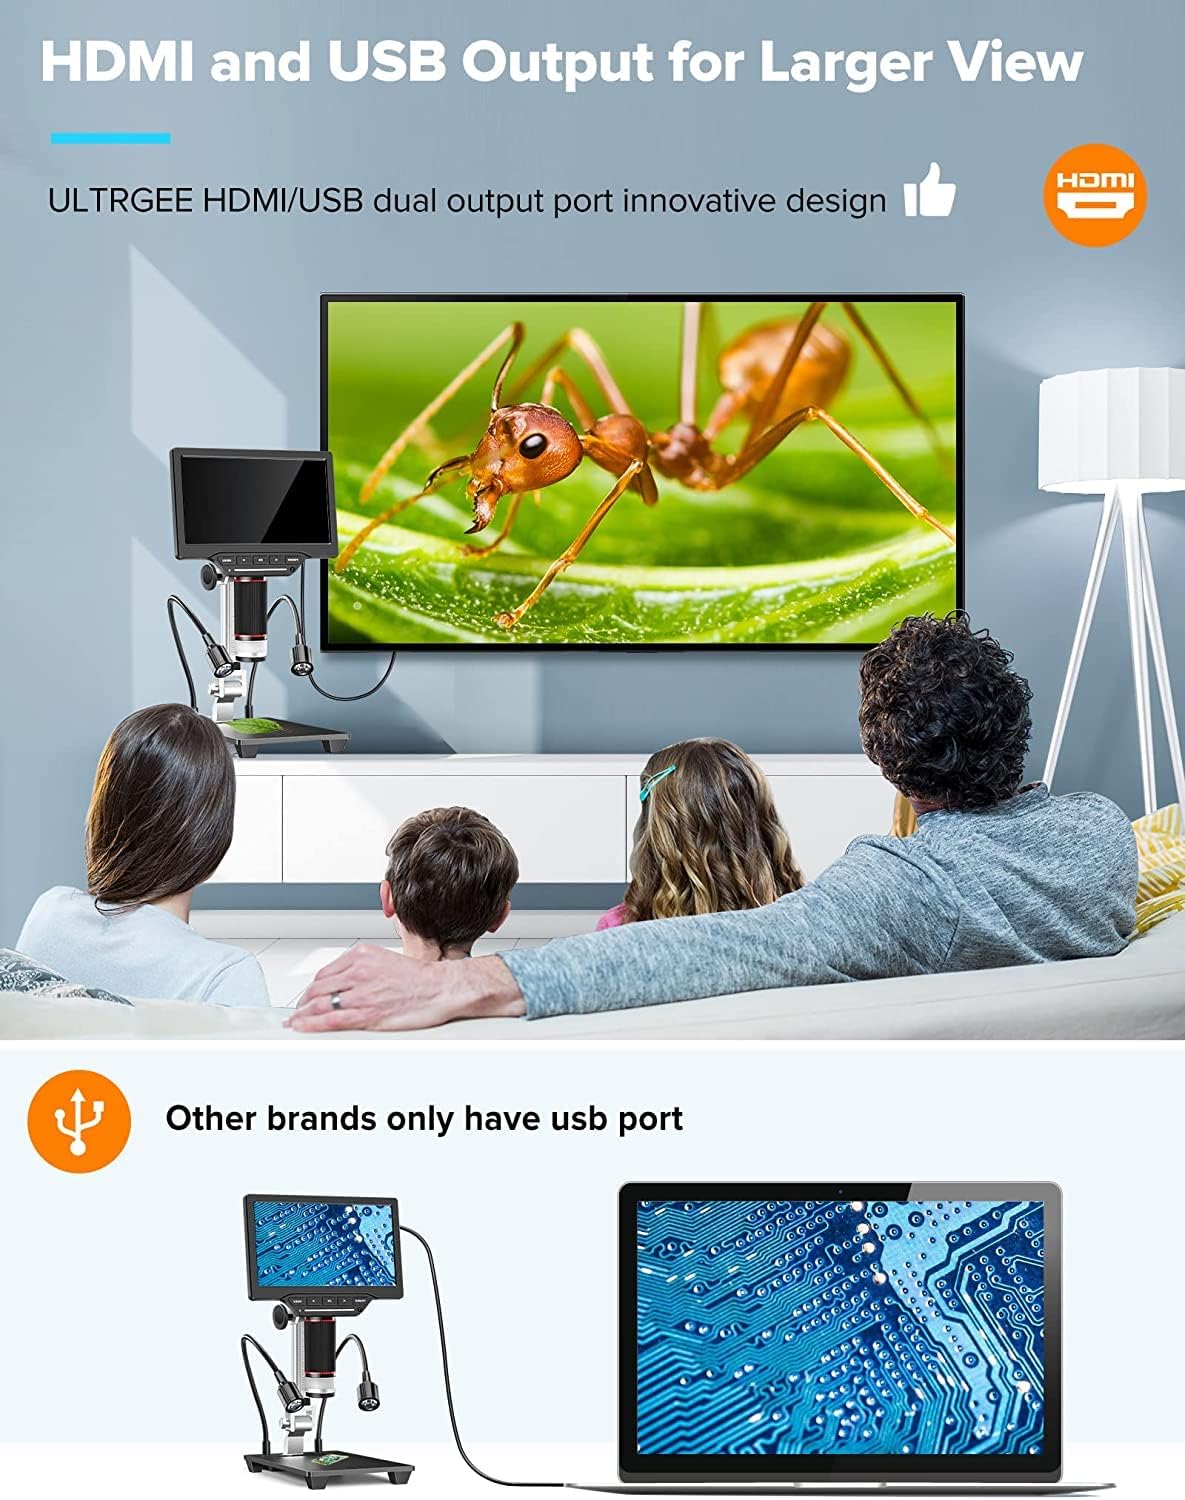
Figure 8: The Dcorn microscope connected to an external monitor via HDMI and to a laptop via USB, illustrating its dual output capabilities for a wider viewing and sharing experience.
Maintenance
- Cleaning the Lens: Use a soft, lint-free cloth specifically designed for optical lenses to gently wipe the microscope lens. Avoid using abrasive materials or harsh chemicals.
- Cleaning the Screen: Use a microfiber cloth to clean the LCD screen. If necessary, slightly dampen the cloth with water or a screen-cleaning solution.
- General Cleaning: Wipe the body of the microscope and stand with a dry or slightly damp cloth.
- Storage: When not in use, store the microscope in a clean, dry place, away from direct sunlight and extreme temperatures.
Troubleshooting
| Problem | Possible Cause | Solution |
|---|---|---|
| No image on screen | Power not connected; Microscope not turned on; Lens cap still on. | Ensure power adapter is connected and unit is powered on. Remove lens cap. |
| Image is blurry | Incorrect focus; Incorrect working distance; Dirty lens. | Adjust the focus wheel. Adjust the height of the microscope. Clean the lens. |
| Cannot capture photos/videos | SD card not inserted; SD card full; SD card corrupted. | Insert SD card. Delete unnecessary files or replace SD card. Format SD card (backup data first). |
| No output to external monitor/PC | Cable not connected properly; Incorrect input selected on external display; Driver not installed (for PC). | Check HDMI/USB cable connections. Select correct input source on monitor/TV. Install software/drivers from the provided CD for PC connection. |
| LED lights not working | Lights turned off; Brightness set to 0%. | Turn on lights and increase brightness using touch controls or remote. |
Specifications
| Brand | Dcorn |
| Model Number | 20230412002 |
| Screen Size | 10-inch LCD |
| Camera Resolution | 16 Megapixels |
| Magnification Range | 10X - 1500X |
| Video Resolution | 1920x1080 30fps, 1280x1020 60fps |
| Photo Resolution | Up to 5376x3024 (16MP) |
| Storage | 32GB Micro SD Card (included) |
| Output Ports | HDMI, USB |
| Compatible Devices | Devices with HDMI port, MacOS, Windows PCs |
| Illumination | 6 Main LEDs, 2 Side LEDs (Dimmable Touch Control) |
| Material | Metal, ABS |
| Product Dimensions (L x W x H) | 11.5 x 20 x 36.5 cm |
| Waterproof Level | Not waterproof |
Warranty and Support
The Dcorn 10-inch LCD HDMI Digital Microscope comes with a 5-year warranty. For technical support, warranty claims, or further assistance, please refer to the contact information provided with your purchase or visit the official Dcorn website.
Spare Parts Availability: Information unavailable.
Software Updates Guaranteed Until: Information unavailable.
Related documents20230412002

Ask a question about this manual
Ask about setup, troubleshooting, compatibility, parts, safety, or missing instructions. Manuals+ will review the question and use this page’s manual context to help answer it.