
Introduction
This manual provides detailed instructions for the installation, operation, and maintenance of your JVC KW-M180BT Bluetooth Car Stereo Receiver. Please read this manual thoroughly before using the product to ensure proper and safe operation. Keep this manual for future reference.

Image: Front view of the JVC KW-M180BT Car Stereo Receiver, showcasing its 6.75-inch touchscreen display.
Safety Information
Always observe the following safety precautions to prevent accidents, injury, or damage to the unit.
- Do not operate the unit while driving. Distraction can lead to accidents.
- Ensure proper installation by a qualified professional to avoid electrical shorts or damage.
- Do not disassemble or modify the unit. This can cause electric shock or malfunction.
- Keep the volume at a level where you can still hear outside sounds, such as emergency vehicles.
- Avoid exposing the unit to moisture or extreme temperatures.
What's in the Box
Upon opening the package, verify that all listed components are present:
- Receiver (JVC KW-M180BT unit)
- Wiring Harness
- Mounting Hardware
- Instruction Manual (this document)
Setup
Installation Guidelines
The JVC KW-M180BT is designed for double-DIN dash openings. Professional installation is highly recommended to ensure correct wiring and secure mounting, preventing damage to your vehicle's electrical system or the unit itself.
- Disconnect the vehicle's negative battery terminal before beginning installation.
- Ensure all connections are secure and properly insulated.
- Refer to your vehicle's specific wiring diagram in conjunction with the receiver's wiring diagram.
Wiring Diagram
Below is a detailed diagram of the rear connections for the KW-M180BT receiver. This diagram illustrates the various inputs and outputs, including power, audio, video, and control connections.
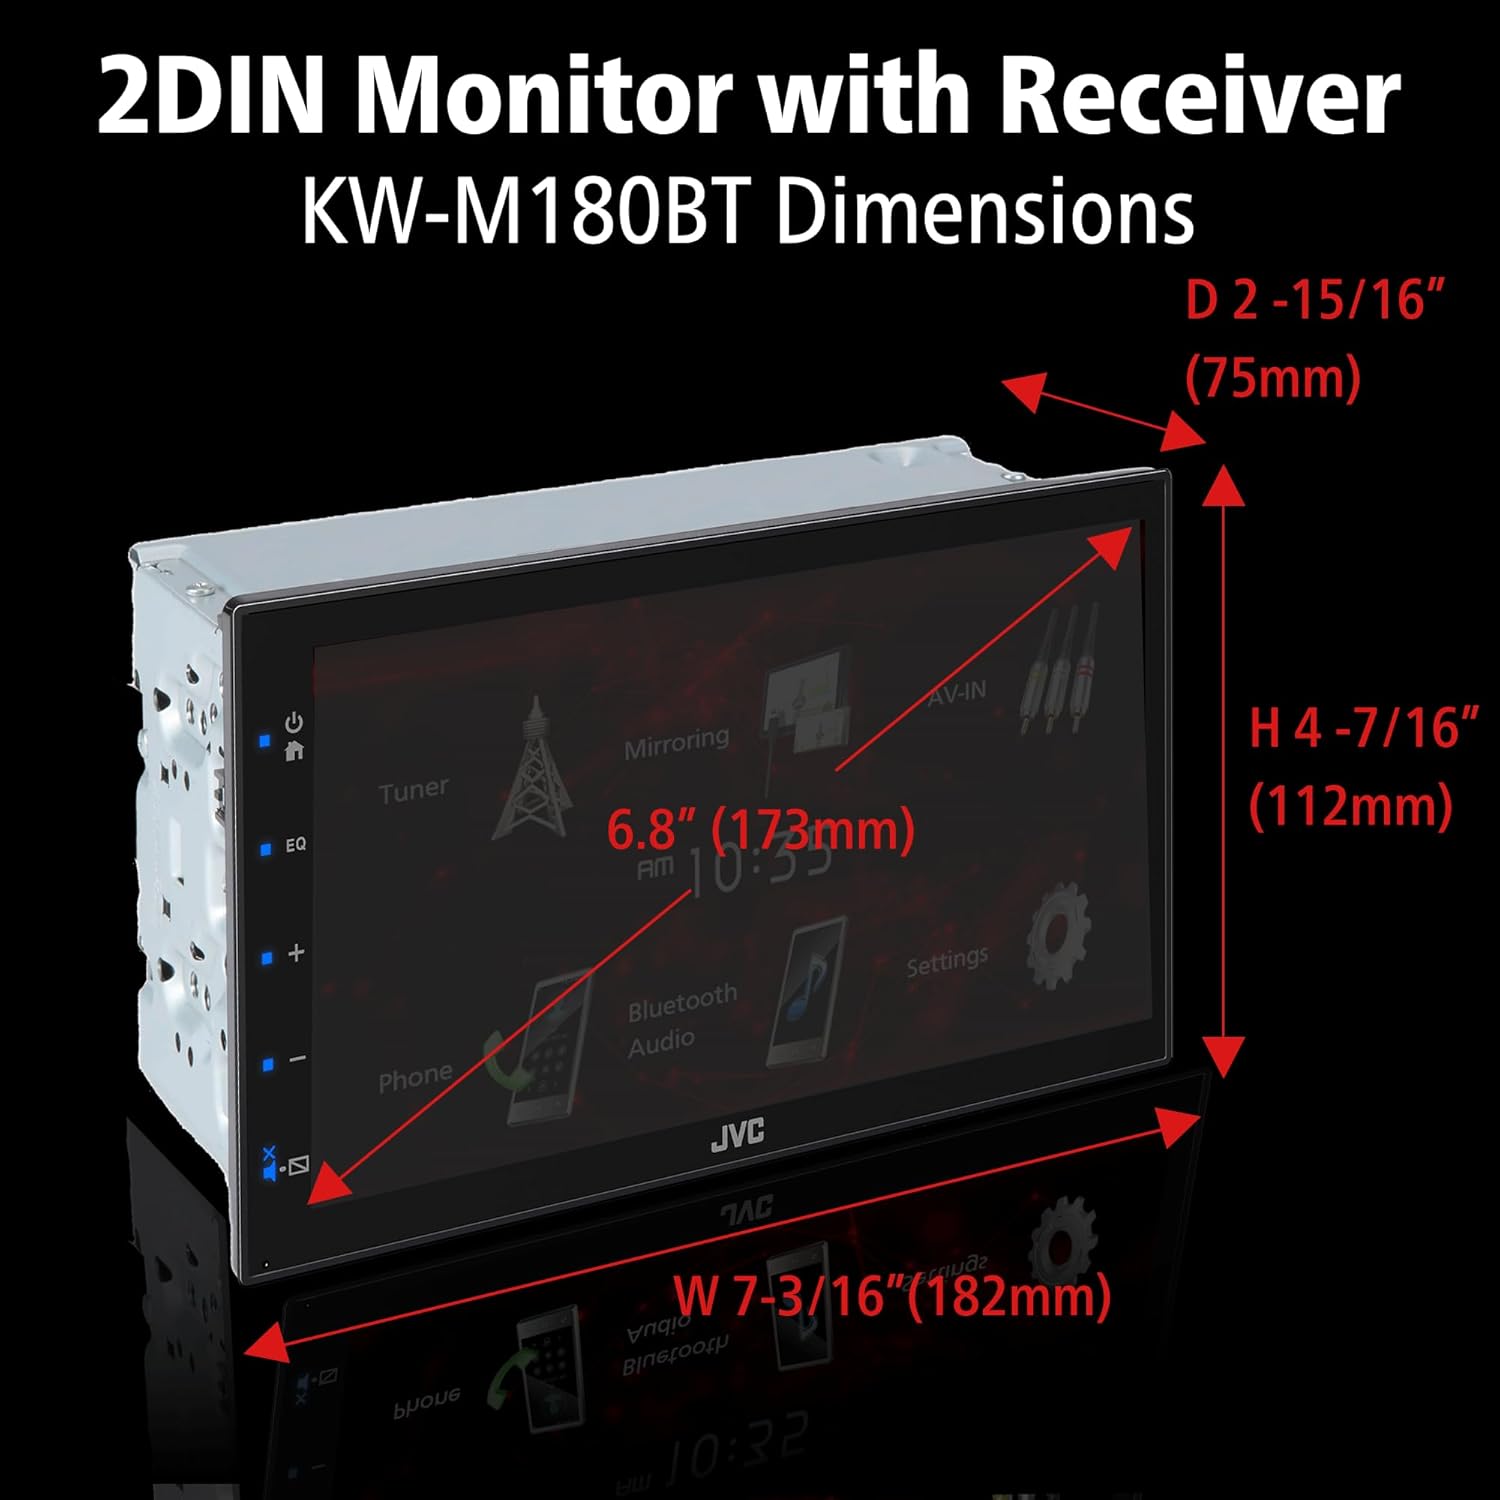
Image: Rear view of the JVC KW-M180BT showing all wiring connections, including speaker harness, power harness, USB terminal, microphone, parking sensor, subwoofer preout, rear audio preout, front audio preout, AV-IN audio input, AM/FM antenna input, AV-IN video input, video output, fuse, and rear view camera input.
- Power Harness: Connects to vehicle's power, ground, and accessory wires.
- Speaker Harness: Connects to vehicle's speaker wires.
- USB Terminal: For USB devices and smartphone connection.
- Bluetooth Microphone: For hands-free calling.
- Rear View Camera Input: For connecting an optional backup camera.
- RCA Outputs: Front, Rear, and Subwoofer preouts for external amplifiers.
- A/V Input: For connecting external audio/video sources.
Product Dimensions
The physical dimensions of the JVC KW-M180BT are crucial for proper fitment into your vehicle's dashboard. The unit features a short chassis design for easier installation in various vehicles.

Image: Diagram showing the dimensions of the JVC KW-M180BT: Width (W) 7-3/16" (182mm), Height (H) 4-7/16" (112mm), Depth (D) 2-15/16" (75mm).
- Width: 7-3/16 inches (182 mm)
- Height: 4-7/16 inches (112 mm)
- Depth: 2-15/16 inches (75 mm)
Operating Instructions
General Features and Controls
The KW-M180BT features a 6.75" capacitive touchscreen display for intuitive control. The main screen provides access to various functions such as Tuner, Mirroring, AV-IN, Phone, Bluetooth Audio, and Settings.

Image: Detailed view of the JVC KW-M180BT touchscreen and physical buttons. Labels indicate functions like Home Screen display, USB Mirroring (Android™ Phone), switching to external AV-IN, Capacitive Touch Panel, SETUP Menu, Hands Free Screen display, and Bluetooth® Audio Player.
- Power/Home Button: Press to turn the unit on/off or return to the home screen.
- Volume Controls: Use the touch-sensitive buttons on the left side to adjust volume.
- EQ Button: Access the equalizer settings.
- Mute/Display OFF Button: Mutes audio or turns off the display.
Bluetooth and Smartphone Features
The unit includes built-in Bluetooth for hands-free calling and music streaming, supporting dual phone connection. It also offers iPhone control and rapid Android charging via the USB port, along with Android screen-mirroring.

Image: A smartphone displaying music playback controls, connected via Bluetooth to the JVC KW-M180BT, which shows the Bluetooth Audio screen. This illustrates wireless music streaming capabilities.
- Bluetooth Pairing: Navigate to the Bluetooth settings menu to pair your smartphone.
- Hands-Free Calling: Make and receive calls directly through the receiver's display and microphone.
- Audio Streaming: Stream music wirelessly from your paired device.
USB Mirroring for Android™ Phone
Connect your Android smartphone via USB to mirror its screen directly onto the receiver's display. This allows you to view and interact with compatible applications, such as navigation and media apps, directly from the car stereo.

Image: An Android smartphone connected via USB cable to the JVC KW-M180BT, with the phone's navigation screen mirrored onto the receiver's display. Icons for popular apps like Google Maps, Waze, YouTube, Instagram, and WhatsApp are shown below, indicating app compatibility.
- Ensure your Android phone is compatible with USB mirroring.
- Connect your phone to the receiver's USB port using a certified USB cable.
- Follow on-screen prompts on both the receiver and your phone to initiate mirroring.
Quick Charge via USB Port
The USB port on the KW-M180BT supports rapid charging for your smartphone, providing up to 1.5A of power. This allows you to quickly charge your device while on the go.

Image: A smartphone connected via USB cable to the JVC KW-M180BT, with a charging icon displayed on the phone screen, indicating rapid charging is active.
Audio/Video Features
The receiver plays media loaded with MP3, WMA, FLAC, and AAC music files from USB memory devices. It features a 13-band equalizer with digital time alignment and high- and low-pass filters for advanced audio customization. Please note, this unit does not play CDs.

Image: A hand interacting with the 13-band equalizer interface on the JVC KW-M180BT touchscreen, showing various frequency bands and adjustment sliders for audio tuning.
- 13-Band Equalizer: Adjust audio frequencies to tailor the sound to your preference. Access through the EQ button on the side panel or the main menu.
- Digital Time Alignment: Optimize sound staging by adjusting the delay for each speaker.
- High-Pass Filter (HPF): Sends only higher frequencies to your main speakers, protecting them from low bass.
- Low-Pass Filter (LPF): Sends only lower frequencies to your subwoofer, ensuring clear bass reproduction.
Maintenance
Proper maintenance ensures the longevity and optimal performance of your JVC KW-M180BT receiver.
- Cleaning the Display: Use a soft, dry cloth to wipe the touchscreen. For stubborn smudges, slightly dampen the cloth with water or a screen-safe cleaner. Avoid abrasive materials or harsh chemicals.
- General Cleaning: Keep the unit free from dust and debris. Use a soft brush or compressed air to clean vents and connections.
- Temperature: Avoid exposing the unit to extreme heat or cold, which can affect its electronic components.
Troubleshooting
If you encounter issues with your JVC KW-M180BT, refer to the following common problems and solutions before seeking professional service.
| Problem | Possible Cause | Solution |
|---|---|---|
| No Power | Blown fuse; incorrect wiring; loose connection. | Check vehicle's fuse box and the unit's fuse. Verify all power connections are secure. Consult wiring diagram. |
| No Sound | Volume too low; mute activated; incorrect speaker wiring; amplifier issue. | Increase volume. Check if mute is on. Verify speaker connections. Ensure external amplifier (if used) is powered on. |
| Bluetooth Not Connecting | Device not in pairing mode; unit not discoverable; interference. | Ensure Bluetooth is enabled on both devices. Put phone in pairing mode. Delete previous pairings and re-pair. Move closer to the unit. |
| USB Mirroring Not Working | Incompatible phone/app; faulty USB cable; incorrect settings. | Verify phone compatibility. Use a high-quality, certified USB cable. Check mirroring settings on both the unit and phone. |
| Touchscreen Unresponsive | Software glitch; dirty screen; extreme temperature. | Restart the unit. Clean the screen. Allow unit to reach normal operating temperature. |
Specifications
Detailed technical specifications for the JVC KW-M180BT Car Stereo Receiver:
- Display: 6.75" Capacitive Touchscreen
- Tuner: AM/FM
- Supported Audio Files: MP3, WMA, FLAC, AAC
- Bluetooth: Built-in, Dual Phone Connection, Hands-Free Calling, Music Streaming
- USB Port: Rear input, iPhone control, Rapid Android Charging (up to 1.5A), Android Screen-Mirroring
- Equalizer: 13-Band with Digital Time Alignment
- Audio Filters: High-Pass Filter, Low-Pass Filter
- Inputs: Rear USB, Backup Camera Input, Rear A/V Input (RCA)
- Outputs: Rear Video Output, 5-Channel Preamp Outputs (2-volt Front, Rear, Mono Sub)
- Installation Size (WxHxD): 7-3/16" x 4-7/16" x 3" (182 x 112 x 75 mm)
- Weight: Approximately 3.65 pounds
- Model Number: KW-M180BT
- Manufacturer: JVC
Warranty and Support
JVC provides a limited warranty for this product. Please refer to the warranty card included with your purchase for specific terms and conditions, including warranty period and coverage details. Keep your proof of purchase for warranty claims.
For technical support, service, or warranty inquiries, please contact JVC customer service or visit the official JVC support website. You may find contact information on the JVC website or in the product packaging.
JVC Official Website: www.jvc.com


