
1. Introduction
This user manual provides comprehensive instructions for the safe operation, installation, maintenance, and troubleshooting of your Domo 10000 BTU Portable Air Conditioner, model DO360A. Please read this manual thoroughly before using the appliance and retain it for future reference.

Image: Front view of the Domo portable air conditioner.
2. Safety Instructions
Always follow basic safety precautions when using electrical appliances to reduce the risk of fire, electric shock, and injury to persons.
- Ensure the power supply matches the voltage specified on the appliance's rating label.
- Do not operate the air conditioner with a damaged cord or plug.
- Keep the appliance away from heat sources and direct sunlight.
- Do not block air inlets or outlets.
- Unplug the unit before cleaning or servicing.
- This appliance is for indoor use only.
- Do not use in wet areas like bathrooms or laundries.
- Keep children and pets away from the unit during operation.
3. Product Overview
3.1 Key Features
- Cooling capacity: 10,000 BTU.
- Suitable for rooms up to 36 m² / 95 m³ (with average ceiling height of 2.6 m).
- Adjustable thermostat from 17°C to 30°C.
- 24-hour timer function.
- Condensate water recycling, reducing the need for frequent water tank emptying.
- Low noise level: 62 dB (A).
- Environmentally friendly refrigerant: R290.
- Multiple functions: Cooling, Fan, Dehumidifier, Sleep mode, Auto function.
- Swing mode for adjusting airflow direction.
- LED display and remote control.
- Includes mounting set and practical swivel wheels for easy mobility.
3.2 Components
Familiarize yourself with the main components of your air conditioner and its accessories.
- Main Air Conditioner Unit
- Exhaust Hose
- Window Sealing Kit (adjustable window slider, hose adapter, window adapter)
- Remote Control
- Drain Hose (for continuous drainage)
- Power Cord

Image: Air conditioner with exhaust hose.

Image: Power cord and storage.

Image: Complete accessory kit.

Image: Remote control.

Image: Control panel.

Image: Rear view of the unit.
4. Setup and Installation
Proper installation is crucial for optimal performance and safety.
4.1 Choosing a Location
- Place the unit on a flat, stable surface.
- Ensure there is at least 30 cm of space around the unit for proper airflow.
- Locate near a window or opening for the exhaust hose.
- Ensure the power outlet is easily accessible.

Image: Example placement of the air conditioner in a room.
4.2 Exhaust Hose Installation
- Attach the hose adapter to one end of the exhaust hose.
- Attach the window adapter to the other end of the exhaust hose.
- Insert the hose adapter into the exhaust outlet on the back of the air conditioner.
- Adjust the window slider kit to fit your window opening.
- Insert the window adapter into the opening of the window slider kit.
- Seal any gaps around the window kit to prevent air leakage.
Image: Air conditioner with exhaust hose connected.
4.3 Mounting Accessories
The included mounting set can be used for securing the window kit or other components if needed.
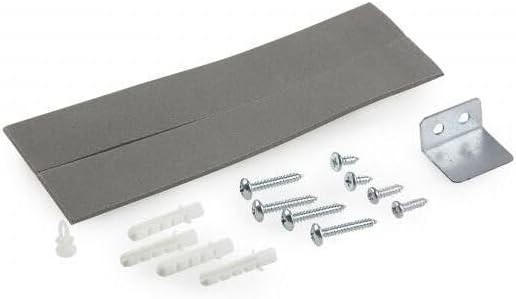
Image: Mounting accessories included.
5. Operating Instructions
Your air conditioner can be operated using the control panel on the unit or the remote control.
5.1 Control Panel
Image: Control panel on top of the unit.
- Power Button (⑁): Turns the unit on or off.
- Mode Button: Cycles through Cooling, Fan, Dehumidifier, and Auto modes.
- Temp Up/Down Buttons (+/-): Adjusts the desired temperature.
- Fan Button: Selects fan speed (Low, Medium, High).
- Timer Button: Sets the 24-hour on/off timer.
- Sleep Button: Activates sleep mode for quieter operation and gradual temperature adjustment.
- Swing Button: Activates or deactivates the automatic swing of the air louvers.
- LED Display: Shows current temperature, timer settings, and error codes.
5.2 Remote Control
Image: Remote control for the unit.
The remote control provides full functionality from a distance. Refer to the remote control diagram for specific button functions, which mirror those on the control panel, along with additional features like "Follow Me" and "LED" display control.
5.3 Operating Modes
- Cooling Mode: Lowers room temperature to the set level.
- Fan Mode: Circulates air without cooling.
- Dehumidifier Mode: Removes moisture from the air.
- Sleep Mode: Adjusts temperature and fan speed for comfortable sleep.
- Auto Mode: Automatically selects cooling or fan mode based on room temperature.
6. Maintenance
Regular maintenance ensures efficient operation and extends the lifespan of your air conditioner.
6.1 Cleaning the Air Filter
- Turn off and unplug the unit before cleaning.
- Locate and remove the air filter (usually on the back or side).
- Clean the filter with a vacuum cleaner or wash with warm, soapy water.
- Rinse thoroughly and allow to air dry completely before reinstalling.
- Clean the filter every two weeks or more frequently if used in dusty environments.
6.2 Draining Water
The unit features condensate water recycling, reducing the need for frequent draining. However, if the water tank becomes full, the unit will stop operating and display an error code (e.g., "FL").
- Turn off and unplug the unit.
- Place a shallow pan or tray under the drain port (located at the bottom rear of the unit).
- Remove the drain plug to allow water to flow out.
- For continuous drainage, attach the provided drain hose to the drain port and direct it to a suitable drain.
- Replace the drain plug securely after draining.
6.3 Storage
- Before storing, drain all water from the unit.
- Clean the air filter.
- Run the unit in fan-only mode for a few hours to dry the interior.
- Unplug the power cord and wrap it neatly using the cord storage feature.
- Store the unit in a cool, dry place, away from direct sunlight and extreme temperatures.
7. Troubleshooting
Before contacting customer support, please refer to the following common issues and solutions.
| Problem | Possible Cause | Solution |
|---|---|---|
| Unit does not turn on. | No power; power cord unplugged; circuit breaker tripped; water tank full. | Check power connection; reset circuit breaker; drain water tank. |
| Unit is not cooling effectively. | Air filter dirty; exhaust hose blocked or detached; windows/doors open; room too large; temperature setting too high. | Clean air filter; check exhaust hose connection and ensure it's not kinked; close windows/doors; ensure room size is within specifications; lower temperature setting. |
| Unit is noisy. | Unit not on a flat surface; air filter dirty; internal components vibrating. | Place unit on a flat, stable surface; clean air filter. |
| Water leakage. | Drain plug not secure; continuous drainage hose not properly connected or blocked. | Ensure drain plug is secure; check continuous drainage hose for proper connection and blockages. |
8. Specifications
| Feature | Detail |
|---|---|
| Model Number | DO360A (284535) |
| Brand | Domo |
| Cooling Capacity | 10,000 BTU |
| Power Consumption | 1350 Watt |
| Energy Efficiency Class | B |
| Noise Level | 62 dB (A) |
| Refrigerant | R290 (Environmentally friendly) |
| Adjustable Thermostat | 17°C to 30°C |
| Product Dimensions (L x W x H) | 50 x 50 x 28 cm |
| Item Weight | 12 Kilograms |
| Room Coverage | Up to 36 m² / 95 m³ |
9. Warranty and Support
This Domo air conditioner comes with a limited warranty. Please refer to the warranty card included with your purchase for specific terms and conditions. For technical support, spare parts, or warranty claims, please contact Domo customer service through their official website or the retailer where the product was purchased.
You can visit the Domo Store on Amazon for more information.


