
1. Introduction
This manual provides comprehensive instructions for the setup, operation, and maintenance of your EPOMAKER TH80 SE Gasket 75% Mechanical Keyboard. Please read this manual thoroughly to ensure proper use and to maximize your keyboard's functionality.

Image: The EPOMAKER TH80 SE keyboard displaying its RGB backlighting.
2. Package Contents
Verify that all items are present in your product package:
- EPOMAKER TH80 SE Mechanical Keyboard
- USB-C Cable
- 2.4GHz USB Receiver (typically stored in the keyboard's bottom compartment)
- Keycap Puller
- Switch Puller
- Additional Keycaps (if included with specific switch variants)
- User Manual (this document)

Image: The EPOMAKER TH80 SE keyboard alongside its included accessories: USB cable, keycap puller, switch puller, and additional keycaps.
3. Product Overview
The EPOMAKER TH80 SE is a 75% layout mechanical keyboard designed for versatility and performance. It features a gasket-mounted structure, hot-swappable switches, and tri-mode connectivity.
Key Features:
- 75% Layout: Compact design retaining essential function keys and arrow keys.
- Gasket Mounted: Provides a flexible and cushioned typing experience.
- Tri-Mode Connectivity: Supports 2.4GHz wireless, Bluetooth 5.0, and wired USB-C connections.
- Hot-Swappable Switches: Compatible with 3-pin and 5-pin mechanical switches, allowing for easy customization without soldering.
- RGB Backlighting: Per-key customizable RGB lighting with various effects.
- Programmable Software: Advanced customization options for key remapping, macros, and lighting effects.
- PBT Keycaps: Durable, oil-resistant keycaps in Cherry profile for comfortable typing.
- Multifunction Rotary Knob: Controls volume, media playback, and can be customized.
- 4000mAh Battery: High-capacity battery for extended wireless use.

Image: Diagram illustrating the dimensions of the EPOMAKER TH80 SE keyboard.

Image: Visual comparison highlighting the compact 75% layout of the TH80 SE against a standard full-size keyboard.
4. Setup
4.1 Initial Charging
Before first use, connect the keyboard to a USB power source using the provided USB-C cable to ensure it is fully charged. The charging indicator will show status (refer to LED indicators section).
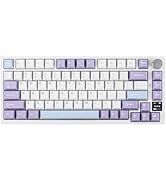
Image: A USB-C cable connected to the keyboard's port, indicating charging.

Image: The 2.4GHz USB receiver being inserted into a USB port.
4.2 Connectivity Modes
The TH80 SE supports three connection modes: Wired (USB-C), 2.4GHz Wireless, and Bluetooth 5.0. A switch on the bottom of the keyboard allows you to select the desired mode.
Image: Close-up of the switches on the keyboard's underside for selecting 2.4G, USB, Bluetooth, and Windows/Mac modes.

Image: Illustration of the keyboard's tri-mode compatibility with PC, laptop, tablet, Xbox, Switch, and PlayStation.
4.2.1 Wired Mode
- Connect the USB-C cable to the keyboard and your computer.
- Set the mode switch on the bottom of the keyboard to 'USB'.
- The keyboard will be recognized automatically by your operating system.
4.2.2 2.4GHz Wireless Mode
- Locate the 2.4GHz USB receiver (usually stored in a compartment on the keyboard's bottom).
- Plug the receiver into an available USB port on your computer.
- Set the mode switch on the bottom of the keyboard to '2.4G'.
- The keyboard should connect automatically.
4.2.3 Bluetooth 5.0 Mode
- Set the mode switch on the bottom of the keyboard to 'BT'.
- On your device (computer, tablet, smartphone), enable Bluetooth and search for new devices.
- The keyboard should appear as 'EPOMAKER TH80 SE'. Select it to pair.
- The keyboard supports connecting to multiple Bluetooth devices. Use Fn + 1/2/3 to switch between paired Bluetooth devices.
4.3 Operating System Switch
Use the 'MAC/WIN' switch on the bottom of the keyboard to select the appropriate operating system layout for optimal key functionality.

Image: The EPOMAKER TH80 SE keyboard shown with Mac and Windows logos, indicating compatibility.
5. Operating Instructions
5.1 Basic Key Functions
The TH80 SE features a standard 75% layout. Most keys function as labeled. Special functions are accessed using the Function (Fn) key.
5.2 RGB Lighting Control
The keyboard features customizable RGB backlighting. Use the following shortcuts to control lighting effects:
- Fn + \|: Switch between various RGB lighting effects.
- Fn + Backspace: Turn the backlight ON/OFF.
- Fn + Arrow Keys: Adjust brightness and speed of lighting effects.

Image: Diagram showing key combinations for switching RGB effects, layers, and controlling the WIN key and backlight.
5.3 Function Layers
The keyboard supports multiple programmable function layers. Switch between them using:
- Fn + Z/X/C: Switch among different programmable layers (Layer 1, Layer 2, Layer 3).

Image: A visual representation of switching between keyboard layers using Fn key combinations.
5.4 WIN Key Lock
- Fn + WIN: Lock or unlock the Windows key to prevent accidental presses during gaming.
5.5 Multifunction Rotary Knob
The metal rotary knob located on the top right of the keyboard provides quick access to media controls:
- Rotate Clockwise: Volume Up
- Rotate Counter-clockwise: Volume Down
- Press: Play/Pause media.
The knob's functions can also be customized using the EPOMAKER software.

Image: A close-up view of the keyboard's rotary knob, indicating its functions for volume control and play/pause, along with custom function capability.
5.6 Battery Status Check
- Fn + B: Check the current battery status. The RGB lighting will indicate the charge level.
5.7 Software Customization
The EPOMAKER TH80 SE features upgraded software for advanced customization. This software allows you to:
- Remap keys and create macros.
- Customize RGB lighting effects, colors, and brightness.
- Manage and program different function layers.
Download the latest software from the official EPOMAKER website.

Image: Screenshots displaying the user interface of the EPOMAKER software for macro programming, lighting control, and key remapping across different layers.
6. Maintenance
6.1 Cleaning
- Disconnect the keyboard from all power sources before cleaning.
- Use a soft, lint-free cloth slightly dampened with water or a mild cleaning solution to wipe the keycaps and chassis.
- For deeper cleaning, use the provided keycap puller to remove keycaps and clean underneath with compressed air or a small brush.
6.2 Hot-Swappable Switches
The TH80 SE features hot-swappable sockets, allowing you to change mechanical switches without soldering. Use the provided switch puller to carefully remove and insert switches.
- Ensure the keyboard is disconnected from power.
- Use the switch puller to grip the top and bottom clips of the switch.
- Gently pull the switch upwards to remove it.
- Align the pins of the new switch with the holes on the PCB. Ensure the pins are straight.
- Press the new switch firmly into place until it clicks. Do not force it if resistance is met; re-check pin alignment.

Image: A close-up showing a mechanical switch being removed from the keyboard's hot-swappable socket.
7. Troubleshooting
If you encounter issues with your EPOMAKER TH80 SE keyboard, refer to the following common solutions:
| Issue | Possible Solution |
|---|---|
| Keyboard not responding in wired mode | Ensure the USB-C cable is securely connected to both the keyboard and the computer. Verify the mode switch on the keyboard's bottom is set to 'USB'. Try a different USB port or cable. |
| 2.4GHz wireless connection unstable or not connecting | Ensure the 2.4GHz USB receiver is securely plugged into a USB port. Set the mode switch to '2.4G'. Try moving the receiver closer to the keyboard or using a different USB port. Ensure the keyboard battery is charged. |
| Bluetooth connection issues | Ensure the mode switch is set to 'BT'. On your device, unpair and re-pair the keyboard. Ensure the keyboard battery is charged. Try resetting the keyboard's Bluetooth connection (refer to advanced functions in software). |
| RGB lighting not working or incorrect | Press Fn + Backspace to toggle the backlight. Use Fn + \| to cycle through effects. Adjust brightness with Fn + Up/Down Arrow. Check software settings for customization. |
| Keys not registering or double-typing | This could indicate a faulty switch. Since the keyboard is hot-swappable, try replacing the affected switch with a spare one. Ensure switches are fully seated. |
| Battery drains quickly | High brightness RGB settings consume more power. Reduce brightness or turn off RGB when not needed. Ensure the keyboard is fully charged. If the issue persists, contact support. |
| Software not detecting keyboard | Ensure the keyboard is connected via wired USB-C mode. Restart the software and/or your computer. Download the latest software version from the official EPOMAKER website. |
8. Specifications
| Feature | Detail |
|---|---|
| Model | TH80 SE |
| Layout | 75% (80 keys) |
| Connectivity | 2.4G Wireless, Bluetooth 5.0, USB-C Wired |
| Switches | Hot-swappable (3/5-pin compatible) |
| Keycaps | PBT Cherry Profile, Double Shot Technique |
| Backlighting | RGB |
| Battery Capacity | 4000mAh |
| Dimensions (L x W x H) | 12.8 x 5.31 x 1.18 inches (32.5 x 13.5 x 3 cm) |
| Weight | 3.05 pounds (approx. 1.38 kg) |
| Compatible Devices | PC, Laptop, Tablet, Smartphone, Gaming Console |
| Operating Systems | Windows, macOS |
9. Warranty and Support
EPOMAKER products are designed for quality and reliability. For warranty information, please refer to the warranty card included with your purchase or visit the official EPOMAKER website. If you require technical assistance or have questions not covered in this manual, please contact EPOMAKER customer support through their official channels.
Official EPOMAKER Website: www.epomaker.com