
1. Introduction
Thank you for purchasing the AFEXOA Digital Alarm Clock, Model RE02. This multifunctional alarm clock is designed to provide a clear time display, customizable alarms, soothing sounds for sleep, and dynamic RGB night lighting. Please read this manual carefully to ensure proper setup and operation of your device.
2. Product Overview
The AFEXOA Digital Alarm Clock features a large LED display, a mirror surface, and intuitive controls. It combines several functions into one compact device:
- Digital Time Display: Clear LED display with 12/24-hour format options.
- Dual Alarms: Set two independent alarms with three working modes (Daily, Weekdays, Weekends).
- Snooze Function: Provides an extra 9 minutes of sleep.
- 7 Alarm Sounds: Choose from a variety of sounds including bell, ocean, waves, bird, piano, beep, and soft music.
- 8 Soothing White Noises: Features sounds like church bells, bonfire, rain, insects, forest, waves, and two piano melodies to aid sleep.
- Adjustable Volume: 16 levels of volume adjustment for both alarms and soothing sounds.
- RGB Night Light: 8 dynamic RGB color modes with 10 levels of brightness.
- Dimmable Display: 0-100% continuous dimming for the LED time display.
- Sleep Timer: Automatic shut-off for soothing sounds and lights, adjustable from 10 to 120 minutes.
- USB Charging Port: Convenient port for charging external devices.
- Mirror Surface: The display surface can also function as a mirror.
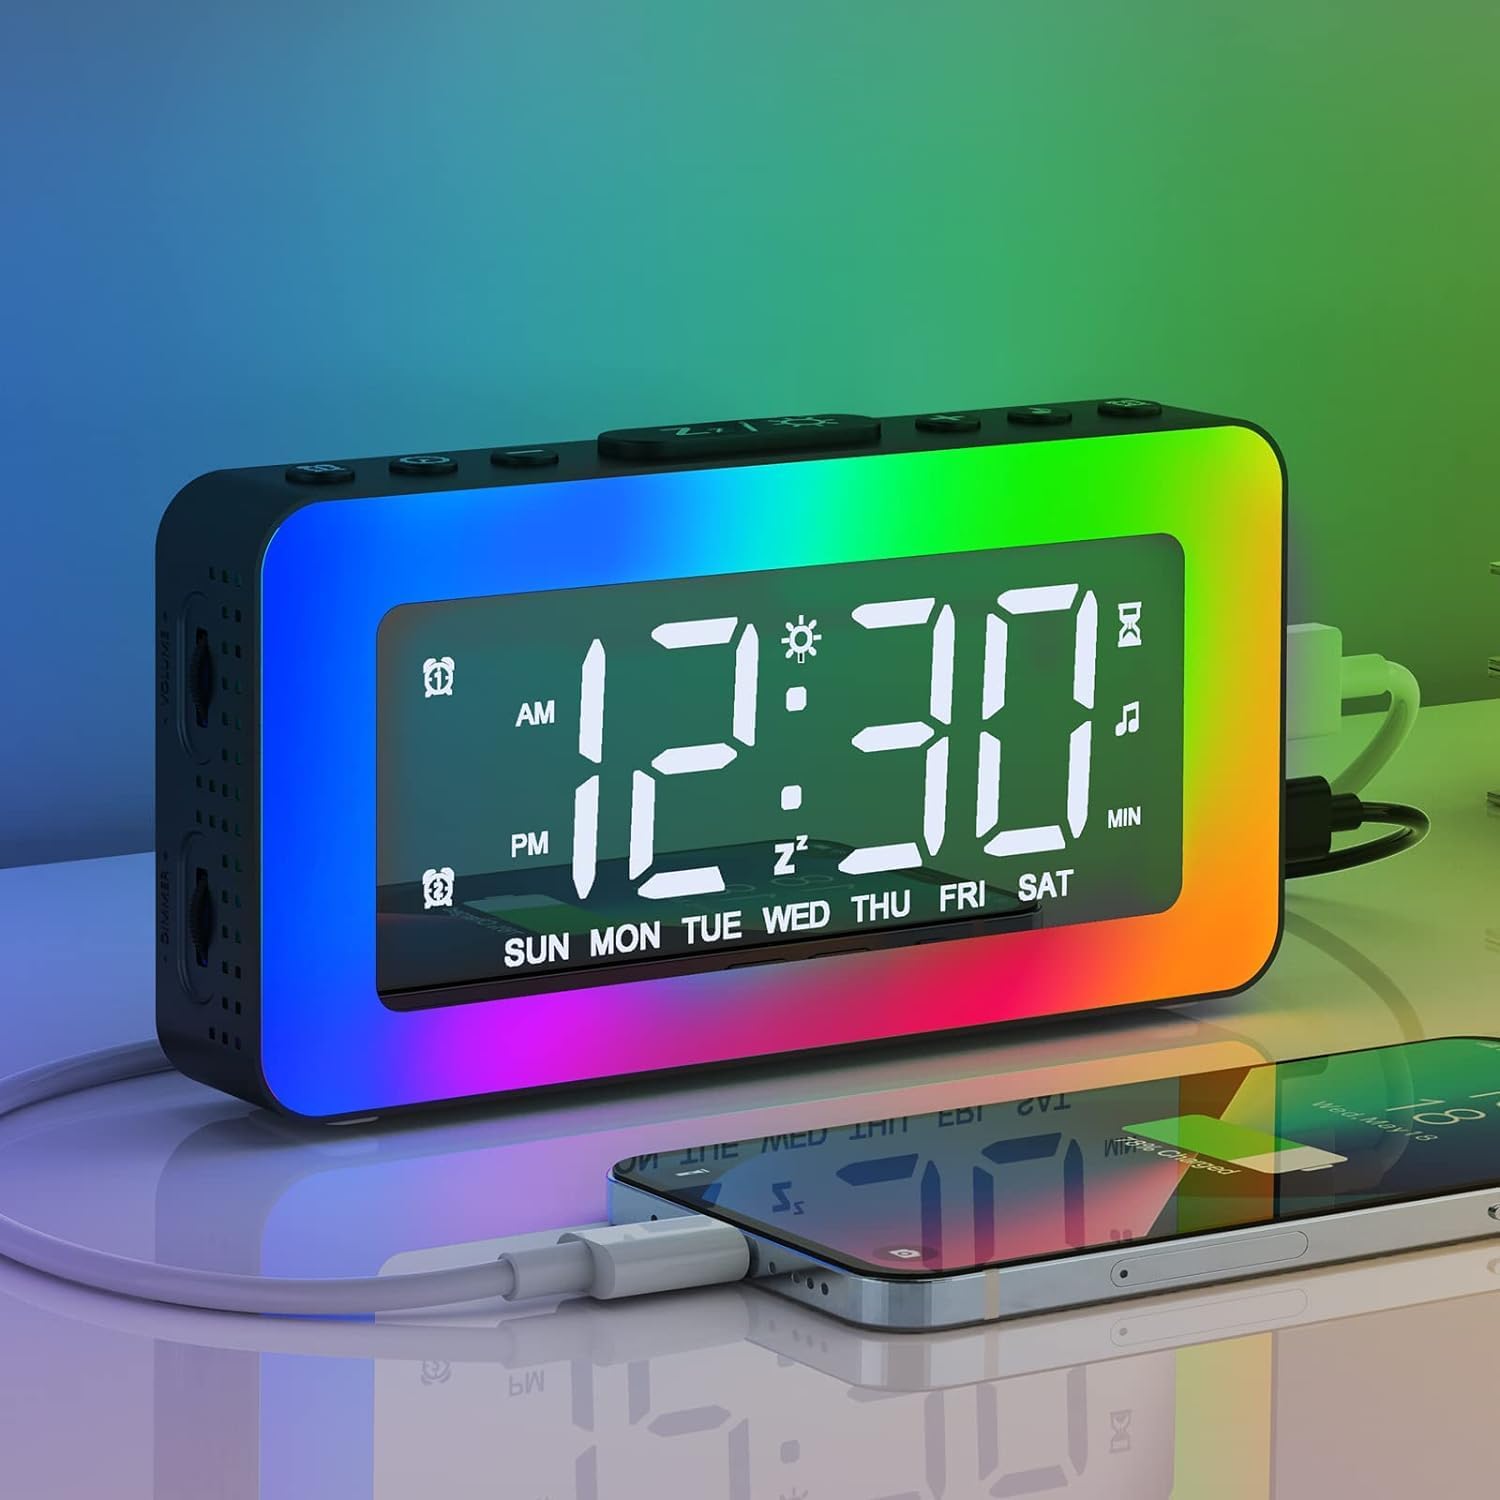
Image 2.1: The AFEXOA Digital Alarm Clock displaying time with vibrant RGB lighting and a smartphone connected for charging.
3. Setup
3.1 What's in the Box
- AFEXOA Digital Alarm Clock (Model RE02)
- USB Power Cable (Note: Power adapter not included)
- User Manual

Image 3.1: Contents of the product package, including the alarm clock, USB cable, and user manual.
3.2 Power Connection
- Connect the provided USB power cable to the DC 5V input port on the back of the alarm clock.
- Plug the other end of the USB cable into a standard USB power adapter (not included) or a powered USB port.
- The clock will power on and the display will illuminate.
Important: The clock requires continuous power via the USB cable to function. The included CR2032 lithium metal battery serves as a memory backup for time and settings during power outages, but does not power the display or functions independently.

Image 3.2: The alarm clock connected via USB, demonstrating its power input and ability to charge other devices.
3.3 Battery Installation (Memory Backup)
The alarm clock comes with a pre-installed CR2032 lithium metal battery for memory backup. If you need to replace it:
- Locate the battery compartment on the bottom of the clock.
- Use a small screwdriver to open the compartment.
- Insert a new CR2032 battery with the positive (+) side facing up.
- Close the battery compartment securely.

Image 3.3: Detail of the CR2032 battery compartment, indicating its location for memory backup.
4. Operating Instructions
4.1 Setting Time and Date
- Press and hold the 'SET' button (usually labeled with a gear icon) to enter time setting mode.
- Use the '+' and '-' buttons to adjust the hour. Press 'SET' to confirm.
- Use the '+' and '-' buttons to adjust the minute. Press 'SET' to confirm.
- Continue pressing 'SET' to cycle through year, month, and day settings, adjusting with '+' and '-' as needed.
- Press 'SET' one last time to exit time setting mode.
- To switch between 12-hour and 24-hour format, briefly press the 'SET' button outside of setting mode.
4.2 Setting Dual Alarms
The clock supports two independent alarms (Alarm 1 and Alarm 2).
- Press the 'ALARM 1' button (often labeled with an alarm icon and '1') to select Alarm 1. The alarm icon will flash.
- Press and hold the 'ALARM 1' button to enter Alarm 1 setting mode.
- Use '+' and '-' to set the alarm hour, then press 'ALARM 1' to confirm.
- Use '+' and '-' to set the alarm minute, then press 'ALARM 1' to confirm.
- Alarm Mode Selection: Use '+' and '-' to choose from three modes:
- Daily: Alarm sounds every day.
- Weekdays: Alarm sounds Monday to Friday.
- Weekends: Alarm sounds Saturday and Sunday.
- Press 'ALARM 1' to confirm the alarm mode and exit setting.
- Repeat steps 1-6 for 'ALARM 2' using the 'ALARM 2' button.
- To activate/deactivate an alarm, briefly press its respective 'ALARM' button. The alarm icon will appear/disappear on the display.

Image 4.1: Visual representation of the dual alarm function with options for everyday, weekdays, and weekends.

Image 4.2: Icons illustrating the three available alarm modes: Weekday, Weekend, and Daily.
4.3 Snooze Function
When an alarm sounds:
- Press the 'SNOOZE/Z' button (often labeled with 'Z' or a sun icon) on the top of the clock.
- The alarm will pause and sound again after 9 minutes. This can be repeated indefinitely.
- If no button is pressed, the alarm will automatically turn off after 20 minutes.
- To completely turn off the alarm for the day, press any other button (e.g., 'ALARM 1' or 'ALARM 2' button) instead of 'SNOOZE/Z'.
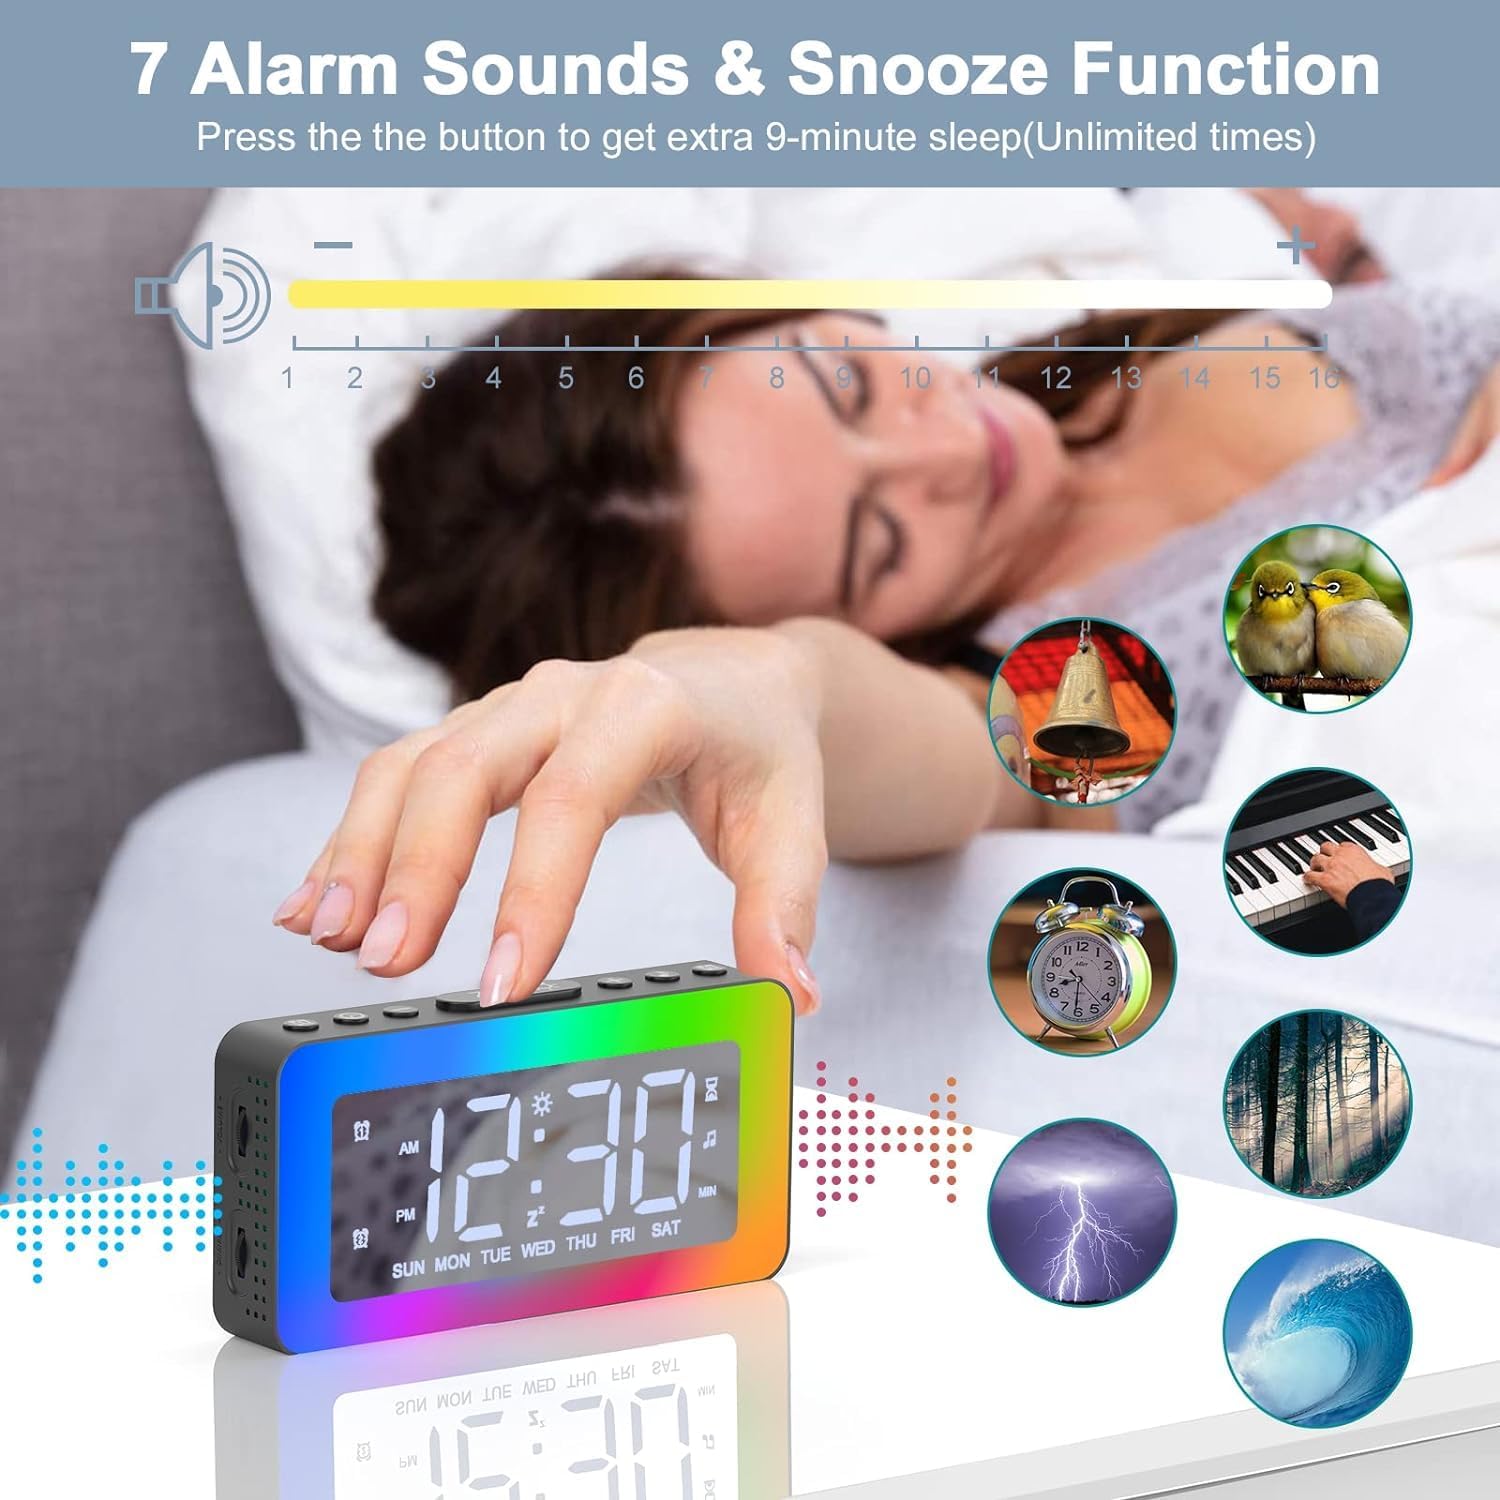
Image 4.3: The alarm clock highlighting the snooze function and displaying icons for the 7 available alarm sounds.
4.4 Setting Alarm Sounds and Volume
- While in alarm setting mode (see 4.2), after setting the alarm time and mode, you will be prompted to select an alarm sound.
- Use the '+' and '-' buttons to cycle through the 7 available alarm sounds (Bell, Ocean, Waves, Bird, Piano, Beep, Soft Music).
- Press the 'ALARM' button to confirm your selection.
- Next, use the '+' and '-' buttons to adjust the alarm volume from level 1 to 16.
- Press the 'ALARM' button to confirm the volume and exit alarm setting.
4.5 RGB Night Light Operation
The clock features 8 dynamic RGB night light modes and 10 brightness levels.
- Press the 'Z/☀' button (often the same as Snooze) on the top to turn the night light ON/OFF or to change between the 8 color modes.
- To adjust the brightness of the night light, repeatedly press the '+' or '-' buttons while the light is on. There are 10 brightness levels.
- To turn off the night light, press and hold the 'Z/☀' button for 3 seconds.

Image 4.4: The alarm clock's one-button control for cycling through various lighting modes and adjusting brightness.

Image 4.5: The alarm clock showcasing its 8 distinct color modes for the night light, each with 10 adjustable brightness levels.
4.6 Soothing White Noises and Sleep Timer
The clock offers 8 soothing sounds to help with sleep, along with a customizable sleep timer.
- Press the 'SOUND' button (often labeled with a music note icon) to activate the soothing sounds.
- Press the 'SOUND' button repeatedly to cycle through the 8 available white noises (Church bells, Bonfire, Rain, Insects, Forest, Waves, Piano 01, Piano 02).
- Adjust the volume of the soothing sounds using the volume wheel located on the left side of the alarm clock (1-16 levels).
- To set the sleep timer, press the 'TIMER' button (often labeled with a clock icon).
- Use the '+' and '-' buttons to set the desired duration from 10 to 120 minutes (in 10-minute increments). The sound and light will automatically turn off after the set time.
- To turn off the soothing sounds and timer manually, press the 'SOUND' button until the sound stops.

Image 4.6: The alarm clock illustrating its 8 soothing sounds for sleep and the timer function, shown with a child and adult.
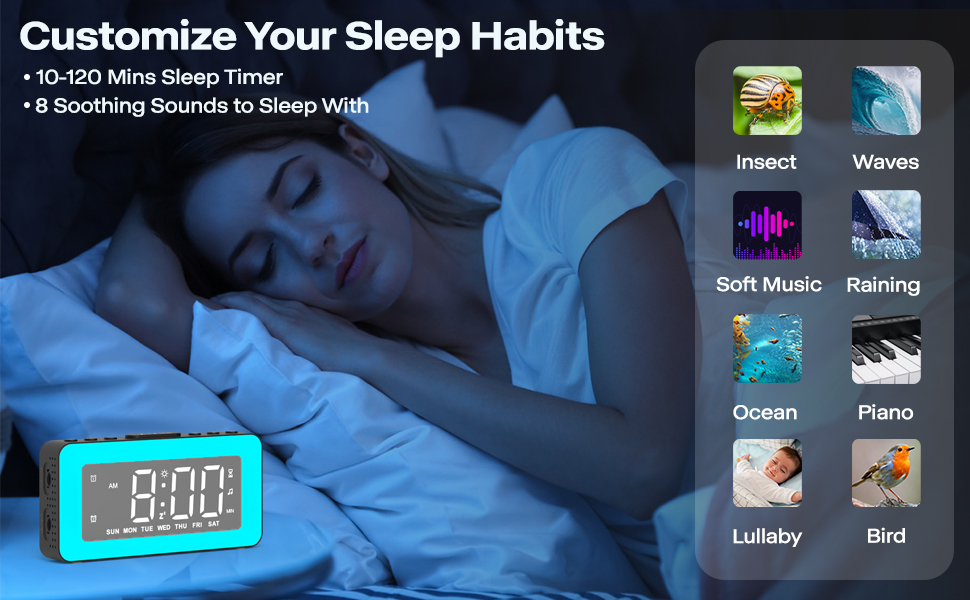
Image 4.7: The alarm clock demonstrating its sleep timer feature (10-120 minutes) and the selection of 8 soothing sounds to aid sleep.
4.7 Adjusting Display Brightness
The LED time display brightness can be adjusted from 0% to 100%.
- Locate the dimmer wheel on the left side of the alarm clock.
- Slide the wheel to the left or right to continuously adjust the display brightness to your preferred level.

Image 4.8: The alarm clock illustrating its 0-100% adjustable dimmer function via a wheel on the side, showing varying display brightness.

Image 4.9: The alarm clock demonstrating its 0-100% dimmable display and 16-level adjustable volume.

Image 4.10: Comparison of the alarm clock's display brightness in a well-lit room versus a dark room, showcasing its dimming capability.
4.8 Using the USB Charging Port
The alarm clock includes a USB port on the side that can be used to charge other small electronic devices, such as smartphones or tablets. Simply connect your device's charging cable to this port.
Image 4.11: The alarm clock providing power to a smartphone through its integrated USB charging port.
4.9 Mirror Surface Display
The front display surface of the alarm clock is designed with a mirror finish, allowing it to be used as a convenient mirror when the display is off or dimmed.

Image 4.12: A woman using the mirror surface of the alarm clock for personal grooming, highlighting its dual functionality.
5. Maintenance
5.1 Cleaning
- Wipe the clock with a soft, dry cloth.
- Do not use abrasive cleaners or solvents, as they may damage the surface.
5.2 Battery Replacement
The CR2032 battery is for memory backup only. Replace it when the clock loses time or settings after a power outage. Refer to Section 3.3 for instructions.
6. Troubleshooting
| Problem | Possible Cause | Solution |
|---|---|---|
| Clock display is off or not working. | No power connection or faulty cable. | Ensure the USB cable is securely connected to a working power source. Try a different USB cable or power adapter. |
| Alarm does not sound. | Alarm not activated, volume too low, or incorrect alarm mode. | Verify the alarm icon is displayed. Check alarm volume (Section 4.4). Ensure the correct alarm mode (Daily, Weekdays, Weekends) is selected. |
| Time/settings are lost after power outage. | CR2032 memory backup battery is dead or missing. | Replace the CR2032 battery (Section 3.3). |
| Night light is too bright/dim. | Brightness level needs adjustment. | Adjust night light brightness using the '+' or '-' buttons (Section 4.5). |
| Display is too bright/dim. | Display brightness needs adjustment. | Adjust display brightness using the dimmer wheel on the left side (Section 4.7). |
| USB charging port not working. | Clock not powered, or device cable is faulty. | Ensure the alarm clock is powered on. Try a different charging cable for your device. |
7. Specifications
| Feature | Detail |
|---|---|
| Brand | AFEXOA |
| Model Number | RE02 (also CH-06) |
| Color | Black |
| Product Dimensions (L x W x H) | 15.01 x 3.81 x 8 cm |
| Item Weight | 240 grams |
| Material | Plastic |
| Display Type | Digital LED |
| Power Source | Electric Cable (USB DC 5V) |
| Backup Battery | 1 x CR2032 Lithium Metal (included) |
| Special Features | Dual Alarm, RGB Night Light, Dimmable Display, Adjustable Volume, White Noise, Sleep Timer, USB Charging Port, Mirror Surface |
8. Warranty and Support
This product is covered by a standard manufacturer's warranty. For specific warranty details, please refer to the product packaging or contact your retailer. For technical support or further assistance, please reach out to the AFEXOA customer service team through the contact information provided with your purchase or on the official AFEXOA website.