
1. Introduction
Thank you for choosing the Steinel L 10 Outdoor Wall Light. This classic lantern-style fixture is designed to provide reliable and aesthetic illumination for your outdoor spaces. Its durable construction and simple design make it a versatile choice for various applications.
This manual provides essential information for the safe installation, operation, and maintenance of your new outdoor light. Please read these instructions carefully before beginning installation and retain them for future reference.

Image 1: Front view of the Steinel L 10 Outdoor Wall Light, showcasing its classic lantern design and E27 bulb socket.
2. Safety Instructions
To ensure safe operation and prevent damage, please observe the following safety precautions:
- Electrical Safety: Installation must be performed by a qualified electrician in accordance with national wiring regulations and local electrical codes.
- Power Disconnection: Always disconnect the power supply at the main fuse or circuit breaker before performing any installation, maintenance, or bulb replacement.
- Voltage: Ensure the supply voltage matches the product's specified voltage (220-240 V, 50/60 Hz).
- Wattage Limits: Do not exceed the maximum bulb wattage: 60W for incandescent E27 bulbs or 15W for LED E27 bulbs.
- Outdoor Use: This fixture is rated IP44, meaning it is protected against solid objects larger than 1mm and against splashing water from any direction. It is suitable for outdoor use but should not be submerged in water.
- Mounting Surface: Ensure the mounting surface is stable and capable of supporting the weight of the fixture.
3. Package Contents
Verify that all components are present in the package:
- 1x Steinel L 10 Outdoor Wall Light
- 2x Screws for mounting
- 2x Wall dowels
- 1x Instruction Manual
Note: The E27 bulb is not included and must be purchased separately.
4. Setup and Installation
Follow these steps for proper installation of your Steinel L 10 Outdoor Wall Light:
- Prepare for Installation:
- Turn off the main power supply to the installation area at the circuit breaker.
- Ensure the wall surface is clean and suitable for mounting.
- Mark Drilling Points:
- Hold the mounting plate of the fixture against the wall at the desired installation height.
- Mark the positions for the two drilling holes.
- Drill Holes and Insert Dowels:
- Drill holes at the marked positions using an appropriate drill bit for your wall type.
- Insert the provided wall dowels into the drilled holes.
- Connect Wiring:
- Carefully connect the electrical wires from your mains supply to the terminal block on the fixture's mounting plate. Ensure correct polarity (Live, Neutral, Earth).
- Secure the wires firmly.

Image 2: Detailed diagram illustrating the wiring connections and how to secure the mounting plate to the wall using screws and dowels.
- Mount the Fixture:
- Align the fixture's mounting plate with the dowels in the wall.
- Secure the fixture to the wall using the provided screws.
- Insert Bulb:
- Unscrew the top cover of the lantern.
- Carefully screw an E27 bulb (max. 60W incandescent or max. 15W LED) into the socket.
- Replace the top cover, ensuring it is securely fastened.
- Restore Power:
- Once installation is complete and all connections are secure, restore power at the circuit breaker.
- Test the light by operating the external switch.

Image 3: The L 10 light installed on a brick wall, demonstrating its illumination in an outdoor setting.
5. Operating Instructions
The Steinel L 10 Outdoor Wall Light (without sensor) operates via an external wall switch. Simply toggle the switch to turn the light ON or OFF.
- Bulb Type: Uses a standard E27 screw-in bulb.
- Manual Control: The light is controlled manually by an external switch. There are no automatic functions (e.g., motion detection, dusk-to-dawn) built into this specific model.
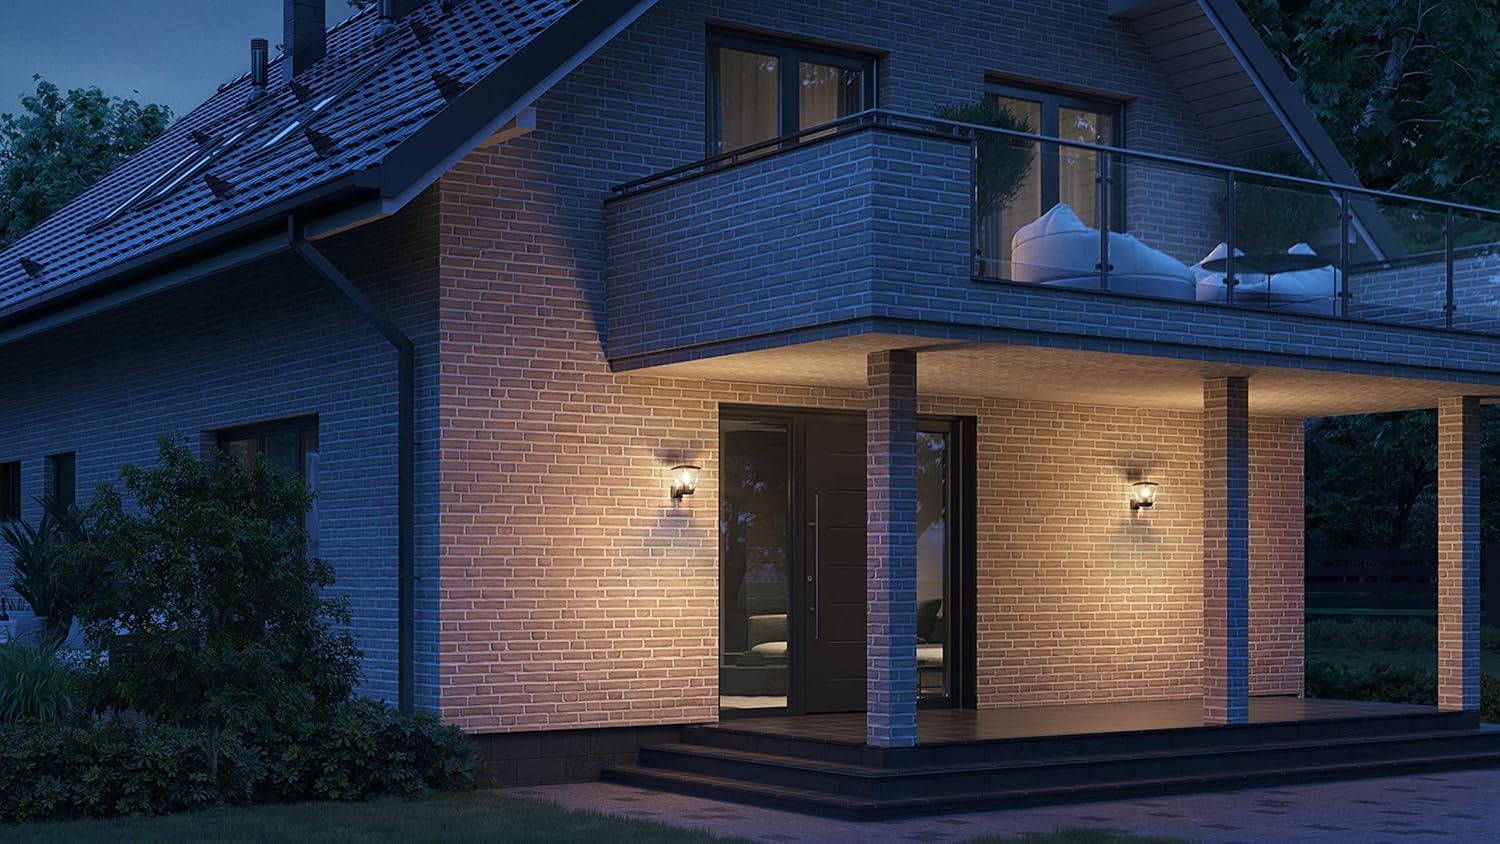
Image 4: Two L 10 lights mounted on a house, providing ambient lighting for an entrance and patio area.
6. Maintenance
Regular maintenance ensures the longevity and optimal performance of your outdoor light.
- Cleaning: Clean the fixture regularly with a soft, damp cloth. Do not use abrasive cleaners or solvents, as these can damage the plastic finish. Ensure the power is off before cleaning.
- Bulb Replacement:
- Always disconnect power before replacing the bulb.
- Allow the old bulb to cool completely before touching it.
- Unscrew the top cover of the lantern.
- Unscrew the old E27 bulb and screw in a new one. Ensure the new bulb does not exceed the maximum wattage (60W incandescent / 15W LED).
- Securely replace the top cover.
- Inspection: Periodically check the fixture for any signs of damage, loose connections, or wear. If any issues are found, disconnect power and consult a qualified electrician.
7. Troubleshooting
If you encounter issues with your Steinel L 10 Outdoor Wall Light, refer to the following common troubleshooting steps:
| Problem | Possible Cause | Solution |
|---|---|---|
| Light does not turn on | No power supply Faulty bulb Loose wiring connection | Check circuit breaker and wall switch. Replace bulb with a new, working one. Ensure all wiring connections are secure (with power off). |
| Light flickers | Loose bulb Incorrect bulb type Faulty wiring | Tighten the bulb in the socket. Ensure bulb wattage is within limits. Check wiring connections (with power off). |
| Water inside fixture | Improper installation Damaged seal | Ensure all covers are properly sealed and screws tightened. Inspect for cracks or damage. If damage is present, replace the fixture. |
If the problem persists after attempting these solutions, please contact customer support or a qualified electrician.
8. Specifications
Detailed technical specifications for the Steinel L 10 Outdoor Wall Light:
| Feature | Specification |
|---|---|
| Brand | Steinel |
| Model Number | 084752 |
| Product Dimensions (L x W x H) | 22.4 x 17.5 x 24.2 cm |
| Item Weight | 785 g |
| IP Rating | IP44 (Splash water protected) |
| Style | Without sensor |
| Color | Black |
| Material | Plastic |
| Bulb Socket Type | E27 |
| Max. Wattage (Incandescent) | 60 Watts |
| Max. Wattage (LED) | 15 Watts |
| Voltage | 220-240 V, 50/60 Hz |
| Specific Uses | Balcony, Garage, Garden, Patio, Walkway |
| Special Features | Water Resistant, Energy Efficient |
| Certification | CE |
| Country of Origin | Romania |

Image 5: Technical drawing showing the dimensions of the L 10 outdoor wall light (height 242mm, width 175mm, depth 224mm).

Image 6: Visual summary of key product features, including maximum LED wattage, outdoor suitability, IP44 rating, packaging, warranty, and CE certification.
9. Warranty
The Steinel L 10 Outdoor Wall Light comes with a 3-year manufacturer's warranty from the date of purchase. This warranty covers defects in materials and workmanship under normal use. Please retain your proof of purchase for warranty claims.
The warranty does not cover damage caused by improper installation, misuse, accidents, unauthorized repairs, or normal wear and tear.
10. Support
For further assistance, technical support, or warranty inquiries, please visit the official Steinel website or contact your local retailer.
You can find more information and contact details on the Steinel Brand Store.


