
1. Introduction
Thank you for choosing the Dripex Magnetic Resistance Stationary Bike, Model 1128. This indoor fitness bike is designed to provide an effective and quiet cardio workout experience in the comfort of your home. Featuring an 8kg flywheel, adjustable magnetic resistance, and an LCD monitor, this bike is built for durability and user comfort. Please read this manual carefully before assembly and use to ensure safe operation and optimal performance.
2. Important Safety Information
Before using this equipment, please read and understand all instructions. Keep this manual for future reference.
- Consult your physician before starting any exercise program, especially if you have pre-existing health conditions.
- This product is intended for adult use only. Keep children and pets away from the equipment during operation.
- Place the bike on a flat, stable surface with adequate clearance around it.
- Inspect the bike before each use for loose parts, wear, or damage. Do not use if any components are compromised.
- Wear appropriate athletic clothing and footwear. Avoid loose clothing that could get caught in moving parts.
- Do not exceed the maximum user weight of 149.69 kg (330 lbs).
- Adjust the seat and handlebars to a comfortable and safe position before beginning your workout.
- The resistance knob also functions as an emergency brake. Press it down firmly to stop the flywheel immediately.
- Stay hydrated during your workout.
3. Package Contents
Please check that all parts are present before assembly. If any parts are missing or damaged, contact customer support.
- Main Frame
- Front and Rear Stabilizers
- Pedals (Left and Right)
- Seat Post and Saddle
- Handlebar Post and Handlebars
- LCD Monitor
- Hardware Kit (bolts, washers, nuts, tools)
- Water Bottle Holder
- User Manual
4. Assembly Instructions
Assembly is straightforward and typically takes 30-60 minutes. It is recommended to have two people for certain steps.
- Attach Stabilizers: Secure the front and rear stabilizers to the main frame using the provided bolts and washers. Ensure they are tightened securely for stability.
- Install Pedals: Identify the Left (L) and Right (R) pedals. The left pedal screws counter-clockwise, and the right pedal screws clockwise. Tighten them firmly.
- Mount Seat Post and Saddle: Insert the seat post into the main frame and adjust to your desired height. Secure with the adjustment knob. Attach the saddle to the seat post.
- Attach Handlebar Post and Handlebars: Insert the handlebar post into the main frame. Attach the handlebars to the post and secure them.
- Connect LCD Monitor: Connect the sensor wires from the main frame to the back of the LCD monitor. Mount the monitor onto the handlebar assembly.
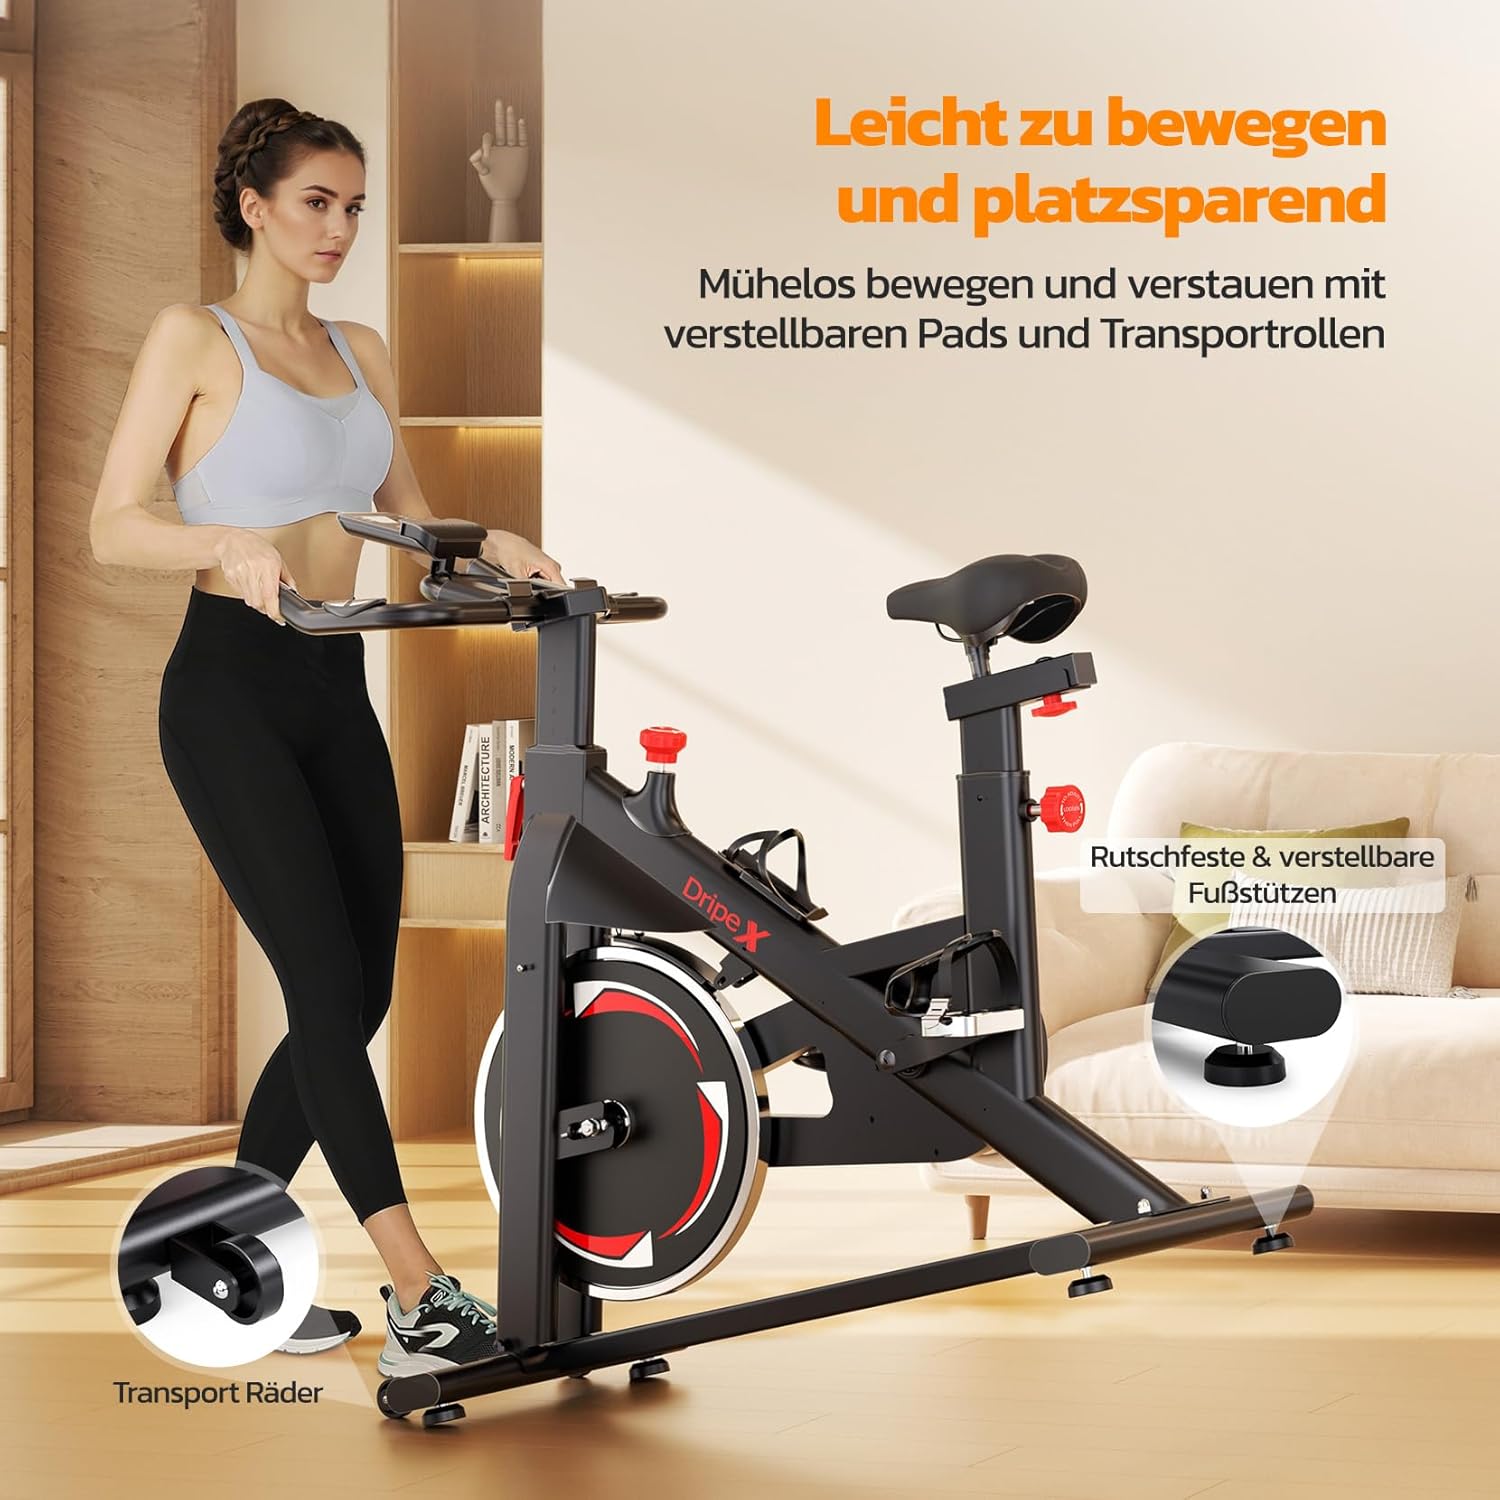
- Final Checks: Ensure all bolts and nuts are tightened. Check the bike's stability and adjust the leveling feet on the stabilizers if necessary.
5. Operating Instructions
5.1 Adjusting Seat and Handlebars
For a comfortable and effective workout, proper adjustment of the seat and handlebars is crucial.
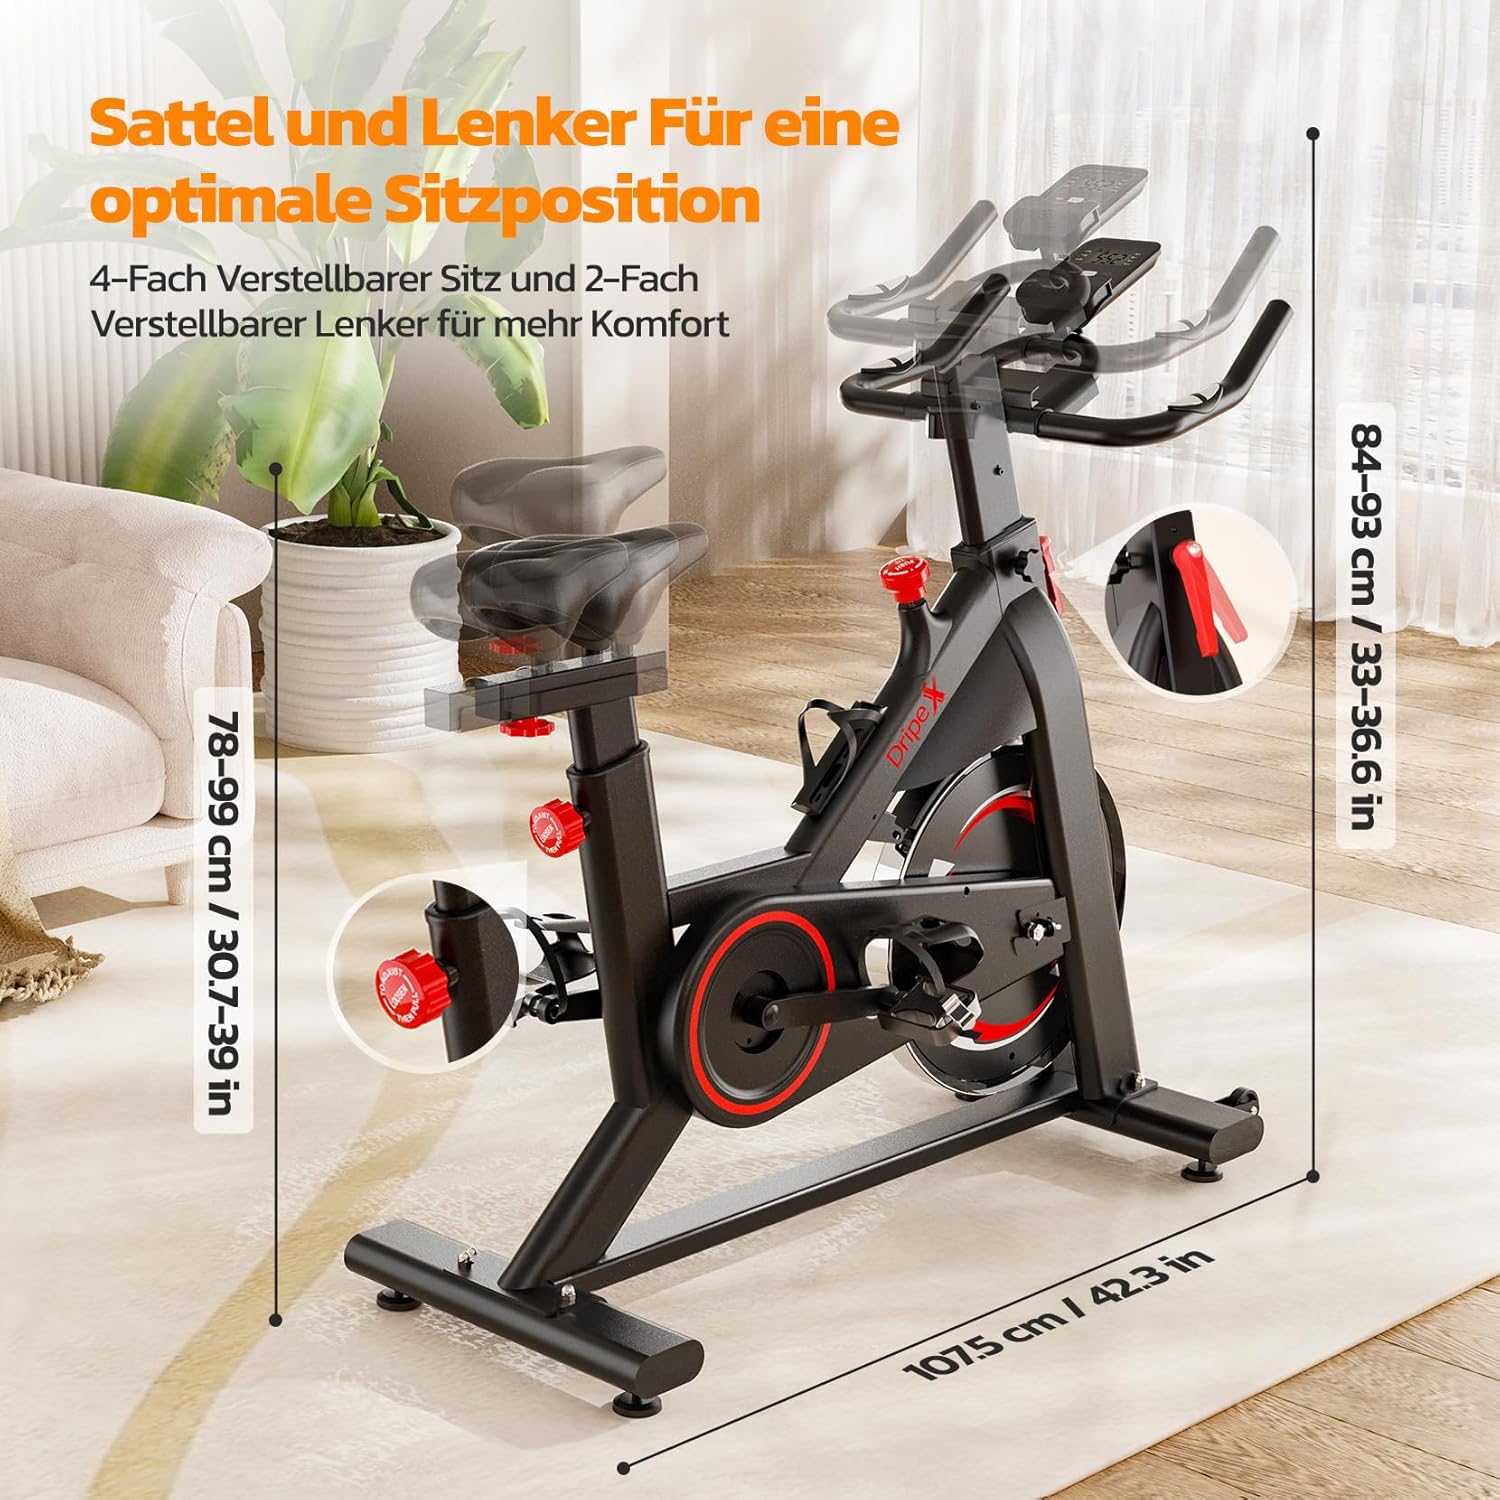
- Seat Adjustment: The seat can be adjusted 4 ways (up/down, forward/backward). Loosen the adjustment knob, slide the seat to your desired position, and tighten the knob securely. When seated, your knee should have a slight bend at the bottom of the pedal stroke.
- Handlebar Adjustment: The handlebars can be adjusted 2 ways (up/down). Loosen the adjustment knob, raise or lower the handlebars to a comfortable height, and tighten the knob. Your back should be straight and your arms slightly bent.
5.2 Adjusting Resistance
The Dripex Stationary Bike features a magnetic resistance system for smooth and quiet operation.
- Increase Resistance: Turn the resistance knob clockwise to increase the intensity of your workout.
- Decrease Resistance: Turn the resistance knob counter-clockwise to decrease the intensity.
- Emergency Stop: Press the resistance knob down firmly to engage the emergency brake and stop the flywheel immediately.

5.3 Using the LCD Monitor
The LCD monitor tracks your workout data to help you monitor your progress.
- Functions: The monitor displays Time, Speed, Distance, Calories Burned, Odometer (total distance), and Pulse (via handgrip sensors).
- Power On/Off: The monitor automatically turns on when you start pedaling or press any button. It will turn off automatically after a period of inactivity.
- Mode Button: Press the 'MODE' button to cycle through the different display functions.
- Reset Button: Press and hold the 'RESET' button to clear all current workout data (except Odometer).
- Pulse Measurement: Grip the pulse sensors on the handlebars firmly with both hands to display your heart rate.

6. Maintenance
Regular maintenance ensures the longevity and safe operation of your Dripex Stationary Bike.
- Cleaning: Wipe down the bike with a damp cloth after each use to remove sweat and dust. Avoid abrasive cleaners.
- Check Bolts and Nuts: Periodically check all bolts, nuts, and connections to ensure they are tight. Retighten as necessary.
- Lubrication: The magnetic resistance system is largely maintenance-free. No lubrication is typically required for the flywheel or resistance mechanism.
- Storage: Store the bike in a dry, cool place away from direct sunlight and extreme temperatures.
7. Troubleshooting
If you encounter any issues, refer to the following common solutions:
| Problem | Possible Cause | Solution |
|---|---|---|
| Monitor not displaying data | Loose sensor cable, dead batteries | Check sensor cable connection. Replace batteries in the monitor. |
| Bike is unstable or wobbles | Uneven surface, loose stabilizers | Adjust the leveling feet on the stabilizers. Ensure all assembly bolts are tight. |
| Unusual noise during operation | Loose parts, friction | Inspect all connections and moving parts for looseness. Ensure no foreign objects are near the flywheel or belt. |
| Resistance not changing | Resistance mechanism issue | Ensure the resistance knob is properly connected and turning the internal mechanism. If the issue persists, contact customer support. |
8. Specifications
- Model Number: 1128
- Dimensions (L x W x H): 104.5 x 22 x 81.3 cm (41.1 x 8.7 x 32 inches)
- Product Weight: 29.7 kg (65.5 lbs)
- Maximum User Weight: 149.69 kg (330 lbs)
- Flywheel Weight: 8 kg
- Resistance Type: Magnetic
- Material: Alloy Steel
- Power Source (Monitor): Battery operated
- Special Features: Calorie control, distance monitor, speed monitor, pulse grip sensor, adjustable seat (4-way), adjustable handlebars (2-way), transport wheels.

9. Warranty and Support
Dripex is committed to providing high-quality fitness equipment. For warranty information, please refer to the documentation included with your purchase or contact your retailer. If you have any questions, require assistance with assembly, or need troubleshooting support, please contact Dripex customer service through the retailer where you purchased the product or visit the official Dripex website for contact details.
Dripex Official Store: Visit Dripex Store on Amazon

